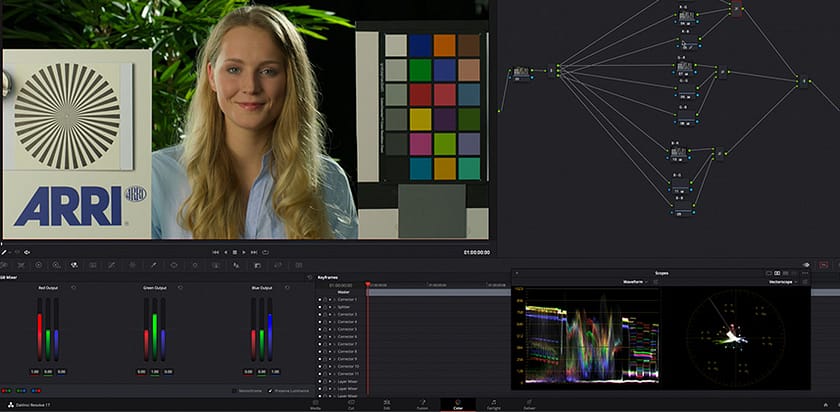
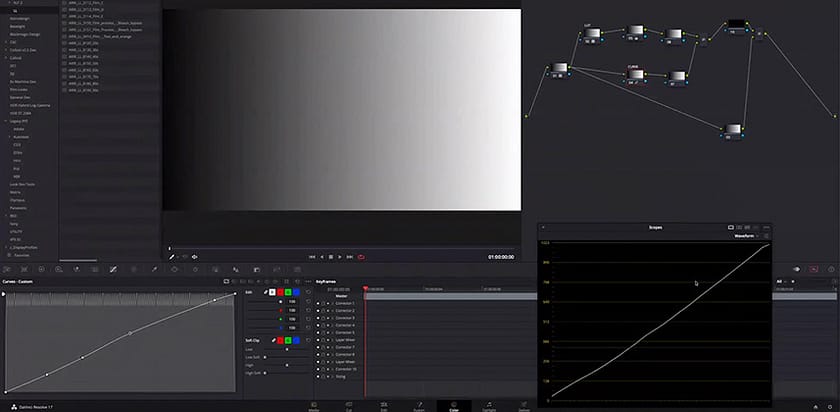
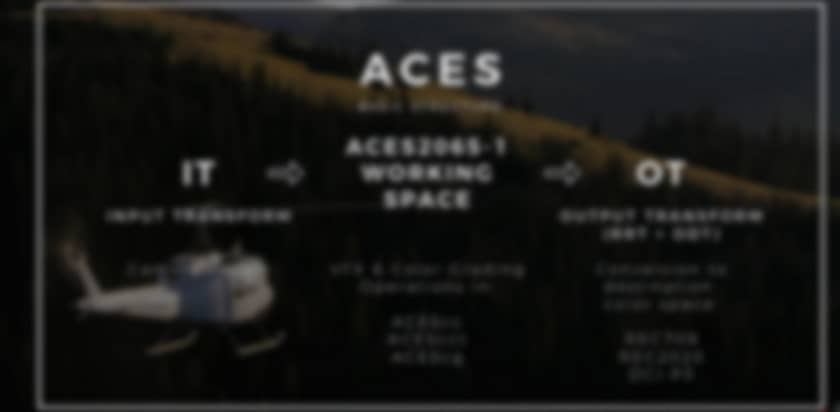
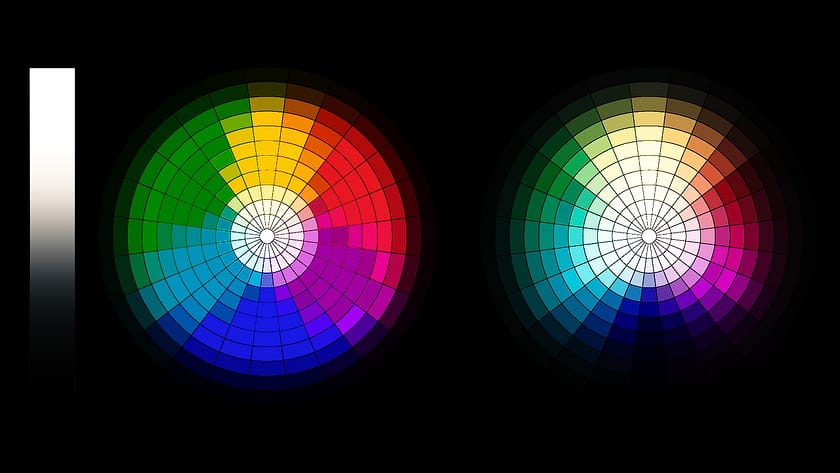
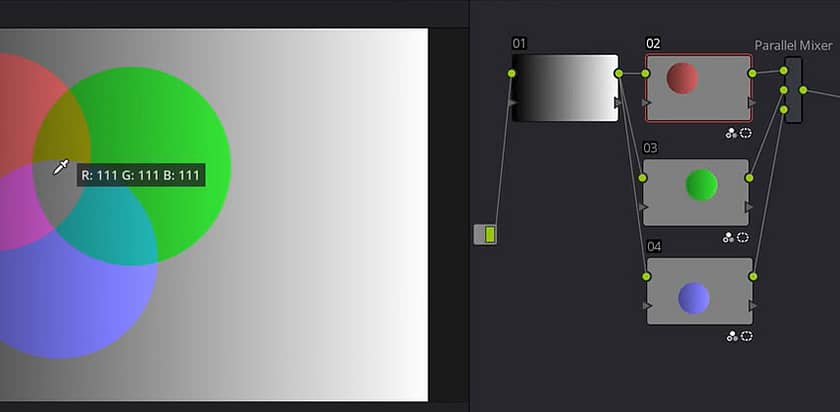
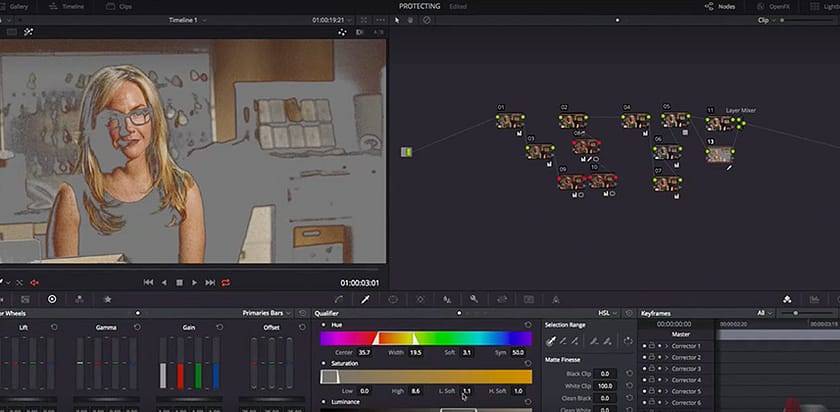
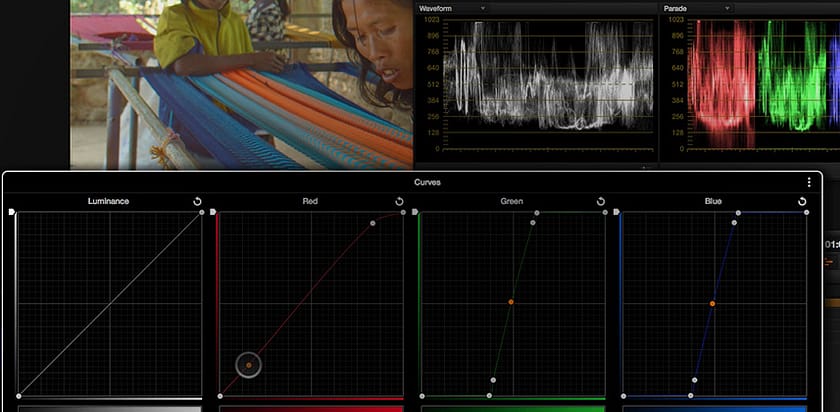
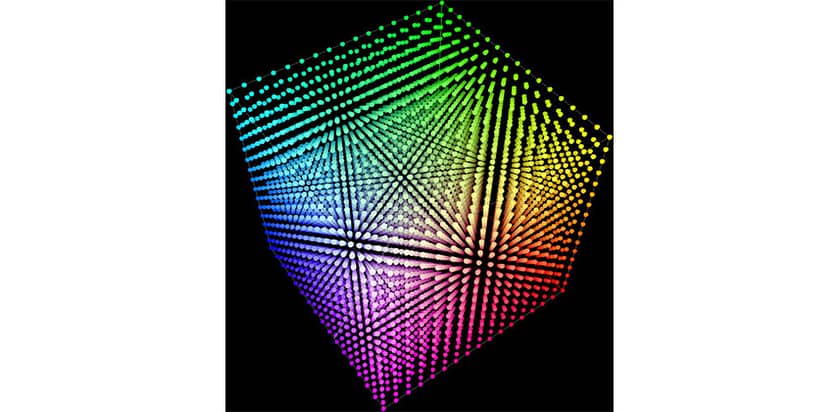
Understanding and Using The JPLog2 Color Space
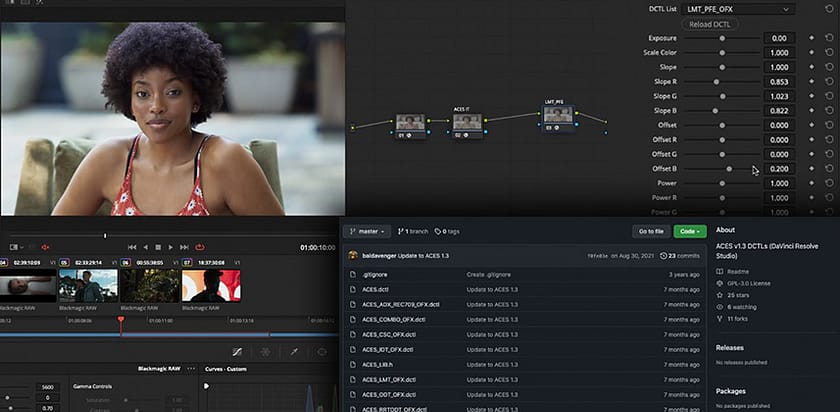
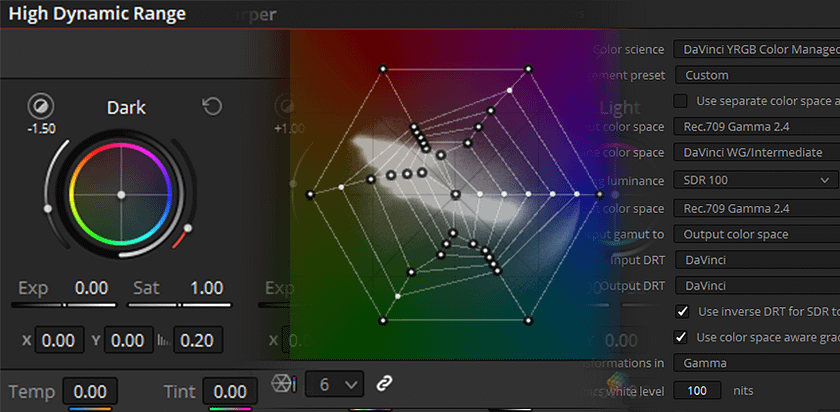
JPLog2 is a powerful working color space for pro colorists. Dado Valentic unpacks why it will impact the future of grading.
Working Life as an Independent Freelance Film Colorist
Kali Bateman, CSI, shares what it's really like to be a freelance colorist who works from a custom-built grading suite but also on the road.
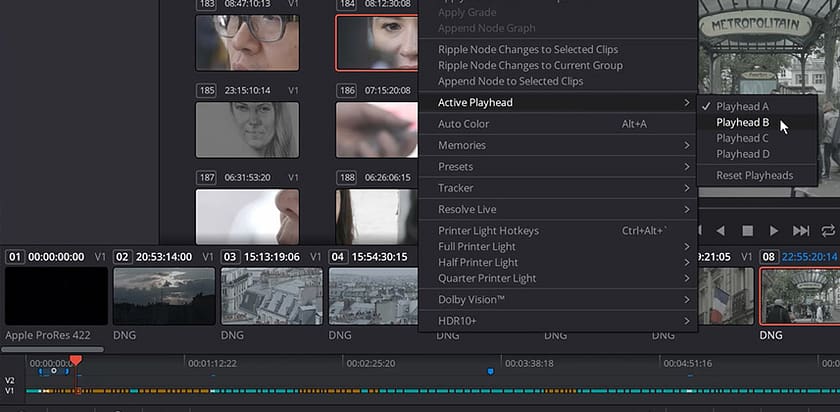
Effortlessly Animate Layered Photoshop Files in DaVinci Resolve
With these effective techniques, quickly build motion graphics animations from layered Photoshop files in the DaVinci Resolve Edit page.
PC Hardware for Creative Pros - Conversation with Puget Systems
What specification should you use to build a custom PC that can handle demanding color grading workflows? Puget Systems has the answer...
Building a Professional Custom Color Grading Suite from Scratch
What do you need to build a professional color grading suite from scratch? Post Professional Sam Lowe shares his in-depth design secrets.
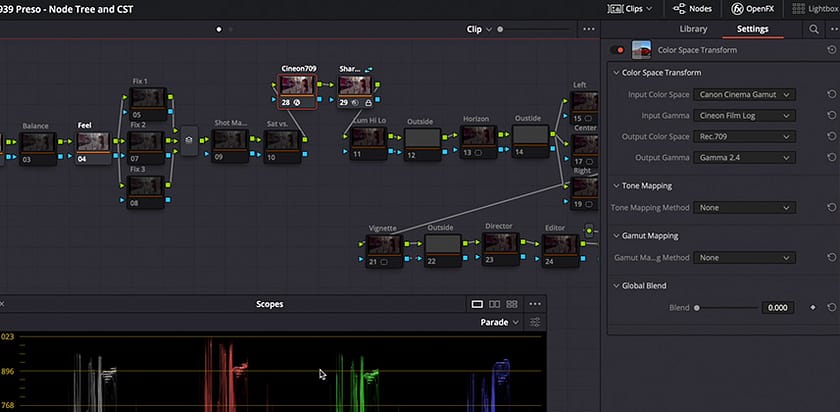
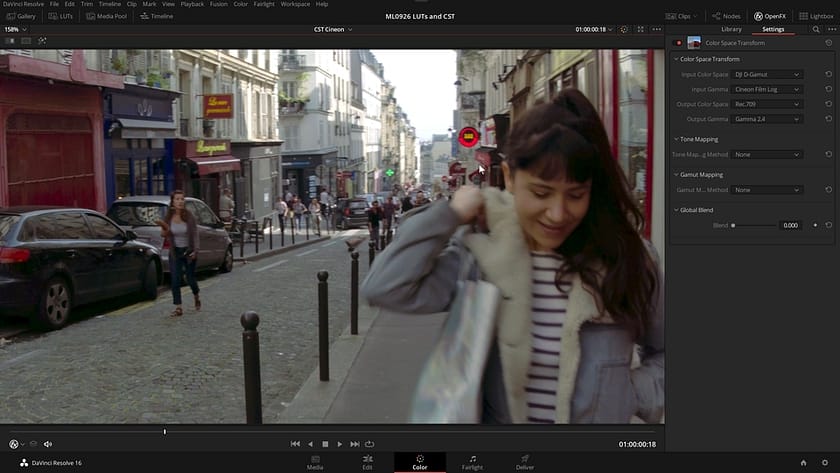
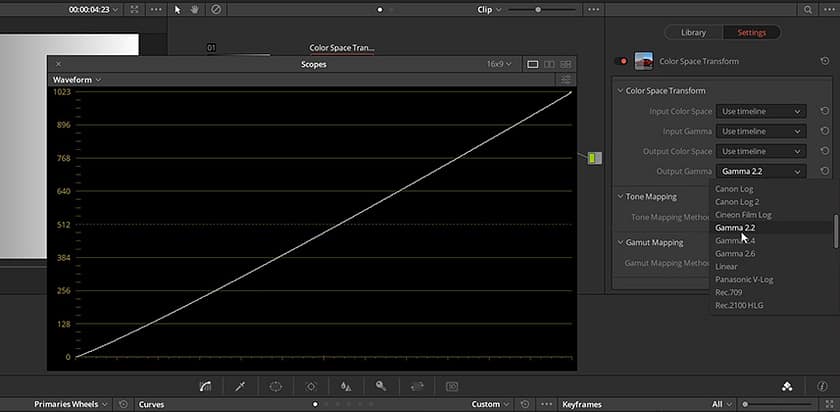
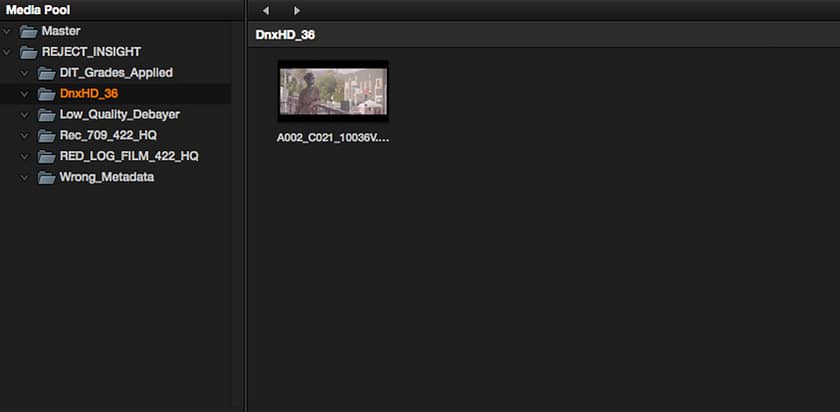
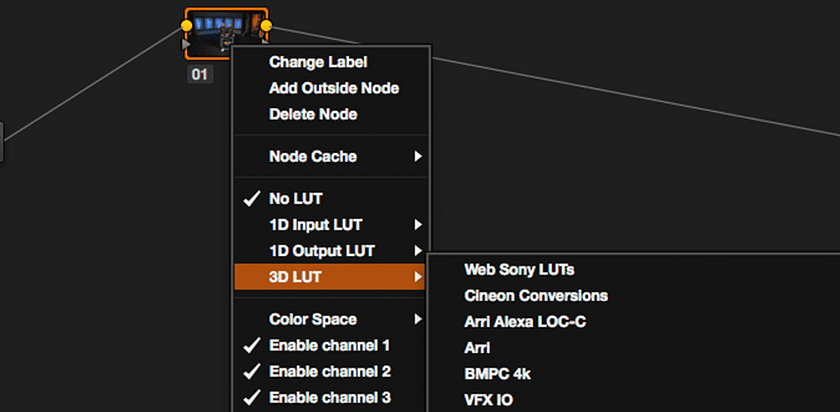
Mystery Log: A Survival Guide Part 2 - Cineon Film Log
Learn to use Resolve's color transform node, offset adjustments, and HDR tools to grade footage lacking recording metadata with simplicity.
Office Hours LIVE – NAB 2025's Biggest News & Takeaways
Mixing Light Contributors share their professional perspectives on NAB 2025, the show's future, the best updates, and the impact of AI.
Jason Bowdach's Favorite Features in DaVinci Resolve 20
Colorist Jason Bowdach walks you through his six favorite new features in Resolve 20, plus a few less obvious favorites from this release.
Frequency Separation Using The 'Contrast Pop' ResolveFX
Using the 'Contrast Pop' ResolveFX plugin, learn about frequency separation in Part 5 of Hector Berrebi's 'Texture Management' series.
Mystery LOG: A Survival Guide Part 1
In his first Insight, Billy Causey tackles the challenge of color grading 'mystery log' footage, which lacks metadata about its origin.
The Art of Color Grading Animation with Keiran Lee
Supervising Colorist Keiran Lee reveals insights on the technical and creative differences in grading feature animations and VFX-heavy films.
Delivering 608 & 708 Captions (which Resolve doesn't support)
Colorist and finisher Patrick Inhofer shares how he developed his workflow for embedding 608 & 708 captions - which Resolve doesn't support.
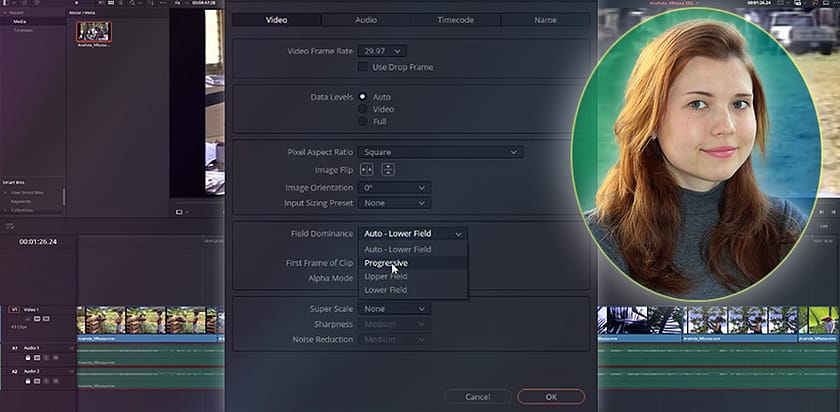
Switching from Avid Media Composer to DaVinci Resolve Part 1
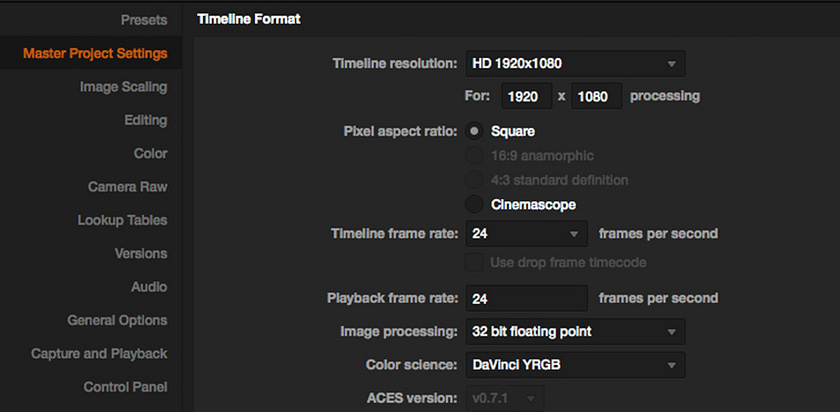
Land the switch from Avid Media Composer to DaVinci Resolve by understanding how key project settings relate to each other.
How to Create Professional High-Quality Video Tutorials
Learn to create professional video tutorials with these tips and tricks from professional trainer and Mixing Light contributor Daria Fissoun.
How to Create a Digital Cinema Package (DCP) in DaVinci Resolve
Need to make your first DCP in DaVinci Resolve? This in-depth guide with 3 Post Pros will teach you everything you need to know to succeed.
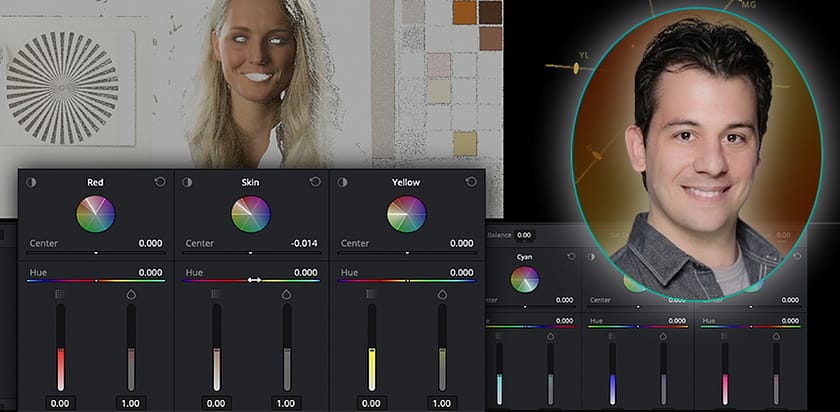
Identifying Chromatic Aberration And Removing Fringing
Colorist Daria Fissoun CSI discusses fringing and chromatic aberration. Including using a ResolveFX filter or an HSL qualifier to reduce it.
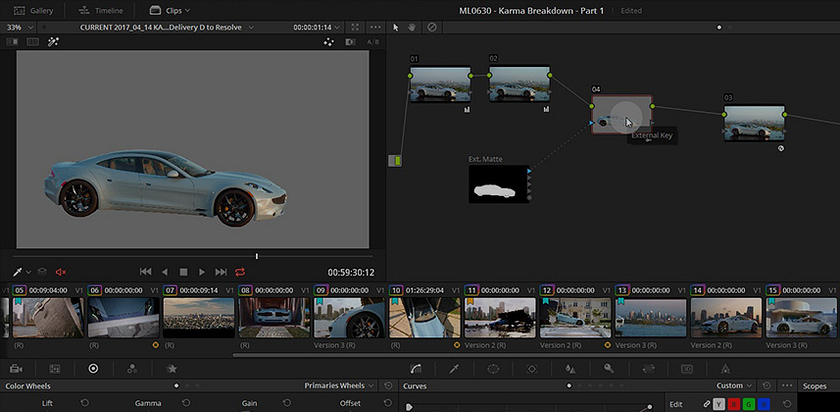
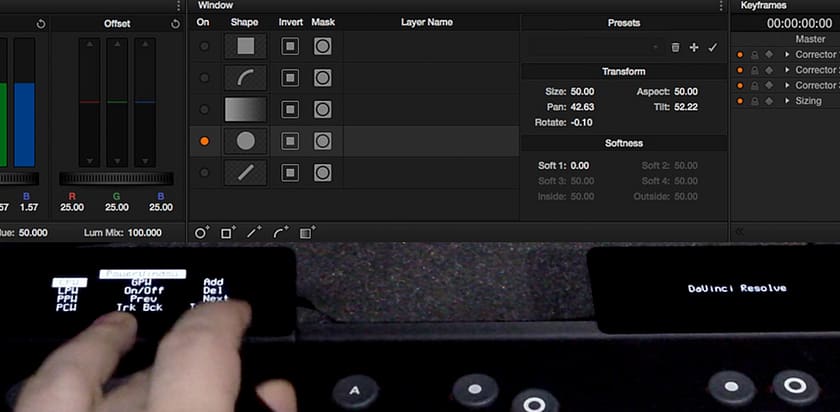
Using Tangent’s New 'Warp Engine' To Accelerate DaVinci Resolve
Learn how to use the Tangent Warp Engine to map any control, on any Tangent panel, to DaVinci Resolve—including ColorSlice and HDR wheels.
How to Set Up And Use DaVinci Resolve's Remote Monitor App
Two colorists show how to set up the DaVinci Remote Monitor app to share your Color Page Viewer with remote clients during a grading session.
Using SMPTE Bars to Color Manage Archival Materials
Daria Fissoun teaches you how to calibrate color bars on videotape archives, using DaVinci Resolve, to ensure accurate color reproduction.
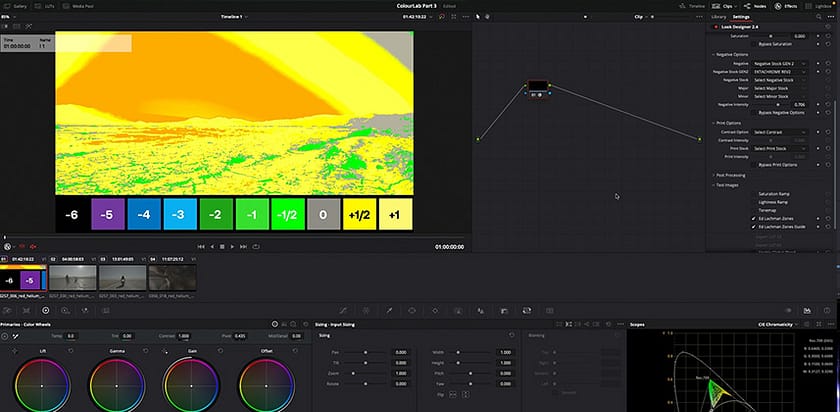
Slider-by-Slider: Using Resolve's New 'Film Look Creator'
Learn to use Resolve's 'Film Look Creator' plugin, slider-by-slider, with tips & advice. Does it compete with Dehancer Pro-style alternatives?
Deinterlacing & Upscaling NTSC Archives To 4K Deliverables
Learn how to use Resolve to deinterlace and upscale NTSC footage to 4K while preserving the original quality of your archive materials.
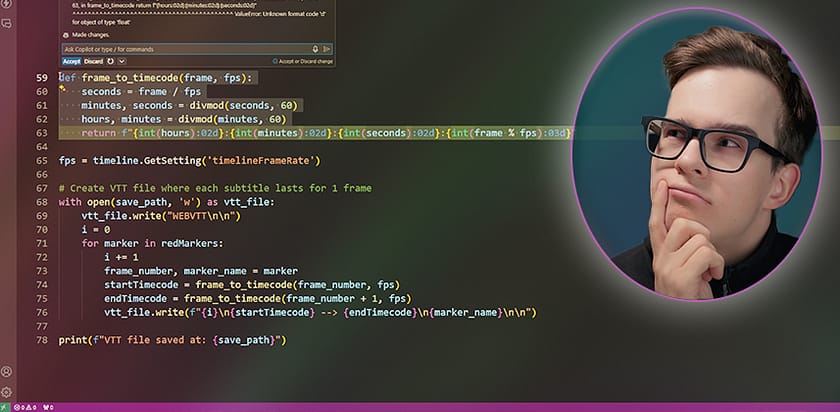
Python 101 Part 6 - Supercharging Code Writing With ChatGPT
Using Python to extract Chapter Markers and create a VTT subtitle file, Kaur Hendrikson teaches how to code with an 'AI' assistant.
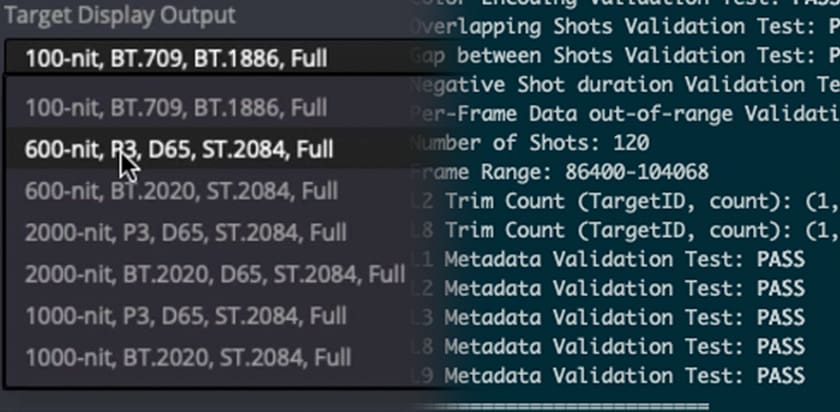
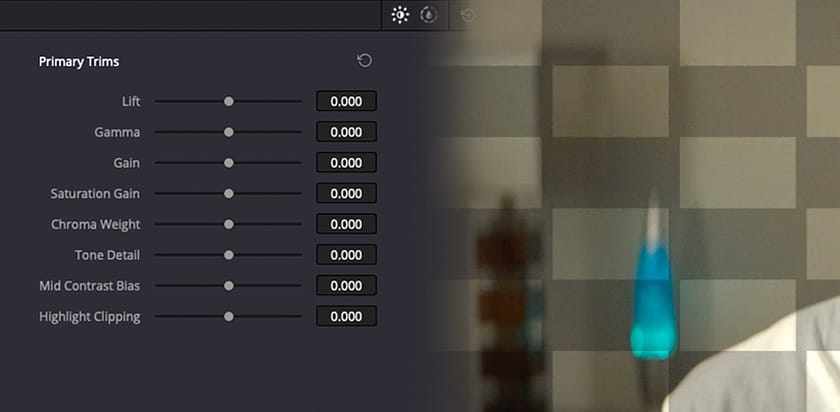
Answering Member Questions: HDR and Dolby Vision Workflows
Grading and delivering HDR is a complex technical process. Learn to master it with an hour of expert insights from 3 professional colorists.
Matt McFarland: A Filmic Time Traveller And ‘Forensic Colorist’
Learn how veteran colorist Matt McFarland restores old print masters to modern formats - with his deep mix of grading skills and experience.
ColorSlice: Deconstructing DaVinci Resolve's New Secondary Tool
Learn to use Resolve’s new subtractive saturation tool, ColorSlice, to create more nuanced color grades. Colorist Jason Bowdach deconstructs.
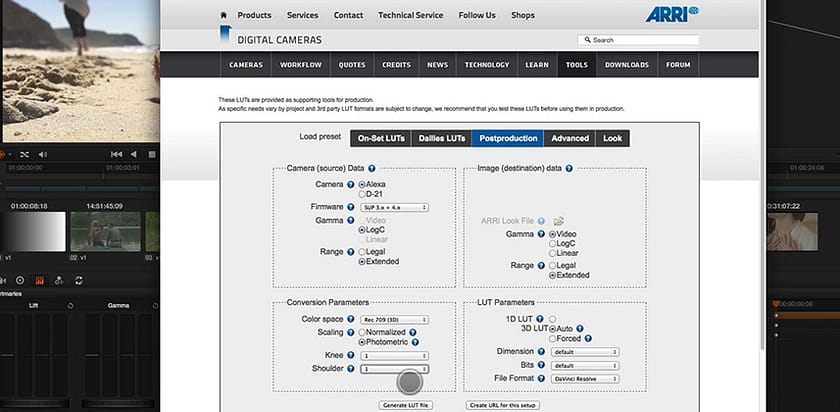
ARRI LUTs, Linux Resolve, Broadcast Safe, & Monitoring LUTs
Mixing Light's team answer: What's the correct ARRI LUT? Building a Linux Resolve system. Is Broadcast Safe obsolete? And monitoring LUTs.
Office Hours Live: NAB 2024 Recap and Resolve 19 Public Beta
We discuss insights from NAB2024 & the Resolve 19 Beta. Join Daria Fissoun & guests as they delve into Blackmagic's latest tools & hardware.
Speed Shootout: DaVinci Resolve On Rocky Linux vs. Windows 11
Which is fastest with DaVinci Resolve? Windows 11 or Rocky Linux? Colorist Igor Riđanović tests his dual-boot system to find out!
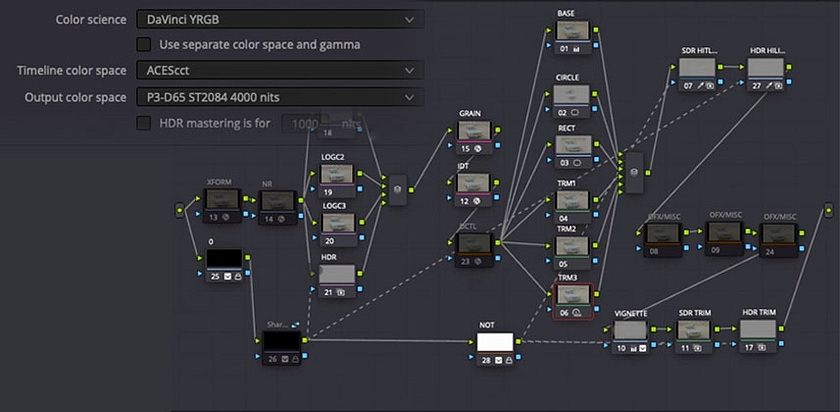
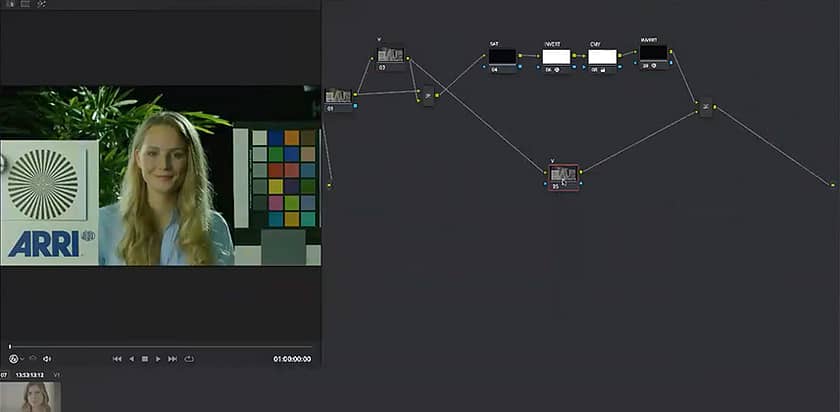
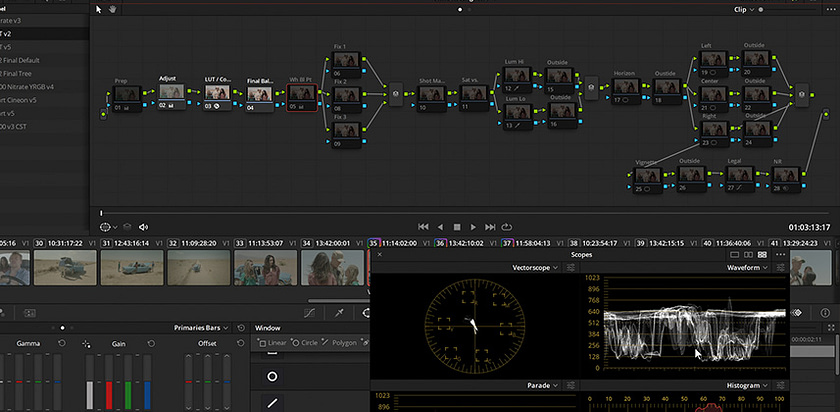
Pat’s DaVinci Fixed Node Tree (2024 Edition) - Color Grading 101
Patrick shares how he's designed his fixed node tree, plus outboard hardware and software optimizing color grading speed and efficiency.
Office Hours Live-NAB 2024 What We Expected + iPad Calibration
We discuss what we expected at NAB 2024, calibrating an iPad Pro, and how/if we're using the headline Resolve features of prior years.
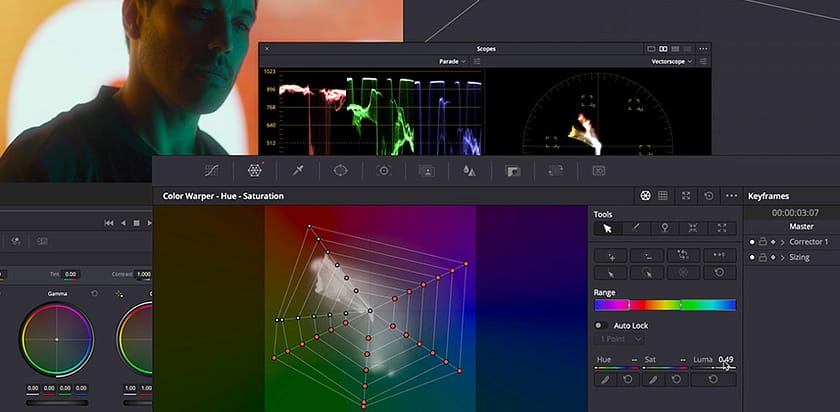
Baselight Inspired: Resolve’s Color Warper For Look Development
Colorist Jamie Dickinson is inspired by Baselight's Chromogen 'stages' paradigm of look development and applies it to Resolve's Color Warper.
Old-School Color Grading - Shot-Matching People & Time Of Day
Learn how Patrick color graded (in Resolve) in 2013! In an upcoming Insight learn how he's overhauled his workflow - for better results.
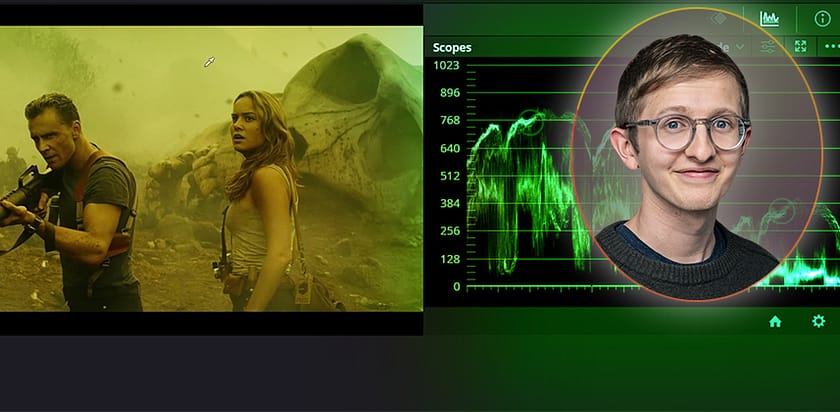
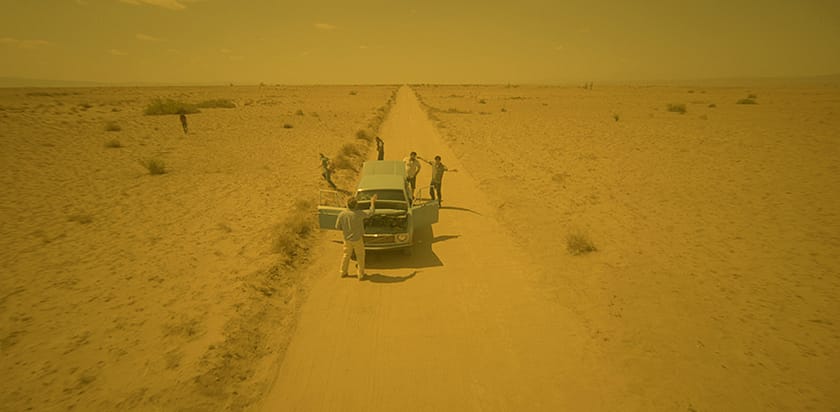
Recreating the Kong: Skull Island ‘Toxic Yellow’ Look
Exercise your grading skills by matching Kong: Skull Island's 'Toxic Yellow' look in DaVinci Resolve. Luke Ross shares his approach.
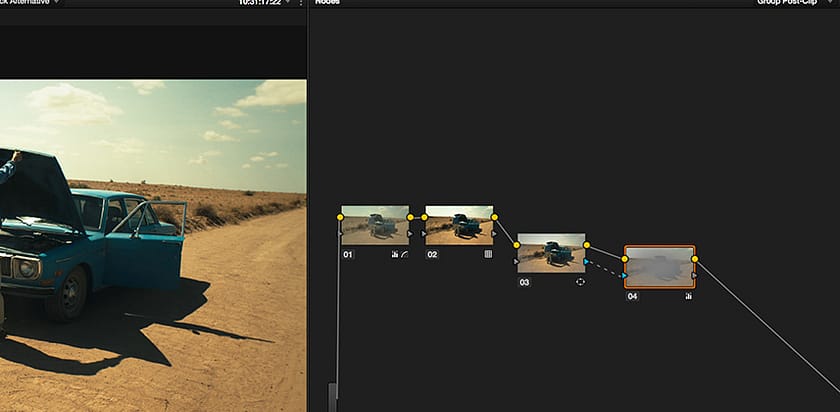
Alternate Uses For Shared Nodes in DaVinci Resolve
Learn how to unlock the utility of Shared Nodes by minimizing the need to switch between the clip-level and timeline-level node graphs.
How To Adapt A Photoshop 'Channels' Technique to Resolve
Patrick answers a member's question about simplifying their node tree, adapting a Photoshop color grading technique to DaVinci Resolve.
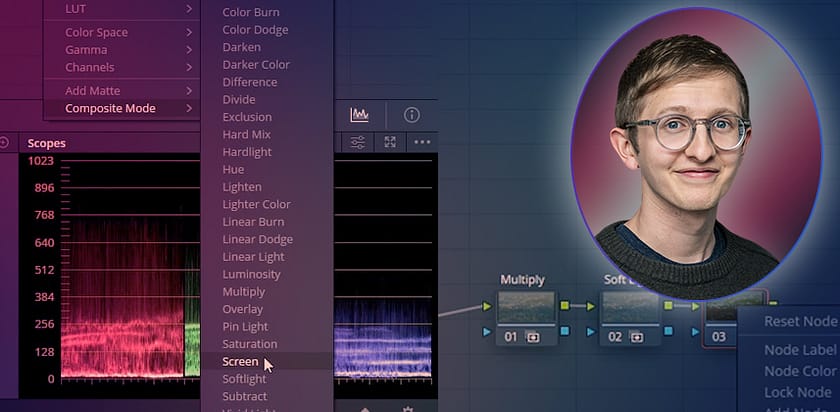
A Guide To Composite Modes in DaVinci Resolve
Refresh your knowledge on blending modes: What they are, what they do, and how to utilise them as color grading tools in DaVinci Resolve.
Emulating Baselight's Texture Blend Tool For Noisy Secondaries
Colorist Marty Webb shows how to emulate Baselight's Texture Blending in DaVinci Resolve to control noisy secondary operations.
'Barbie Look' In Resolve: Emulating Technicolor's 3-Strip Process
Colorist Jason Bowdach creates a Barbie-inspired 3-Strip Technicolor film look with customization controls using Nodes in DaVinci Resolve.
Color Management With Log, The Elusive "Filmic" Look, & Clients
Mixing Light's panel of Colorists answers questions on color management with log footage, the "filmic" look, and choosing your clients.
Automatic Naming Using Metadata Variables in DaVinci Resolve
Luke Ross explores DaVinci Resolve's 'Metadata Variables'. Learn how to generate still, burn-in, and render setting names - automagically.
Color Grading 101 - Defeating the Tyranny Of The First Move
Is color grading mystifying because you have trouble getting similar results as the pros? Reboot your confidence with this new series.
Accelerated Workflows with Resolve’s Remote And Local Grades
Learn how to speed up your color grading workflow using DaVinci Resolve's under-utilized Local and Remote Grades functionality.
Upgrade Your Toolkit By Creating A Subtractive Color Balance Tool
Colorist Cullen Kelly teaches you to create a subtractive color balance tool for more pleasing color washes & looks in DaVinci Resolve.
Connecting the APIs: From DaVinci Resolve To OpenAI, Part 2
Igor Riđanović shows you how to create a YouTube summary from a Resolve timeline with the APIs from DaVinci Resolve and OpenAI using ChatGPT.
Getting Started With Blackmagic Cloud Storage in DaVinci Resolve
Learn how to set up and share project media with collaborators in DaVinci Resolve with Blackmagic Cloud Storage and the BMD Camera App.
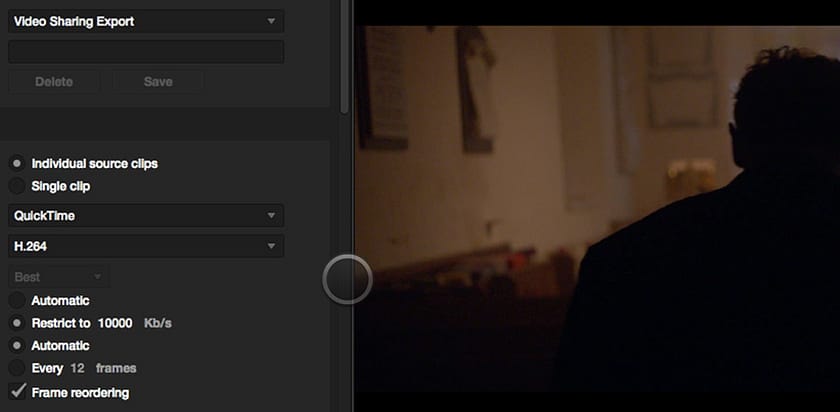
A Deep Dive Into Rendering H.264 & H.265 from DaVinci Resolve
Mixing Light contributor and freelance colorist Luke Ross takes a deep dive into H.264 & H.265 render options on a Mac and PC in Resolve.
Connecting DaVinci Resolve and OpenAI - Part 1
Using a little bit of Python code, you'll learn the fundamentals for connecting OpenAI and DaVinci Resolve using their APIs.
Upgrade Your Toolkit: Create Custom Highlight & Shadow Controls
Learn how to create a custom highlight roller tools tailored to your creative needs inside DaVinci Resolve.
How To Build A Custom Contrast-Pivot Tool Using Curves
Colorist Patrick Inhofer shares his favorite, and simplest, method for controlling the contrast of your images when doing Primary corrections.
DaVinci Resolve Printer Lights VS Baselight Base Grade Bumps
Explore and compare DaVinci's Printer Lights tool with Baselight's Base Grade Bumps controls, mapping either tool to a keyboard number pad.
Tips For Avoiding (and Solving) Gamma Shifts On MacOS Renders
Avoid the Mac Gamma Shift problem on your exports with this step-by-step guide to consistent color management in DaVinci Resolve on a Mac.
Do You Need Free, Fast, & Accurate Transcription? MacWhisper.
Do you need free, accurate, and quick audio transcription for captions, paper edits, or documentary scripting? Learn to use MacWhisper!
How to Export the Highest Quality YouTube Videos
Learn how to set up DaVinci Resolve's color management when delivering to YouTube and modify the default preset for better quality.
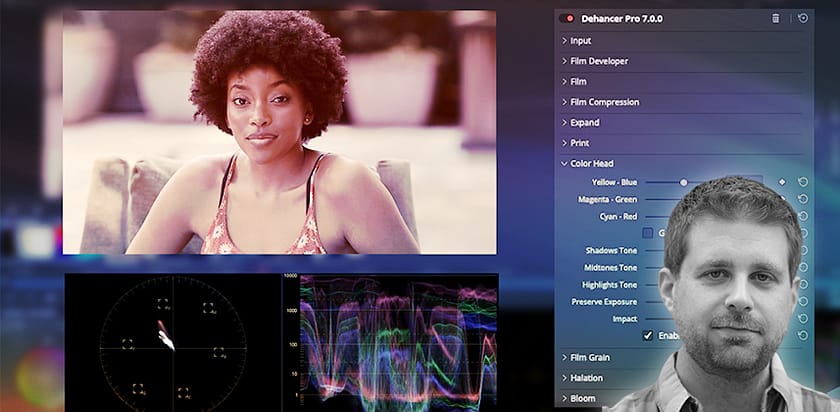
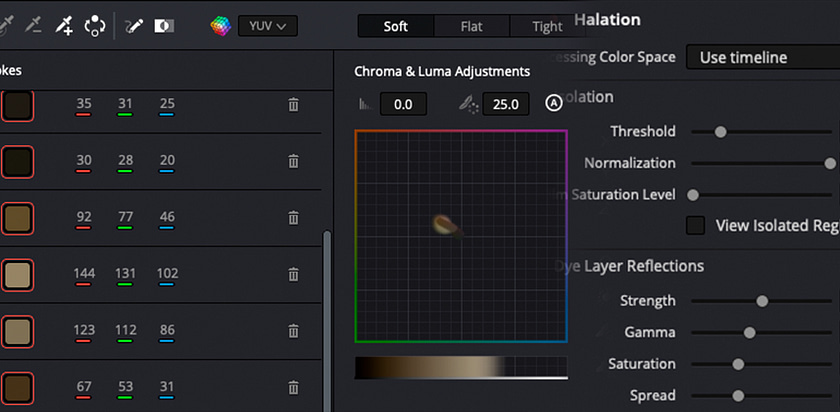
Film Print Emulation: Dehancer Pro v7 Review - Part 2
In our Dehancer Pro v7 Part 2 review, colorist Peder Morgenthaler digs into its 'dehancing' tools: Grain, Halation, Bloom, Weave, and more.
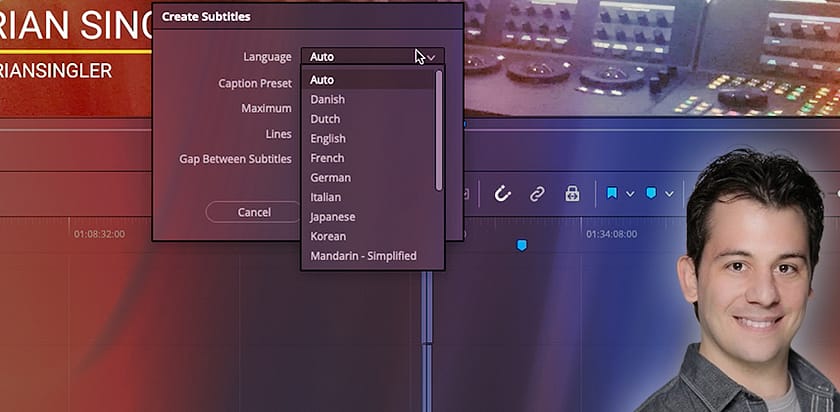
Using Resolve 18.5 Transcription & Subtitle Tools
Colorist and finisher Jason Bowdach teaches you to use DaVinci Resolve 18.5's new Machine Learning-powered transcription and subtitle tools.
Office Hours LIVE! HDR White, Saturation Controls, New Displays
Mixing Light's professional colorists answer questions on graphic white points in HDR, crafting meaty saturation and the limitations of AI.
Film Print Emulation: Dehancer Pro v7 Review - Part 1
Colorist Peder Morgenthaler reviews the popular Dehancer Pro OFX plugin for DaVinci Resolve for creating detailed filmic looks.
Office Hours LIVE! Color pipelines, Gamma & Remote Live-Review
Our Contributors answer tough member questions on color management issues, mastering gamma, and affordable remote live review solutions.
Creative Look Inspiration - Wes Anderson's 'Asteroid City'
Build a low-contrast, targeted saturation look inspired by Wes Anderson’s 'Asteroid City', by learning how to evaluate the production stills.
Creatively Manipulating Node-Based ColorSpace and Gamma Tags
Learn colorist Cullen Kelly’s favorite uses for node-based Color Space and Gamma context menus available within individual nodes in Resolve.
Tips for matching an imported timeline in DaVinci Resolve
Get tips for solving common - but challenging - mistakes when conforming an offline reference, including eye-matching variable speed changes.
How To Set Up A Headless Computer For Resolve - And Why?
Colorist Jason Bowdach on regaining control over your multiple computers while ditching the keyboard and mouse and gaining new efficiencies.
Office Hours - NAB 2023, Sony HX-3110, Resolve 18.5, Virtual Sets
Team Mixing Light discusses Sony's prototype 4,000nit display, Resolve 18.5 Beta new features, and colorist opportunities on Virtual Sets.
Ideas For Using The Resolve 18.5 Relight Effect
Joey D'Anna shows how to integrate the Relight ResolveFX plugin into fixed node trees to maximize its usefulness, capability, and performance.
How To Manipulate Hue More Effectively In DaVinci Resolve
Learn how to dramatically improve your Hue vs. Hue adjustments in DaVinci Resolve by changing a node's color model - and why this works.
Office Hours LIVE! Color Management, HDR, & Cinema Grading
Four Mixing Light Contributors help one of our members solidify their color management settings & workflows for HDR and cinema color grading.
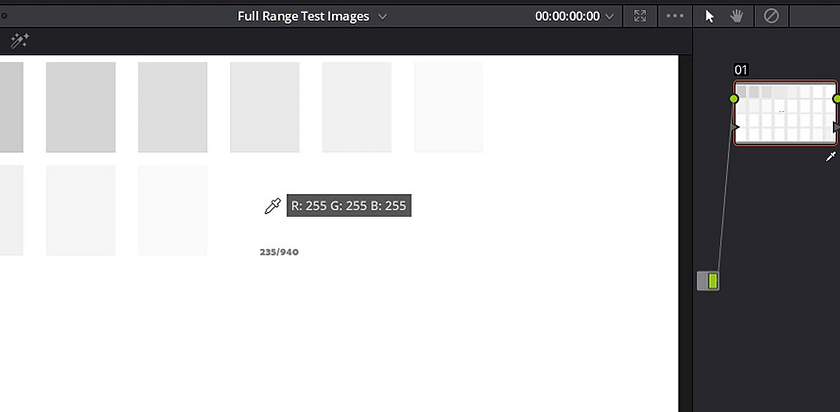
Update! DaVinci Resolve ‘Levels’ Setting For Premiere Renders
Colorist and finisher Jason Bowdach revisits the topic of which setting to use in Resolve for exporting to Premiere Pro: Data vs Video Levels?
Temporal And Spatial Noise Reduction 101 in DaVinci Resolve
Colourist Luke Ross shows how to uses the various selections in Resolve Studio's Noise Reduction toolset - and identifies mistakes to avoid.
Is The Mini Control Surface 'Breaking' HDR Palette Operations?
Learn how the Blackmagic Mini control surface is giving you the 'wrong' results on the HDR Palette if your not paying VERY close attention.
Learn How To Build Your Custom Film Print ODT
Cullen Kelly shows you how to build a custom transform by combining a film print LUT with basic color science - to add style to images.
How To Install And Evaluate The Upcoming ACES 2.0 ODT
Cullen Kelly shows how you can explore the candidate ACES 2.0 output transforms. Learn the differences compared to the current ACES release.
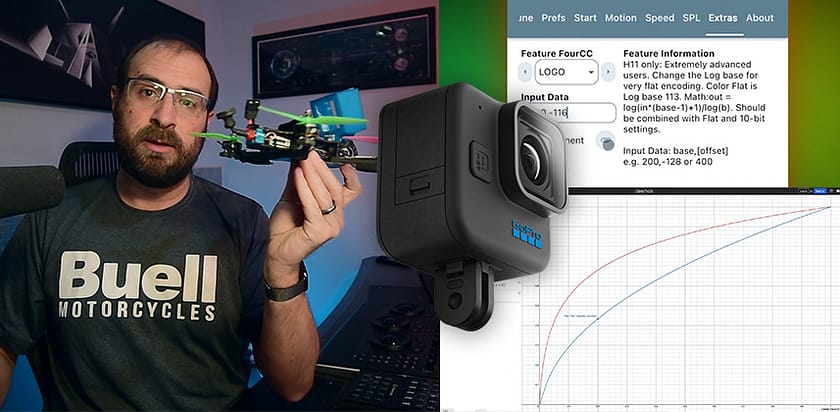
How To Upgrade Your GoPro Hero11 To A 10-bit Log Workflow
Learn to leverage GoPro labs firmware and Resolve colorspace transforms to color manage footage from the new Hero 11 cameras in 10 bit log.
The Multiple Personalities of Resolve's Contrast-Pivot Controls
Colorist Patrick Inhofer shows you the three different and distinct behaviors of DaVinci Resolve's two Contrast-Pivot controls.
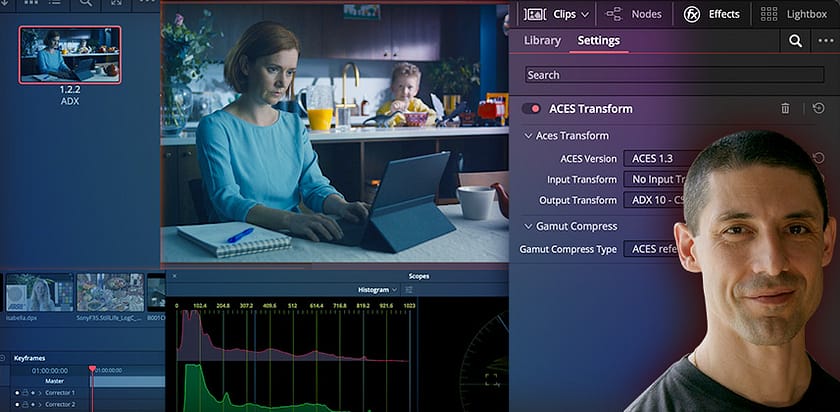
Substituting ACES ADX for Cineon Film Log With Film Looks LUTs
Explore how to get better results from Resolve’s Film Looks LUTs by leveraging the ACES ADX standard — even if you're not grading in ACES!
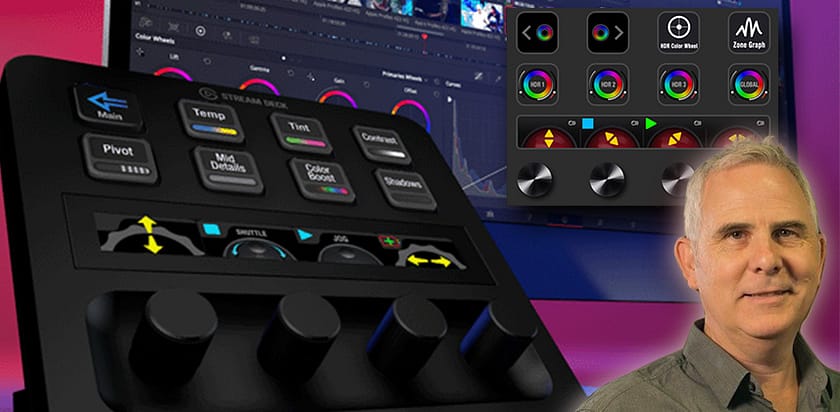
First Look: Elgato Stream Deck + with SideshowFX Profiles
Colorist Jamie Dickinson shares initial impressions using Elgato's Stream Deck + (with SideshowFX profiles) to control Resolve's HDR Palette.
The Do’s And Don’ts of Color Correcting with Hue-vs-Sat Curves
Colorist Cullen Kelly explores his favorite uses of the Sat vs Lum curve in Resolve and best practices for consistently great results.
A Hands-On Introduction To DaVinci Resolve On iPad Beta for Pros
Colorist Joey D’Anna gives an extended review of DaVinci Resolve for iPad Beta, how it differs from the desktop, and what it may excel at.
Deep Dive: DaVinci Resolve Cloud Remote Collaboration
In Part 2 of our series, learn the many features (and tips/trick) of Davinci Resolve 18's cloud-based Collaborative Workflow
New Little Features Packing A Punch In DaVinci Resolve 18.1
DaVinci Resolve 18.1 is a feature-rich update. Colorist and finisher Joey D'Anna offers his list of impactful features - that aren't obvious.
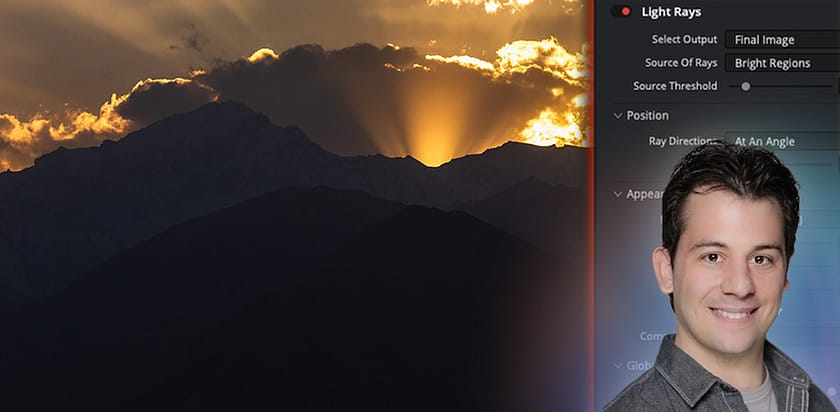
Emulating the ‘God Rays’ Look with the Light Rays Resolve FX
Crepuscular rays (God Rays) are a unique natural phenomenon. Learn how to quickly emulate this effect using Resolve's 'Light Rays' plugin.
Color Grading Docs, HDR Trims, NVMe Disks for Cache, and more!
In this Office Hours, a team of Mixing Light Contributors tackles member questions about estimating time for HDR trim passes - and much more!
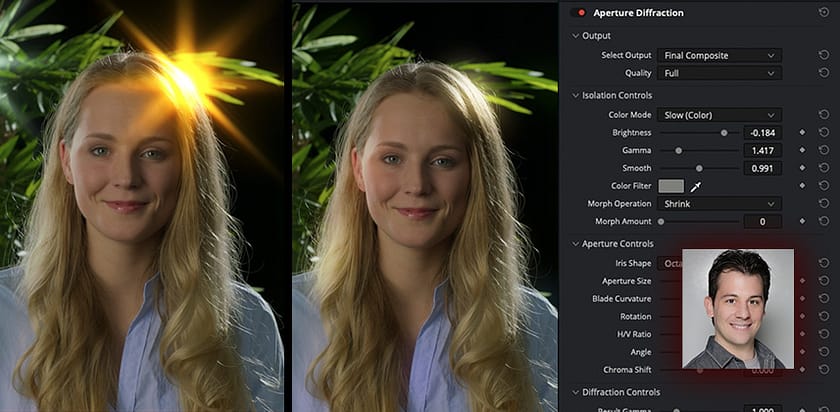
Creating Glows with the Aperture Diffraction ResolveFX Plugin
Learn how to get a physically realistic glow-like effect by manipulating the properties of Aperture Diffraction's “virtual” iris.
Learning to Color Balance More Quickly With Fewer Adjustments
In the final episode of his 'Flexing Fundamentals' series, Cullen Kelly shows how to color balance more efficiently by thinking differently.
Delivery Tips for Remote Sessions and DaVinci Resolve Trainers
When it’s time to share your Resolve User Interface with a remote client or classroom, a few simple tips and optimizations can win the day!
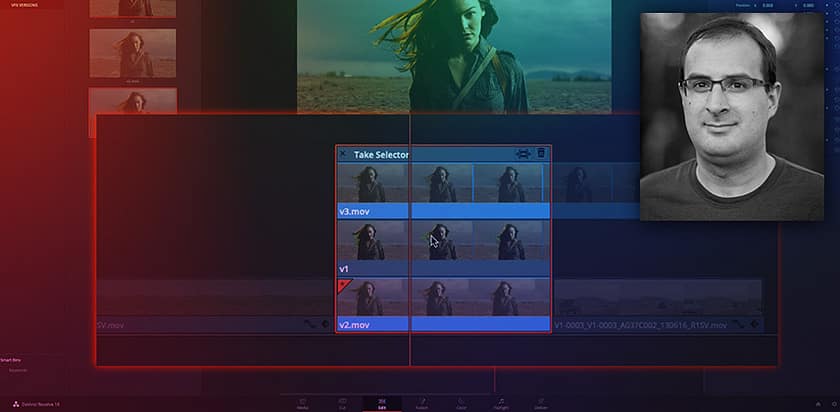
How To Manage Versions for VFX & Graphics in DaVinci Resolve
If you have many graphics or visual effects shots that might be replaced at the last minute, learn the value of Resolve's 'Take Selector'.
NEW: DaVinci Resolve Courses, Credits, All-Access Memberships
Announcing: 5 new DaVinci Resolve courses, a credit system allowing members to unlock them, and an upcoming 'All-Access' membership level!
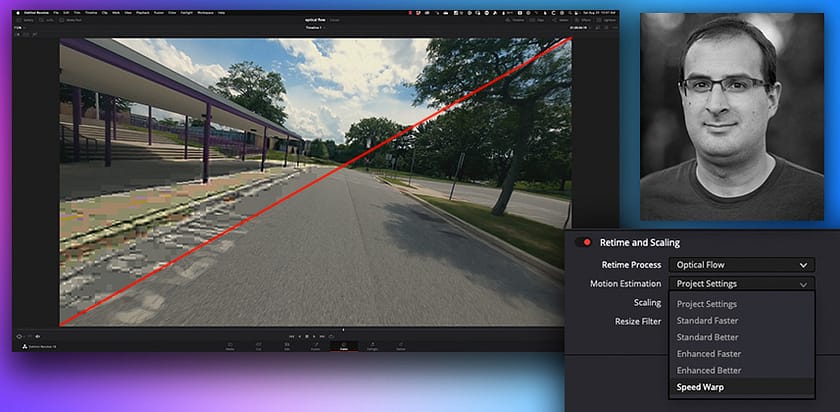
Advanced Optical Flow Techniques For Image Repair
Learn to use optical flow for more than speed changes. In this Insight, fix a corrupt frame and repair archival footage pull-down artifacts.
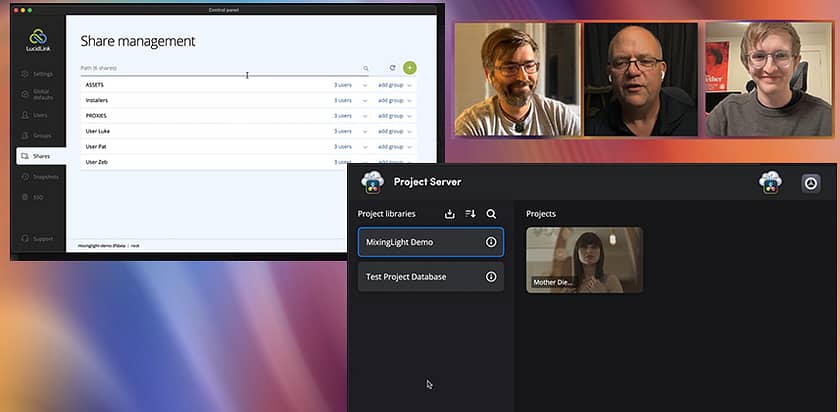
Intro to Resolve's Collaborative Workflow - LucidLink and Proxies
Get started with DaVinci Resolve 18's Cloud-based Collaboration workflow. In Part 1, begin sharing media and projects with a remote team.
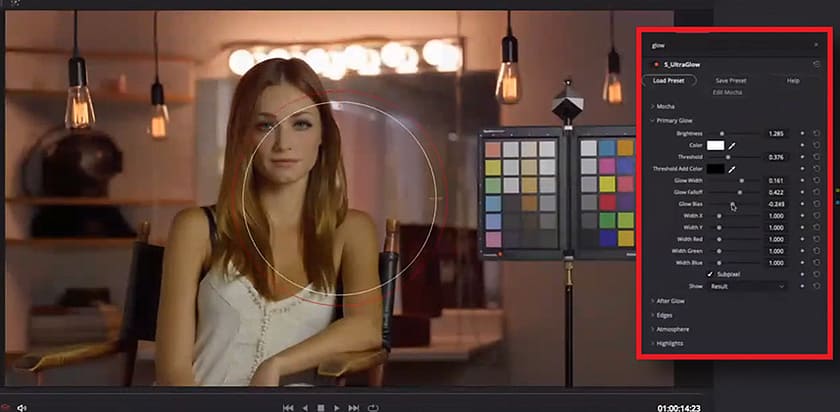
How To Use The Sapphire S_Ultraglow OpenFX
In Part 2 of Jason Bowdach's series on glow effects, get a close look at the Sapphire S_UltraGlow and the additional options it offers.
Contrast Adjustments: Which Is The Right Tool For You?
In Part 3 of Cullen Kelly's 'Flexing Fundamentals' series, learn how to think about organizing contrast adjustments to improve your results.
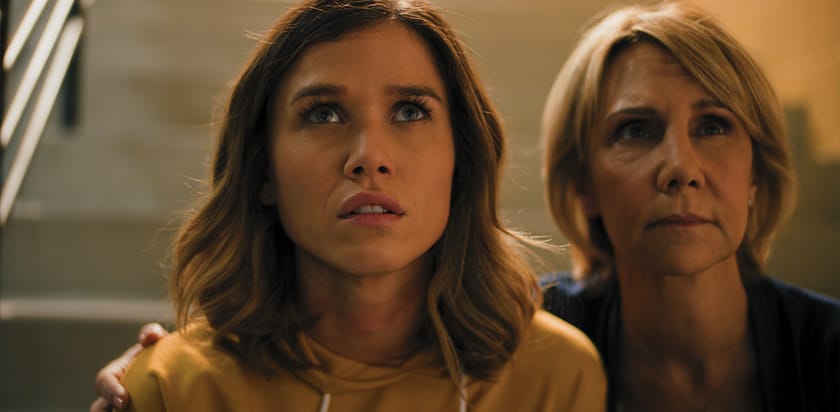
Using Color Grading To Tell A Decades-Long Story
Colorist Joey D'Anna breaks down his color grade of an indie feature - showing how he executed the goals & technical challenges of this film.
Edit Faster With 10 Keyboard Tips & Tricks For DaVinci Resolve
Learn 10 essential keyboard shortcuts you can bind on the DaVinci Resolve edit page to speed up your editing workflow.
Learning To Work Quickly Using The 'Glow' Resolve FX
Glow effects are versatile - but you can waste time fiddling with their controls. Learn how to work with the Glow Resolve FX, intentionally.
How To Upgrade Your Contrast, Pivot, Lift, and Gain Adjustments
Learn why colorist Cullen Kelly loves Contrast-Pivot for his contrast adjustments - and how you can upgrade them for more nuanced control.
Film Print Emulation: A Deep Dive Into The Filmbox OFX Plugin
In this deep dive into the Filmbox OFX plugin learn its basic operation, features, and how it compares to alternate film print emulators.
Better Keying Using DaVinci Resolve’s 3D Keyer
Are you pulling a key for color grading and Resolve's HSL keyer isn't doing it? This dive into the 3D Keyer may get better results, faster.
Flexing Fundamentals: The Hidden Power of the Offset Wheel
In a new series on Primary color corrections, Cullen Kelly explores the hidden strength of the Offset Wheel - when working color-managed.
Charting Gamma Curves, REC-709a, Premiere 2022 Color Management
Team Mixing Light, and members, discuss Log Gamma curves, revisit Rec-709a, Premiere Pro 2022's color management, and declining job offers.
How To Build Your Own ‘RGB Crosstalk Curves’ Node Matrix
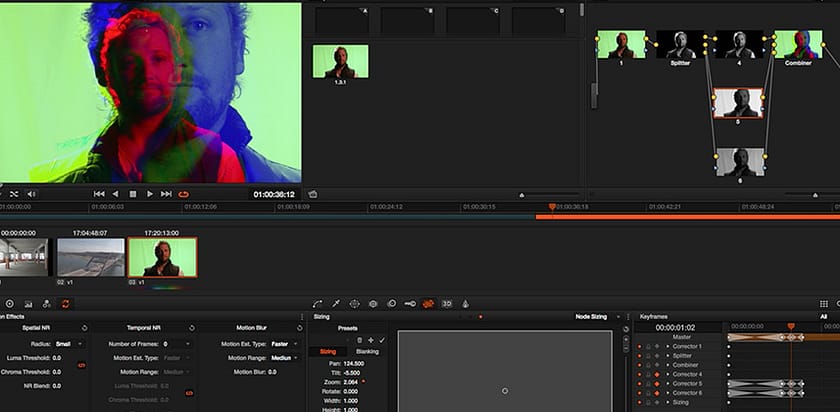
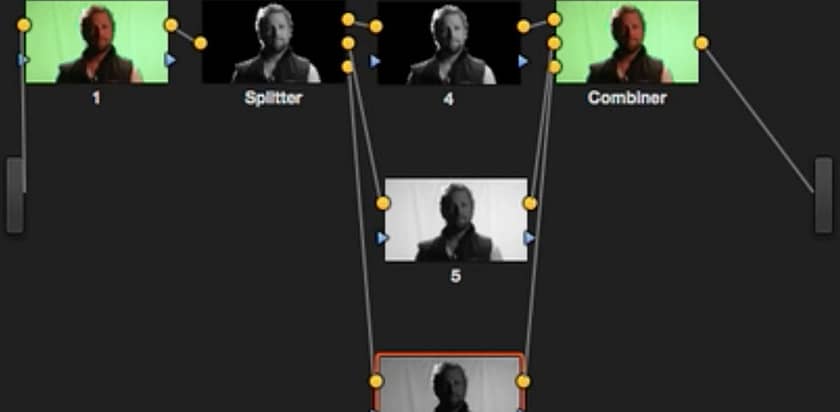
In Part 7 of Cullen Kelly's 'Visual Math' series, rebuild Resolve’s RGB Mixer with splitter/combiner nodes to control with Custom Curves.
ResolveFX Surface Tracker Part 2 - Beauty Work Within Fusion
In Part 2, Igor Ridanovic leverages the stabilization work of the new Surface Tracker plugin to execute beauty work on the Fusion page.
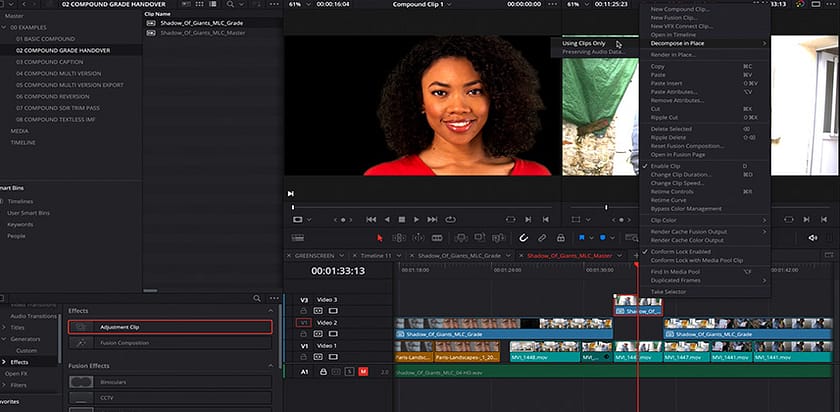
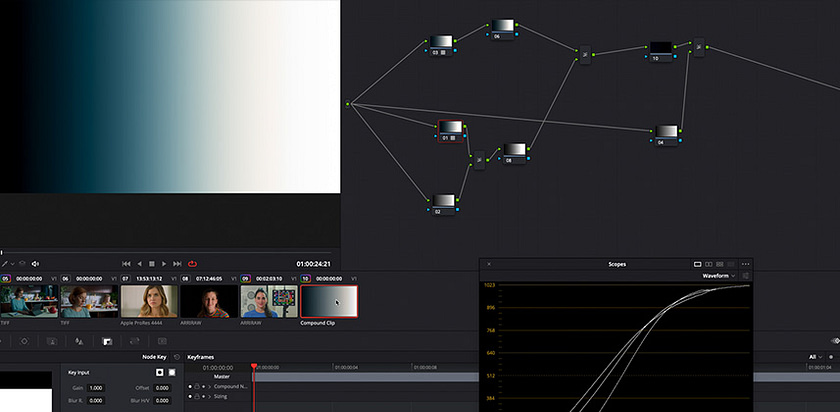
Using Compound Clips For Dolby Vision Revisions & IMF Delivery
Learn an advanced compound timeline use-case for Dolby Vision deliverables - without ever rendering & replacing the original HDR timeline.
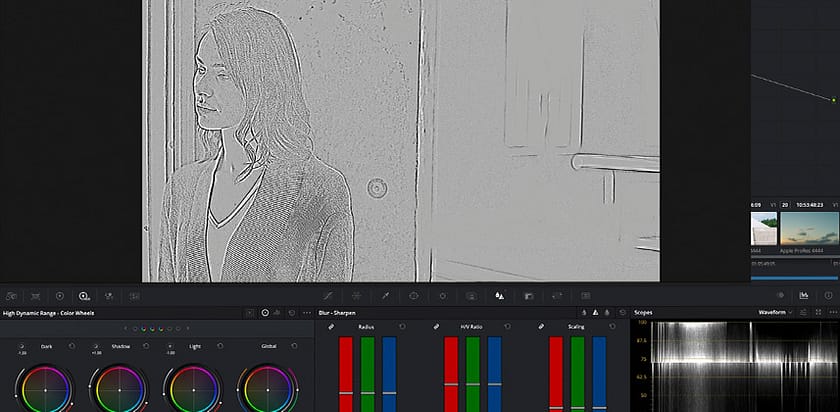
Deconstructing Blur, Mist, and Unsharp Mask Operations
In Part 3 of Hector Berrebi's 'Texture Management' series, learn what blur is doing to your images and build an Unsharp Mask using nodes.
How To ‘Trace’ a LUT’s Contrast Curve By Hand
Learn how to use Layer Mixer nodes to recreate a LUT's contrast curve for further creative manipulation in Part 6 of the Visual Math series.
Digging Into The ResolveFX Surface Tracker (For Retouching)
Resolve 18's Surface Tracker combines a multiple-point tracker and a warper in one tool. Learn how it works while prepping a retouch job.
An Introduction To Versioning Efficiently Using Compound Timelines
Use compound timelines in DaVinci Resolve for speed and efficiency when managing separate versions of timelines and multiple creative teams.
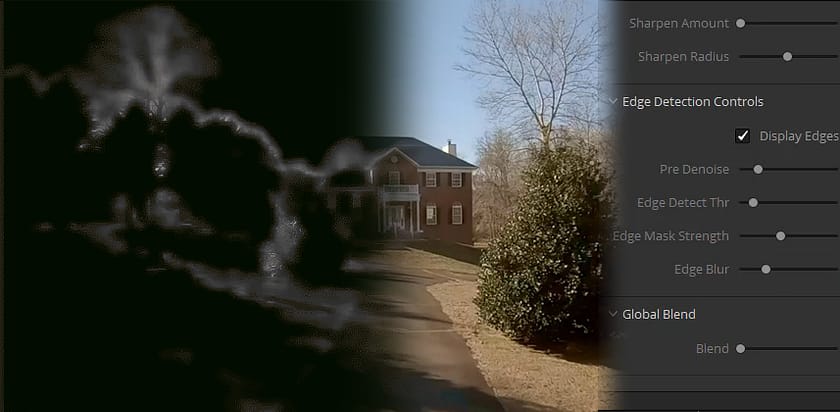
How Do You Avoid Adding Visual Artifacts When Sharpening Your Images?
Are you adding RGB artifacts into images when sharpening? How is Midtone Detail different (in DaVinci Resolve)? Plus, sharpening in LAB space.
How Do You Succeed Running A Color Grading Business?
The team is joined by our newest Contributor, Zeb Chadfield, answering business-related questions on being a colorist and getting paid.
Film Print Emulation: Paul Dore’s ACES DCTL Look Modification Transform
In Part 3, learn how to go beyond LUTs for an artistic approach to emulating film print looks using Paul Dore's DCTL in an ACES workflow.
An Introduction to Texture Management (using DaVinci Resolve)
In the start of a new series, colorist & educator Hector Berrebi defines the terms and tools of the important concept: Texture Management.
Using Parsec and VirtualHere For Remote, Secure Color Grading Sessions
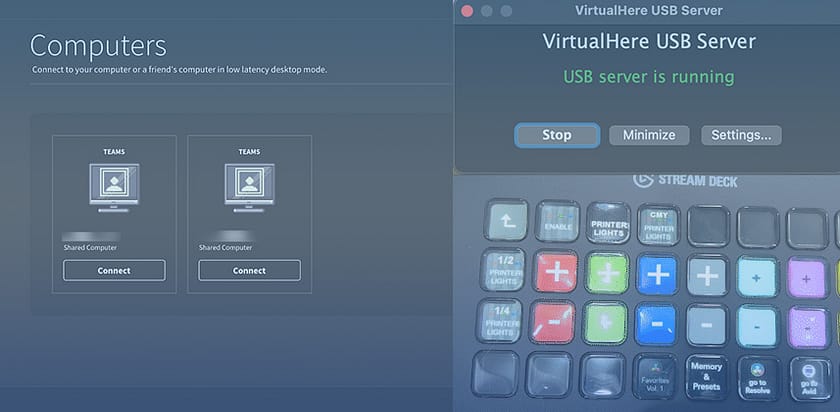
Learn how to control a remote DaVinci Resolve workstation using Parsec with VirtualHere to virtualize locally-attached USB devices.
Evaluating Skin Tones, Working With Drone Footage, Grading On Laptops
Team Mixing Light helps our members work through confidence problems color grading skin tones, drones, and laptop displays in a live call.
Building Custom 'Lum vs Sat' Curves In HSL Using Resolve's Node Tree
In Part 5 of our 'Visual Math' series, learn how 'vs. Curves' work from within Resolve's node graph by building your own in HSL space.
DIY - Virtualizing Your Networked Resolve Database Server On Linux
Learn how to install and configure Postrgres database servers in a Linux virtual machine across an internal network for DaVinci Resolve.
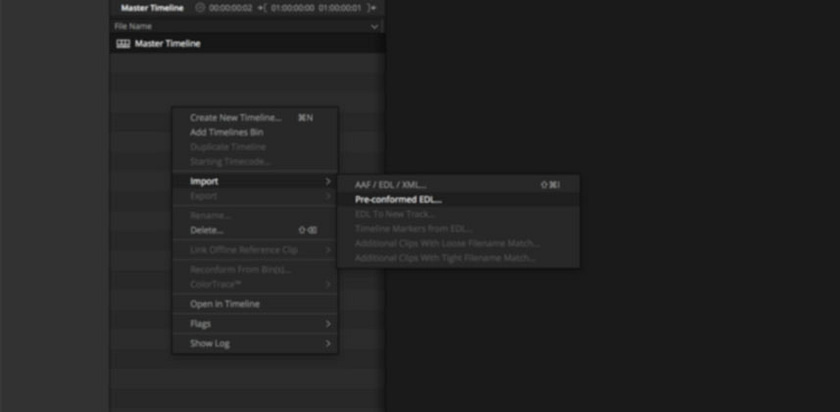
Moving timelines into DaVinci Resolve Using EDLs - More Tips and Tricks
50 years later, the simple EDL is still useful for sharing timelines! Get more tips and tricks on integrating EDLs in colour managed projects.
Film Print Emulation: Breaking Down PixelTools 'Film Lab PowerGrades'
Continue developing your critical eye for evaluating Film Print Emulations (FPEs) by breaking down Pixel Tools Post's 'Film Lab PowerGrades'.
Extracting Only The Hue Or Saturation of a LUT using DaVinci Resolve
Learn how to extract the hue and/or saturation shifts of a 3D LUT, without getting stuck with the LUT's accompanying contrast adjustment.
The HDR Palette One Year Later & Selling Your Project Files: Good Ideas?
Team Mixing Light, in a live conference call, takes member questions on Resolve's HDR palette and the practice of handing over project files.
Color Management For Preconformed Workflows With EDL Clip Names
Using Resolve's Edit Index and EDL comments, you can prepare a preconformed timeline for color management much easier than you think.
Why Are Film Print Emulation LUTs Special (and how to use them)?
In this new series, build the foundation to evaluate & implement ANY Film Print Emulation (FPE) - with the Kodak 2382 film stock as baseline.
Creating And Evaluating PowerGrade Tools - Tips and Tricks
Colorist Jason Bowdach teaches you his approach to developing and evaluating technical PowerGrades (and how it helps your creative grading).
DaVinci Resolve 17.4.5 - Custom YRGB Output Color Spaces
Colorist Joey D’Anna explains why the new Output color space setting in DaVinci YRGB projects is a great tool for node based color management.
Color Warper Tips Part 2 - Migrating Off Curves in DaVinci Resolve
Colorist Patrick Inhofer shares how he modified his approach to Resolve's Color Warper - and now rarely uses 'Hue vs' and 'Sat vs' curves.
How To Extract A LUT's Split-Tone Component Using DaVinci Resolve
Learn how to isolate the color impact of a LUT from its luma component to craft the image to your preferences, all within DaVinci Resolve.
Colourlab Ai - Working In A Color Managed Workflow
In Part 3 of this series, Jason Bowdach demonstrates how to use Colourlab Ai in a color-managed workflow in Resolve and shows new features.
Office Hours LIVE! - ACES Color Management Using Nodes (in Resolve)
Join colorist Joey D'Anna as he answers node-based color management strategies for ACES and RCM workflows (including groups and shared nodes).
Joey’s Custom Workshop - Two Useful Scripts And A Fusion Effect
Colorist Joey D’Anna shares with you new custom tools for batch rendering, automatic backups, and a 3D motion control template.
Resolve Color Warper Tips Part 1 - Pin Patterns Within Fixed Node Trees
Learn how to build Color Warper 'Pin Patterns' for flexible saturation fixes in DaVinci Resolve and integrating them into fixed node trees.
Building A Subtractive Saturation Node Tree In DaVinci Resolve
'Subtractive saturation' is a hot topic with colorists. Learn how to manually build this tool in DaVinci Resolve for more natural results.
Office Hours Live Stream - Color Management (and much more)
This is our first Office Hours Livestream. Four Mixing Light Contributors take and answer questions from members in a livestream.
Dolby Vision - Custom ACES SDR to HDR Part 4 - Deliverables And QC
In Part 4, learn how to QC and deliver your Dolby Vision HDR and SDR masters, including Video- or Data- level settings for ProRes exports.
Custom ACES SDR to HDR Part 3 - Dolby Vision Trims
Learn how to use the original SDR color grade as a reference for a new SDR Dolby Vision trim from an HDR re-master (gulp!)!
Live Call - Coding DCTLs Wrap-Up Discussion with Cullen Kelly
Cullen Kelly wraps his 10-part intro series about Coding DCTL. It's a live Q&A session answering questions, while Cullen learns something new!
Elsewhere On The Web: Netflix Recommended Displays (and more)
This series returns with stories on Netflix recommended displays; being a better colorist; color harmonies; and note-taking.
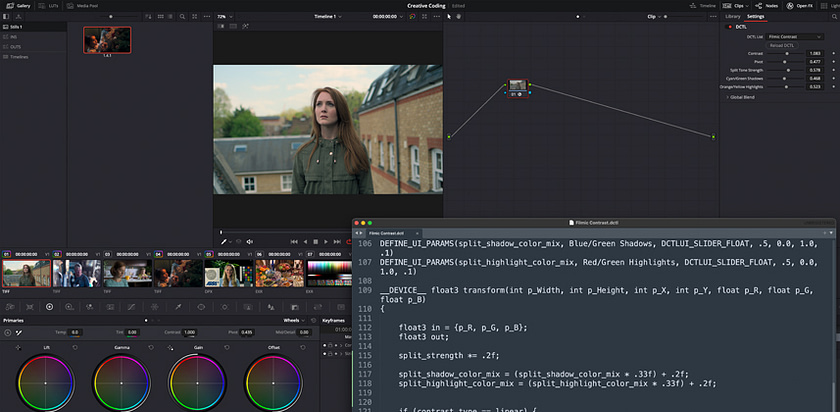
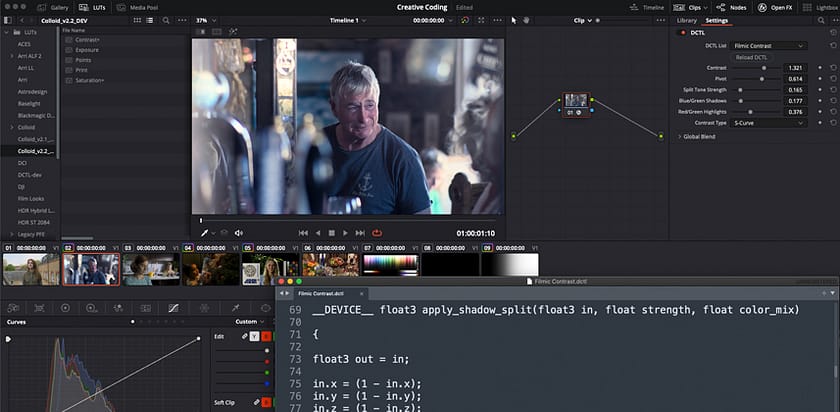
Creative Coding with DCTL Part 9 – Adding A Visual Curve Overlay
Colorist Cullen Kelly finishes off coding a split-toning Resolve DCTL plugin with a visual overlay showing how the RGB channels are modified.
SDR To HDR - Working With Graphics In Node-Level Color Management
In part two of his series, Colorist Joey D'Anna shows you how to color manage graphics when trimming a project from SDR up to HDR.
Creative Coding with DCTL Part 8 - Refining UI Parameters
Colorist Cullen Kelly finished defining his Davinci Resolve DCTL plugin. Learn how he tweaks the interface, eliminating 'dead zones.'
Resolve 17.4: My Favorites From A Huge Release
DaVinci Resolve 17.4 is a substantial update. Colorist Joey D'Anna explores his favorite features, big and small, on the Color & Edit Pages.
Custom ACES: SDR To HDR - Part 1
In this Insight, Colorist Joey D’Anna shows you how to move an SDR grade into HDR using a Custom ACES fixed node structure.
Color Page Tools You Might Have Forgotten About Or Didn't Know
In an application as deep as Resolve its easy to forget about a feature or not even know one was there! In this Insight, Robbie Carman explores some of these
Creative Coding with DCTL Part 7 - Adding Split Toning
In Part 7, Colorist Cullen Kelly shows how to add split-toning into the custom DCTL. Then he debugs and commits it to the main GitHub branch.
Color Grading An Animated Short Film - Part 1
Colorist Patrick Inhofer shares a behind-the-scenes look at color grading an animated short film - and how it differs from live action.
Binary Logic In The Node Tree: Creating Procedural Node Structures
What does binary logic have to do with color grading? Colorist Joey D'Anna shows you how to build switches and logic into your Resolve node structure.
Creative Coding With DCTL: Part 6
In part 6 of his ongoing series, Cullen Kelly explores how to combine two separate DCTLs for increased user functionality without adding complexity.
Coloring Reality: How To Color Grade 1700 Shots In Two Days
Coloring Reality TV can be a huge undertaking. However, if you organize and prepare, you'll deliver a high-quality show on time.
Can You Use Project-Level Color Management With 'Flat File' Workflows?
Learn how to tag a single clip with multiple 'input color spaces' in DaVinci Resolve when executing a 'flat file'/preconformed workflow.
Match Move ResolveFX: A Color Page Multitool
In this Insight, Joey D'Anna shows you how to use the DaVinci Resolve Match Move ResolveFX plugin for powerful tracking, stabilization, and paintwork
Creative Coding With DCTL: Part 5
In part 5 of his ongoing series on coding DCTLs, Cullen starts to get into the thick of the tool he's creating - exploring how to define and code contrast.
Creative Coding with DCTL: Part 4
In part four of his ongoing series on creating DCTLs, Cullen Kelly builds upon work done to create a static DCTL by adding user adjustable controls.
Creative Coding With DCTL: Part 3
In part 3 of this ongoing series, with foundational knowledge in place, start coding your first DCTL a colorist Cullen Kelly guides you step by step.
Creative Coding With DCTL: Part 2
In Part 2 of his series on coding DCTLs, Cullen Kelly covers some additional setup and tools you'll need to successfully build DCTLs
Using A Blackmagic Color Panel Remotely - Resolve 17 Solves A Problem
Learn how to use Resolve 17's new remote panel capabilities for remote color grading that is secure, interactive, and color accurate.
Creative Coding With DCTL: Part 1
Cullen Kelly kicks off a new exciting series about DCTL coding. Learn the vocabulary, syntax, and techniques to create DCTLs to aid your color grading.
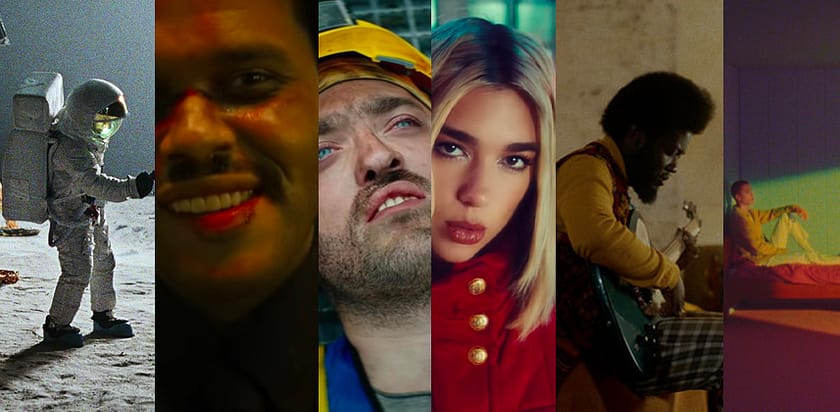
Colorist Inspiration - UK Music Video Awards 2020
Dan shares some grading inspiration from the 2020 best colour grading nominees at the UK music video awards
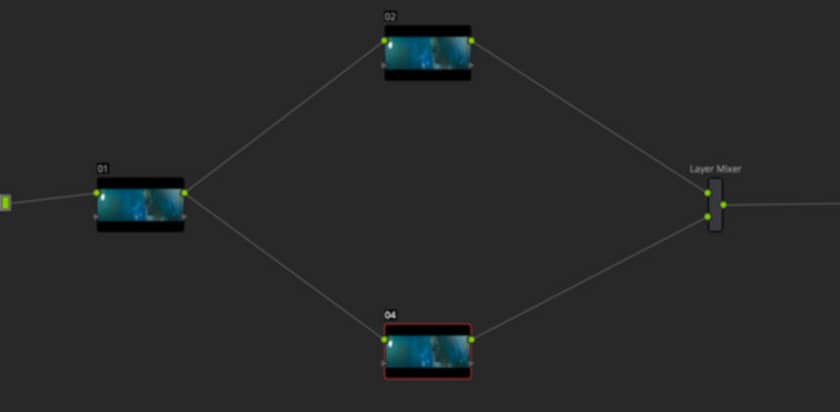
How Do You Use Resolve's Parallel Mixer and Layer Mixer Nodes?
In Part 2 of our series on learning how to use Resolve's Serial Nodes, we look at combining them with Layer and Parallel Mixer nodes.
Joey's Custom Workshop: Solving Problems Using DCTL and Python
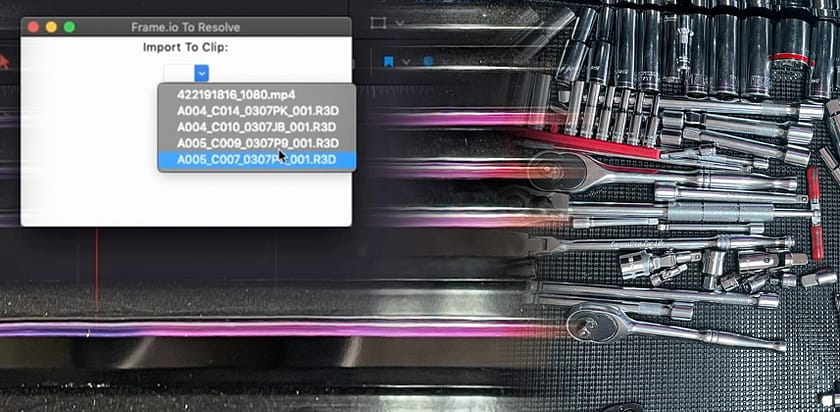
Expand your colorist toolbox with custom Python scripts and DCTLs for Frame.io workflows, subtractive saturation, and timeline duplication.
Inside the Grade: The First Pass On A Feature Film
Watch over the shoulder of senior colorist Cullen Kelly as he works through his first pass on a feature film and shares his approach.
Getting Sync'd Up: Advanced Audio Monitoring In DaVinci Resolve
Learn to measure audio/video sync issues with a smartphone, and compensate in DaVinci Resolve using Fairlight's B-Chain
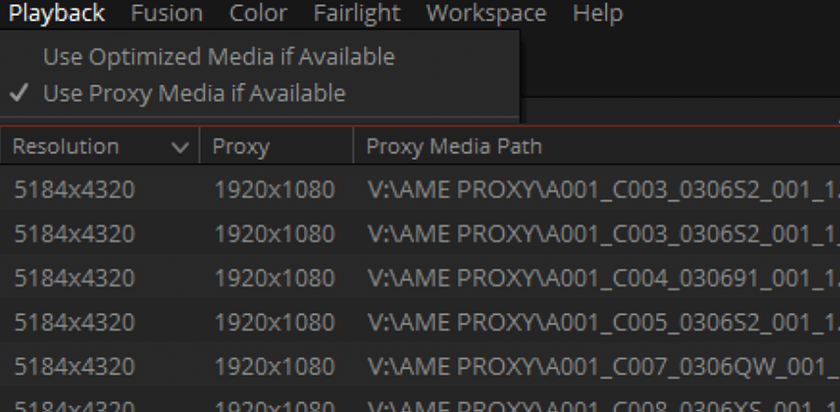
Getting Up To Speed On Resolve 17's New Proxy Workflow
Get up to speed on Resolve 17's new proxy workflow for lightning fast editing and grading performance when working remotely.
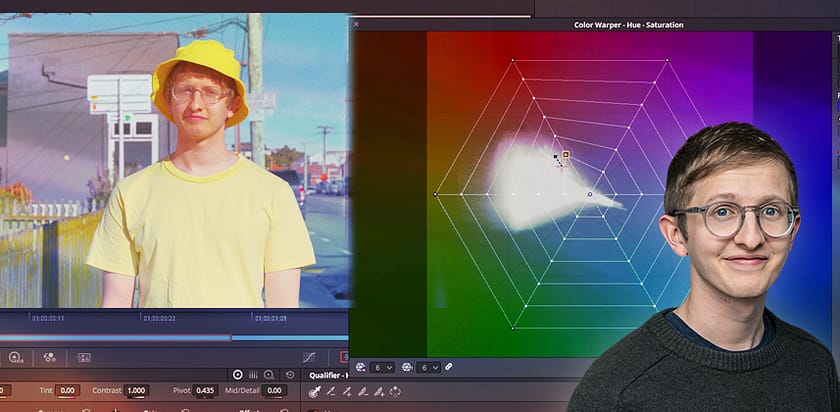
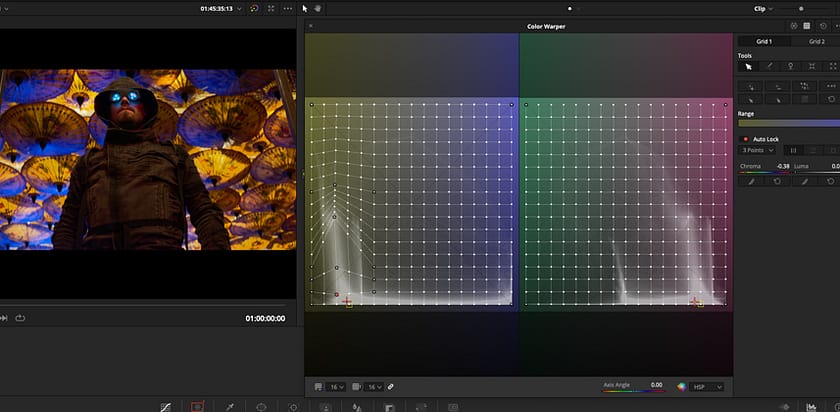
Color Warper 101 Part 3: Creating Looks (Plus A Grading Challenge)
In the finale of the series, colorist Peder Morgenthaler puts what we've learned into action creative 3 looks with the Color Warper.
Look Development Part 3: Sweetening The Color Palette
In the last installment of his series on the essentials of look development, Cullen Kelly guides you through the concept of preferential color mapping.
Color Warper 101 Part 2: Managing Points & Pins + Chroma-Luma Panel
In part 2 of his series, Peder Morgenthaler dives deeper into the controls in DaVinci Resolve's Color Warper.
Review - Controlling The HDR Palette With The Resolve Mini Panel
How does the DaVinci Resolve Mini control surface manage to control 7+ color wheels in the HDR Palette, with only 3 physical trackballs?
Look Development Part 2: Dialing In The Contrast Curve
In Part 2 of his series, Cullen Kelly takes a look at dialing in the contrast curve for a look with the new HDR Zone tool in Davinci Resolve 17.
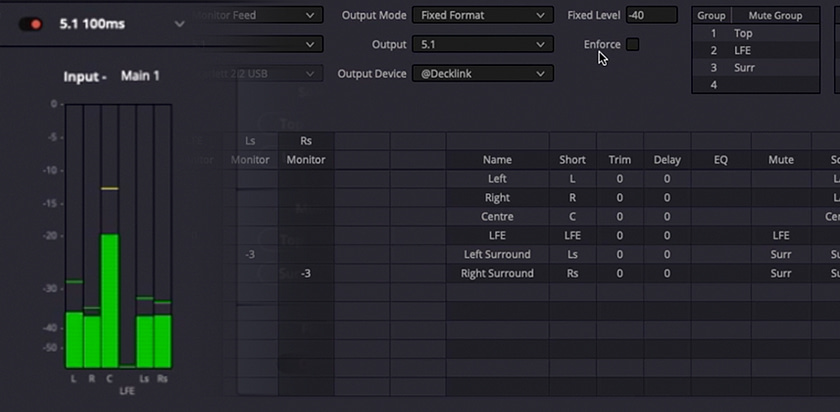
How To Set Up and Deliver Dolby ATMOS in Resolve 17
In this Insight, learn how to setup, monitor, edit and deliver Dolby Atmos immersive audio in DaVinci Resolve 17
Resolve 17 Color Management Tips and Pat's Fixed Node Tree
Learn how to set up Resolve Color Management for success. You'll also see a colorist's node tree, designed for RCM & the HDR Palette.
Color Warper 101 Part 1: Concepts and Interface Fundamentals
The new Color Warper in DaVinci Resolve 17 is very powerful, very accurate, but a bit complicated. In Part 1, learn this tool's fundamentals.
HDR Palette 101 - Resolve Color Management 2.0 + Contrast Controls
In Part 3 of this series, learn how the color grading controls work differently with RCM 2 enabled. Plus, contrast control in the HDR Palette.
HDR Palette - Using Multiple Zones, Contrast, Presets, Global Control
In Part 2 of this series, we dig deeper into the HDR Palette and continue exploring its differences from the traditional Primaries Palette.
Resolve 17 Big Little Features Part 2 – The Edit Page
Small features can make a huge difference to your workflow! Learn new edit page features to speed up and improve your workflow in Resolve 17.
How Do Zones Work in Resolve 17's New HDR Palette?
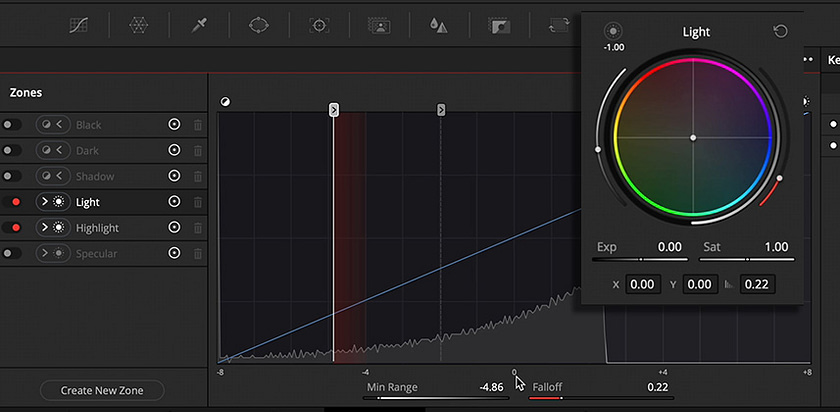
The HDR Palette represents a major advance in Resolve 17's color grading toolset. Learn about it's core concept, Zones, and how they work.
Resolve 17: Big Little Features Part 1 - The Color Page
Sometimes, it's the small features making a huge difference! Learn new color page tools to speed up and improve your workflow in Resolve 17.
A Mixing Light Special Report: Resolve 17 Announcement
Blackmagic Design just announced Resolve 17. We jump on a call to discuss the release, its timing, new features, and our initial thoughts.
Resolve 17: First Impressions And Favorite Features
Resolve 17 Public Beta is here and it is a huge release! Colorist Joey D'Anna points you to his favorite new features, updates, improvements.
Node Tree Compositing: Building A Green Screen Shot In One Node Tree
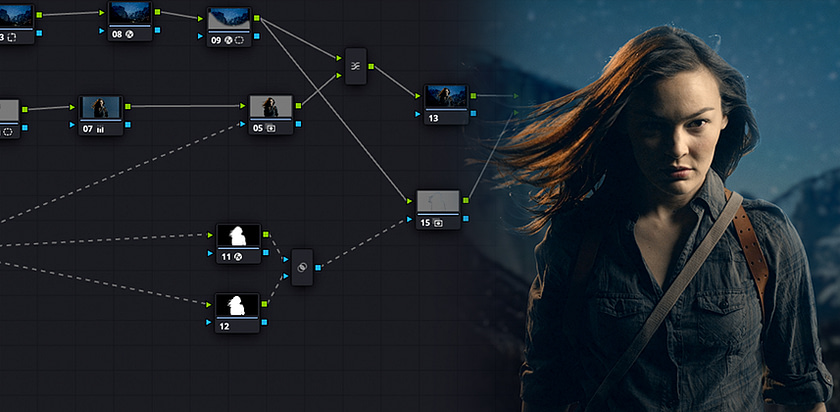
In this Insight, Joey D'Anna shows you how he uses the DaVinci Resolve color page node tree to build great looking green screen composites.
Working With Reference Images Part 3: Building The Look
Cullen shows how to put the analysis of reference images + analysis of shots on the timeline together to create a cohesive, matching look.
Nodes 101 – Mastering DaVinci Resolve’s Serial Node
Do the nodes in DaVinci Resolve's Color Page confuse you? In Part 1, learn how to think about using nodes with this intro to the Serial Node.
Combining Group Grades With Shared Nodes While Avoiding The Pitfalls
In Part 2 of this advanced workflow series, learn how you can use Shared Nodes inside Group Grades for quick & easy revisions down the road.
Using Playheads - Working Faster In DaVinci Resolve's Color Page
Learn how to accelerate your color grading in DaVinci Resolve's Color Page by using multiple Playheads to quickly navigate the timeline.
Combining Shared Nodes and Group Grades in DaVinci Resolve
Applying the one color grade to multiple shots is easier with Resolve's Groups or with Shared nodes. Learn how to combine the two approaches.
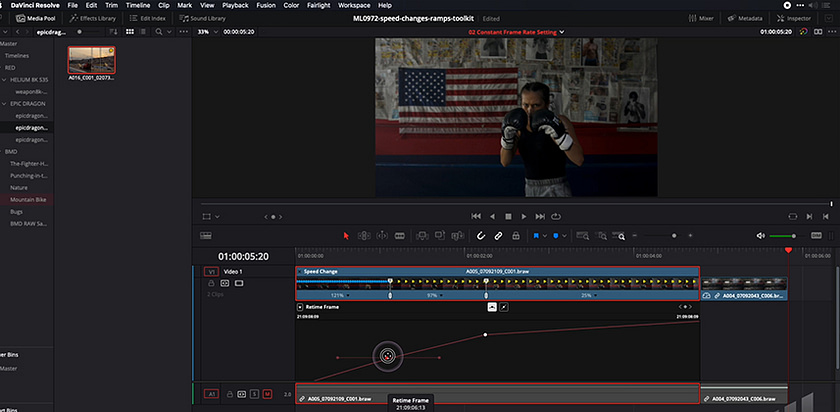
Creating And Modifying Speed Effects in Davinci Resolve
Learn how to fix frame rate problems and create both constant- and variable-rate speed effects (and image processing options they enable).
Working With Reference Images: Evaluating Camera Source Footage
In Part 2 learn how you can evaluate the source footage on your timeline to answer: Is this footage a good match for our references?
The Fundamentals of DaVinci Resolve's Gallery and Memories
Learn how to use Resolve's Gallery for comparing and sharing color corrections or nodes between different shots.
Working With Reference Images: Part 1
In part 1 of a new series, learn the essentials of how to interpret and read references for contrast, tonality, and other key factors.
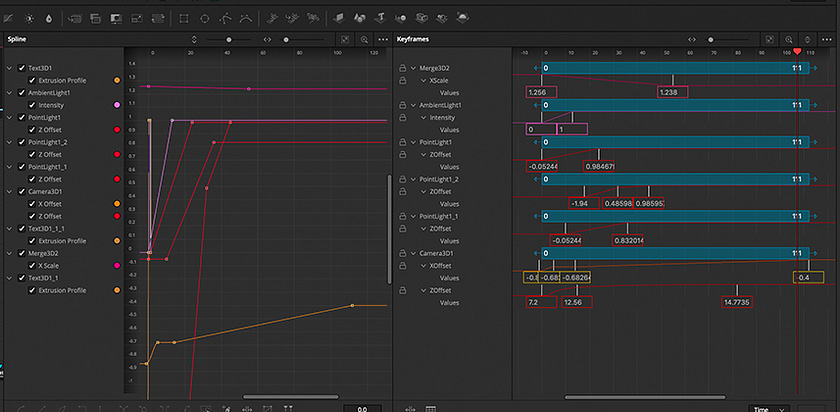
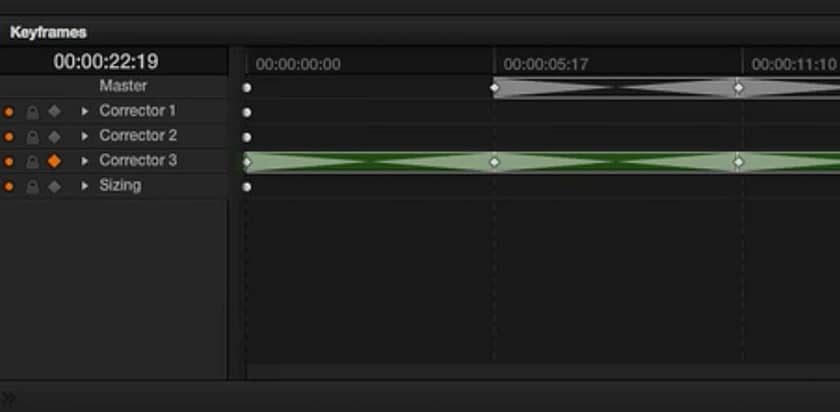
Advanced Keyframe Editing in Fusion
Learn powerful keyframe editing techniques in DaVinci Resolve's Fusion page, using the built-in spline and keyframe editors.
What's Tone Mapping?
In this installment of From The Mailbag we sit down to talk about tone mapping and how's used in software and on consumer displays.
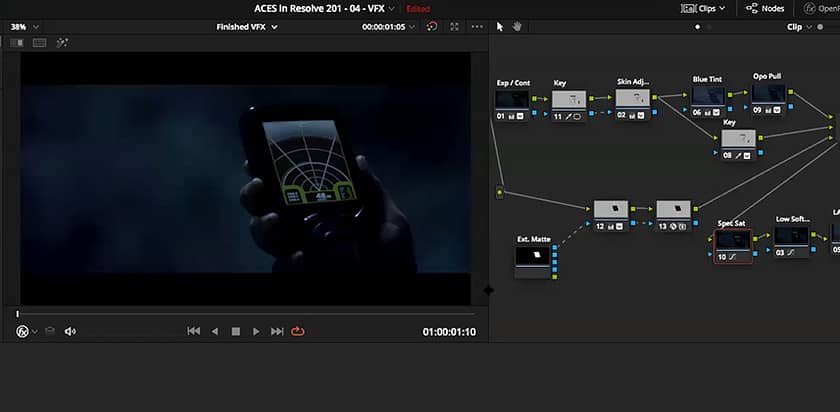
ACES 201 - Node-based Grading, Sharing Looks to On-Set and VFX
In this webinar, learn an alternative approach to color grading ACES projects in DaVinci Resolve plus collaborating with others in ACES.
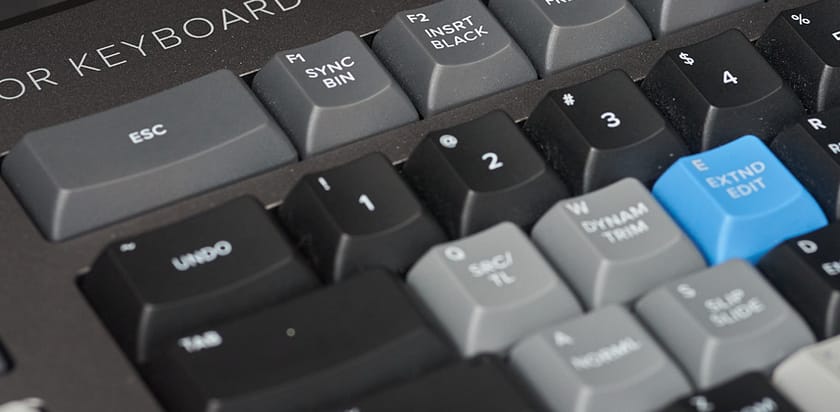
A Review of Blackmagic's Editor Keyboard: 1 year later
Learn what a online editor and colorist thinks after spending a year working with the Blackmagic editor keyboard, full-time. Plus, his tips.
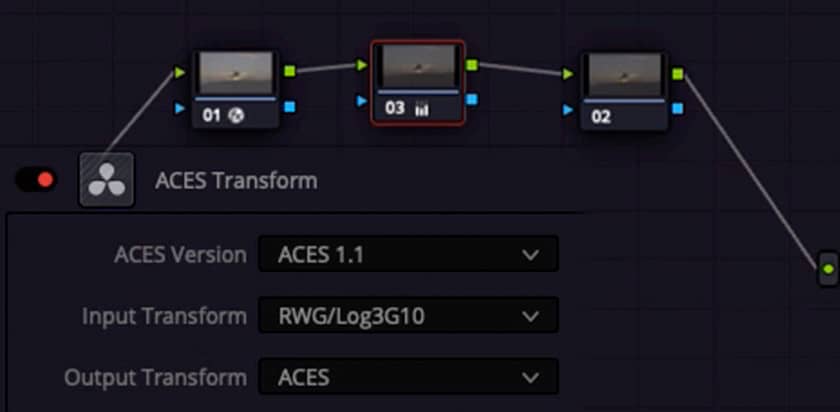
Custom ACES Part 3: ODTs, Deliverables and HDR
Learn how to use a custom ACES workflow to easily manage deliverables in different color spaces, and easily take your grade from SDR to HDR.
The 10-Minute Grade: Shot Balancing
In this installment of The 10-Minute Grade, Cullen Kelly walks you thru a few different techniques to quickly get shots balanced when time is of the essence
Mastering DaVinci Resolve Cloud, Point Trackers for Shapes and OpenFX
If you want to master DaVinci Resolve's Color Page then you need to master its Cloud and Point trackers. This Insight sets you on that path.
Performance Optimization in DaVinci Resolve Webinar
Creative decision-making on a stuttering timeline is no fun. Learn what you need to know about playback performance within DaVinci Resolve
Custom ACES Part 2: Grading Custom ACES With Fixed Node Structures
Learn how to build a powerful fixed node structure in DaVinci Resolve to work within a valid ACES pipeline, without normal limitations.
The 10-Minute Grade: Global Contrast
In the first installment of a new series, Cullen Kelly shares his strategies for quickly getting a grade on its feet by creating global contrast
HDR Essentials: Vocabulary & Workflow Webinar
In this Mixing Light Webinar replay, join Mixing Light co-founder Robbie Carman as he explores HDR essentials, including vocabuarly & workflow
Custom ACES Part 1: Building An ACES Workflow In A Resolve Node Tree
Learn how to leverage a powerful ACES workflow without any limitations, by customizing it a DaVinci Resolve node tree.
ACES and DaVinci Resolve 101 Webinar - Understanding the Workflow
Are you confused about what is ACES? What is it used for? How do you use and implement ACES within DaVinci Resolve? This webinar is for you.
Three Strategies for Increasing Color Separation in DaVinci Resolve
Do your images need to look more colorful? In this Insight, learn 3 color separation tools for increasing perceptual colorfulness.
Mastering DaVinci Resolve's Stabilizer and Classic Stabilizer
Learn DaVinci Resolve's Stabilizer and its legacy 'Classic Stabilizer'. This Insight is pulled from our Courses with a new introduction.
Resolve Remote Workflow: Hawaii To LA & Back
In this From The Mailbag we revisit some key aspects of a Resolve remote workflow as we try to answer questions from a member on the same subject.
Integrating Resolve's 'CST' Plugin with Fixed Node Trees
Learn how a pro colorist is integrating the Resolve 'color space transform' plugin into his fixed node tree to get better results, faster.
An Overview and Tour of DaVinci Resolve 16's Cut Page
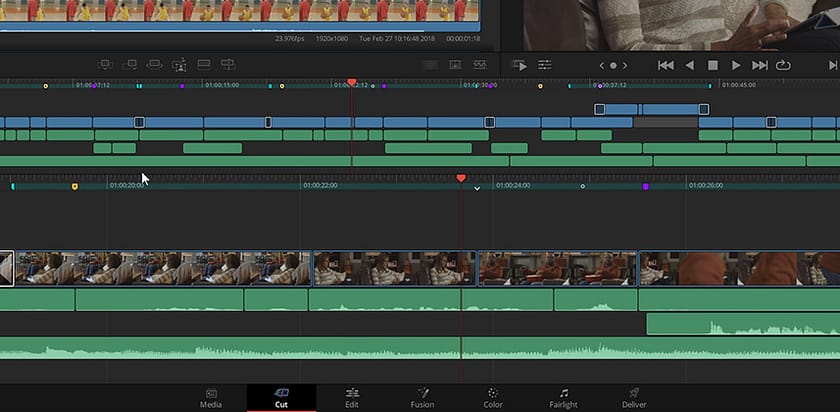
When you open DaVinci Resolve 16 for the first time, you land on its Cut Page. How is it laid out? How does it differ from the Edit Page?
Quick Export: Customizing Resolve's New Export Features
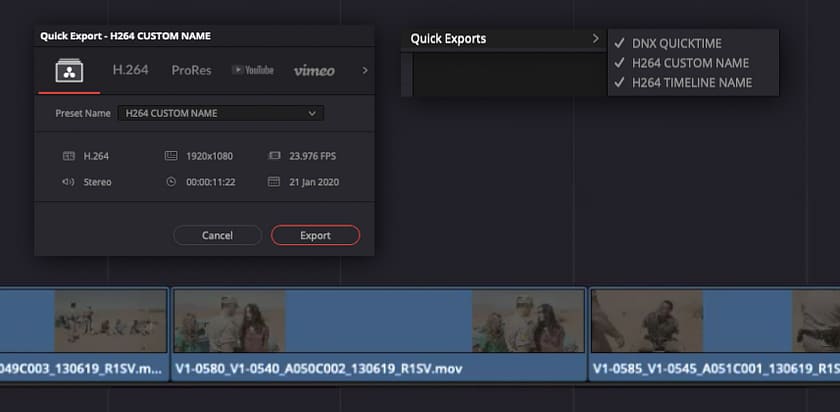
DaVinci Resolve's Quick Export is often overlooked because it looks simplistic. Learn how to power up Quick Exports and save yourself time.
Revisiting Temporal and Spacial Noise Reduction in DaVinci Resolve
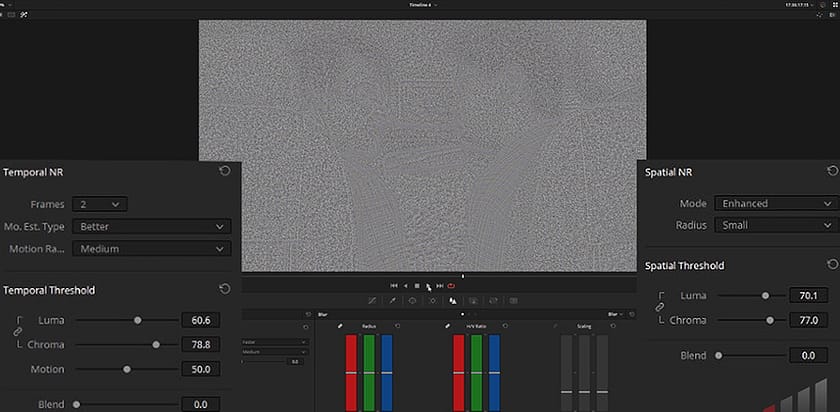
Take a fresh look at Resolve Studio's native noise reduction tools. Learn the process for working through the Temporal and Spacial toolsets.
Removing Unwanted Elements Using ResolveFX Revival Plugins
Do you want to remove artifacts from dirty lenses or remove objects that are distracting. These ResolveFX can help you, in Resolve Studio.
Colorist Inspiration - January 2020
Dan kicks off January 2020 by looking back on 2019 and speaks about his personal favourite grades & experiences of the past year.
The Color Mangled Workflow: Modifying Look-Up Tables For Better Results
Do you struggle getting a good starting point while using Look-Up Tables (LUTs)? This idea may make things easier (in Davinci Resolve).
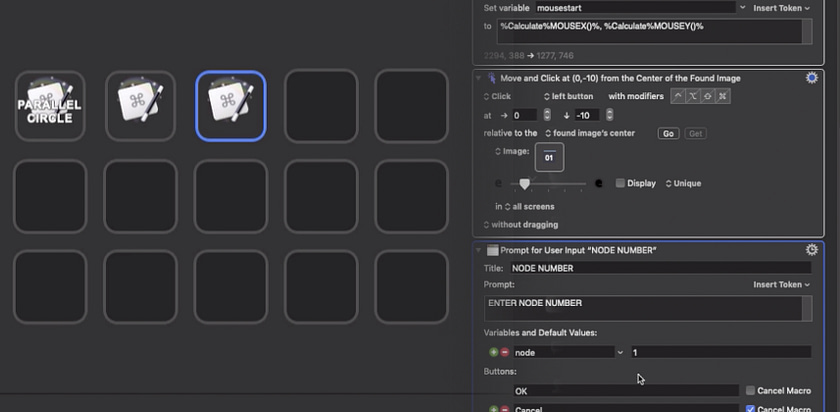
Macros on MacOS - Switching from AutoHotKey to Keyboard Maestro
Learn how to use Keyboard Maestro and Stream Deck to supercharge your workflow in DaVinci Resolve on Mac with powerful macros.
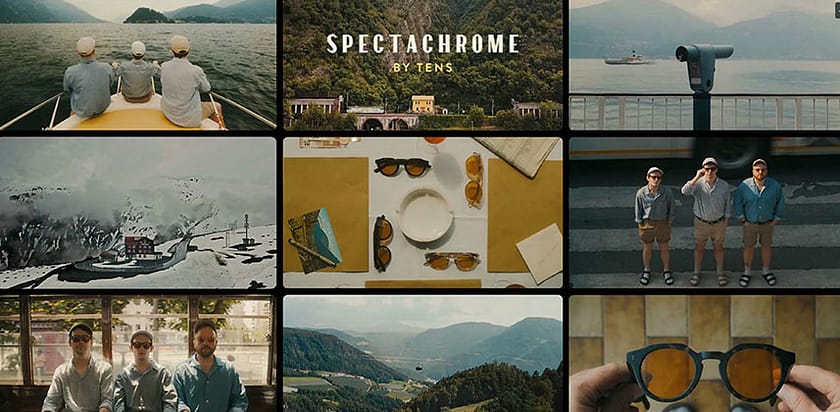
Color Grading In Spectachrome Part 2 - Working With The Fuji XT-3
Working with new cameras is always a challenge. Get an inside look at what Dan does when working with the Fuji XT-3 camera
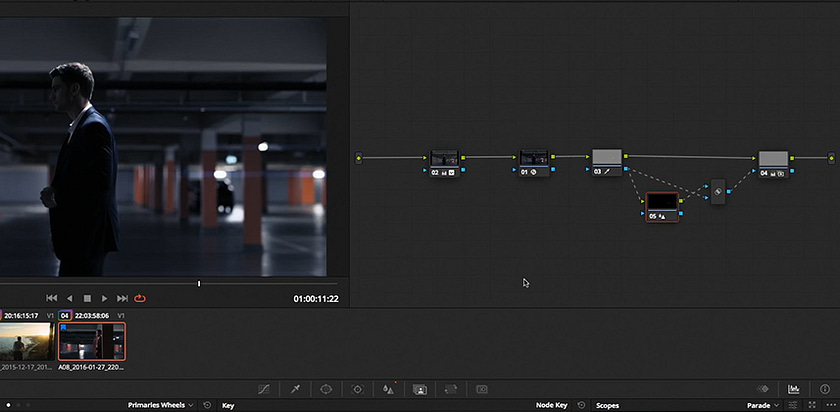
Inside Pat's Color Grading Head - The Evolution of His Fixed Node Tree
Learn the benefits of a 'fixed node tree' in DaVinci Resolve. Get a look inside one colorist's node tree - and how it evolved over time.
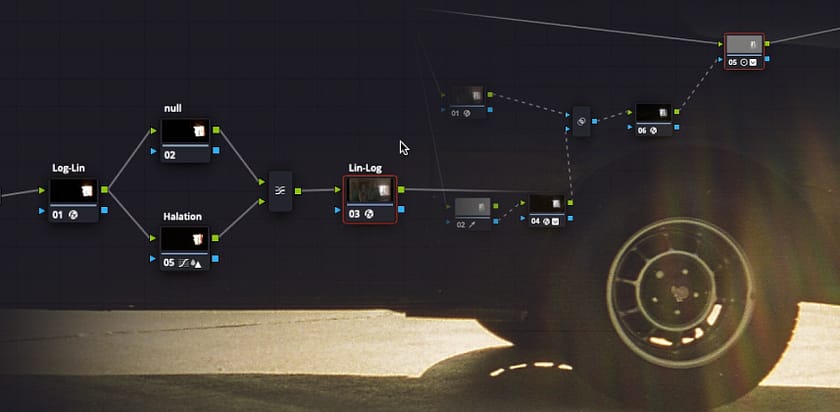
Emulating Film Halation in DaVinci Resolve
Learn two different methods (with different levels of control) of emualting the beauty of film halation using DaVinci Resolve.
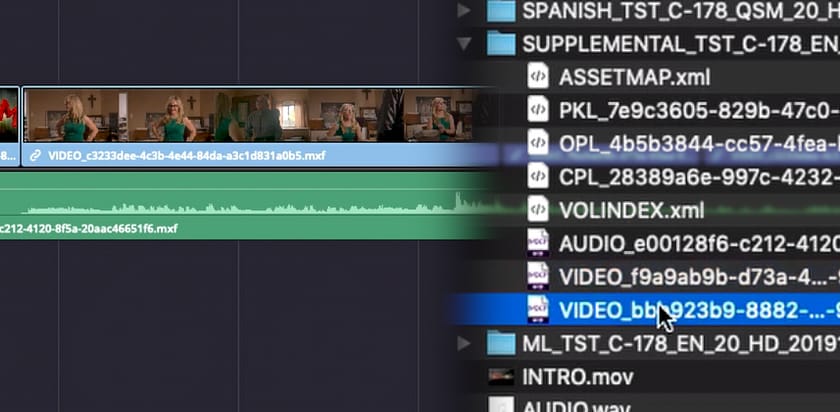
Creating Supplemental IMF Packages in DaVinci Resolve
What is an IMF package? How doyou use DaVinci Resolve to create supplemental IMFs for delivering fixes and alternate versions?
Broadcast Promo Finishing Workflows in DaVinci Resolve
Learn how to use DaVinci Resolve to finish and output coutless versions of broadcast promos, easy fast and without any mistakes.
Color Grading In Spectachrome - Starting With Grain
Dan answers some comments from members about why he adds his grain to the image at the very beginning of his node graph
ACES in Action Part 2 - Breaking Down the Imaging Pipeline
In Part 2 of this Series, learn the details of an indie film navigating ACES between DaVinci Resolve, Premiere Pro, and After Effects.
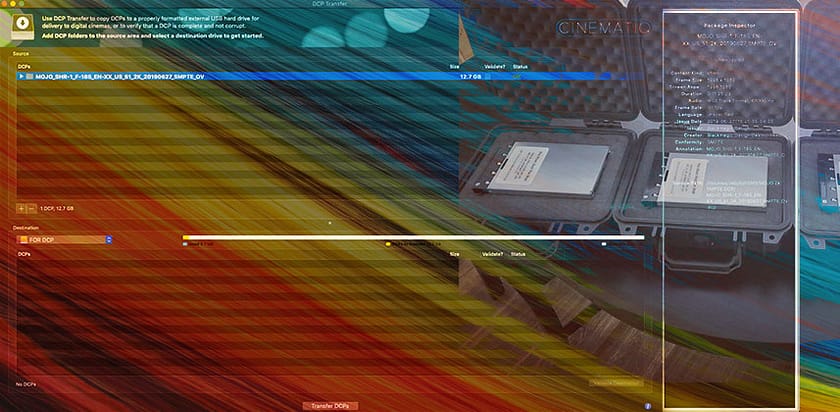
Simplifying DCP Drive Delivery With Cinematiq's DCP Transfer
Learn about Cinematiq's DCP Transfer application for streamlining EXT2 DCP driver deliveries - without having to jump in the Terminal!
ACES Color Correction in Action: An Indie Case Study Part 1
The ACES color management workflow is a key technology for major Hollywood productions. Learn how an Indie film implemented ACES.
Working On The Road - Taking Vacation As A Freelance Colourist
Working as a freelance colorist seems like freedom and flexibility. But what do you do on vacation - and the client has urgent revisions?
Exploring Saturation Controls in DaVinci Resolve - Color Boost Part 3
Learn how various Saturation controls in DaVinci Resolve are identical to each other. Plus, understanding saturation-related hue shifts.
Is DaVinci Resolve 16 Public Beta Now Ready For You To Upgrade?
DaVinci Resolve 16 is very exciting. But it's currently in 'Public Beta'. What does that mean? Can you update to it safely?
Understanding Color Boost in DaVinci Resolve - Part 2
We continue deconstructing Resolve's Color Boost controls, offer an alternative definition, and demonstrate how it differs from Saturation.
My Favourite New Feature In Resolve 16 - Analog Damage ResolveFX
Dan shares his thoughts on recreating tape based artifacts using the brand new Resolve 16 Analog Damage tool.
Scopes and Critical Image Evaluation In Resolve 16
Video scopes are an essential tool to all colorists. Learn all the exciting new scope features in Resolve 16 to speed up your grading.
PixelTools Review: Is There Magical Pixie Dust in These PowerGrades?
A video review of how PixelTools uses the native tools in Davici Resolve to construct custom looks and utilities with PowerGrades.
My Favorite New Color Feature in Resolve 16: The Adjustment Clip
Resolve 16 adds hundreds of features, including powerful new adjustment clips. Learn how to use them streamline your grading workflow.
What I Learned (and Surprised Me) in 5 Hours at NAB 2019 - Part 1
At NAB 2019 with 5 hours of 'me time', in Part 1 learn what I though was significant in Resolve 16 and Mistika Boutique.
Understanding How Color Boost Works in DaVinci Resolve - Part 1
It's not always clear how Resolve's 'Color Boost' tool works differently than its 'Saturation' tool. This video breaks down the differences.
Troubleshooting 101 – Color Compressor & Node Resizing
Dan shares his breakdown of cleaning up a bike frame using the color compressor and node resizing in Resolve
Troubleshooting 101 - Cleaning Up An Annoying Background
Dan shares his thoughts behind his solution to removing a reflection using Resolve's Color Page - on a 16mm shot with moving grain structure.
CDLs in Action and Roundtripping Through DaVinci Resolve
Learn how to create, export, and import ASC-CDL compliant color grades using DaVinci Resolve. Plus tips and tricks with CDL data.
Troubleshooting 101 - Resolve Color Management
Troubleshoot an interesting problem for a more in-depth understanding how Resolve Color Management (RCM) works.
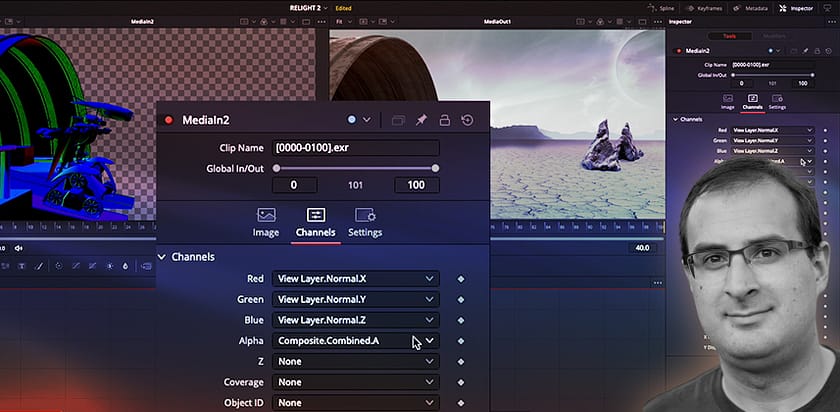
Overview of Materials and Auxiliary Channels in DaVinci Resolve Fusion
Learn the workflow of the 3D toolset in DaVinci Resolve Fusion. Discover how to change materials, add reflections, color grade 3D objects.
Look Inspiration - Emulating VHS Camcorder Footage
What's harder than faking a VHS-look from a high-end camera? Intercutting that look with actual crummy VHS. Learn one way to do it.
Using DCTLs And Expanding Resolve's Functionality
Do you perform repetitive tasks on a regular basis when color correcting or finishing? Then learn how to use DCTLs to automate those tasks!
Behind The Curtain - 16mm Style Grade Part Four
Dan wraps up his behind the curtain series with a watch through and matching pass on the whole video to make sure it flows as a whole film
What Is A CDL And When Do You Use It?
Take an introductory look at the Color Decision List (CDL) and learn about the strengths and weaknesses of an ASC-CDL based workflow.
From Commercial Colorist to Dailies - How Does the Job Change?
A successful commercials colorist color grades dailies. He shares his challenges, mistakes, and how it's different than commercials.
The Benefits Of Fixed Node Structures in DaVinci Resolve - Part 2
In Part 1 you learned how to build a Fixed Node Structure in Resolve's node tree when color grading. Now learn its huge time-saving benefits.
Behind The Curtain - Not So Near-Set Grading
Dan shares his story from a recent "not so near-set grade" for an upcoming collaboration with friends on a short film.
How To Develop A Fixed Node Structure In DaVinci Resolve: Part 1
Building out node trees on the DaVinci Resolve Color page can be a messy affair. And haphazard. Learn how to develop a personalized node tree.
Behind The Curtain - 16mm Style Grade Part Three
Dan is back in part three of his unfiltered look at a recent grade. In this part we take a look at matching the externals in this 16mm style
Behind The Curtain - 16mm Style Grade Part Two
Dan picks up where he left off in this series on real time grading a music video. In part 2 we look at the noisy internal scene.
Learning Fusion The Easy Way: Using Resolve's Fusion Text Generator
DaVinci Resolve's Fusion page is intimidating. In this video, learn an easy way of getting into Fusion, with a simple Text animation.
Handling Over-Sharpening: How to Soften Footage Without Losing Detail
Drone footage adds tons of production value to projects. But the cameras often suffer from over-sharpening. Get tips for fixing this problem.
Revisiting the Versatile RGB Mixer (in DaVinci Resolve)
Mixing the R, G, and B colour channels is a versatile color grading technique. Using Resolve's RGB Mixer, learn its simplicity - and power.
Making It Pop: Evaluating Methods of Adjusting Saturation
Do all saturation controls behave similarly? Or are there subtle differences that add new arrows in your quiver of saturation controls?
Behind The Curtain - 16mm Style Grade Part One
Dan shares the opening part to his full unfiltered look at how he graded a music video in a 16mm film style.
Behind The Curtain - Cleaning Up For 2019
Dan shares his thoughts on trying to clean up his grades in 2019 and moving away from his favourite film emulation techniques.
Behind The Curtain - 16mm Film Emulation
In this Insight, Dan shares his approach to creating a classic 16mm Film Emulation that he used on a recent music video.
Using Python and Expanding DaVinci Resolve's Functionality
Resolve's new scripting APIs open up exciting new possibilities. Learn how to get started by using Python to import comments from Frame.io.
Color Correcting With Blending Modes -Recovering Highlights With Multiply
Dan shares his technique of using the multiply blending mode to recover highlights easily and naturally via a layer node.
Creating A Western Look Using Color Space Transform & Emulation LUT
While creating a Western look, learn how to use a color space transform with a film print emulation LUT in DaVinci Resolve.
Getting To Know Dolby Vision Part 3: Dolby Vision For Everyone!
In part 3 of our ongoing Dolby Vision series, learn about big changes to Dolby Vision & Resolve in 2018, plus new tools & workflows.
Grading Challenge - 90s Video Review
Dan shares his 90s video review and his attempt at going bold, bright soft and crushed in this grading challenge.
Adapting Photoshop's 'Channel Masks' to DaVinci Resolve, Part 2
Are you trying to do Photoshop's Channel or Luminosity Mask techniques in DaVinci Resolve? Learn how, by simplifying the workflow.
Behind The Curtain - Liberty Commercials: Adding Depth To Drone Footage
Drone footage is a very common occurance on timelines these days. Dan shares his techniques for adding depth to the footage.
Revisiting DCP Creation With Resolve 15
Resolve 15 supports the ability to create DCPs natively. In this Insight, learn how that works and get back ground info on essential DCP specs.
Behind The Curtain - Liberty Commercials Sun vs No Sun
Sometimes we are gifted with better sun than other times. In this Insight Dan shares his experience on a job shot over multiple months.
Guide To Safely Upgrading To DaVinci Resolve 15 (and beyond)
If you want to upgrade from an earlier version to DaVinci Resolve 15 then how do you do it safely? This checklist will help you out.
Behind The Curtain - Thrice The Grey
In this Insight, Dan shares his experience in developing a look to back up the lyrics and narrative in a music video by his favourite band.
An Overview (And Tips) On Using The DaVinci Resolve Project Server App
Designed for sharing database on several computers in DaVinci Resolve, learn how the Resolve Project Server App simplifies your life.
Elsewhere On The Web: Managing Saturation, Live HDR, Resolve Fusion (& more)
Summer 2018 round-up of don't-miss color correction tutorials from other websites (with commentary). We wish we had them here, first.
Rediscover The Basics - Fixing Exposure Shifts
Exposure shifts creep up in projects regularly. With the right node structure and correct technique you can easily fix these in seconds.
How To (Improperly) Export LUTs in DaVinci Resolve 15
Learn the 'rules' when exporting LUTs in DaVinci Resolve 15. You also learn how to break a LUT to understand the problems with many LUTs.
Behind The Curtain - Live Concert Grade
Dan shares a tale of things going a bit wrong on a live concert grade w/ high powered LED lights and how moving over to ACES solved things.
10 Things I've Learned (So Far) About HDR Grading
In this Insight, Robbie explores 10 things he's learned in 3 years of grading HDR and how his recent experiences have informed his view on HDR.
Colorist Toolbox 2.0 - Building A Look Library 2018
The only person that is going to inspire you is yourself. A Look Library surrounds you with inspiration keeping you motivated and current.
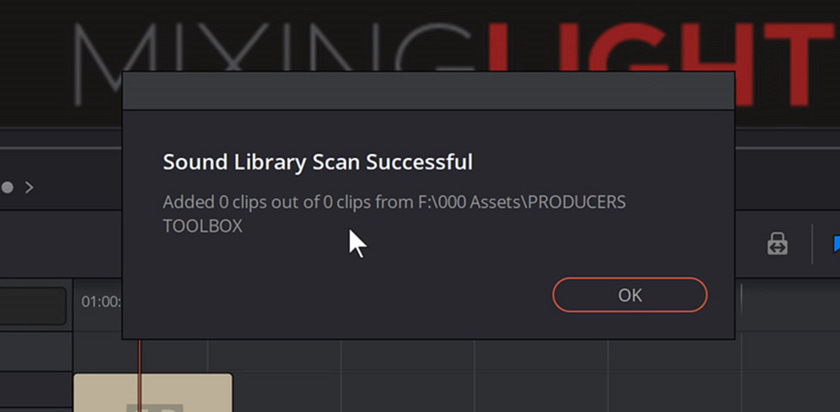
What's Wrong With The 'Sound Library' Feature In Resolve 15 Beta?
The Sound Library feature released with DaVinci Resolve 15 Public Beta feels very incomplete, and how I think it needs to improve.
Speed Boosting The Resolve Mini Panel With Gaming Keypads
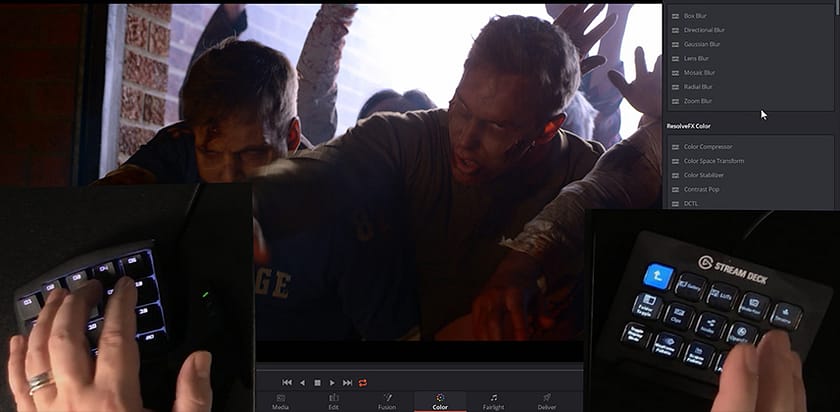
Are you looking for ideas on programming your El Gato Stream Deck or Razer Orbweaver to speed up color correcting? Get some tips about focusing your efforts to reduce 'mouse travel' - increasing your productivity.
DaVinci Resolve Compound Nodes: Efficiently Managing Looks
Now that DaVinci Resolve is gaining tools by the month, Dan takes a look at managing the node graph to keep things organised and flexible - with the goal of allowing for quick changes.
One Year Later: A Video Review of the Resolve Mini Control Surface
In this 'Resolve Mini' control surface Video Review, see several exciting features in action - plus a bug that confuses things.
How Hard Is It To Export A 'Broken LUT' from DaVinci Resolve?
In an earlier Insight, you learned how to Stress Test your Look Up Tables (LUTs) to discover if they are introducing artifacts in your images. In this Insight, learn how easy (or hard) it is to generate 'broken LUTs' in DaVinci Resolve.
How To Safely Upgrade to DaVinci Resolve 15 Public Beta
The latest release of DaVinci Resolve 15 is very exciting. But it's currently in 'Public Beta'. What does this term really mean? And how can you update to it without putting your computer (or your projects) at risk?
Is Your LUT Damaging Your Image? How To Do A LUT Stress Test
Look-Up Tables (LUTs) are black boxes that make it difficult to know what precisely they're doing to your image. Colorist Jason Bowdach shows you how to stress test and evaluate your LUTs.
Practical Beauty Color Grading Level One: Quick and Effective
Sometimes even offering the smallest level of beauty work for a client can go a long way. Learn quick skin-smoothing / eyebag-reducing tips .
First Impressions with DaVinci Resolve 15 Public Beta (after NAB)
Learn what one colorist thinks of DaVinci Resolve 15 Public Beta the first time he launches it. Not on the trade show floor in Las Vegas where he first saw it... but in quiet of his suite. And discover the huge new feature no one is talking about!
Practical Beauty Work - Why You Need To Be Offering It
Beauty work and re-touching can be a great additional source of income as a freelance colourist. Dan shares his thoughts and kicks off a new series on getting involved in retouching.
Inspired by Mini 2018 - How One Colorist Emulates A Vintage Look
We've all seen amazing commercials and films that inspire us, but how do we turn that into color corrections that we can use on our own projects? Dan shares his approach to being inspired by a recent award-nominated color grade.
Colorist Inspiration -Best Colorist Nominations 2018
Dan Moran shares his thoughts on the best commercial color grade nominations 2018. Top work from excellent colorists are great sources of ideas.
Resolve 15 New Color Page Features
In this Insight, colorist Joey D'Anna, fresh off demoing Resolve 15 at the Blackmagic booth at NAB 2018, shares his thoughts on the top new features that benefit the dedicated colorist the most in Resolve 15.
Two Ways of Using DaVinci Resolve's Parallel Mixer Node
In Part 2 of this series you learn two different ways of using DaVinci Resolve's Parallel Mixer node. We take the theory from Part 1 and put it into action on real footage (from one of our Color Correction Practice Projects).
Behind The Curtain - Can You Prebuild An Ideal Node Structure?
Can you prebuild a perfect node structure and use it to speed up your grading? Dan is taking a deep dive to find out how well it works, and if it's a genius idea or a total waste of time.
Understanding DaVinci Resolve's Parallel Mixer Node (and when to use it)
Understanding DaVinci Resolve's Parallel Mixer node is essential to eventual mastery of the software. In this Insight, learn how the Parallel node works and the difference between it and the Layer node.
From The Grading Room – Is Yellow The New Orange?
In the last couple of years there has been a shift away from teal and orange to teal and yellow. Dan investigates that transition and looks at his own grades. He also asks do you miss teal and orange?
Re-Revisiting Multi-Channel Audio Output In Resolve
No, that's not Déjà vu! We're re-revisiting multi-channel audio output in DaVinci Resolve! In Part 1 of a new series, we'll explore the essentials of multi-channel output including using the 'Timeline Tracks' method, The Link Group behavior, and basic bussing.
Behind The Curtain - Refining and Enhancing 'Bread'
In this insight, we take a look at the final pass on the bread short film. Dan looks at his matching with fresh eyes, checks his black and white levels and decides on the sharpening and grain levels of the film.
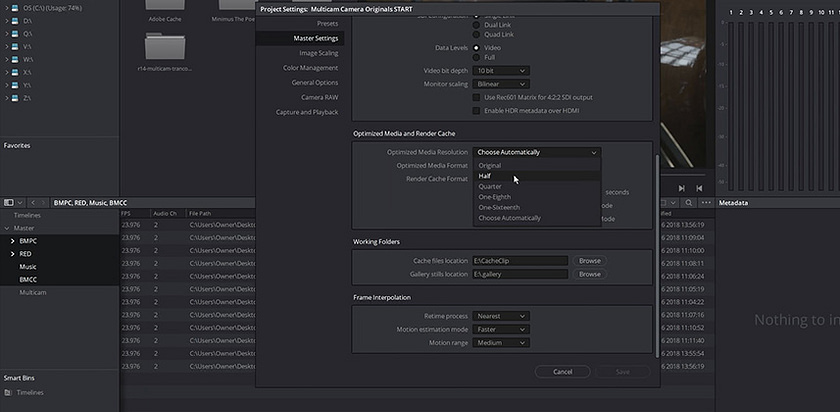
How to Get Real-Time Playback with Multicam Clips
Editing Multicam clips can be a great workflow... unless you can't get real-time playback and your system keeps dropping frames. Learn how Resolve's optimized workflow can help you get back to real-time.
Multicam Gone Wrong: Re-syncing Clips in DaVinci Resolve 14
DaVinci Resolve's automatic syncing of multiple cameras for its multicam editing workflow often fails. Learn how to reliably re-sync cameras after creating a multicam clip.
Behind The Curtain - Shot Matching 'Bread'
In part two of grading the bread short film, Dan dives into the matching side of things. Although it's the least glamorous part of grading it's also the most important.
How To Migrate PowerBins, PowerGrades, Configs Between Databases?
Team Mixing Light discusses strategies for moving Resolve PowerGrades, PowerBins & project configurations between databases.
Behind The Curtain - Bread Short Film Part One
In this new series, Dan is showing a real-time grade of the bread short film he graded recently. Shot in less than ideal conditions with natural light on a compressed camera, it's a great chance to see the good the bad and the ugly from the grading suite.
Behind the Curtain - Commercial #2: From Base Grade to Final Look
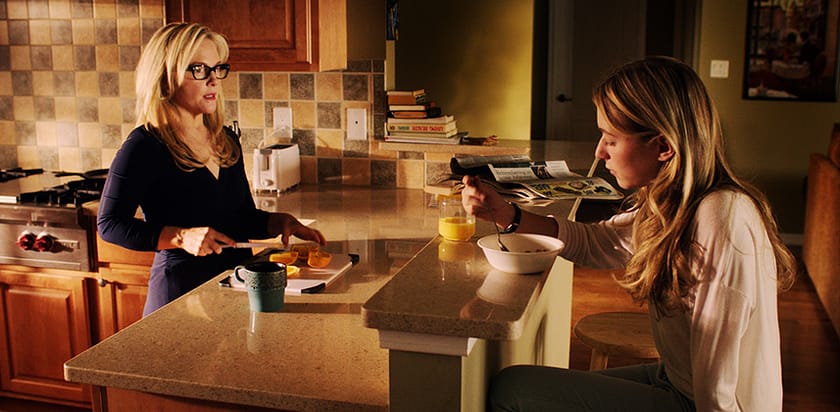
In this Insight, Dan covers another of his behind the curtain commercials. This time we look at a bright morning kitchen scene. In this real-world assessment and grade, Dan focuses on getting a bright airy feel without losing on the filmic sense.
Grading The White Cyc Stand Up - When White Is Not White
In this video, you learn techniques for color correcting log encoded white cyc footage. Plus get several solutions for fixing common problems with these types of shoots and why, many times, your corrections are a compromise.
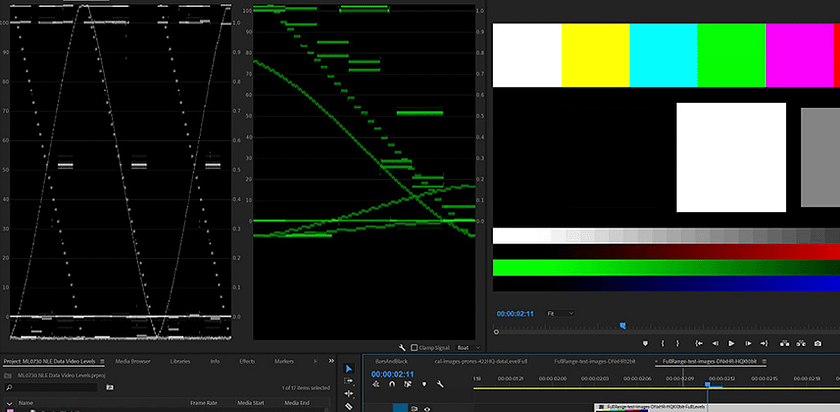
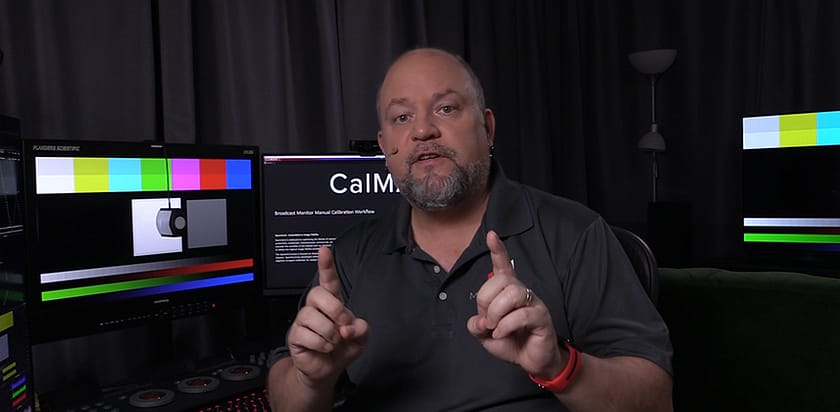
CalMAN Part 10: Using Calibration Test Patterns In Your NLE
If you want to calibrate your reference display through your main non-linear editing software then you want to use calibration test patterns playing through a timeline. Learn how to be sure you don't have Data- and Video- level mismatches.
Behind the Curtain - Commercial #1: From Base Grade to Final Look
Dan returns to his Behind The Curtain series with a real-time insight that shows his approaches to this commercial grade. He covers primaries, look theory, shot matching and Look refinement.
Demystifying Contrast and Brightness Calibration Test Images
In our reference display calibration series we've been using a specific set of calibration test images. But two test images (used to precalibrate our Contrast and Brightness settings) generate a lot of confusion. Get unconfused in this Insight.
Is Your Reference Display Input Properly Set To Data Levels Or Video Levels?
If you have a broadcast reference monitor for editing and color correction then you need to make sure it's properly processing your images. Learn how to know if you have a mismatch in data levels with your editing or color correction software.
Grading A Short Film Part 2 - Testing The Feel Of The Footage
Dan shares his assessment of how to get the feel of the footage before you speak to the director. It helps when you can be upfront about what is and isn't possible.
Precalibrating A Reference Display (without using LUTs) Part 1
In this CalMAN Studio series you've learned how to calibrate a video reference display using Look Up Tables (LUTs). Not every display supports internal LUTs. If you don't have (or want) an external LUT box then what do you do then? Watch and learn.
Grading A Short Film Part 1 - Download The Footage
Dan is excited to launch a new series on Mixing Light that will feature a briefing from the real director of the project. In this intro Insight, download some RED 8k footage to attempt a grade before getting creative brief from the client.
Elsewhere On the Web... Insights You Shouldn't Miss 'Out There'
Our focus in our Insights Color Correction Library is on creating original content. But sometimes we see original thoughts on other websites that you need to read. In this post, we share a few of those don't-miss insights from the internet.
What Not To Do When A Client Asks For A New Direction
Dan shares a tale from the grading room of a film emulation gone wrong and how by missing the mistake was destined to fail in the grade with his clients.
The Challenges (And Lessons Learned) Of Color Restoring Classic Films
The color restoration of classic films is one of the few 'Dark Arts' of digital color correction. Colorist Jim Wicks shares his challenges - and lessons learned - from this unforgiving niche of the craft of color grading.
Building A Show LUT to Keep Your Looks Consistent
When you have complex node trees, rolling it into a show LUT can make your life. Learn how to build your own LUT for your project.
Learn How to Start Scripting El Gato's Stream Deck Using Autohotkey
The Elgato Stream Deck is a powerful control surface add-on for colorists, especially when paired with autohotkey. In this insight, learn to take that functionality to the next level with advanced scripts and workflow examples.
Colorist Inspiration - January 2018 Edition
Colorist Dan Moran spends the first day of January 2018 looking back on his best work from 2017. Picking his favourite commercials, music videos and long form narrative projects and also sharing the stories behind when he enjoyed them so much.
When do you reach for Temp or Tint controls to White Balance shots?
White balancing is a basic color correction task. And Temp or Tint controls are often a time-saving shortcut. But they don't always work. Learn why?
Can You Save This Shot? Part 2: Patrick's Solution (in real-time)
How do you save a shot that has exposure changes and compression artifacts? Patrick shows you how he does it, with footage you can download.
Image Cleanup In Resolve - Rotoscoping, Cloning, and Repeated Frames
Being able to offer Basic Cleanup in the grade is a great ability. It saves moving to and from a compositing application and helps finish off that job.
The Fundamentals of Rotoscoping in DaVinci Resolve
Sometimes a shot is so basic that a little VFX knowledge goes a long way. In this insight Dan shares his real world rotoscoping example
Getting To Know Dolby Vision Part 1: Terminology, Gear, and Workflow
In part 1 of our series on getting to know Dolby Vision HDR workflow & color correction, you learn the essentials of setting up a professional Dolby Vision mastering suite.
Fixing VFX Colorspace Issues In A Problematic Pipeline
VFX colorspace issues are the last thing you need when you are on a tight deadline. Dan shares his experience solving issues like these.
Introduction to Reference Display Calibration - Series Overview
Begin learning how to calibrate your color correction Reference Display by seeing how to calibrate your colorimeter for highly precise measurements.
Grade Rescue - Saving A DSLR Moving Portrait
Dan filmed some bad footage on his 7D with the wrong color temperature, harsh lighting & heavy compression. He offers up his best effort on a grade rescue.
Can You Save This Shot? (while learning Resolve's Noise Reduction)
Download and color correct a challenging video clip - following the instructions of a supervising colorist. And learn about Resolve's noise reduction.
Color Grading Challenge - Beauty Grading Review
Dan critiques your beauty grading entries and shares his attempt. The challenge was quite advanced and the results are great. Dan's DRX is also downloadable
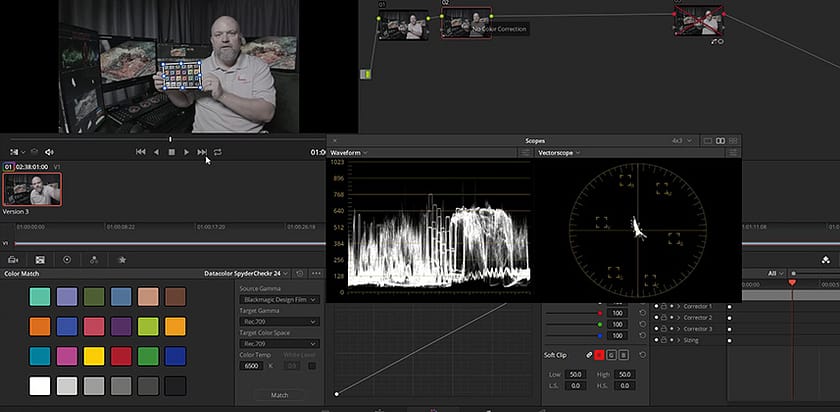
How to Work with Color Charts in DaVinci Resolve 14
If you use DaVinci Resolve to color correct with Color Charts then should you change your workflow in DaVinci Resolve 14? The answer isn't simple. Or is it?
Grading Challenge - Beauty Grading Brief
Beauty grading is a discipline all on its own. Dan shares a typical client brief and will offer stages of feedback like a real world client
Grading Challenge - Reviewing My Car Brief Grades
In this insight Dan is reviewing your efforts on his car brief and also sharing his attempt at the shot to show his approach to the grade.
Is Magic Bullet Looks 4 Fast Enough For Client-Attended Sessions?
Magic Bullet Looks is a powerful plug-in for creating looks. Does the newest version play back in real-time? How is its performance in Davinci Resolve?
Thinking Like A Colorist - The "Final Grade"
An old school technique that is still regularly used today in commercials. Having a break between grading the same footage has huge advantages.
How do you choose Gamma 2.2 vs Gamma 2.4 when color correcting?
When you start delving into the finer points of color correction you'll eventually learn about Gamma 2.2 vs Gamma 2.4. Learn how to choose between them.
DaVinci Resolve 14 Public Beta 7 and Its Redesigned Preferences
In Davinci Resolve 14 Public Beta 7 the Project, System & User Preferences are revised. Learn what's changed, what needs improvement and what's left to do.
Eye Training : Diagnose and Compare
In a new series Dan shares his guide to training your eye for contrast issues. Follow this four step process to learn how to diagnose and fix your images
RED's IPP2 Pipeline In Resolve (Sort Of)
RED's new IPP2 processing pipeline has a lot to offer, in this Insight, we explore the new pipeline setup in RedCineX & DaVinci Resolve 14
Choosing Between ACES Or RCM? Plus, Control Surface Sensitivity.
The Team fields a member question about how we set up the sensitivity of our colorist control surfaces? How do we decide?
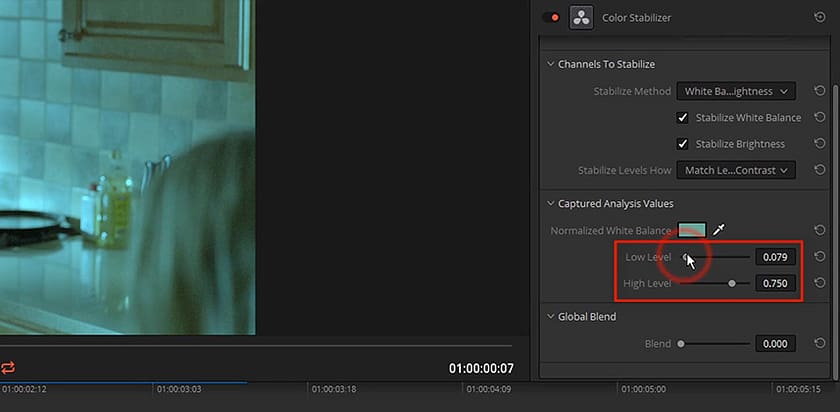
Using Resolve 14's New Color Stabilizer To Smooth Exposure Bumps
If you're trying to smooth out exposure changes in your footage then you'll love using Resolve 14's new Color Stabilizer filter (and avoid keyframing).
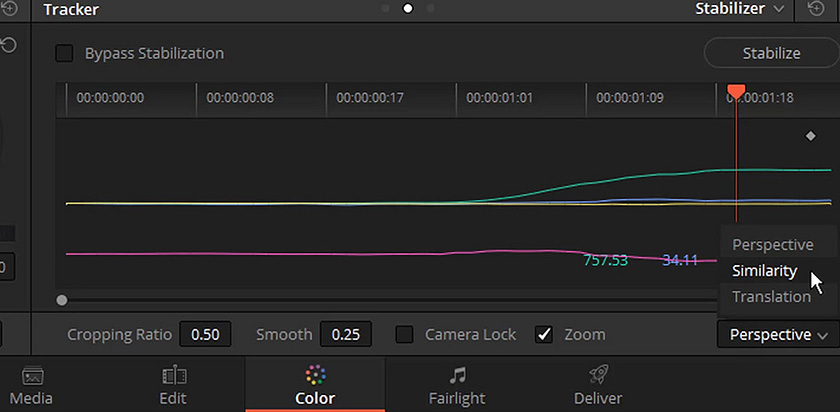
Is Resolve 14's New Stabilizer An Upgrade (or is it dumbed down)?
In DaVinci Resolve 14, the Stabilizer got a new set of controls that seem overly simple. Has this tool been upgraded? Or should you work in Classic mode?
Thinking Like A Colorist - Assessing Tonal Range
Dan shares his new approach to Assessing Tonal Range and the initial grading moves by asking. Are you trying to make it look better or different?
Creative Color Grading - Blending LUTs | Mixing Light
Some jobs just call for the grade to be turned up to 11. A fun way to do this is by blending multiple LUTs together and enjoying the happy accidents!
Is Your ARRI Alexa Mini Color Pipeline Properly Set in ACES?
The ARRI Alexa Mini is a great camera - and it color corrects beautifully in ACES. Learn how to confirm your color pipeline (in DaVinci Resolve).
Dust Busting - Removing Dirt In Resolve
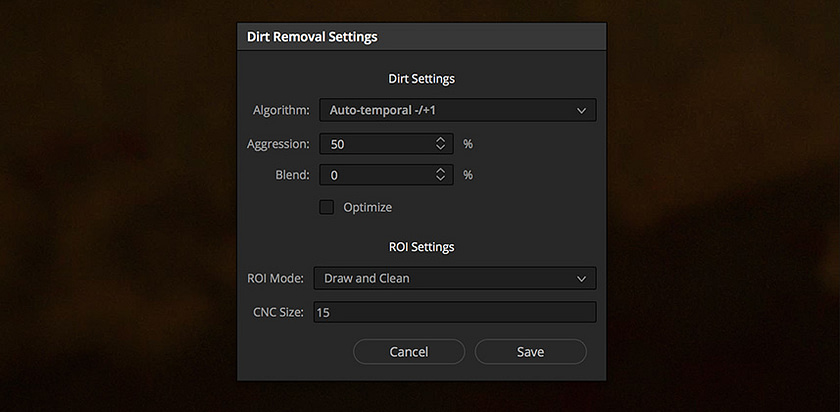
Dust Busting in one of those tools you don't know exists in Resolve. Dan shares his tips on how and when to use it in the grade
From The Grading Room – Grading Lucy Rose
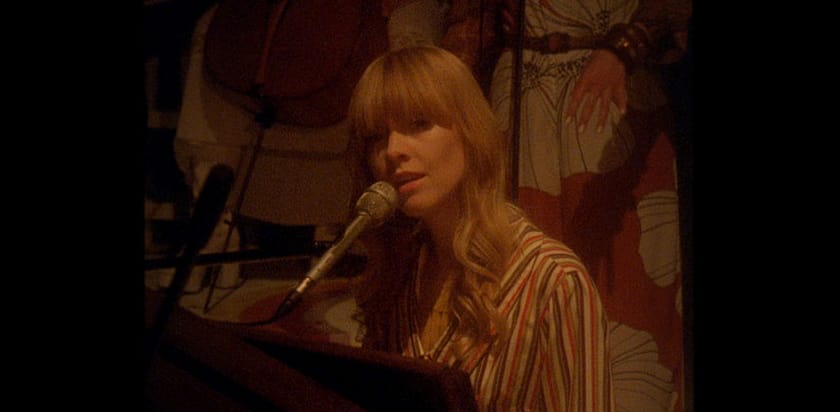
Dan shares the behind the scenes thoughts that go into such a stylised 70s era music video for Lucy Rose. 80% in camera and 20% in the grade
In Action: Working With The Key Mixer In DaVinci Resolve
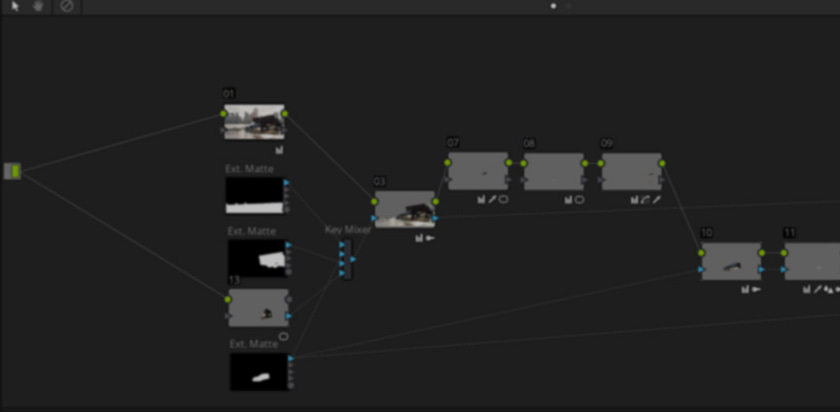
In Part 2 of this series on working with alpha channels in DaVinci Resolve, learn how to use the Key Mixer to solve tricky a tricky problem on a commercial.
From The Grading Room – A Tribute To An Icon
Sometimes we need to go outside our role as traditional colorist. Dan shares his story form his work paying tribute to an icon
Getting To Know The Resolve 14 Collaborative Workflow Part 2
In this Insight, we put Part 1 into action and explore the powerful workflows possible with Resolve 14 collaborative workflows.
Dan's Month In ACES
Dan spent a month in ACES getting to know the new way of grading. In this insight he shares his thoughts on the good the bad and the ugly of ACES.
From the Mac to PC for Media Pros: Answering Member Questions Part 2
If you need to buy a high-performance video post production computer today, then you're looking at a PC. Here are more answers to questions of Mac users.
Creative Grading - Retro Sci-fi Look
Sometimes you have to go full cheese and pay homage to looks and films from the 70s and 80s. In this insight we create a retro Sci-Fi look
Getting To Know The Resolve 14 Collaborative Workflow: Part 1
Among Resolve 14's great new features, the redesigned collaborative workflow stands out. In this Insight, learn the essentials of Resolve collaboration.
In Action: Working with Key Signals in DaVinci Resolve
Working with key signals in DaVinci Resolve isn't hard - but it's not intuitive either. Once you figure it out, it's also a power feature. Learn more.
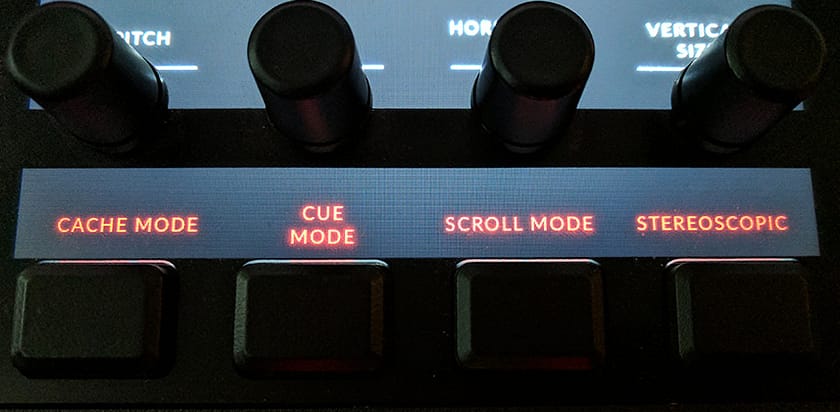
DaVinci Resolve Advanced Panel - Scroll Mode
Using Scroll Mode in DaVinci Resolve is a quick and effortless way to audition grades for your current shot by loading grades
Moving From A Mac to PC for Media Professionals: Member Questions
A 2-part interview series for media pros talking about the challenges Mac users face when moving to the PC elicited many questions. Here are the answers.
DaVinci Resolve 14: The Mythical Collaborative Workflow Has Arrived
Like flying cars, the 'Studio' concept of post-production was promised for generations. At NAB 2017 we have the first actual implementation in Resolve 14.
DaVinci Resolve 14: First Look
In this Insight, we take a look at some of the compelling new features in DaVinci Resolve 14 including OFX, performance and editing improvements.
From The Grading Room - Are We Sterilizing Images?
Now that most people have a basic knowledge of color correction thanks to Instagram what does that mean for us colorists?
What Are The Key Elements Of An On-Set Color Correction Cart?
Rich Roddman C.S.I. shows how he sets up his Cart for on-set color correction... and the thinking behind his choices.Part 4 of a DIT series.
First Look: Getting To Know the Resolve Mini Control Surface
In this special edition of the Color Correction Gear Head series, we welcome Joey D'Anna & his review of the Resolve Mini Panel.
Green Screen Keying & Managing Transparency In Resolve
Learn how to pull a green screen key in DaVinci Resolve and how to manage transparency and render alpha channels.
Becoming A Better Colorist - Stop Focusing On Individual Shots
We should be spending more time looking at the timeline as a whole than focusing on shots. Nobody ever watches a single shot!
Skin Tone Essentials: Hands, Arms, Legs and Feet Part One
Have you ever considered hands or legs when doing a beauty grade? We spend hours on faces but the skin should match all over the body.
From The Grading Room – Knowing When To Start From Scratch
Sometimes when grading you end up going in totally the wrong direction have to just stop what your doing and start from scratch.
From Mac to PC - What Post Pros Need To Know Building A Custom PC
Are you a Mac-based Post-Production professional moving to the PC platform? Eric Bowden, custom PC builder, talks about the differences.
Getting To Know The EasyDCP Resolve Plugin: Streamlined DCP Creation
Want to make a DCP directly from Resolve? In this Insight, Robbie explores the essentials of using the EasyDCP Resolve plugin.
Feature Grading: Getting Started
Getting started on a feature film can be a daunting process. Dan shares his experience on getting the ball rolling slowly and carefully
How To Use DaVinci Resolve's Color Match In An ACES Pipeline
DaVinci Resolve's 'Color Match' function is simple but can be confusing. Learn how to properly set up Color Match in ACES workflows.
How to Color Match using Color Charts with RAW (or LOG) Footage
DaVinci Resolve's 'Color Match' is terrific for Color Charts recorded on-set. Learn the tricks to this feature if your Footage is RAW or Log.
Feature Inspired Color Grading Looks - Blade Runner 2049
Inspired by the Blade Runner 2049 trailer Dan shares his attempt at recreateing the intense warm washed look.
How To Prepare And Quote A Bid To Color Grade A Feature Film
Dan jumps from commercials to features in this series and shares his guide to getting organized and plan for efficient feature grading
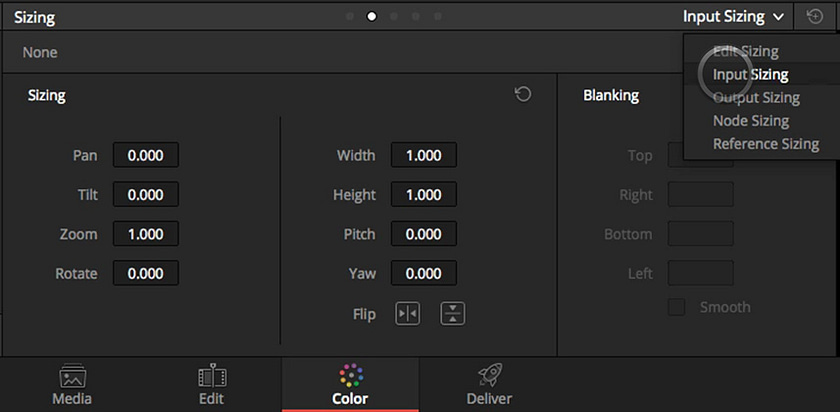
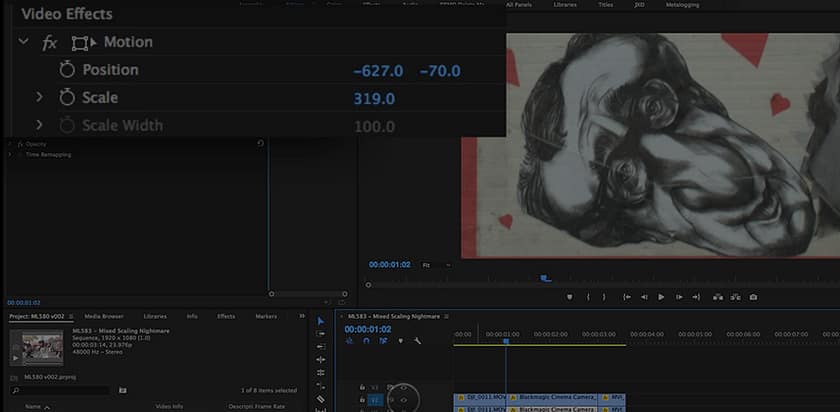
Saving The Day With Input Sizing in DaVinci Resolve
If you're having trouble with you sizing in Premiere Pro not being replicated in DaVinci Resolve, the Input Sizing control may be your hero.
How to Handle Scaling in XML Workflows for Premiere Pro CC
Learn what settings to use in Premiere Pro CC when Scaling in XML workflows. And the settings to use for importing into DaVinci Resolve.
Developing Looks And Settling On Your Exposure Levels
In How I Grade Part Two Dan shares more steps in his grading process. We look at auditioning looks and checking the correct exposure
Understanding the Premiere to DaVinci Resolve Image Sizing Handoff
If you have problems exporting XMLs with image sizing from Premiere to DaVinci Resolve, this video explores the settings you need to know.
How A Colorist Makes Decisions Through The Grading Process
Dan attempts to walk through his thoughts when grading step by step from quality control to setting the first primary correction
Why You Need to Master the 'Frame Size' Option in Premiere Pro CC
If you send your timelines from Premiere Pro CC to DaVinci Resolve then you know resizes often fail. Your 'Frame Size' selection is the key.
An Overview of the Logitech G13 Gaming Keypad For Use By Colorists
Get an overview of how the Logitech G13 Gaming keypad works - with ideas on how it can speed up your video post-production workflow.
Sky Replacement - Is It An Essential Skill For Colorists?
If a client asks for a sky replacement; as a colourist, should you? If so, how? Plus a tip on where to start when evaluating a sequence.
Why We Love LUTs and How To Replace Your LUT Addiction
Most of us love to use LUTs behind closed doors. Dan shares his thoughts on why and how to break out of needing LUTs
Using DaVinci Resolve's 'Offline Reference Clip' to Conform Timelines
Learn how to use the 'Offline Reference Clip' to see what the final approved timeline looked like - while color correcting in DaVinci Resolve.
Creating Haze To Add Depth To Your Image Without Using Shapes
Using Haze as a grading tool is an alternative method to using Vignettes. Making things lower contrast helps them sit back in the image.
How To Quickly Generate Color Correction Ideas At The Start Of A Session
Are you having problems deciding how to attack color correcting your images? Learn how to quickly generate ideas in this video.
Finishing In Resolve - Reframing, Blanking & Delivering
Reframing in Resolve as become common practice. Dan shares his approach to finishing in the box and shares his tips and tricks
Resolve Collect
If you're having trouble with DaVinci Resolve's built-in Media Manager then check out this video featuring 'Resolve Collect'.
Creating the Classic Black and White Look By Thinking Like A Colorist
Dan shares the skills he learned in the darkroom and how he applies them to grading black and white in DaVinci Resolve
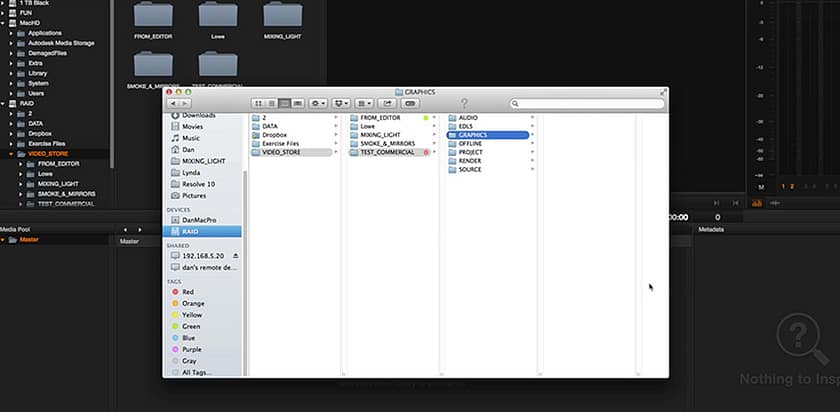
Managing Media in DaVinci Resolve
Part of a larger series, we finish conforming a timeline and start managing media off a client hard drive onto our RAID, in DaVinci Resolve.
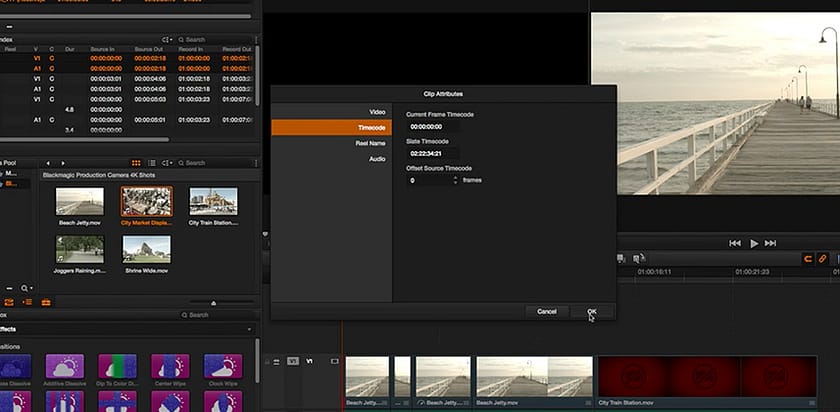
Conforming In DaVinci Resolve - Solving Sync & Frame Rate Problems
When importing a timeline & conforming in DaVinci Resolve, problems occur. See how we methodically solve frame rate & sync problems.
Thinking Like A Colorist: Breaking Down the Western Scene
Download the footage and follow along as professional Colorist Dan Moran, CSI color corrects a classic shot in the style of a Hollywood Western Look.
How to Fix 'Reel Conflicts' and 'Force Conform' Errors in DaVinci Resolve
When importing a timeline into DaVinci Resolve, learn how to find and solve 'reel conflicts'. Plus, learn to solve a 'Force Conform' error.
Exploring XML Conform Options in DaVinci Resolve
Importing XMLs into DaVinci Resolve can be frustrating. Sometimes, a change in Resolve's 'Conform Options' settings can save the day (or not).
Thinking Like A Colorist - Color Correcting A Forest Scene
Colorist Dan Moran shares a color correction breakdown on how he approaches a new shot, sight unseen. How to make it an alien planet or a shed in a garden?
Matching Pantone References - And When To Say No
Matching Pantone references to video can be tricky at the best of the times. Get advice on getting that exact match - even if it's not precisely correct.
Media Manage An XML For Color Correction (from client drives to your raid)
Learn how to prepare to Media Manage an XML, and get footage off your client's hard drives and onto your high-performance RAID.
Warm Looks: Yellow Warmth Vs Red Warmth (which are you?)
Warm looks don't always have to be rosy red and cozy looking. Take a look at a non-traditional warm color and learn how to add it to your color toolkit.
Getting To Know ACES Part 4: The Latest In ACES Updates
Continuing our introductory series on ACES, you learn about the latest updates to ACES, including a working color space added to the ACES 1.03 specficiation: ACEScct. Plus, how it effects DaVinci Resolve colorists.
What is the Golden Rule of Conforming Timelines?
If you move your timeline from one bit of post-production software to another then you need to know the 'Golden Rule of Conforming'.
DaVinci Resolve Detective: Is the Mouse Math fixed in DaVinci Resolve 12.5.3?
Did Blackmagic fix the 'Mouse Math' problem in DaVinci Resolve 12.5.3? Plus, how about the other bugs we found in our Resolve Detective series?
White Balancing Shots and Solving Common Problems
Learn how to white balance shots with mixed color temperatures. Plus, how to deal with subtle color balance issues.
How To White Balance Shots Using Common Color Correction Tools
Watch how to White Balance (or Color Balance) digital video images. You'll explore 4 different tools and learn their differences.
Remote Grading Via Skype
When Your Director Is 6000 Miles Away In this Insight I’d like to share an experience I had this week. I had a room full of clients in London but…
Thinking Like A Colorist - Considering Final Contrast Pt 1
Considering Final Contrast before you make your first primary correction is a huge advantage creatively to help you get the best results
Getting To Know ACES Part 3: Visual Effects Workflows
Our Getting To Know ACES series continues, looking at the essentials of using ACES for VFX roundtrips with DaVinci Resolve. You learn how to move images between VFX and color grading within the ACES color science.
Revisiting Multi-Channel Audio Output In DaVinci Resolve
Resolve users are often tasked with making final outputs.In this Insight, learn how to easily route multi-channel audio for output.
How to Work Around the 'Mouse Math Bug' in DaVinci Resolve
In an earlier video we showed you the 'mouse math bug' when color correcting in DaVinci Resolve—now learn how to work around it.
Getting To Know The DaVinci Resolve Control Panel - An Overview
The DaVinci Resolve Control Panel gives you the most hands-on control of Resolve. In this Insight, learn about the design & functionality.
Color Grading with the ResolveFX Lens Flare Plug-in
Dan shares his experimentation with the idea of grading using lens flares for subtle lighting effects to help match and lift scenes.
Color Correction Math in DaVinci Resolve: Control Surface vs. Mouse
Does the color correction math in DaVinci Resolve change depending if you're using a mouse versus using a colorist control surface?
Hands On the Tangent Ripple Colorist Control Surface and Tangent HUD
A hands-on overview of the most affordable color correction control surface on the market today—the Tangent Ripple.
New Stereoscopic Tools for HDR Workflows in DaVinci Resolve
DaVinci Resolve 12.5 has introduced some new Stereo features... to support HDR workflows for High Dynamic Range color grading. Learn more...
From The Grading Room – Radiohead
Dan shares his story from the grading room on grading a short promo project for radiohead
What's New in the DaVinci Resolve 12.5.1 Update?
What's new in the DaVinci Resolve 12.5.1 Update? Learn about new features, new behaviors and general observations about this latest update.
Should You Go For That Film Look Or Embrace The Digital Clean Look?
Sometimes going for the film look is not the right decision. Dan shares his tips on going digital to give us great punchy sharp images.
How to Protect Skin Tones While Color Grading with a Heavy Look
When working with heavy looks we sometimes forget about protecting skin tone and making our artist/actor look as good as possible
How to (mostly) Fix RGB Gamut Excursions in Software
If you're color correcting digital video for professional distribution, nothing is worse than having it rejected for RGB Gamut excursions!
Controlling Saturation in DaVinci Resolve
If you're looking for ideas on controlling excessive saturation in DaVinci Resolve, this tutorial will offer some food for thought.
How to Color Grade With Client Revisions In Mind
Sometimes we get lost in the heat of the moment and over complicate our grades. Dan shares his tips for responsible grading when time is short
Conform Issues Database – Introduction
Conforming timelines can be time-consuming before you even start color correcting. Learn the common issues (and how to fix them).
Resolve Remote Rendering: Setting Up A ProRes 'Dongle'
Working on a PC but need to render ProRes? In this Insight, learn how to setup Resolve remote rendering & use a spare Mac for ProRes renders
Dirty Color Grading Looks - Taking Your Image To The Limit
Dan shares his techniques for taking your image to the brightness, saturation, and sharpness limits while maintaining legal levels.
Bad TV: Essential Steps For Creating The Bad TV Look
Every once and a while you'll need to create a stylized bad TV or surveillance camera look. In this Insight learn how.
Dirty Looks: Early '00s Looks
Dan shares some looks from his past focusing on two Early '00s looks in particular. One home digital camera one heavy 35mm music video
Dirty Looks - Emulating Early Film Looks with Light Leaks
Early film looks are a very popular request from clients.They can be tricky to build quickly so Dan shares his DRX files that you can download
Dirty Looks - Looks Throughout The Ages
At some point in every colorists career you will be asked to make some looks throughout the ages like 60s, 70s, 80s, 90s. Dan shares how.
Getting Started with CalMAN's Colormatch Workflow
If you do video color correction, watch 'Getting Started with CalMAN ColorMatch' to learn how to test if your reference display is accurate.
Dirty Looks - Pushing Your Images Toward Extreme Warmth
Some projects call out for extreme warmth to help back up the story. Learn methods to get an extremely warm feel that looks real.
Graphs in Lightspace DPS: How To Read Your Profile Results
Learn how to read the graphs in Lightspace DPS, to evaluate if your display requires calibration for color correction.
Inspiration - Color Grading Methods In A Fashion Commercial
Get an inside look on methods and techniques a professional digital video colorist uses on a short-form fashion commercial.
Getting Started with Lightspace DPS - Do You Need To Calibrate?
'Does my color correction display need recalibration?' Getting Started with Lightspace DPS (a free app) helps you answer that question.
Reference Display Profiling: Is Your Display Accurate?
If you do video color correction, do you know if your reference display is accurate? Learn how to find out. The first video in a series.
Colorist Inspiration - Creating Looks from Reference Images
Learn how Dan uses reference images to create his Looks - and download the sampe footage to try your hand and practice your skills.
12 New Features in Resolve Studio 12.5 (that are worth paying to upgrade)
These 12 New Features in Resolve Studio 12.5 may finally get you to upgrade to the paid version. See some of them in action.
DaVinci Resolve Studio - Exclusive Features for the Paid Version
Learn how Resolve Studio 12.5, the paid version of Resolve, is starting to get siginificant features that free users will want.
Color Correction Ergonomics - Working Faster and Comfortably
If you're looking to improve your color correction ergonomics for your editing or color correction suite - this post has some ideas for you.
Resolve 12.5 - Dan's Favorite New Can't Miss Features
Resolve 12.5 is here and Dan shares his thoughts on the exciting brand new features and how they can be used to help you colour correct better.
Resolve 12.5 First Look - Patrick's Gems You Need To Know
This DaVinci Resolve 12.5 First Look shares a working colorist's initial thoughts about the big new update to this color correction software.
Resolve 12.5 - Robbie's Top Features
Another April, another version of DaVinci Resolve! In this Insight, Robbie shares his top new features of this exciting release.
Shot Matching Challenge – Match My Shot Part 2
Dan shares his node breakdown from his match my shot challenge including a downloadable Resolve project
How to Properly Use Dropbox with DaVinci Resolve (and avoid disaster)
If you're using Dropbox and DaVinci Resolve as a server for your disk databases, that's not a good idea! Learn why...
Shot Matching Challenge – Match My Shot Part 1
Shot Matching – The Challenge I had an eye-opening experience in my grading suite this week. Some clients of mine asked me to match grade some new shots that were…
Understanding the Scene Cut Detection Workflows in DaVinci Resolve
DaVinci Resolve's 'Scene Cut Detection' workflow can be efficient. But it gets confusing if you've got revisions—here's one way to handle it.
From The Grading Room Grading Underwater Footage
Grading underwater footage is like grading footage from an alien planet. Dan shares his approach and technique for working in that world
Shot Matching 101 - Techniques for Matching Black Levels
In this insight dan shares his approach and methods to matching black levels. Matching is hard but with practice you can become much faster!
Advanced Finishing Techniques - Dealing with Picture-In-Picture Effects
How do you color correct Picture-In-Picture effects in DaVinci Resolve, when all you have is a single rendered movie of the entire timeline?
4 Things To Know About Working With Look Up Tables
Using Luts in a color correction workflow is common, but everything doesn't always worked as planned. Learn 4 ways to work around look up table limitations
DaVinci Resolve - How to Use External Scopes with Video vs Data Levels
Learn how the 'data levels' and 'video levels' Project Setting effects your external scopes when color correcting in DaVinci Resolve.
Shot Matching - Learning Through A Commercial Case Study
Dan shares a job as a commercial case study in shot matching - from pristine stock footage to constantly changing clouds.
How To Work With Non-Broadcast Frame Sizes in DaVinci Resolve
Are you trying to work with non-HD Frame Sizes in DaVinci Resolve? It's very common for display advertising and this video will show you how to handle it.
From Big Shop To One Man Show - A Workflow To Minimize Downtime
Building a one man workflow to get the maximum out of your time grading.
Getting Grainy: 3 Different OFX Plugins
In this Insight Robbie explores 3 different OFX grain plugins for Resolve from Film Convert, Boris, and GenArts and explains which is his favorite and why
HDR Essentials: Reading The Scopes In DaVinci Resolve
The Waveform & RGB Parade are essential tools for color correction. But when working with HDR footage in Resolve reading them can be slightly confusing.
An Introduction into Shot Matching
Shot Matching is one of the hardest areas of being a colorist. Dan shares his approach to going head to head with mismatched shots.
Data Levels or Video Levels — How To Choose Wisely
DaVinci Resolve allows you to choose between 'video levels' and 'data levels'. Learn how to choose wisely and if you should be making a choice at all?
Look Inspiration - Inspiration From Unlikely Sources
Sometimes inspiration can strike in the strangest of places. In this insight Dan shares how he finds inspiration from unlikely sources.
Look Inspiration - Bond Movie Inspired Retro Look
Dan shares his attempt and look inspiration in DaVinci of a fabulous Bond movie inspired 35mm film look from the music video Genghis Khan by Miike Snow.
Look Inspiration - Getting the 70s TV Inspired Retro Look
There is a time in every colorist’s life when we need to add some retro 70s TV vibes to footage! This insight is based on both creating a parody of…
Is DaVinci Resolve Studio on the Mac App Store Worth It?
Is DaVinci Resolve Studio on the Mac App Store worth the $500 upgrade over the free version? Or should you buy the more expensive 'dongled' version?
Look Inspiration - Adding To The Narrative In A Flashback
Sometimes we need to add more to our image to sell a flashback. Dan shares his tips for a firey look and adding diffusion and motion blur.
Building IR LUT Variations In Photoshop
In this Insight learn how to build Infrared type looks in Photoshop & export them for use video grading tools like DaVinci Resolve.
Fixing Cache & Gallery Warning Dialog Boxes
Pesky warning messages about inaccessible cache & still locations in Resolve can be a nusiance. Learn how to fix them in this Insight
Look Inspiration - Colorized Film Look
Dan shares his look and drx files for a Colorized Film Look
Look Inspiration - Getting the Classic ENR Processed Look
Dan shares his ENR processed look with his nodes and footage to grade along with at home.
HDR Essentials: Getting Setup In DaVinci Resolve
Diving into HDR (high dynamic range) video? Check out this Insight to learn the essentials of getting setup for HDR in DaVInci Resolve
Magic Bullet Looks 3 - An Overview
Watch an overview of how a professional colorist uses Magic Bullet Looks 3 to jump-start the 'look creation' process.
Look Inspiration - Executing the Cold Commercial Look
A cold commercial look can help bring bright natural commercial into a moody and grungy world
HDR Essentials: What's HDR?
HDR is the 'next big thing' for color grading.In this Insight, get up to speed with two discussions about HDR with industry experts Bram Desmet & Juan Salvo
Optimizing X-Keys With A Colorist Control Surface
Learn how to maximize your color correction speed if you're using a Tangent Element or Avid Color by optimizing X-Keys, a low cost USB hardware add-on.
RED HDRx Workflow With Resolve
In this Insight, learn the essentials of working with RED HDRx media in DaVinci Resolve to get the most out of an exposure and the look of a shot.
Colorist Inspiration - Adding Sunshine
Adding Sunshine In post can be tricky but Dan shares his techniques in DaVinci resolve to turn dull and grey images into warm and sunny!
Look Inspiration - Red Filtered B&W
Dan shares his thoughts on how to emulate shooting black and white with a red filter on front of the lens to give an interesting look.
Look Inspiration - Warm Commercial Look
Dan shares his attempt at matching the shot on 35mm film warm commercial look of one of his favorite commercials this year.
LUT Limitation - The Best Of Both Worlds
The main pain when working with LUTs is not knowing exactly what they are doing. Dan shares his technique of LUT Limitation.
Finding Opportunities When Color Correcting
How do you stay creative when you're not feeling creative? Learn how one professional is always finding opportunities when color correcting.
Look Inspiration - Hyperreal Look
We all strive to create the most cinematic looking images possible but sometimes its fun to go for a harsh hyperreal sharp bright look.
Color Correction Breakdown: Solving Problems
In color correction we're solving problems. Sometimes they're handed to us, sometimes they're problems we created. See examples of both.
Tales From The Grading Suite - Lighting The Looks
When jobs look good you wonder why your own work might not look as good. In this insight Dan shares his thoughts on Lighting The Looks.
LAB Colorspace in DaVinci Resolve 12
How DaVinci Resolve 12 changes the way we write contrast curves in the LAB Colorspace. See the difference between Resolve 11 & 12 curves.
Creating a 'Film Look' and Managing Film Grain
Breaking down the color correction for a 'webisode' and creating a 'Film Look'. Plus, ideas for managing film grain.
Tales From The Grading Suite - Pains In The LUT
Dan shares recent issues from his grading suite and focuses on noise and keying issues when working with a lut on recent jobs
Using Resolve's 'Layer Mixer' to Switch Between Looks
If you need to switch between different Looks in a single shot, learn how to use DaVinci Resolve's 'Layer Mixer' node for fine-tuned control.
Advanced Key-Framing Tips: A Color Correction Breakdown
Learn advanced key-framing techniques as we break down a color correction of a short film for a real-life haunted house.
Look Inspiration - Metallic Monochrome
Sometimes you need to go hard and contrasty with black and white and Dan shares his experience when building a metallic monochrome look
Resolve Color Management & Raw
Resolve Color Management (RCM) is powerful workflow tool but using it with Raw footage can be slightly confusing. Learn more in this Insight
Delivering Multi-Channel Audio From Resolve
Resolve is a capable finishing tool not just for video but for audio as well. In this Insight, learn how to configure multi-channel output
Rotoscoping In Resolve : An Introduction
Rotoscoping in Resolve is becoming more and more necessary. Dan shares some hints and tips on how he approaches the task.
DaVinci Resolve Remote Grading : An Introduction
Remote grading in DaVinci Resolve is a unique way to color grade. It allows clients to view real time grading anywhere in the world.
Rendering Multiple Projects (And Timelines) At Once!
In this Insight, learn how to leverage DaVinci Resolve's powerful rendering engine to render multiple projects and timelines all at once.
Color correcting raw footage using Camera Raw controls
DaVinci Resolve provides RAW controls for color correcting raw footage. Here are three rules if you want to use those controls.
Organizing the DaVinci Resolve 12 Media Pool
DaVinci Resolve 12 offers several new tools for keeping your Media Pool organizing. Learn how to use them when starting a new project.
Rebooting Your Eyes : How To Step Back From Your Grade
Rebooting Your eyes can be tricky after spending hours, days or even weeks on a project. Dan shares how to refresh your eyes for a grade.
Is Changing ISO in Post Production Accurate?
When working with RAW-recorded video in post-production is changing ISO in software the same as doing it in-camera? Click and find out.
Resolve 12 First look: Resolve Color Management
Check out this Insight to learn more about the essential of the new Resolve Color Management (RCM) features of DaVinci Resolve 12
Resolve 12 First Look: Automatic Shot Matching
A most welcomed new feature in Resolve 12 is Automatic Shot Matching. In this Insight, learn how it works and if it's right for your workflow
Compositing in DaVinci Resolve 12 - A First Look
Have you ever tried compositing in DaVinci Resolve? It used to feel like a work-around. In Resolve 12, it's MUCH easier. This video explains.
First Look at the DaVinci Resolve 3D Keyer
Are you figuring out the DaVinci Resolve 3D Keyer? In this color correction tutorial we take a First Look at this new feature in Resolve 12.
DaVinci Resolve 12 Public Beta 1: Special Report
Three colorists discuss DaVinci Resolve 12 including: What it means to use Beta software; favorite features (so far); areas of improvement
DaVinci Resolve 12 First Look : Colorist Crash Course Mixing Light
Resolve 12 is here and this insight is aimed to get experienced colorists up and running as soon as possible with some tips from Dan
Changing Exposure in Post-Production: A Thought Experiment
Does the Exposure control for a RAW-recorded video file work the same as changing the iris on your camera? This video explores this concept.
Creating A Shared DaVinci Resolve Database Server
In this updated Insight learn what gear you'll need and how to properly setup a shared database in DaVInci Resolve.
Setting Up X-Keys: A Control Surface Companion
In this video, contributor Josh Petok shows how to setup the X-Keys XK-24. It's a perfect companion to many colorist control surfaces.
Grade Breakdown - Challenge Your Imagination
In this insight Dan shares a Grade Breakdown on a recent commercial to challenge you to use your eyes to notice all his grades
Using DaVinci Resolve's Curves To Deconstruct A Look
In this Insight, contributor Josh Petok shows a straight forward but very effective way to use Resolve's curves to deconstruct a look.
Grading CG Footage - An Introduction To Video Game Footage
Video games are just as visually stunning as films these days but how to you approach color grading CG footage from one?
Degrading Footage - How To Mess Up Shots
Sometimes you need to throw the rules out the window and create the worst possible image for effect. Dan shows you how to do this in Resolve
Using Post-Clip Grouping As A Timeline Grading Alternative
In this Insight, learn how to use Post-Clip in DaVinci Resolve's grouping behavior as an alternative to timeline level grades
Color Washes - Working With Extreme Washes
Color washes are the most extreme form of grading but can be very rewarding when done well. Dan shows you how he thinks they work best.
Lens Distortion Removal With Premiere Pro
Action cameras and other wide angle lens can have some pretty severe lens distortion. Check out this Insight to learn how to remove it.
Rediscover The Basics - Invisible Look Technique
What do you do when a client says keep it natural? Dan shares tips for getting the most out of your image by building an invisible look
Advanced Beauty Grading : Stills Techniques
In this insight I borrow my Stills Techniques and try and apply them to my video work. The standard is very high and the results are amazing
Rediscover The Basics - Defining Texture In Your Image
Defining Texture is a great decision to make early on when grading. Do you want it to look glossy and commercial or textured and filmic?
Frequency Seperation : An Introduction
When working with skin it's quite easy to make it look false and over worked
Patrick's Shot Matching Workflow
Do you have trouble with shot matching while color correcting video? This tutorial will show you a reproducible workflow for any software.
Advanced Beauty Grading Part Three : Smoothing Skin Tones
When working with people we always need to smooth skin tones. In this video I explore my three favorite skin smoothing tools.
Damage Control - DSLR Music Video Case Study
DSLR Music Video are pretty common and can be incredibly tricky. Dan shares one of his favorite music videos shot on DSLR
Damage Control - Working With Tricky DSLR Footage
Working with Tricky DSLR footage can be frustrating. Dan pulls out some awful clips from his archive and does his best to fix them.
Damage Control - Creating A Look With Difficult Footage
Grading high quality is fun but what happens when you have difficult footage to begin with? Dan takes a look at Damage control when grading
Rendering Filtered Timelines in DaVinci Resolve
Rendering filtered timelines in DaVinci Resolve is a two-step process... Learn how to get it done.
A LightRoom LUT Workflow
In this Insight, learn how with help of a simple yet powerful plugin you can export Look Up Tables (LUTs) from Lightroom to use elsewhere.
Color Correction Workflow: Seeing Like Your Client
What's a quick and efficient color correction workflow when collaborating with a client? Part 1 shows you, using Resolve's Grouping feature.
How to Become a DaVinci Resolve Project Preset Ninja
Learn how to 'hack' DaVinci Resolve Project Presets so you can easily share them in other databases - or on someone else's computer.
How to Use Project Presets in DaVinci Resolve, Part 1
If you want to learn how to wield Project Presets in DaVinci Resolve like a ninja, then you must understand Presets—which ain't easy.
Creating Skin Contrast With High/Low Key Techniques
In this Insight, learn how powerful shaping skin contrast around someone's face can be to make a shot more dynamic.
Rediscover The Basics - Advanced Node Operations
When you get into very advanced grading there are even more node operations to worry about. Dan shows you his layout for commercial grading.
Exporting LAB LUTs from Photoshop: Does it work?
Can you make extreme color corrections in LAB color space and export those LAB LUTs from Photoshop and have them work in Davinci Resolve?
Rediscover The Basics - Node Operations
Have you ever paused to think of the order that you place your nodes? Dan shares his approach to getting the most out of your image.
Designing a Color Match Workflow (in DaVinci Resolve)
Are you looking for a reliable color match workflow for DaVinci Resolve? Learn how to get the most from Resolve's 'Color Match' feature.
Rediscover The Basics - Color Temperature
Color temperature allows us to control many factors from time of day to adding to the mood of your image by warming or cooling.
Rediscover The Basics - Contrast
Its tempting to dive in with many nodes & advanced techniques but spend more time getting your contrast right & you'll love the results
Manual Color Matching in DaVinci Resolve 11
Part 3 of a series on how to use the DaVinci Resolve 11 'Color Match' tool. In this video, learn how to build your own Color Match node.
Using Data Burn-In & Text Layers For Client Notes
Take notes in a grading session? Have bad handwriting? In this Insight learn how to create client notes directly in Resolve with data burn-in
Rediscover The Basics - Saturation
In a world where you can apply 20 nodes to build a look Dan challenges you to rediscover basic grading concepts starting with Saturation
Resolve's 'Color Match' Is Easier Using 'Brightness First' Rule
DaVinci Resolve's 'Color Match' feature can be tricky. But if you follow the 'Brightness First' Rule, you'll probably get better results.
Why Is Camera Matching with Color Charts So Hard?
If you've tried to match multiple cameras together using color charts, you've likely found it difficult. What's the problem you're having?
Dynamic Project Switching In DaVinci Resolve
Learn about a little known feature in Resolve 11 called Dynamic Project Switching that allows you instantly switch between large projects
Advanced Beauty Grading Part Two : The Fashion Look
Time to take the image into the next level with a fashion look in part two of the series on advanced beauty grading.
Advanced Beauty Grading Part One
Advanced Beauty Grading is quite a dark art in the world of color grading. Dan shows you his approach to beauty grading on a commercial.
MailBag Episode 18:YouTube/Vimeo & SSD For Render Cache
Check out this episode of From The MailBag to learn about grading of Vimeo/YouTube & When to use an SSD For Resolve's Render Cache.
Dealing with Saturation in LAB Colorspace
In Part 5 of our LAB in DaVinci Resolve series, we answer members questions about dealing with saturation in LAB colorspace.
DaVinci Resolve Node Trees for LAB Colorspace
Explore the different types of DaVinci Resolve node trees for LAB colorspace. Should we do all our work in one node? Or multiple nodes?
Adding Some Clarity: 3 Different Methods
The clarity slider in some Adobe apps is a popular way to add a little pop or punch to a shot. Learn 3 methods for emulating this control.
Neo Noir B&W - Using Hardlight Blending Mode
Creating a feature film neo noir look can be tough. Dan shares his look using hardlight blending modes instead of his beloved curves.
LAB Color in DaVinci Resolve: Is it effective?
Explore several types of source footage to determine which one are best suited for working with LAB color in DaVinci Resolve.
4 Ways To Create The Leave Color Behind Look
The leave color behind look is something every colorist should have in their tool kit. Learn 4 different methods for creating this look.
Infrared Look - Emulating Aerochrome
Building an Infrared Look can give you some beautiful results if you have the right projects and feel adventurous!
Selectively Apply The "Instagram" Look With YSFX
YSFX tools in Resolve can be used to create vintage looks especially when combined with selectively applying them. Learn this technique now
First Look: Red Giant Universe in DaVinci Resolve 11
The Red Giant Universe suite of plug-ins is now available for Davinci Resolve. Here's our first look at this collection of 80+ plugins.
LAB Color in DaVinci Resolve - Foundations Part 2
In this video, transfer those Photoshop skills color correcting LAB color in DaVinci Resolve - plus how the tools don't translate directly.
Color Correction Breakdown - Spanning the Ages
Commercial Breakdown - Rolo. Dan shares another instalment of his series of behind the scenes insights. We build looks for different eras.
LAB Colorspace: An Introduction (using DaVinci Resolve 11)
Photoshop pros are learning the power of LAB Colorspace. This is the first of several videos on applying those Insights to moving images.
Footage Quality Control - When To Reject Footage
Footage Quality Control in a modern file based world can be tricky. Dan shares his advice on how and when to reject source material.
Building A Visual LUT Library With DaVinci Resolve
Learn how to take a list of Look Up Tables in Resolve and make it into a visual LUT Library. This workflow can be used in any version of Resolve before Resolve 15 (which introduced a built-in LUT Library).
DaVinci Resolve: Consolidate Clips Function
DaVinci Resolve's renamed Consolidate Clips function can now work with Quicktime and MXF files. Learn how to use this command.
Look Library - Halloween Slasher
Dan shows you how he built a Halloween Slasher Look inspired by classic 80s movies for a recent teaser commercial for Halloween.
Advanced Windows - Difficult Shape Masking
We take a look at difficult shape masking and combining multiple windows in DaVinci Resolve to give you total control over difficult images.
Automatic Database Management
Tired of manually backing up your Resolve? Using some handy scripts Dan shows you how to fully automate the process
Remote Versions: Sharing Grades Between Multiple Timelines
If you have to color correct multiple versions of a timeline, DaVinci Resolve's Remote Versions is a feature you need to know.
Advanced Windows - Multiple Windows & Tracking
Using multiple windows and tracking them into your scene gives you total control of your image and allows you to build powerful looks.
Commercial Breakdown - Smirnoff
Dan takes a look at his latest commercial grade and shares the thinking and techniques behind the grades.
Shot Matching - The Basics of Matching Cameras Together
In this Insight we take a look at doing shot matching with multiple cameras to create a smooth edit. Featuring: BMPCC, BMCC and Red Scarlet cameras.
Resolve Keyframes - From Newbie To Ninja
Resolve Keyframes can be confusing at first but if you follow a few essential rules you'll be keyframing like a pro in no time!
Shot Matching - Working With Skin Tone
Making people look as good is part of the dayjob for colorists. Working with skin tone can be tricky but Dan shares his tips and approach.
1D Vs 3D LUTs - The Colorists Prespective
Look Up Tables can be complex subject. In this Insight get a colorists perspective on the difference between 1D and 3D LUTs.
Using Log Controls As A Secondary Correction
Many colorists use log controls as a primary grading tool. In this Insight learn how the log controls can also be used as a secondary.
Circuit Training - From Camera Rushes To Final Look
Dan breaks down a shot from camera rushes to final look. He shares the good the bad and the ugly grades from starting point to final grade.
Shot Matching - Matching Skies
Shot Matching - Matching Skies. In this Insight, Dan shows you his techniques for color matching skies between multiple set ups and scenes
Resolve 11 Highlights And Shadows Controls
New Tools For Resolve 11 Are The Highlights And Shadows Controls. They offer up new creative options for setting the contrast in your scene.
Using The Smart Render Cache in DaVinci Resolve 11
Part 2 in the series, learn how the smart render cache can speed up your workflow by caching footage, effects and grades automatically .
Attended Grading - Starting A Session
Attended Grading - Starting A Session is the hardest part of the grade. You need to understand what your new clients want from the grade
How to Use the Render Cache in DaVinci Resolve 11
Are you having problems with full frame rate playback in DaVinci Resolve? Learn how to use Resolve 11's redesigned Render Cache.
Resolve 11 - Softlight Blending Mode
New to Resolve 11 the softlight blending mode gives you a great new way to add texture and depth to your image.
Resolve 11 - New Matte Finesse Controls
Resolve 11 - New Matte Finesse Controls brings some great refinements to the qualifier controls. Clipping and noise reduction make pulling keys easier than ever!
Resolve 11 - Introduction To Lab Mode Grading
Introduction To Lab Mode Grading in Resolve 11. This new way of working gives us lots of new creative options when grading.
Color Grading in Groups with DaVinci Resolve 11
Group grading in Resolve 11 has been totally revised.In this Insight learn how to get started & how to use group grading in your own projects
Managing Contrast Across Multiple Scenes
Stop using the full video contrast range on every shot in every scene. Learn to start managing contrast between scenes for visual interest.
Working With The Clone Tool
Working With The Clone Tool in Resolve 11. Dan will be showing you how to paint and clone out elements of your footage.
Resolve 11 - Dan's First Thoughts
Dan Moran takes you on a tour of his favorite new DaVinci Resolve 11 features including grading tools, render caching and much more
How to Use Manual Color Trace in DaVinci Resolve
This is Part 3 in a series on using DaVinci Resolve's Color Trace function. In this final movie we explore the Manual Color Trace mode.
Narrowing Your Color Palette
Grading isn't always about adding to your image. Taking away and controlling colors is just as important when building strong images.
Legalizing With No Legalizer & R3D Trimming
In this installment of From The Mailbag we discuss two questions about video legalization & using R3D trimming in Resolve with Remote Grades
Using Color Trace in DaVinci Resolve - Part 2
This is Part 2 in our series on how to use Color Trace in DaVinci Resolve. This is a more advanced example of Automatic Color Trace.
Sky Replacement Challenge
Using a sky replacement we change a simple beach scene into a moody tropical sci fi establishing shot
How to make Blown-Out Highlights Look Intentional
Frequently we need to make blown-out highlights in our videos look intentional. I demonstrate doing that using Lens Flares from Sapphire 7.
How to use the Offset Control in DaVinci Resolve
The Offset Control in video color correction looks quite rudimentary. Learn how to use it powerfully and to great effect.
Best Exposure From Your Raw Files
Working With raw files allows you to to get the best possible results with your footage. Lets start with getting the best exposure
Narrative Color Grading: Practice Your Craft By Setting Time Periods
Have you ever had to build a look that helps put a shot into a certain era? Learn how to approach this challenge - and download a 6K RED Dragon shot to give it a shot and share with us.
A Straightforward Approach To Creating Blurred or Glowing Highlights
Learn how to quickly create a blurred or glowing highlights look using DaVinci Resolve
Creating An S-Curve Using The Contrast & Pivot Controls
Learn how to quickly create an S-Curve using the Contrast and Pivot controls in Resolve to add more filmic contrast to shots
Adding Grain Efficiently Using The Overlay Blending Mode
Adding grain can be hard to manage in Resolve but handy to have in your 'toolbox'. Dan shows you a simple way to add grain, without a plugin.
Using Color Trace to Copy Color Grades in DaVinci Resolve - Part 1
Learn how to copy color corrections from one timeline to another timeline using Color Trace in DaVinci Resolve.
How to create a light, airy feel by dropping the midtones
Are you having trouble getting bright, happy images that aren't also feeling flat? Learn how I get around this by dropping the midtones.
Using Dropbox for Multiple DaVinci Resolve Project Backups and Versions
How to use Dropbox for multiple backups of your DaVinci Resolve projects.
Creating a Color Wash Look (feat. DaVinci Resolve)
Learn a quick and easy method to create a 2- or 3- tone color wash over a moving image very very quickly - especially if you have a very specific color palette you want to use.
Offset Controls - Introduction To Offsets
Dan takes a look at the offset controls. The oldest and most overlooked primary controls in Resolve. Great for shot balancing.
Matching Shots While Working With Look-Up Tables
In this video we try matching shots with LUTs applied - and leanr how using the RGB parade scope helps us get the job done.
Reference Images - Matching To A Reference
Reference Images - Matching To A Reference. Have you ever had to match your footage to a famous movie or photo? Dan will show you how.
Broadcast Legalization Part 5 - Hard Clipping in DaVinci Resolve
Learn how Hard Clipping in DaVinci Resolve can help you legalize your video for Broadcast. And the dangers of using it indiscriminately.
Legalizing Video with DaVinci Resolve
Legalizing Video with DaVinci Resolve can be done in several ways. In this video we show you how to do it Shot-by-Shot.
The Unsupervised Session: Tips For Offsite Client Review
When color grading, unsupervised sessions can be difficult. In this Insight, learn strategies and techniques to handle these types sessions.
Commercial Workflow Part 2: Leveraging The Master Session
Learn how ripple your color corrections through multiple timelines in DaVinci Resolve using the power of the Master Session.
Color Grading Picture-In-Picture Effects in DaVinci Resolve
Color grading composites, like picture in picture effects, from a single render is hard. Learn how to attack these shots in DaVinci Resolve.
Understanding Output Sizing in DaVinci Resolve
If you're confused about understanding Output Sizing in DaVinci Resolve—especially if you need to keyframe it—then this video is for you!
Multiple Aspect Ratios
Learn an innovative approach to framing filmed images for multiple aspect ratios. Also - how to view these framings inside DaVinci Resolve.
Double Side Technique: Getting Aggressive with Complementary Colors
Learn how the Double Side Technique can help you to create more dynamic color corrections on flat or boring shots. This simple technique can generate multitudes of stylized Looks.
Mailbag: Resolve vs SpeedGrade & Managing Versions In Resolve
In this Episode Of From The Mailbag, we discuss the pros and cons of Resolve vs SpeedGrade. As well as how to manage versions in Resolve.
Six Approaches for Primary Color Corrections (featuring Davinci Resolve)
The first step in color correction is to do your 'primary correction'. What controls should you touch first? This video explores 6 options.
Commercial Workflow : Labeling And Ingest
Have you ever wondered how other colorists organise and run their jobs? Now is your chance to see a real commercial workflow in action.
Colorist Communication Dealing With Difficult Clients
Sometimes clients can have a very different vision of the project than you had.I offer some tips on grading in this situation
Using the Tangent Element with DaVinci Resolve 10
This video tutorial is an overview of the integration between Tangent Element with DaVinci Resolve, focusing on new features in Resolve 10.
Resolve Live Grading Essentials
A powerful new feature in DaVinci Resolve 10 is Resolve Live. Learn the essentials of how to his feature works & can help you on-set.
Dealing With Timecode : When The Rushes And Proxies Don't Match
When the rushes and Proxies don't match due to lack of timecode conforming in Resolve can be a nightmare. Here's how I approach that subject
Analysing Your Footage : Pieces To Camera
Get the most out of your 'Pieces To Camera' (on-camera Stand-Ups) using power windows and curves on footage that needs to look normal.
Techniques for Color Correcting Long Steadicam Shots
Color correcting long steadicam shots can be a challenge. Learn how a professional colorist cracks this nut with shapes, tracking and keyframes.
How To Analyse Your Footage For Color Correction: Beach Sunset
Learn how a professional colorist analyses an image. Learn what they focus on and how they grade using contrast, color and secondaries.
Understanding the Arri LUT Generator: Do's and Don'ts
Learn how to create LUTs for the Alexa using the official Arri LUT Generator. Develop your own set of best practices when working with this tool.
Color Correcting With Blending Modes : Using the Add & Screen Modes
In Part 2 of this series you learn how to use the Add and Screen blending modes to create glows, texture or light leaks to your moving images.
How To Creatively Use DaVinci Resolve's Splitter-Combiner Nodes
Learn how you can easily add some fun 'video distortion' to a music video or commercial using some creative Splitter-Combiner techniques in DaVinci Resolve.
Digital Video Noise Reduction: Targeting Individual Color Channels
In DaVinci Resolve, video noise reduction targeted to specific color channels lets us balance between sharpness and noise reduction.
How To Work With Arri Alexa LUTs, Part 1: In Action
Are you confused about how to use Arri Alexa LUTs on your projects? Learn one approach to using them creatively, based on Arri's own LUT Generator.
Color Correcting A Film Trailer: Simple Compositing (in DaVinci Resolve)
Can you perform simple compositing in DaVinci Resolve? Yes. Plus, you can use blending modes and alpha channels to add visual effects or graphics.
Basic Visual Effects & Online Editing in DaVinci Resolve 10
Learn how to perform basic online editing tasks in DaVinci Resolve 10. This tutorial looks at compositing, titles and Sapphire plug-ins.
How To Use the RGB Mixer To Remove The Arri Alexa Film Matrix
Are you fighting a green color cast with Arri Alexa footage? This may be due to the Arri Alexa Film Matrix. Learn how to use Resolve's RGB mixer to fix it.
Color Correcting A Film Trailer: Sony FS700 Footage
In this color correction tutorial, we explore color correcting FS700 footage in our Fake Film Trailer. We'll also use Sapphire plug-ins for DaVinci Resolve.
Color Correcting A Fake Film Trailer: Grading RED Dragon Footage
In this installment of the Fake Film Trailer, I start color correcting Red Dragon footage. It's my first time working with this camera.
Video Noise Reduction In DaVinci Resolve: The Neat Video OFX Plug-in
We explored video noise reduction in DaVinci Resolve 10 earlier. In this tutorial you look at the OpenFX plug-in, Neat Video, and compare the differences.
Video Noise Reduction In DaVinci Resolve: The Built-In Toolset
Explore DaVinci Resolve 10's built-in video noise reduction tools. It's available to paid owners Resolve 10. Should you upgrade? Watch Parts 1 & 2...
How To Create a Dream Sequence Look: 'Heavenly Whites'
The Dream Sequence Look is commonly requested. You learn how to create a 'Heavenly White' Look for an indie feature film—and try it out on your next job. No plug-ins, just the standard tools you'll find in most software.
Adding Tension by Animating Power Windows: The Spaceship Sequence
We're going to use DaVinci Resolve key frames with animating Power Windows—dialing up the tension and creating the feeling of alien ships flying over head.
Scene Cut Detect (& Preconformed Workflows): Dealing with dissolves
When using Scene Cut Detect (or Preconforming) in DaVinci Resolve, how do you deal with Dissolves? Watch the video and learn the very simple answer.
How to Prepare A Film Trailer For Color Correction
Learn how a professional colorist evaluates a project (film trailer) before a single shot is color corrected - a critical step for smooth sessions.
FilmConvert Review: In Action to Color Correct RED Footage
In part 2 of our FilmConvert Review you'll learn how to use this OpenFX plug-in on RED footage, with impressively good results.
An Introduction to the OpenFX Film Convert Plug-In: Part 1
Part 1 of our two-part overview of the Film Convert Plug In. Learn how to use the OpenFX version in DaVinci Resolve 10 and explore its various options.
How to Color Correct Using LUTs (By Preparing Your Images)
If you're confused on how to color correct using LUTs, this video (one in a series) shows several different approaches for you to try.
How to Reverse Engineer Look-Up Tables (LUTs)
Learn how to deconstruct a LUT (Look Up Table) to understand its impact on your image. This will improve your color correction using LUTs.
How to Use DaVinci Resolve's Splitter Combiner Nodes
Learn how to split color channels into RGB, YUV or LAB with the Splitter Combiner nodes in DaVinci Resolve. Watch me put them to work.
How To Color Correct With Blending Modes : The Overlay Mode
You can use the Overlay blending mode to add grain and get great colour and contrast pop, with the click of a button. Watch me put it to use.
How to Create a Custom Log Grading Keyboard Shortcut
In Davinci Resolve, learn how to create a custom Log Grading keyboard shortcut - giving quick access to this 3-Way Color Correction panel.
How To Color Correct Green Screen Footage (in DaVinci Resolve)
I like to work with background plates in Resolve. This allows me to color correct my product or actor in place, allowing creative choices. Watch me work.
Color Correction Looks: Creating Black and White Looks
Creating a Black and White Look seems like an easy prospect, initially. But they can be some of the most difficult jobs. Learn how to execute this Look.
Using Node-Based PTZR For Lens Spot Removal (in DaVinci Resolve)
Learn how you can create a window and use the new node PTZR controls hide a dead pixel, water spot or other unwanted item in that shot.
Creating Color Correction Looks: The Low Contrast Look
The Low Contrast Look is a flat style of color correcting. In this video, learn how we execute it without making our images look lifeless.
Understanding Time Remapping in DaVinci Resolve 10
New feature in Resolve 10 include frame blending, motion flow, rippling your timeline and varispeeds via XML. In this video I cover all these features.
Creating Color Correction Looks: Emulating the Film Look
Has a client ever asked you to create a 'Film Look'? Yes, us too. In this video, learn how we get to this Look using some new features in DaVinci Resolve.
Building Color Correction Looks: Tinting Your Shadows
Sometimes when you're color correcting you need to give the job an extra wow factor. My favorite technique at the moment is tinting the shadows. Learn how.
Playing 720p23.976 Inside DaVinci Resolve
DaVinci Resolve doesn't officially support the specific combination of a 720p frame size playing back at 23.976. Learn how you can force this playback.
Tips and Tricks When Pulling External Keys (in DaVinci Resolve)
Do you ever wish you could work on a perfect duplicate of an HSL key you created in DaVinci Resolve? Learn tricks for doing that (and avoid copy/pasting).
Secondary Corrections in DaVinci Resolve
'Secondary corrections' are isolations to areas of an image to make specific color corrections. Here are tips on getting quick results.
The Fundamentals of Power Windows in DaVinci Resolve
Learn the recent updates and feature refinements for Resolve's Power Windows, including a new gradient window and unlimited shapes per node.
HEY—Where's My Master Session (in DaVinci Resolve 10)?
DaVinci Resolve 10 hides the 'Master Session' by default. Why do I rely on it when color correcting commercials and music videos? How do you find it again?
Color Correcting Food for Commercial Clients in Digital Video
How does a professional colorist color correct food? Our guest colorist Rob Bessette shares his secrets and the keys for a successful session.
Tips & Tricks for Time Remapping in DaVinci Resolve 9 & 10
Dealing with Time Warps in a color correction workflow is difficult to manage. I found a workflow, saving time and money for you and your clients!
Using Resolve Track Nodes: Controlling Uncontrollable Light Sources
Learn how to make a global correction to the brightest and most intensely saturated areas of an image without tediously creating nodes for each shot.
DaVinci Resolve: Working With 'Handles' While Color Correcting
If your clients are asking for you to render out 'handles' after color correcting their job then this Insight will help sidestep some pitfalls.
How to Color Correct the Blackmagic Pocket Camera
Are you looking for ideas on how to color correct the Blackmagic Pocket Camera? I share how I work with it in DaVinci Resolve.
Ask Me Anything: Color Correcting the Birthmark Music Video
After color correcting the music video 'Birthmark' by Cass Lowe, here's your chance to 'ask us anything' of the Colorist and Cinematographer.
Color Correction Tips: Matching Shots To A Brand Logo
Have you ever been asked to color match a shot to a reference image for their video? Here are a few ideas on how to do that in DaVinci Resolve.
DaVinci Resolve Tools: Using The Key Mixer Node
You will learn two ways to use the Key Mixer Node: How to set it up as a master control for multiple masks; and how to build garbage masks for cleaner keys.
Trimming RED Footage Using DaVinci Resolve's Media Manager
Learn how you can trim RED footage and copy to your hard drive only the portions of your clips needed to recreate your timeline, saving hard drive space.
Color Correction Looks: Creating The 7D Korean Horror Look
If you're looking to create a Look and want something a bit different (and even noisy)... here's how you can create the 'Korean Horror' Look.
Tracking Power Windows: Tips and Tricks in DaVinci Resolve
Learn how you can track foregrounds, backgrounds + copying and pasting tracks and how to deal with objects moving behind other objects while tracking.
Color Correcting with Log Controls in DaVinci Resolve: An Overview
Have you wondered how to use the Log Controls in DaVinci Resolve? This video is an overview of all the controls and some basic theory of how they work.
How To Blend Between Color Corrections Into The 'Day For Night' Look
DaVinci Resolve's node tree makes it tough dissolving between two completely different Looks. Learn how to do it easily, without getting lost in keyframes.
How to Build A 'Day For Night' Look - Color Correction Technique
What does it mean to shoot film or video as 'Day for Night'? Learn the terminology and how to do it in this video tutorial.
How to Build a Vintage Look For Your Videos
Recently, clients have been coming in asking me to create a 'vintage look' for them. What is that? And how do I go about it?
Color Correcting A Music Video: Ask Me Anything
Do you have burning questions about color correcting music videos? Professional colorist Dan Moran, CSI is here to give you his answers.
The Case For Completely Avoiding LUTs (And Going DIY)
You shouldn't be a slave to LUTs... learn how to quickly decide if they're working. And if not, learn to throw away those LUTs and just 'Do It Yourself'.
How To Apply Custom Aspect Ratios In DaVinci Resolve
When a client asks for a specific pixel dimension or Aspect Ratio learn how you can precisely set it up in DaVinci Resolve, even if no preset exists.
Using LUTs in Adobe Photoshop: Applying Grades To Still Images
Learn how to use a color correction exported as a LUT and use it in Photoshop. Plus—a small caveat in this workflow (about how Photoshop applies LUTs).
Adding Depth-of-Field to Video: Sharpening & Blurring In Action
As part of our series on adding Depth-Of-Field while color correcting, learn my final step when executing this technique, making the image look sharp.
Adding Depth-of-Field To Video: Localized Contrast In Action
I spoke about the theory of adding depth earlier in this series but lets take a practical look at executing the theory so you can do this on your footage.
Waveforms, Legal Range And The Differences Between Avid and Resolve
Avid's Y Waveform sets black above the bottom of the scale whereas Resolve's Waveform sets its blacks at the bottom of its scale. Which is correct?
Adding Depth To Video : Putting Theory Into Action
After my 3-part series on the theory of Depth-of-Field and techniques simulating it, the theory is put to action—learn how you can use these techniques.
On Overview Of The "Pre-Conformed Workflow" In DaVinci Resolve
This workflow is an ultimate timesaver and involves getting a single flattened video clip of the project you're grading and using Resolve to slice it up.
How to Split Your Brightness and Color Channels For Creative Control
When color correcting, learn how to split your image into separate brightness and color channels for creative reasons (and additional technical benefits).
How To Build Your Own Custom Render Cache in DaVinci Resolve
If you're having trouble getting real-time playback in DaVinci Resolve then try this tip for creating your own custom render cache.
The 3-Band Technique for Enhancing Boring Exterior Shots
Flat boring outdoor shots are very common when color correcting. What can you do to fix it? Learn a technique based on Classical painting theory.
The Fundamentals of Color Correcting for Beauty
Have you ever needed to improve how an actor 'looks' in a video? Learn the basics of how the pros do it in this Beauty Grading 101 video.
Creatively Using Soft Clipping in DaVinci Resolve
'Clipping' image detail is considered bad. But learn how to use DaVinci Resolve's 'soft clipping' control for great creative effect.
How to Set Up a Legacy DaVinci Resolve Shared Database
Learn how to set up a DaVinci Resolve shared database in this step-by-step tutorial using the Command-Line interface.
How to Move Your Look from Lightroom into DaVinci Resolve
Would you like to take a color correction you created in Lightroom and apply it to video in DaVinci Resolve? Here's one way to do it.
Color Correcting with LUTs: The 3-Node Approach
Learn a node structure for using LUTs in DaVinci Resolve (and the reasoning behind it). Segmenting your workflow into clear distinct actions speeds you up.
What is a LUT (and how do you use a LUT for color correction)?
Look-up Tables are mathematically precise. Understanding LUTs requires you to accept that a single LUT can NEVER be used for all your shots.
Three Strategies for Backing Up DaVinci Resolve Projects
You're going to learn 3 useful and easy methods to protect your work from hard drive catastrophe by saving your Projects, Stills & Databases.
How To Be Absolutely Sure That You Color Corrected All Of Your Shots
If you are color correcting a long timeline in DaVinci Resolve then how can you be sure you didn't miss a shot? Learn how to never miss a shot again.
How to Quickly Flip Between Corrections in DaVinci Resolve
The Versions feature in DaVinci Resolve will help you build different grades for the same shot—and then flip between them quickly.
DaVinci Resolve: How to Organize Your Color Corrections with 'Still Pages'
On big jobs, organizing your saved 'stills' in DaVinci Resolve can save you a lot of time and energy. Learn how Resolve's Gallery can help you stay focused.
Curves Color Correction: Avid Symphony vs. DaVinci Resolve
What is the difference between the Curves interfaces in Avid Symphony and DaVinci Resolve? Learn how to simulate Avid Curves in Resolve.
How You Can Add Camera Shake in DaVinci Resolve
If you want to add Camera Shake in Davince Resolve then it can be tricky since there isn't a 'shake' tool. Learn a quick workaround to achieve this effect.


