| Series |
|---|
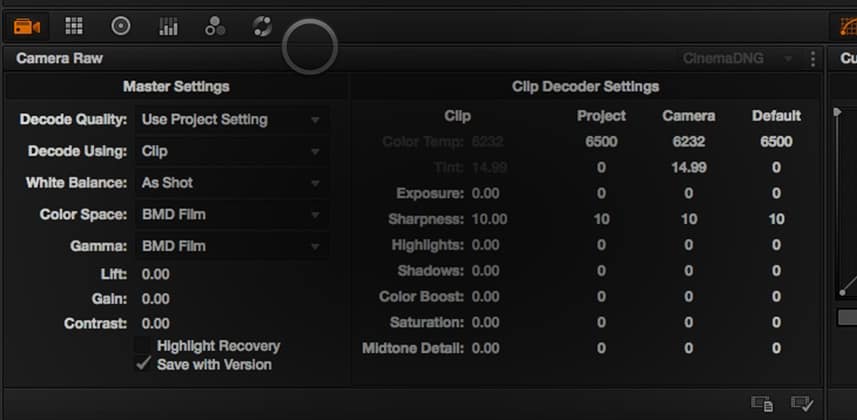
Have you ever wondered if the Exposure control in your RAW controls changes the image in the same way that changing the Iris on the lens does?
It’s a question I’ve wondered about for a long time. And on a recent project where I was using those controls, it occurred to me I could test out the Exposure control on RAW footage using the Blackmagic Pocket Camera we got for MixingLight last year.
I’m calling this Insight a ‘Thought Experiment’ because I can’t generalize my results
There are several aspects of my workflow that make it tough to apply these conclusions to all RAW-capable cameras:
- The test image was displayed on an OLED… rather than a printed test image. The OLED has all sorts of technology to get the panel to conform to industry specifications. I had to turn off the 1D and 3D LUTs loaded at the factory to get the native linear response of the panel… but it isn’t a perfect representation of the grayscale ramp. Which means it isn’t 100% accurate.
- CinemaDNG in the Blackmagic Pocket Camera is a compressed variant of the CinemaDNG spec – which may change the behavior of the RAW controls in DaVinci Resolve. Or maybe not. I don’t have a BM Cinema Camera to confirm the test results.
- Exposure sliders for RED R3D or ARRIRAW may work differently… but I don’t have those cameras to test with and can’t confirm my conclusions will hold to those cameras.
So, is this question about Exposure sliders worth asking—and testing?
Absolutely! If we want to refine our workflows for re-creating ‘filmic looks’ then we need to understand how closely our software tools mimic the response of ‘getting it in-camera’. If the Exposure sliders are hocus-pocus, that’s worth knowing.
One of the nice things to come out of this test is I found a plug-in whose Exposure slider nicely mimics what happens on the Iris of a lens… even if you use it with non-RAW, flat-recorded images. The plug-in is Film Convert and we’ve taken a look at an earlier version of the Film Convert plug-in.
Do YOU want to work with me to recreate this test using ARRI, Sony or RED?
I’ll be happy to work with your footage and do a comparison of the different Exposure sliders of the different cameras shooting RAW. Here’s what you need to do to re-create this test.
- Reach out to me via the Contact Us form and let me know you want to be involved.
- Once I give you the go-ahead (so we don’t have multiple Members using the same camera)… Shoot a grayscale ramp, ideally with blacks around 20 IRE and the whites hitting around 80 IRE at a fairly wide open T-Stop. If you’re shooting a display (as opposed to a printed card), it must be set to gamma 1.0. If you’re shooting an FSI display, turn off both the 1D and 3D LUTs (which will also bypass your gamma settings).
- Let me know your: ISO setting and your RAW settings.
- Record a sweep of the iris going from wide open to all the way stopped down
- Try recording at several different ISOs so we can also test ISO changes (which we’ll talk about with the Pocket Camera in an upcoming Insight)
Some Additional Thoughts and Conclusions
After recording this Insight and thinking upon it some more, I thought I’d summarize and more clearly articulate what I think I discovered for myself:
- This Insight would be made much more valuable if we could test the RAW controls across several different cameras. So if you’ve got a RAW-recording camera, I’d love to work with you and have you shoot some test footage that we can share with the Mixing Light community.
- The main problem I have with the Pocket Camera Exposure slider is that it doesn’t go dark enough. One reason I came to the conclusion that the control doesn’t fully correspond to an actual Iris? My Iris can stop down much further than the RAW Exposure control allows me to go in-camera.
- In Part 2: We’ll look at ISO changes and how we can mimic those changes using RAW controls and—for non-RAW, Log-recorded images—how well Film Convert works in this regard.
- In Part 3: The last in this series I’ll wrap up my thoughts by applying all this theory to actual images. I’ve been doing lots of testing and ‘playing’ and it’s safe to say, RAW controls are no post-production panacea. They can be extremely useful. Or they can be destructive. I’ve got examples of both scenarios to wrap up this series.
Did you find a mistake in my thinking or a flaw in methodology? Let me know!
This is a Thought Experiment. I’m completely open to the idea that there may be a fatal flaw in my testing that renders my conclusions invalid. Let’s discuss in the comments below. If I have to, I’ll re-design the test!
– pat
Member Content
Sorry... the rest of this content is for members only. You'll need to login or Join Now to continue (we hope you do!).
Need more information about our memberships? Click to learn more.
Membership optionsMember Login


