Good Ideas? The HDR Palette One Year Later & Selling Your Project Files

March 30, 2022

Team Mixing Light, in a live conference call, takes member questions on Resolve's HDR palette and the practice of handing over project files.


Series

Office Hours Conference Call, 22 March 2022

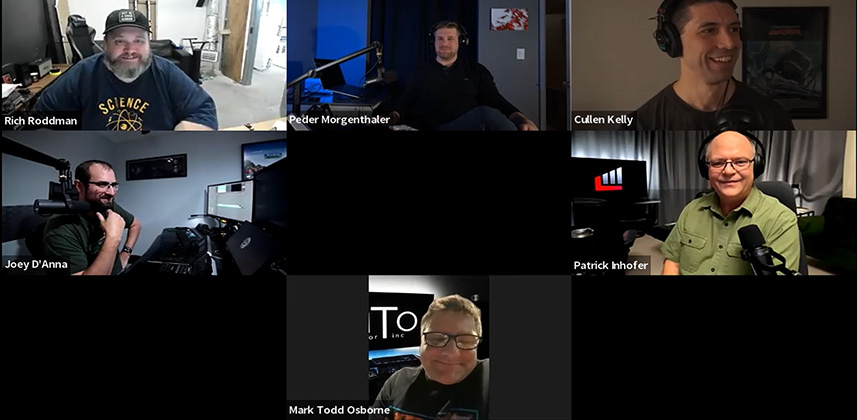
Mixing Light Contributors Joey D’Anna, Cullen Kelly, Rich Roddman, and Peder Morgenthaler join host Patrick Inhofer taking member questions in a live conference call format.

After starting the conversation sharing recent wins, we dive into the questions that are at the top of mind for our members. Today, we take questions about:

  • How are we now working in the still-new HDR palette in Resolve 17?
  • Does working in unmanaged projects negate the ‘color space awareness’ of the HDR palette?
  • Is it appropriate to hand your project files to your client, and if so, how much is a reasonable price?

Questions or Comments?

The team had a good time on this call. Feel free to continue the conversation below in the comments!

Table of Contents

(Note: There is some explicit language in this episode)

  • 00:10 – Introductions
  • 01:30 – Joey’s going to NAB
  • 06:11 – Member Question, Rich M.: What’s everyone experience using Resolve’s new HDR tool?
  • 07:00 – Rich M. explains he sees big differences compared to the Log and Printer Lights controls.
  • 08:54 – Peder talks about the specific HDR tools he finds himself using the most.
  • 09:54 – Rich Roddman found an interesting use-case for the HDR and Rec.709 footage
  • 10:56 – Joey talks about the importance of color management so that he doesn’t have to use the HDR tool
  • 11:46 – Demo: How the HDR tool really shines if you ‘feed it’ an exposure adjusted image
  • 15:33 – Cullen talks about his slightly different approach to using the HDR tool, everything he loves about it, except for one big thing…
  • 17:40 – Patrick’s evolution on how he uses the HDR tool, one year after releasing his initial Insight on it
  • 19:15 – The Team gets into a back-and-forth discussion on different elements of the HDr tool
  • 23:00 – ML member Tony shares how inconsistent exposure hurts the efficacy of the HDR tool and kicks off a conversation about tracking mid-gray exposure values.
  • 27:50 – Chat room question: What about Temp/Tint controls in HDR vs Primary wheels?
  • 28:35 – Mark Todd Osborne joins the conversation with a question: Does working in an un-color managed project invalidate the HDR tool?
  • 31:20 – Member Question, Lannie L.: Is it appropriate to bill for you project files if a client asks for a copy?
  • 42:30 – Member Comment, Tony: Compares project files to an accountant’s raw tax software files vs. the deliverable of the final tax return.
  • 44:03 – Rich and Joey share their practice of providing project files to clients.
  • 48:18 – Joey offers great business advice on handling client requests for project files by discovering the motivation for the request, opening up another round of comments about this practice
  • 53:52 – Conclusion

Member Content

Sorry... the rest of this content is for members only. You'll need to login or Join Now to continue (we hope you do!).

Need more information about our memberships? Click to learn more.

Membership options
Member Login

Are you using our app? For the best experience, please login using the app's launch screen


Comments

Homepage Forums Good Ideas? The HDR Palette One Year Later & Selling Your Project Files

  • I found the discussion around exposure, grey point, and the HDR tool extremely interesting, as it related to my own perspective with grading footage. Establishing a “standard” grey point, relative to the original exposure choices, the OETF conversion, and the final intent becomes a “chore” for all  my footage. I, sincerely, wish Blackmagic could “standardize” the HDR tool to a reference grey point standard. I recognize the difficulty with that, but, perhaps it should be related to each camera characteristics, much like the camera’s native DRT is.


  • Jim Robinson
    Member

    Starting to wonder what the 3 dot colors space and color gamma assignment does to the HDR controls.
    I thought before watching this that it would take the manufactures middle grey as a set point. But after watching this I tested it and changing from one LOG to another with that menu all the zones stayed the same but the histogram trace moved.
    Is there any sure way to test exactly what it does changing it there?


    • Patrick Inhofer
      Administrator

      If you want to test it, take a rendered grayscale or color chart and make one or two adjustments in the middle zones and observe the waveform.

      Then, use the 3-dot options menu and change the gamut/gamma and see what happens.

      Here’s what BMD has to say in the intro of the HDR chapter in the User Manual (and, as a result, is my understanding of the tool):

      “Being color space aware means that the color and contrast controls of the HDR palette conform themselves to the range of each clip’s image data as mapped from the Input Color Space assigned to the source clip to the Timeline Color Space your program is working within. Practically, this provides two benefits:

      • The controls of the HDR palette work and feel virtually identical no matter what type of source clip you’re adjusting, and no matter which timeline color space you’re choosing to work within.
      • HDR palette adjustments made to one type of media will have a similar result when copied to other types of media. This makes makes matching shots and copying looks from one type of media to another easier than with previous tools.”

      The tool remaps based on color spaces, not necessarily how one particular camera maps middle gray within that color space.


      • Jim Robinson
        Member

        My comment was specifically referring to changing the color space and gamma using the 3-dot menu on the HDR tool. I found that when testing that the middle grey didn’t move at all. I see here now that Cullen has done similar tests.
        So “content aware”  I would have previously assumed was that it was moving to manufacture suggested middle grey. And I can’t see it doing much of anything when changed.

        I only asked about a way to test it, that I may have not thought of.


  • Cullen Kelly
    Member

    Sharing a quick experiment: attached are screen grabs showing how the HDR Palette is plotting mid gray and the surrounding zones with three different mid gray cards: one for ACEScct, one for LogC, and one for Davinci Intermediate. In each case, Timeline Color Space was set to match that of the gray card being used.

    So which one is which? There’s no way to tell, because the results are identical, which is what I’d expect. While this quick test doesn’t rule out the possibility of localized bugs, it’s clear that the intended (and actual) behavior is exactly what we’re asking for in this thread: middle gray being defined by the declared color space, and the zones being drawn relative to that point.


  • Hey Cullen….

    I can confirm what you’re demonstrating. Now, let me ask a question that confuses me. Instead of using the three dot menu, add a CST node converting the 709 grey card to the T/L space, say Davinci Wide Gamut. In order to get the grey card to align with ‘0’ on the HDR display, I have to turn off tone mapping, saturation mapping and EOTF. This implies that in order to get a “proper” transform of the grey point, with EOTF, tone, and sat mapping turned on, a different grey point needs to be used. For example, the native grey of Davinci WG is 344 or 86 IRE. With the transform remapping turned on, the grey point shifts to 100 IRE. So, which is the correct grey point?

    • Sorry, not IRE, but RGB value on 8-bit scale.


    • Jim Robinson
      Member

      That is a good question


    • Cullen Kelly
      Member

      I think a few things may be getting confused here, but the first is that I’m not quite sure what you mean by “709 card” — there’s really no such thing. An explicit, accurate, and fixed definition of middle gray is only possible in scene space. For a quick demonstration of this, apply LogC->709 transforms to a LogC gray card using RCM, ACES, and Arri’s K1S1 — each will plot that same input to a different output position. This relates to your discovery that attempting to map a display state image/value back into scene state isn’t a hard science with single solutions.

      This is all to say that want to evaluate and work with mid gray independent of any display transform, and this would start by generating your initial mid gray value for evaluation in a suitable scene space. The math is fairly straightforward, but you can use my mid gray cheat sheet and/or Exposure Chart DCTL to make even quicker work of it. Hope this makes sense!


  • Cullen Kelly
    Member

    I think a few things may be getting confused here, but the first is that I’m not quite sure what you mean by “709 card” — there’s really no such thing. An explicit, accurate, and fixed definition of middle gray is only possible in scene space. For a quick demonstration of this, apply LogC->709 transforms to a LogC gray card using RCM, ACES, and Arri’s K1S1 — each will plot that same input to a different output position. This relates to your discovery that attempting to map a display state image/value back into scene state isn’t a hard science with single solutions.

    This is all to say that want to evaluate and work with mid gray independent of any display transform, and this would start by generating your initial mid gray value for evaluation in a suitable scene space. The math is fairly straightforward, but you can use my mid gray cheat sheet and/or Exposure Chart DCTL to make even quicker work of it. Hope this makes sense!

  • ahhh. I think I understand what you’re saying. 18% grey(what I called a 709 grey card) exists only in scene space. It doesn’t translate to a mathematically unique number in display space. Even tho’, that’s what I’ve been wanting to do to establish a baseline exposure in display space….in this case rec709.


    • Cullen Kelly
      Member

      There you go! Yes, it’s a rather confusing reality. The good thing is that if your pipeline minds mid gray all the way up to that final output transform, you can pin down a value you like to see it encode at for a particular display standard. For 709, I tend to go with Arri’s value of around 410/1023.

  • Thanx, Cullen. Greatly appreciate your time.

  • Wow, thank you for all the discussion about my drp deliverable question.  I will say that in the past I’ve delivered a drp and when the output file they made came back to me for some other work, it looked very different, which is something I even warned them about.  So that is definitely a valid concern.  Also, I once had to create luts and deliver along with a drp since I used a 3rd party plug-in, not fun.


    • Patrick Inhofer
      Administrator

      Lannie – I have to say that Cullen’s thinking on NOT providing a Resolve Project file (unless it’s a network deliverable) has me rethinking my approach. I enjoyed that discussion. Thanks for asking!


  • Marc Wielage
    Member

    One thing that was not mentioned much in the discussion: if you do work for Amazon, Apple, Netflix, and a few other major studios, they do insist on “owning” all the session files used for their project. I think their fear is, “what if we need to come back in six months and the colorist got hit by a truck?” So there is a justifiable concern.

    The post supervisors I’ve talked to tell me they get the actual Avid edit session (or the Premiere session), the full Pro Tools session, and the final color session as part of the entire deliverables package they assemble for the studio. Of course, they pay a premium price for this, particularly when you consider there could be 4-5-6 passes for different HDR versions, different aspect ratios, theatrical vs. broadcast/streaming, and so on. Even worse for 3D and large format theaters.

    If I have to freelance for a specific company and use their facility, then they own the session at the end of the day. I accept that, because that’s the freelance world out there. In my own boutique room, I own the session and nobody gets it. When you go to a fine restaurant, you pay for the meal — not the recipe.

    Everything is always subject to negotiation, and I won’t tell somebody “no” — I’ll just remind them that in our deal memo, we specify that we keep all session materials and that the client only gets the final renders. I’m open to offers, but my guess is for a feature, I’d want the equivalent of another 10-hour day for the file, just out of principle.

Log in to reply.

1,000+ Tutorials to Explore

Get full access to our entire library of over 1,100+ color tutorials for an entire week!


Start Your Test Drive!
Loading...