| Series |
|---|
Day 17: 24 Insights In 24 Days – 2020 New Year Marathon!
Inside DaVinci Resolve 16: Object Removal with ResolveFX Revival Plugins
Blackmagic’s Revival was a software-based film restoration tool. It was end-of-life’ed a few years ago and some of its magic has made its way into Resolve as a set of ResolveFX plugins.
In this Insight, we’re focusing on the Revival plugins dealing with object removal. These objects can be as tiny as a spec of dust or as large as a person. Of course, with all these tools if you try to remove too large an object you’ll get very unpredictable and undesirable results. The general rule of thumb: Smaller is better.
Another rule of thumb: The less motion the better. Almost all these tools rely on surrounding frames to inform the current frame on how best to remove the unwanted object. If the surrounding frames are rapidly changing then this can dramatically complicate things.
Warnings aside, when these tools work – it’s like magic! They work quite frequently, often when you least expect it. What plugins are we dealing with in this Insight?
- Dust Buster: This is a frame-by-frame utility to easily remove bits of dust or other tiny artifacts that only last one or two frames on the image.
- Automatic Dirt Removal: It tries to do the same thing as the dust buster but automagically without the frame-by-frame tedium.
- Dead Pixel Fixer: Got a spot on the image that just sticks to the same place on the screen – like it’s glued to the lens? Then this plugin is your best friend.
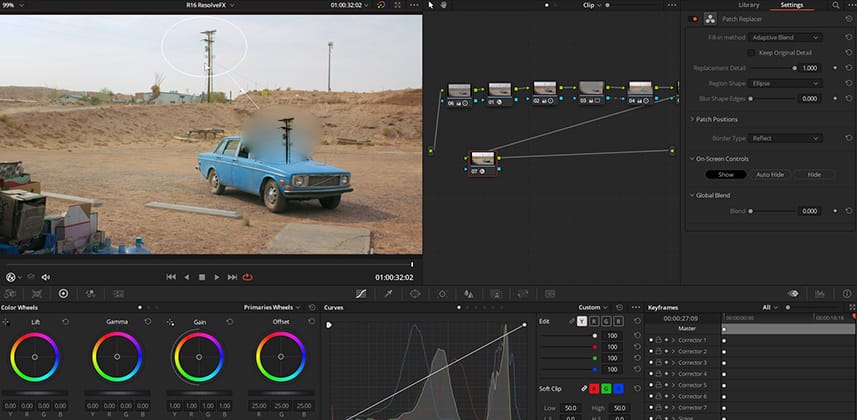
- Patch Replacer: The tried and true method of object removal is to grab a piece of the image that doesn’t have your unwanted object and cover it! This is an easier-to-execute method of that approach.
- Object Removal: Similar to the Patch Replacer but it uses a context-aware fill method of replacing an object, using the pixels surrounding the unwanted feature to fill it in and hide it.
The last three plugins in this list can all be used to tackle the same problem. But they each have strengths and weaknesses, so it’s good to know how each works since you may need to try all three to find the right solution to any particular problem. Also – all these plug-ins are Studio-only, requiring a paid license to bypass the watermark. If you’re looking for a reason to upgrade to the paid version, one of the tools in this Insight may provide that justification.
Enjoy!
-pi
Member Content
Sorry... the rest of this content is for members only. You'll need to login or Join Now to continue (we hope you do!).
Need more information about our memberships? Click to learn more.
Membership optionsMember Login


