| Series |
|---|
Part 4: Legalizing Video with DaVinci Resolve, Shot-by-Shot
DaVinci Resolve gives us a great opportunity to discuss how to legalize your video without using any filters since, unlike SpeedGrade CC or Premiere Pro CC, Resolve doesn’t have a ‘Legalize’ filter or button!
DIY Video Legalization: The Pyramid
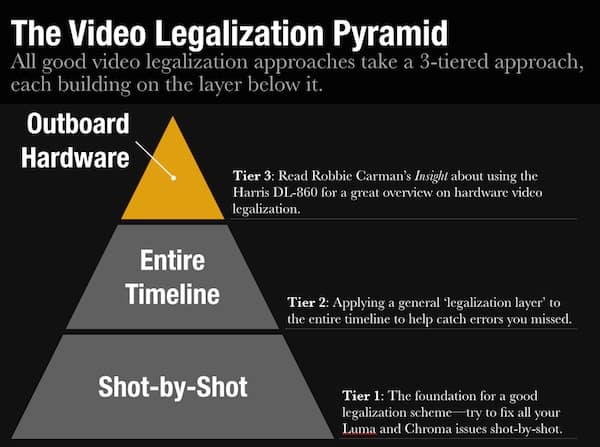
Even if you have access to an expensive piece of hardware like the Harris DL-860, it’s still a good idea to manage your Luma and Chroma levels during the color correction process. I like to think of this DIY Video Legalization as a multi-layered pyramid:

The good news is, even if you don’t have outboard hardware – a very careful, eagle-eyed DIY approach to video legalization (using just Tiers 1 and 2) may be all you need to pass network QC (though I wouldn’t bet my career on it).
Legalizing Video with DaVinci Resolve: Shot-by-Shot
In this Insight I’ll show you my typical approach to legalizing an individual shot. Sometimes I’ll follow this workflow during the initial color grade. Sometimes I leave it as the last thing I do, after the client has left the room, and watch the entire job focused solely on my Vectorscope and Waveform monitor… stopping to solve every ‘legal’ problem that might cause a network to reject the final product.
Since DaVinci Resolve doesn’t have an automatic way of doing this, my two main Resolve tools are the HSL Qualifiers and the Soft Clip interface—each of which solves a different problem.
In the Insight on this topic, I’ll show you what I do for my Tier 2 Legalization… which is very similar to applying an Adjustment Layer to the entire timeline as we did in Part 1 and Part 2 of this series.
Question? Comments!
Do you handle legalization differently? Was something in this Insight confusing? Let us know and start the discussion below in the comments!
Member Content
Sorry... the rest of this content is for members only. You'll need to login or Join Now to continue (we hope you do!).
Need more information about our memberships? Click to learn more.
Membership optionsMember Login


