advanced panel close

Getting To Know The DaVinci Resolve Control Panel – Overview

September 20, 2016

The DaVinci Resolve Control Panel gives you the most hands-on control of Resolve. In this Insight, learn about the design & functionality.


Series

Demystifying The Resolve Advanced Control Panel

The ‘Big Panel’, ‘Advanced Control Surface’, or just simply the Resolve Control Panel — if you’re a Resolve user you probably know what we’re talking about!

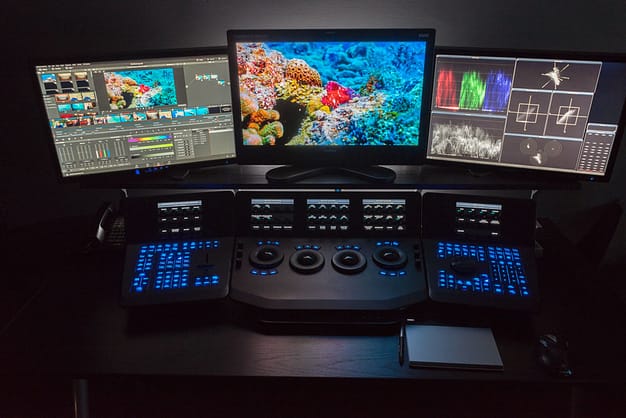
The Resolve Control Panel (it’s actually three separate panels) is manufactured and sold by Blackmagic Design and at $30,000, The Resolve Control Panel is clearly not for everyone, but it does provide the Resolve colorist with the most tactile control available.

Recently, we have received several emails from members who’ve recently upgraded to the Resolve Control Panel and were surprised that there is literally no documentation about how to use it!


robbiecarman_suite_dark


On a smaller panel, one can learn to get around in a few hours, but on a panel(s) with 5 LCD displays, 32 soft knobs, 30 soft buttons and dozens of hard labeled buttons, not to mention quite a few sub-menus – learning the ‘big panels’ can be very intimidating.

And that’s not even getting into the countless panel ‘shortcuts’ and features only found on on this panel.

Scratching our heads about why we hadn’t covered the big panels in depth before now, we decided to do something about, and in this Insight, we’ll start a new series on the Resolve Panel with a detailed overview.

In this Insight

Although we’re based in different cities (and across thousands of miles) Team Mixing Light does get together every so often.

Recently, Pat & Robbie were together recording some training for a corporate partner of Mixing Light and we had Robbie’s Resolve Control Panel in the studio. We decided it was time to finally do an overview on the Advanced Panel.


_MG_9392_HDR


In this Insight, we discuss how to get the Resolve Panel, the overall design and connections as well as go over the essential sections of the panel.

In addition, we also discuss how bigger IS better! With so much tactile control over the Resolve UI, the Resolve Panel can actually let you work faster and focus more shots rather than messing around with a mouse in the interface.

The only way to really get to know any panel is to get hands-on time with it and develop muscle memory. And that of course, means lots of practice and figuring out where things are and how the panel operates.


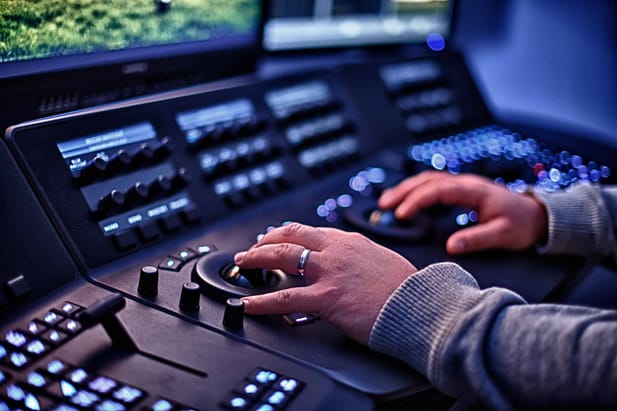
Patrick working on a DaVinci Resolve Colorist Control SurfaceOn a complex panel like the Resolve Panel, there are multiple ways to get to the same place, combinations of keys that do different things, etc.

Of course, we’ll happily provide answers to any questions you may have or follow up on anything we may have missed.

-Robbie, Dan, Patrick


Comments

Homepage Forums Getting To Know The DaVinci Resolve Control Panel – Overview

Page 1 of 3

  • Marc Wielage
    Member

    Lose the default red buttons on the panel! I find they’re easier on the eyes when they’re in a whitish zone.

    This video should be provided by BMD as a freebie for anybody buying the panels.


  • Robbie Carman
    Guest

    For sure! I’m all about the white buttons – but I get why some people don’t like them as they’re not totally uniform white. I usually roll 5 for LCD brightness, 2/2/2 for RGB. To get me a nice dim white. In the video so they’d show up a bit better, we had them running at 50/50/50

  • I went with blue for now, so far i like it, though see the point in neutral white.
    But to be honest, to me, nothing beats the looks or red buttons 😀 I cant stand it in session, but when i come in and look at panel in the morning, i love that red 🙂

  • Thank you both for doing this series!
    I started working on this panel a month ago and was kinda shocked that i had to dig stuff about it out on my own here and there. Asking on LGG forum and FB instead of having a dedicated manual. I mean, you can find documentation on any tangent panel including shortcuts, but not on resolve native-doesnt make sense to me at all… 🙂

    I would love you to show how you use scroll mode and ripple mode.
    I tried those out, scroll i get theoretically, but havent come up with a good way of using it, or when it would be good to use.
    Ripple mode on the other hand i would LOVE to use and I tried following manual, but didnt work out and i didnt have a change to play with it again just yet. I can imagine how on a long format project it would be great to ripple node changes to the same node in a filtered timeline or append a new node with current settings but every time i tried it i would get a message that changes are not sufficient enough or something like that. I post exact message tomorrow, if its relevant..
    Thanks again, and really looking forward to more insights about this panel!


  • YuriiHydrick
    Guest

    Thanks so much for starting this Insight series!
    A couple of questions: What are “POTS” and “Printer Lites?” Also, what exactly do the triangle keys do? They seem to work sort of as “shift” keys, but the only thing I’ve really used them for is with the “disable current” button, so as to enable the “bypass” and “disable all nodes” functions. (And speaking of the bypass function, is there a better way to do it on the panel? I use it all the time, and it’s super straightforward on the Tangent Element, but quite frankly it’s pretty annoying on this Control Surface).
    One more question: how do you change what the fourth wheel/joyball does? I’ve found that its functions change by itself, like it has a mind of its own. Sometimes it works as offset, sometimes it does something else entirely. Am I just crazy? Haha.
    Thanks a bunch, guys!


  • YuriiHydrick
    Guest

    How do you change the light colors?
    EDIT: Never mind. I found it in the Control Panel settings.


  • Robbie Carman
    Guest

    yep thats the place. they’re saved a part of a config. have multiple configs for different colors.


  • Robbie Carman
    Guest

    timeline management functionality is something we’ll cover.

    But essentially scroll allows you to simply choose how many clips before or forward of your current one to copy to your current clip. I find it really useful for copying grades without touching the mouse especially in long scenes.

    You’re on the right path with Ripple. Check out the Ripple settings on the Color page in Project settings for the different ways it can work detailed coverage on this is actually in the Resolve manual starting page 793.

    But yes I know these are confusing things and we’ll cover them in detail in future parts (this series is gonna grow!)


  • Jamied
    Guest

    This is a really good idea for a Insight series, thanks! I agree, I never used certain function like Memories but when I got on this panel, I could see I’d use them all the time. Same for Preview Mem and Original Mem – because they have dedicated buttons (in fact I’ve now learned the keyboard shortcuts too!). This panel really needs a built-in Wacom and a better placed keyboard but…


  • Robbie Carman
    Guest

    I don’t mind placement of the keyboard, but its for sure a crap keyboard. As I said in the video its just crazy that its not backlit. Also over the years the quality of the keyboard has really shown – the glow on the surround around the keyboard as aged and become less sticky causing the surround to peel off. Maybe I”m a purist, but I don’t want a 30k panel to feel flimsy at any point!

    On the Wacom I’m love/hate. For sure people coming from Quantel (I think you right?) or Flimlight background love integrated Wacom. I’ve just never really been a pen guy. With that said I’d love BMD to ‘borrow’ a design element of the Nucoda panel and integrate a touch/pen sensitive UI screen on the panel.


  • Jamied
    Guest

    Even space for a little mouse pad would help so you wouldn’t need to lean over so far to mouse! Having a keyboard up front and accessible (and back lit) is very handy because you can use the JKL keys for transport instead of a jog/shuttle.
    Looking forward to the next episode in the series anyway, thanks!


  • Dan Moran
    Member

    Hey Yurii!

    The POTS control is like having the primary sliders that you see in the GUI on the panel. You have red, green and blue for lift gamma and gain. Some people prefer working this way as it’s slightly more precise than making adjustments on the balls.

    The printer lights pop up on the input sizing screen on the right panel. They are essentially the offset controls but mapped to printer points which was a very common way of grading film prints. I used to get lots of DOPs asking for a point more green but it’s not as common these days.

    The easiest way of thinking about the shift keys is look for any keys with small text above and below the lines. Up shift does what is written at the top of the key above the line and down shift does what it says below the line.

    A good example of this is Up shift + Base Mem resets the shot back to it’s original state.

    If you push the LOG button on the middle LCD screen an option called Joyball Offset shows up. Pushing this toggles the 4th ball between controlling the offsets and controlling the curves.

    There is so much panel things to cover we shall many insights to come!

  • what does the lever do?


  • Patrick Inhofer
    Guest

    Wipes and dissolves to Stills.

  • thanks patrick. i’ve always wanted to know that.

Page 1 of 3

Log in to reply.

1,000+ Tutorials to Explore

Get full access to our entire library of over 1,100+ color tutorials for an entire week!


Start Your Test Drive!
Loading...