| Series |
|---|
Day 23: 24 Insights in 24 Days New Year Marathon
Color Warper 101 Part 2: Diving Deeper Into Advanced Controls
In the first part of this series we dipped our toes in the Color Warper, covering the basic concepts & the overall interface.
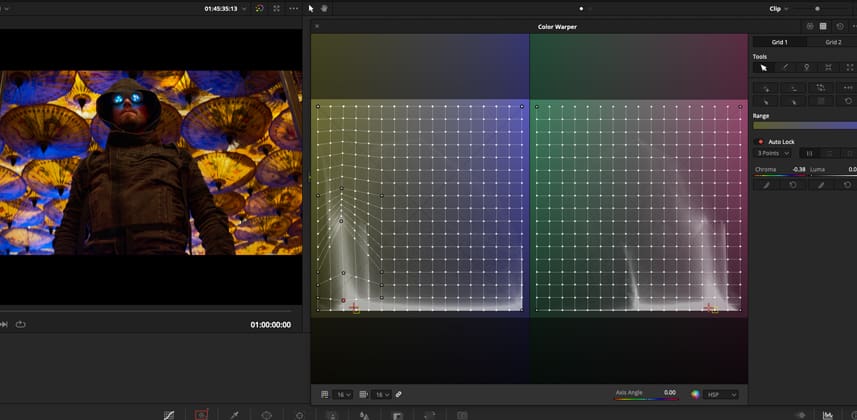
Now in Part 2, we’re taking a deep dive! We’ll take a look at the toolset for managing point selections and pins, the range selector, and working directly with hue, sat & luma values on a per-point basis using the control sliders.
Together, these tools enable finer, more nuanced control over specific areas of the Color Warper mesh and form the foundation for the creation of detailed looks.
Then, we’ll do a deeper exploration of the mysterious Luma-Chroma panel & see what kind of operations make sense there. It’s a lot of content, and a long Insight, so settle in but rest assured in part 3, we’ll put all we’ve learned into action to build some creative looks.
The Various Point & Pin Tools To Target Specific Hue & Saturation ranges
The Color Warper provides a handful of ways to select, pin & move specific ranges of points in the mesh. Using these tools, we can limit and tune our corrections in various ways to achieve more detailed results. Specific tools, such as Select/Pin Column & Select/Pin Ring – I’ll show you these in action in the video.
The Direct Control Sliders For Specific Types Of Operations
The hue, sat & luma sliders can be used on a per-point basis, or on groups of points. Combining these with the various point selection tools, we can achieve corrections that are not possible through direct manipulation of the mesh alone. In the Insight video we’ll explore these controls in more detail as away to manipulate the mesh with precision.
The Chroma-Luma Panel Is Great For Adjustments Along Opposing Color Axes
Due to the planar nature of two grids in the Chroma-Luma panel, we’re always working along opposing color axes. Those axes can be changed using the Axis Angle slider, allowing us to target any opposing axis on the color wheel.
And since the y-axis on the grid always represents luma, we can make those chroma adjustments at specific tonal ranges without affecting the rest of the image. Conversely, adjustments in the y-axis can be made to adjust the luminance of specific color ranges to achieve interesting tonal looks.
Caveat: The Color Warper In R17 Beta 7 Currently Breaks Resolve’s 32bit Float Image Pipeline
In the comments section of the first Insight in this series, Mixing Light member Jean Paul Sneider alerted us to a critical issue with the Color Warper tool.
Currently, in Resolve 17 b7, the Color Warper breaks Resolve’s 32bit float image pipeline, resulting in potential clipping. Basically, any information that is clipped before or in the Color Warper node will be unrecoverable afterwards.
I expect that this issue will be solved by the official release of Resolve 17, but in the meantime, I recommend that the Color Warper be used with caution. It’s probably best to use it near the end of node chains, after you’ve set overall exposure and contrast and won’t need to recover any clipped data.
Comments & Questions
Please leave any questions or comments you have in the discussion below!
-Peder
Member Content
Sorry... the rest of this content is for members only. You'll need to login or Join Now to continue (we hope you do!).
Need more information about our memberships? Click to learn more.
Membership optionsMember Login


