Note: Mixing Light contributor Joey D’Anna spent two days training on DaVinci Resolve 14 before demonstrating the software for 3 days on the show floor of NAB 2017 for Blackmagic Design. These are Joey’s thoughts after spending a week working (and playing) on Resolve 14.
Highlights Of A Massive Release
At NAB 2017, Blackmagic Design revealed a massive update to DaVinci Resolve. In addition to performance increases due to optimization across the board, Resolve 14 includes hundreds of new features for editing, color grading and finishing. The entire audio subsystem has also been replaced by Fairlight, which adds a compelling audio mixing and finishing toolset right inside of Resolve.
In addition to all that – Resolve Studio has also been drastically reduced in price to only $299.
I had the pleasure of working with many talented demo artists and Blackmagic team members at the Blackmagic booth this past week, where I worked showing off many of the amazing new features of Resolve 14. That experience got me thinking about what really stands out in Resolve 14.
So, instead of simply listing off every single one of the new features, in this Insight, I want to go in-depth on a few of my favorites, and explain why I feel they are significant for colorists (and a few features for the many colorists who also have to do a lot of their own onlining and timeline prep work).
While there are enhancements in all parts of Resolve – color grading is very well represented in version 14. Some of the best new features aren’t dramatic new functionality, but simple workflow enhancements that remove some of the day to day pain points that come up in long grading sessions.
Performance Enhancements
First and possibly most important, Resolve 14 has had major improvements in performance system-wide.
From playback to interactivity – the entire system just feels noticeably faster, and runs better on a variety of hardware. Even on an off the shelf iMac, version 14 feels very fluid and interactive.
Specifically, scrubbing and playback performance with H.264 and similar codecs is drastically improved (up to 10 times faster!). JKL playback is much more interactive, and both in the color and edit pages the delay between pressing play and getting full framerate playback is now basically nonexistant. Viewer zoom/pan/tilt is also smoother and faster.
Resolve 14 also adds support for Apple’s Metal on Mac, and has improvements in memory management and CPU usage.
Node Tree Improvements
One of my favorite new features is that you can now have disconnected nodes in your tree, without interrupting processing and video output. This is a huge benefit to me because it means I can build a node tree organically, without losing picture. It also lets me use the node tree as a bit of a scratchpad while building a look – if something isn’t working, or I want to try a few different options without starting over (or using versions), I can disconnect sections of node tree, place them to the side and continue trying other options.

Also new in the node tree is the ability to drop OFX plugins right in as their own node.
This will feel immediately familiar to colorists coming from other node-based applications, as you can now build looks with clearly labeled node operations right in the tree without going to the trouble of manually labeling each node.
The only downside is – since these OFX nodes don’t live on a corrector node, you can’t limit them with qualifiers/windows and you can’t add additional color grading on the same node. Having the option to work either way is a welcome feature, adding flexibility to the node structure.
The color page keyframe editor is also drastically improved – with the ability to lasso groups of keyframes and then simply move or delete them. This is a big speed boost if you do a lot of keyframing or roto. Gone are the days of painstakingly shift-clicking keyframes, which is a process I certainly will not miss.
Finally, you can now right-click on any clip in the media pool and make it available as a track matte on the color page.
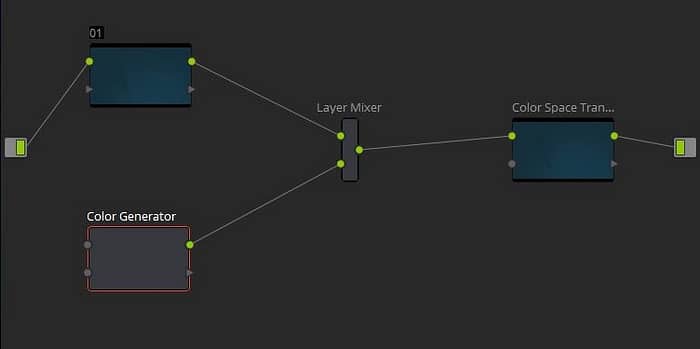
The old method required navigating to the matte file on your storage and manually adding it specifically as a track matte. Track mattes are not only useful for limiting corrections using external mattes (which I use a lot while grading docs – often I am able to get track mattes from the graphic designers, so I can easily grade around transitions and effects they have built), but they are also very useful for bringing in additional pieces of media into your tree.
For example, you can add grain, or textures, or anything else to your tree – and use a layer mixer and blending modes to comp them into your grade.

This feature also helps clean up your media pool, as you no longer need to add specific track matte clips. You can add all the media you need, then simply flag the ones you want to be available as track mattes afterwards.
If you use a lot of track mattes or additional clips in your node trees, this can save you a lot of time.
New Mini Panel Functions
As you may have read in my last Insight, I am a huge fan of the new Mini Panel, and Resolve 14 adds a few simple but useful enhancements for Mini Panel owners:
- LCDs and button backlights now have user configurable dimming available in settings
- Prev/Next frame buttons now double as top and tail of clip buttons when pressed and held
- Reset now resets the entire node tree when pressed and held
- Play fwd/rev now can be pressed multiple times to speed up forward or reverse playback in the color page.
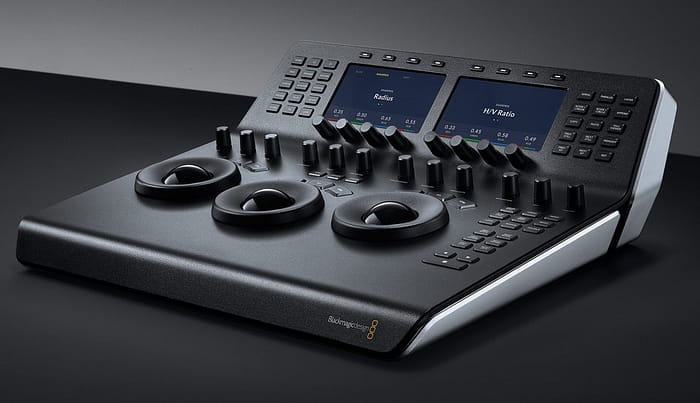
These changes don’t dramatically alter how the panel works, but they add functions that the Mini was lacking and many users may have had to map to external macro controllers.
New Resolve FX
The bulk of the new color features in version 14 come as new ResolveFX OFX plugins. The advantage of adding features this way is that since Resolve is a node-based environment – these effects don’t have to be one-trick ponies. They can be integrated into a node tree to help you build complex looks, and used in any number of methods or combinations.
The first and most headline-grabbing of these is the new Face Refinement tool. This effect will automatically analyze and track a face, recognizing not only its outline – but its structure.
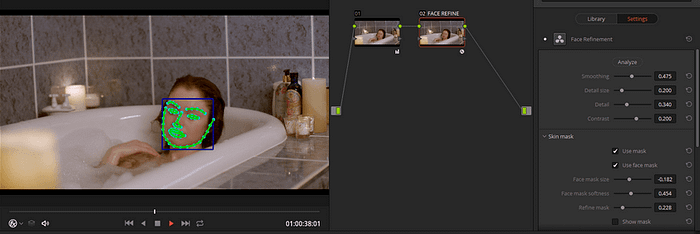
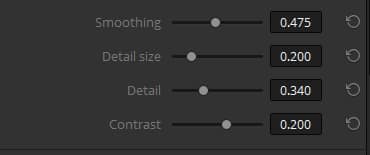
The obvious use case here is skin smoothing and beauty work, and the effect does it well. Not only do you get smoothing controls, you can specify how much detail to keep, and how small or large that detail is. These controls work both ways – they don’t have to improve the skin, they can be dialed the other direction to make it look worse if that is the creative intent.
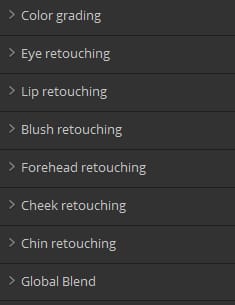
Face refine also lets you adjust everything from eye sharpening and lighting, all the way to the hue and saturation of lips, cheeks, chins and foreheads. Because the effect tracks the actual shape of the face – it gives you a huge variety of face-specific adjustments
These are great built-in features, but to me the coolest thing is that the face refinement tool generates a tracked matte of the face, which can be viewed by checking the “Show Mask” option. If needed, the mask can be tweaked with size, softness, and refine controls.
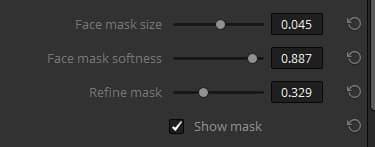
This matte can be easily used anywhere else in your node tree, allowing the face tracking to be used on any of Resolve’s color or effects tools.

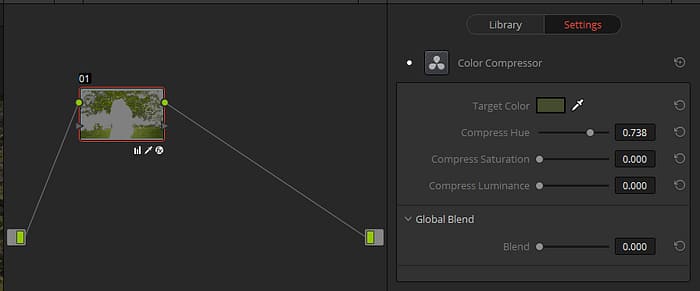
The color compressor is another great new tool. Color compressor allows you to select a target color, and gently push other hue, saturation and luminance values towards that color. This is very useful when combined with a qualifier or power window – for example, you can use the color compressor to even out a splotchy skin tone, or to push foliage from a range of yellows, reds and greens to a more unified green.
ResolveFX now includes a very powerful warping tool. Unlike mesh warpers which require you to manually subdivide and position a mesh, the new warper lets you put warping points anywhere in the image, and lets you constrain them simply by shift-clicking to add limiting points.
This allows you to do very specific shape adjustments on an image, and the effect is fully trackable using Resolve’s FX tracker. Once tracked – the warp controls stay live, and points can be added or changed without having to re-track.

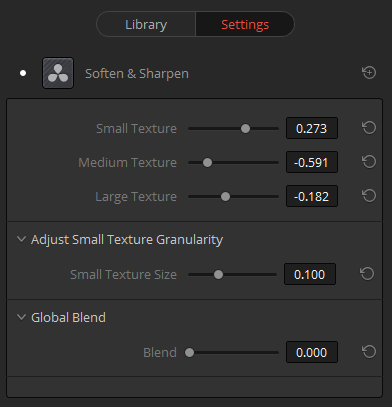
Soften and sharpen is one of a few new detail management tools in Resolve 14, and it is the one I am most excited about. Soften and sharpen divides the detail of your image into 3 ranges (small, medium and large detail).
This effectively gives you a single node frequency separation – allowing you to sharpen or soften different levels of detail in the image. This is not only great for skin and beauty work, but allows you to interactively dial in the texture you want to the image. You can even adjust the threshold between small and medium detail, allowing you to really fine tune the effect.
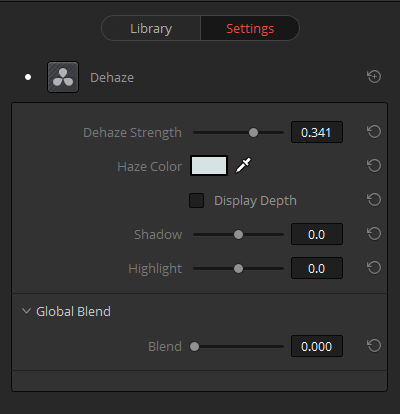
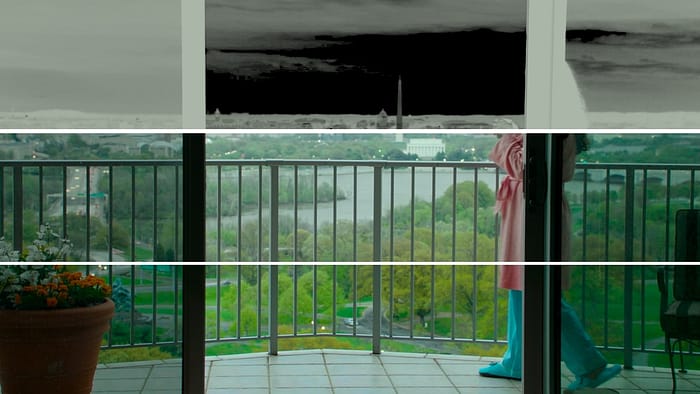
Dehaze is another awesome new tool. This effect generates an estimated depth matte, and adds color and contrast to remove haze from the image.
The great advantage over traditional contrast controls is that the depth matte only adds contrast where haze is present, so it does a great job of maintaining shadow detail while adding contrast and saturation.
You also can specify the color of the haze, and it will suppress that color, which is great for keeping skies looking clean. Just like the face refinement tool – the depth map can be displayed with a checkbox, and you can use that map as a matte input on any other node to build more advanced corrections.
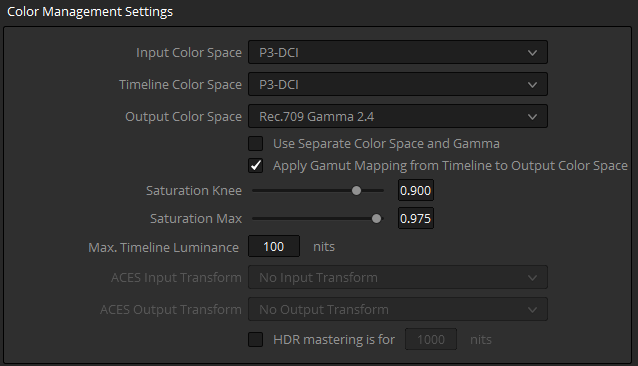
Lastly, Resolve 14 has added a new Gamut Mapping effect. This softly rolls out of gamut colors back into gamut while leaving in-gamut colors alone. It can be useful for recovering highlights in an aggressive look, but in my opinion it is most useful as part of Resolve color management.
Not only is gamut mapping available as a standalone effect, it is also integrated into both the color space transform effect and in the global Resolve color management settings.
So, for example if you are working in a color managed P3 project and need to make a Rec. 709 master – you can use gamut mapping in your color management settings to bring colors in your P3 grade that are out of Rec. 709 gamut into gamut, while avoiding harsh clipping and maintaining the creative intent of your grade because in-gamut colors aren’t affected.

I’ve only scratched the surface here, as there are a total of 21 new ResolveFX plugins. Most of them are included in the free version, but a few (including the new Face Refinement tool) are exclusive to Resolve Studio.
There are also new effects to fix dead pixels, stabilize luminance changes, clean up alpha channels, and much more. Combined with the improvements in the node tree – having these effects available will be a huge help for colorists.
Online Editing Enhancements
For those like me, who often both color grade and do some online editing, Resolve 14 has a few great editing features that will make online work a lot easier.
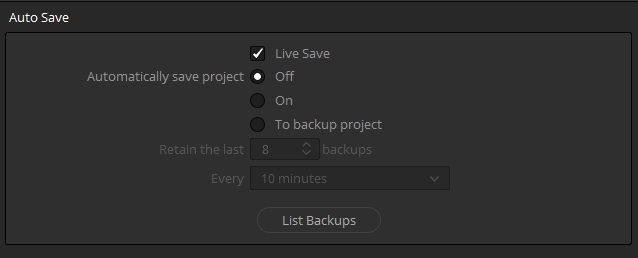
First – they have introduced a “Live Save” option in the auto save settings. This saves your project in real-time as you work (with minimal performance impact, since the saves are incremental) – preventing losses of work due to crashes, power outages, hardware failures, or any other unexpected disaster.
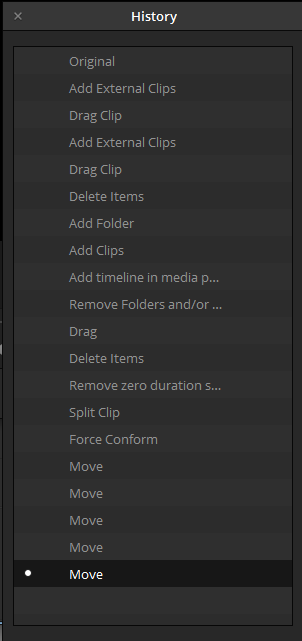
Resolve 14 also now has an all-new Undo History panel. This shows you a history of changes, and you can interactively go back or forward in time while your project and timeline update to reflect your selection. This can be very useful if you don’t notice a mistake you’ve made and continue working, then later need to go back and retrace your steps to find where you made the error.
Speaking of making mistakes and re-tracing steps – Everyone that has onlined a complex long-form show has at some point in their life accidentally knocked the show out of sync, or out of the network’s clock.
Often it’s as innocent an accidental ripple trim, or extracting a frame instead of lifting it. These errors can go unnoticed until hours of work later, which means a lot of detective work to figure out where you went wrong.
To help prevent this, Resolve 14 now has the ability to position lock a track. Unlike the normal lock function – while position locked, the online editor can do almost all of what they need to do. You can still slip, trim, add edits, adjust transitions, add or adjust effects – but the one thing it won’t let you do – is move any clips forward or backwards in time, or extract or insert anything.
This is a huge safety net when onlining and prepping complex picture locked shows for grading, and I anticipate using it very often.

Closing Thoughts
Overall, Resolve 14 has a very impressive set of new tools, workflow enhancements, and improvements to make your day easier as a colorist or as an online editor. For a full list of new features – check out the release notes here:
https://www.blackmagicdesign.com/support/readme/bc7f695cfa3541379901835974c406bd
The public beta for Resolve 14 is available now, however, all the usual caveats with beta software certainly apply. My general recommendation for beta use are:
- Always do a full backup of your database before upgrading. Databases can be updated to the new version, but cannot be reverted back – so if you need to downgrade to the current release, you will need to restore from a backup.
- I wouldn’t recommend installing the beta on your production machine if you have time sensitive jobs coming up and don’t have a backup system if you run into problems.
- Do not update mid-project. Finish any important projects before updating, or start off by installing the beta on a test or spare system.
- Don’t forget to submit feedback! If you find bugs, or if a tool isn’t working how you would like It too – the developers can’t fix it unless they know about it. A public beta is a great opportunity for artists to help shape the future of the tools they use every day, so make the best of it by submitting bug reports and feedback.
Now that Resolve 14 is in public beta we can all get our hands on it! I’m interested in hearing your thoughts about this update.
If you have something to add to the conversation or questions please use the comments below
-Joey

