Mastering The Multiple Personalities of Resolve’s Contrast-Pivot Controls

January 16, 2023

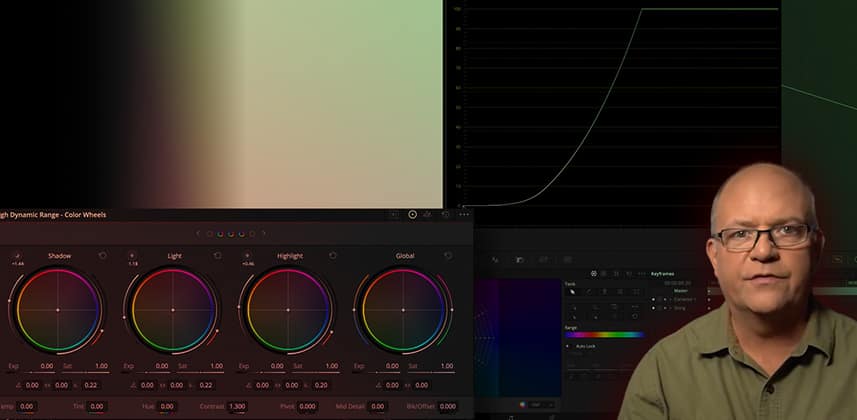
Colorist Patrick Inhofer shows you the three different and distinct behaviors of DaVinci Resolve's two Contrast-Pivot controls.


Note: This Insight is the first in a new category of shorter Insights, that we’re calling Quick Tips. Their running times will be between 2-6 minutes and focus very narrowly on a particular aspect of a tool or workflow.


Quick Tip: How DaVinci Resolve’s two Contrast-Pivot controls behave very differently

In the Mixing Light Forums, a Mixing Light member recently commented:

Note that the Resolve reference manual says, “the Contrast control in the HDR palette ignores the “Use S-curve for contrast” setting in the General Options panel of the Project Settings.”

– Maurice M.

Maurice is 100% correct. The Contrast-Pivot controls in the Primaries Palette is an entirely different tool than the Contrast-Pivot control in the HDR Palette. AND it behaves differently. It’s confusing. It’s not entirely clear HOW they are different if you pull up a few different images and start spinning the Contrast knob. You’ll discover that something is different between these controls. But what?

As is often the case, the key is to apply these controls to a grayscale image – and then evaluate the results.

Key Takeaways from this Insight

By the end of this Quick Tip, you should understand:

  • How and why the ‘S-Curve’ Project Setting ONLY effects the Primaries palette, not the HDR Palette
  • How the HDR palette is a hybrid of the two possible modes in the Primaries palette
  • The HDR palette behavior mimics optics and the human brain’s interpretation of adding contrast

Related Insights

Questions or Comments?

What do you think of this new shorter format of Mixing Light Insights (they may go as short as 3 minutes)? Have you noticed any other behaviors of the HDR Palette’s toolset that aren’t clear to you? My next Quick Tip will call a few of these behaviors out – although probably not in the way that you might think.

– patrick

Member Content

Sorry... the rest of this content is for members only. You'll need to login or Join Now to continue (we hope you do!).

Need more information about our memberships? Click to learn more.

Membership options
Member Login

Are you using our app? For the best experience, please login using the app's launch screen


Comments

Homepage Forums Mastering The Multiple Personalities of Resolve’s Contrast-Pivot Controls


  • Jim Robinson
    Member

    Interesting topic.
    I think that the gray scale ramp to show the s-curve is really good – but when using the old conventional contrast, someone who may not have worked that way before, might wonder why it was ever used.
    But if the example had shown something where the blacks were elevated and highlights were low, that the use of increasing the dark and the light would be more obvious.

    But the HDR tool to date I haven’t seen anyone explain it as I see it for functionality. And it seems that a lot of time that it is explained that we tend to look at it by using the comparison to the Primary tool or Log wheels. To my mind it is making the actual use of the HDR tool more confusing for users to understand how and why to use it.

    The photometric design of doubling light per stop and blacks not changing – is a good perspective and might even be surprising for some. But it is really easy to see when using the exposure adjustment on the HDR tool and comparing it to using the Offset.

    But for me the utilization and power of the tool is to set up a tonal balance, and then pinpoint areas to smoothly edit and blend back into the look.

    Using an audio analogy, people understand the use of using parametric eq and doing a frequency sweep on top of a tonal curve and narrowing the Q factor to zero in on a tone then adjust it by broadening the Q factor and reducing the frequency. You can then blend smoothly the pinpointed frequency back into the mix.
    So I approach the HDR tool with the same idea of setting up a broad area of a tone, by using the “Shadow” and “Light” wheels to set up the overall curve, then pinpoint areas that I want to adjust. By pinpointing in the “Black” or “Dark” areas to edit on top of the “Shadow” region or above middle grey, or adjust the “highlight” and/or “Specular” regions, then setting the roll offs to blend the edit smoothly into the tonal regions previously set by the Shadow and Light areas.

    Not sure If I have explained that correctly – would be easier with a graphic or demo.
    But the idea is that we need to look at the HDR tool as something that is not just another version of the Log wheels. It, in my opinion is written off too quickly by some of us. The mindset is to jump in and start spinning the wheels and then when not being happy with results, jump right back into the way we always have done it.
    All curves need to be gentle in audio or in the video tools – the HDR tool is to smoothly make adjustments and keep the transition of those adjustments in the smoothest controllable manner.


    • Patrick Inhofer
      Administrator

      Jim – If you want, we can talk about having you demo how you use the HDR Palette as your tool for setting tonal ranges. Email me (reply to any newsletter or use the Contact Us form) and we can chat about it.

      Thanks for the thoughtful reply!

  • Reducing contrast in the HDR tool will increase saturation, and vice versa. Perhaps this can offer a new way to create a bleach bypass look without having to use a layer mixer for example.


    • Patrick Inhofer
      Administrator

      Luca – I thought about discussing the saturation effects of the HDR palette contrast-pivot tool but it went beyond the basics of a Quick Tip. It’s probably worth its Quick Tip.

      I’m mixed about using it for Bleach Bypass unless the footage is shot specifically with this approach in mind. I find the highlights can quickly get out of control using the HDR palette’s contrast-pivot so the DP will need to carefully place the highlights to keep them from shooting to the moon while you’re opening up the midtones.

      But it’s an interesting idea.

Log in to reply.

1,000+ Tutorials to Explore

Get full access to our entire library of over 1,100+ color tutorials for an entire week!


Start Your Test Drive!
Loading...