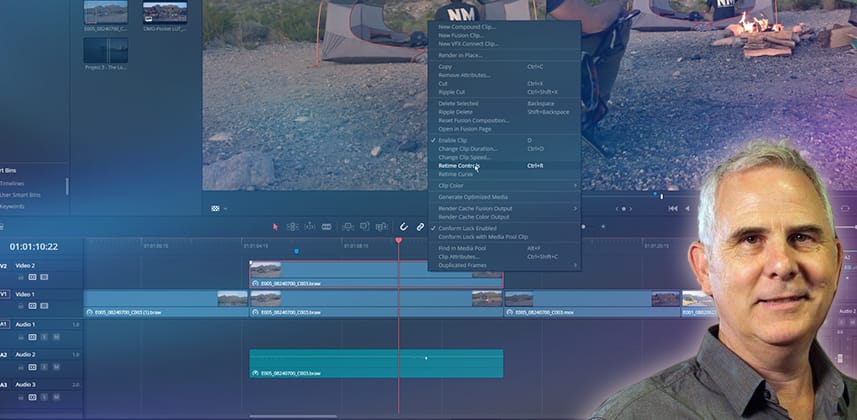
Tips for matching an imported timeline in DaVinci Resolve

June 8, 2023

Get tips for solving common - but challenging - mistakes when conforming an offline reference, including eye-matching variable speed changes.


Series

Several quick tips when conforming (matching) an imported timeline

It’s a common workflow to be provided with a rendered ‘guide clip’ (offline reference movie) approved by the editor. Usually, the editor exports a .xml or .aaf to be imported into DaVinci Resolve that reconstructs the timeline. But things almost always go wrong when the editor’s software platform differs from your software.

Your job is to fix all the problems that arise so your timeline matches the approved offline reference movie.

Depending upon your workflow, you may have only a few clips that need to be manually fixed to match the offline – or there may be hundreds of clips! In my experience, the average one-hour broadcast documentary will need 10% of the shots to be fixed (hello, drone shots.)

In this Insight, you’ll learn a few of my favorite tips and tricks for solving common timeline-conforming problems. We’ll also cover a few preference changes in Resolve that make this workflow easier.

Key takeaways from this Insight

By the end of this Insight, you should understand how to:

  • Change the frame rate of clips to avoid repeated frames
  • How to quickly recover if you change ‘clip attributes’ and the media goes offline
  • One method for immediately discovering if a single clip is used multiple times
  • A super-quick tip for attaching an Offline Reference to the timeline
  • A powerfully simple tip for eye-matching re-size/re-positions
  • Manually eye-match speed changes using the Re-time tool and markers

Related Mixing Light Insights

Questions or Comments? Leave a comment!

Is this Insight useful to you? Let us know! Mixing Light is all about community discussions, and we’re curious if you found this helpful, if you have something to add, or if you need more questions answered?

– Jamie

Member Content

Sorry... the rest of this content is for members only. You'll need to login or Join Now to continue (we hope you do!).

Need more information about our memberships? Click to learn more.

Membership options
Member Login

Are you using our app? For the best experience, please login using the app's launch screen


Comments

Homepage Forums Tips for matching an imported timeline in DaVinci Resolve


  • andi winter
    Member

    simple and nice! thank you!


  • Marty Webb
    Member

    You can avoid the media going offline if you disable Assist using reel names temporarily. You can still get a bit of slippage that will need correcting though.

    • Thanks, I’ll check on that. I don’t think I had that enable for this. I know that some of the clips I tested this on didn’t go offline, it depends on the extent of the clip handles I think.


  • Chris Coote
    Member

    I run into all of these problems when conforming as well. Regarding speed keyframing – I always ask for a copy of the Premiere or Avid project, so I can just open it up and find the exact frames on the timeline where things are happening.

    Also – for the offline reference clip – I’ve never liked using the offline option. I always just cut the offline in on an upper track – crop it halfway and turn it on and off by toggling D. Maybe it’s just me, but seems simpler…

    • That’s great if you can have access to look into the original edit for speed changes (and the time). I’ve seen lots of odd situations where data appears to have come over into Resolve, even with a keyframe on every frame, but the result is way off and it’s quicker to start from scratch. I’ve also seen quite complex speed changes import perfectly.

      <div>Regarding your method of comparing to an offline, I’d definitely disagree, I’ve inherited jobs set up like that and I found it quite annoying! Whatever works for you though 🙂 </div>


      • Patrick Inhofer
        Administrator

        RE: Offline Reference Movies – I disagree with both of you, and I agree with both of you! During conform, I like putting the Reference on the top track, cropping to create a box in the middle of the image (and if the timecode is burned in, I’ll crop out only an edge of the TC), and set the opacity to around 60%. The crop and the opacity allow for easy identification of various problems.

        When the conform is finished, I delete it off the top track and add it to the timeline as a reference so I can easily pull it up on the color page – if we need quick verification of the offline. But then that offline reference track is forever out of the way (where it can get annoying later in the finishing/grading process).


        • Mel Matsuoka
          Member

          The biggest benefits to using Offline Reference Clips when conforming are that A) You dont have to clutter up your timeline with a reference movie on the topmost track, and B) You can quickly drop in and out of Difference Mode using keyboard shortcuts (or my case, using a Stream Deck).

          I’m still fascinated by finishers who prefer to compare reference movies to their conformed timelines using split screens, boxes or “mix” dissolve modes. To me, Difference Mode is the easiest and most accurate way to ensure that your conform is lining up to the reference. If the frame is completely Black, then you know it’s aligned properly, and can quickly move on.

          I’m genuinely curious to learn what advantages there are to using splitscreens or mixed-opacity methods of comparing conforms to reference movies?

          I made a video a few years back showing how using Offline Reference Clips with Difference Mode shortcuts on a Stream Deck really speeds up the conform process:

          https://www.postproductive.tv/2021/06/17/davinci-resolve-tip-using-offline-reference-clips-with-difference-mode-when-conforming-timelines/


          • Patrick Inhofer
            Administrator

            Mel –

            I don’t particularly appreciate using the Difference mode: Verifying the reference movie to the conformed timeline is usually also when I’m watching the full timeline for the first time.

            If I use the Difference mode during the initial Conform, I hear the finished timeline – but all I see is black! I can’t watch the show/film/timeline.

            For me, the conform is a great time to get a sense of other problems that I’ll need to solve during color grading – and difference mode denies me that opportunity.


            • Mel Matsuoka
              Member

              Thanks for the perspective on your workflow, Pat. I guess for me, I approach watch-downs as a completely separate part of the finishing process. I know I’m going to have to conform the sequence to match the reference anyway, so I’d rather just watch the reference first as an objective viewer, without worrying about the conform or any other potential technical issues. Then after the watch-down, I do all the dirty work with Difference mode.

              I will say, though, that I’m still not particularly sold on the idea that “the crop and the opacity allow for easy identification of various problems”, at least in the sense of that method being more effective than the Difference Mode technique. Difference mode is 99 & 44/100% objective, as far as sussing out problems go. If you don’t see a completely black frame, then you know there’s something you need to take a closer look at. Opacity/crop/wipe based comparisons would seem to leave a lot of potential for errors, especially subtle ones.

              I guess my hatred for the conform process fuels my desire to find ways to get through it as quickly as possible while still maintaining accuracy, hence my love for Difference Mode!


            • Patrick Inhofer
              Administrator

              Mel – I hear you. One thing we both agree upon: The crop/opacity method requires eagle-eyed vigilance during playback. The same kind of vigilance I used back when I worked in duplication and did QC watching for drop-outs. If you looked away for a second, you had to back up and continue. The Difference mode method does not require that kind of vigilance to catch the subtle errors. But with the proper attention, the crop/opacity method is equally effective – IME.


            • Patrick Inhofer
              Administrator

              Mel (and anyone else interested in using the Difference mode when conforming), I was researching the content on Mixing Light using Resolve’s Scene Cut Detector, and I ran across a portion of an Insight showing how I use the Difference mode when getting timeline revisions from a client. It starts at around 6 minutes in 😉:

              https://mixinglight.com/color-grading-tutorials/dealing-revisions-with-scene-cut-detection-davinci-resolve/

  • That’s cool. With the Offline mode you can box or mix but not both!


  • Scott Stacy
    Member

    Well done, Jamie. Very helpful!

  • Finding same clips visually I just change the clip colour in the media pool. This will then show up every time that clip has been used. Again, if you know its been used multiple times, it helps knowing that first.

    I often get locked edits that can not change due to sync or other factors. I tend to use OF and SpeedWarp to “fix” the double frame or cadence issues. Just switching this option on, with the original frame rate works. Often I will then change frame rate, and then timewarp the length to fit and use OF and SpeedWarp. Sometimes, however this does not work, so, change frame rate and deal with the extra frames it is!

    I also never use the ‘Offline Clip’ mode during conform, and like Patrick said above, I have always put the offline on a top layer in difference mode and push up and down arrows to skip through cut points. I can quickly move through and edit to see any MAJOR issues, before going back to hit play or scrub the timeline with a 50% difference matte mix to do a proper play though. I will see any frame rate issues, or timewarp issues then, and often by that point, they are the only issues I am needing to fix

    • Yes, you need to try optical flow or Speed Warp if there’s sync audio but I prefer to have a clip run frame-for-frame and not have any other processing if it doesn’t cause any other issues.

      Regarding the offline mode – Mix Wipe is an option. I quite like your 50% with difference method.

Log in to reply.

1,000+ Tutorials to Explore

Get full access to our entire library of over 1,100+ color tutorials for an entire week!


Start Your Test Drive!
Loading...