Color Correcting with LUTs: The 3-Node Approach

Color Correcting with LUTs: The 3-Node Approach

March 13, 2013

Learn a node structure for using LUTs in DaVinci Resolve (and the reasoning behind it). Segmenting your workflow into clear distinct actions speeds you up.


Series

Organized Nodes Can Save You A Lot Of Time (And Hassle)

One LUT to rule them all,

One LUT to find them,
One LUT to bring them all
and 3-Nodes in the darkness bind them.

– Dan Moran

Why Three Nodes?

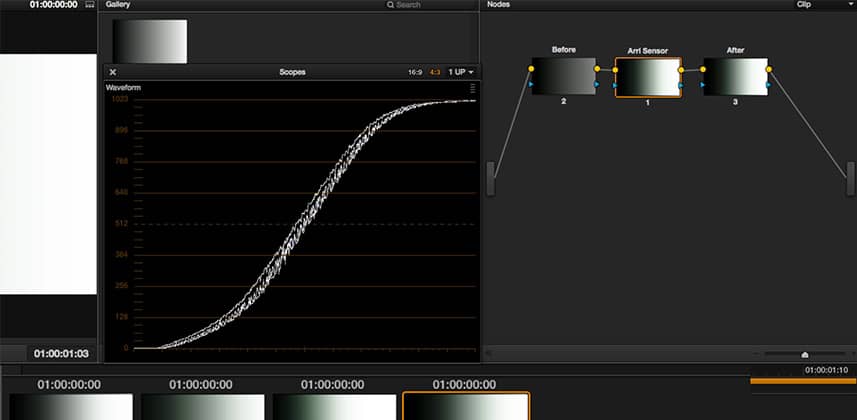
In Mixing Light Insight 008, I demonstrated how the exposure of an image can radically change the effect of any single LUT on that image. In doing so I used three nodes in DaVinci Resolve:

  • Node 1: We used this to manipulate our black- and white-points before the LUT.
  • Node 2: We called this our ‘Sensor’ node, where we applied the LUT to simulate us finishing what the sensor started.
  • Node 3: This was our ‘After’ LUT – but we didn’t do much with it in that Lesson.

In this article we’re going to look at why precisely I used this node structure and the reasoning behind it. We won’t be discussing Node #3 yet, that’ll come in a later article. But by the end of the accompanying video you should start getting the idea of the power of this approach – segmenting our workflow into clear distinct actions allowing any LUT we use to have its maximum impact.

The 3-Node Structure works in other apps too

This approach to controlling how you use your LUTs isn’t just for DaVinci Resolve. In FCP, Premiere or Avid these can be three separate filters – one applied after the other with the LUT filter being sandwiched between the other two. Enjoy!

-pi

Member Content

Sorry... the rest of this content is for members only. You'll need to login or Join Now to continue (we hope you do!).

Need more information about our memberships? Click to learn more.

Membership options
Member Login

Are you using our app? For the best experience, please login using the app's launch screen


Comments

Homepage Forums Color Correcting with LUTs: The 3-Node Approach


  • Caleb
    Guest

    Thank you for this! I am constantly questioning where I should put LUTs in my workflow and this explanation showing how they work with an image has really helped open my eyes on how they affect things in a workflow.


  • bella.zarraa
    Guest

    Very usefull, thanks


  • Patrick Inhofer
    Guest

    You’re very welcome!


  • zemariaabreusantos
    Guest

    Hi Patrick doesn’t Resolve automatically make the contrast adjustment in the LUT Node before it applies the Lut? I actually use the same techique, it’s great if you want to come back and change it later, you can turn the node on and off without turning the Lut on and off and that’s great if you’re showing the client what’s being done where. Thanks for the video


  • Patrick Inhofer
    Guest

    In Resolve’s Order of Operations (page 869 of the Sept 2015 User Manual), LUTs get processed well after any tool you’d use for contrast adjustments. If you’re looking to simplify your node trees, then yes, doing your contrast adjustment in the same node as applying your LUT is operationally identical to doing the same contrast adjustment in a node prior to the LUT operation.

    I like separating them out for the exact reason you say… to toggle off the contrast adjustment while leaving the LUT in play. It’s handy when you’re not sure which operation is causing you a problem.

    Also – for teaching and learning purposes, it’s much simpler to break these actions apart. As you get more experienced it’s okay to start combining these, if you wish.

Log in to reply.

1,000+ Tutorials to Explore

Get full access to our entire library of over 1,100+ color tutorials for an entire week!


Start Your Test Drive!
Loading...