| Series |
|---|
Texture Management Part 3 – The Other side of Sharpening
Previously in this series, we summed up:
- What is Texture?
- What are the tools for manipulating texture through sharpening?
- How do those tools affect our pixels when we sharpen our images in different ways?
Now, it’s time to check out the other & equally important type of manipulating textures in video – softening/blurring using blur, mist and unsharp mask tools.
Understanding blur, mist, and unsharp mask
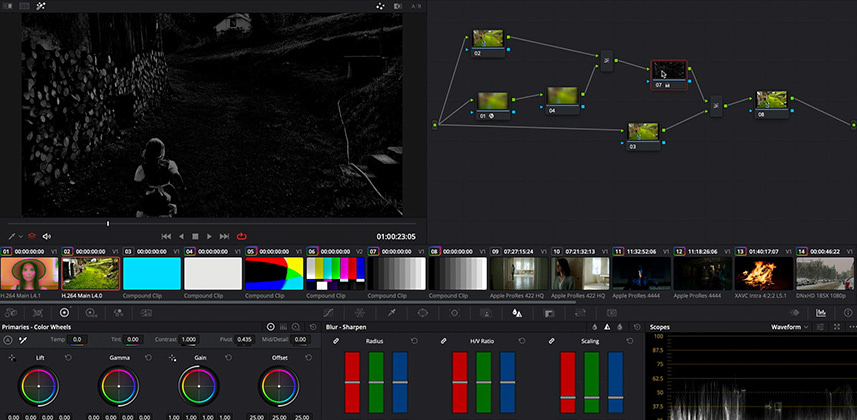
In this Insight, you learn how blurs affect our pixels and what are the different types of blurs available in DaVinci Resolve. In the last part of this Insight, we use blur to construct our own texture manipulation tool/node tree.
One key point, that’s perhaps even more true with softening than with sharpening, these blur operations are usually isolated. It is uncommon to blur/soften an entire image. Blur controls are also often incorporated as subsets of larger tools or plugins.
For example, noise reduction and face refinement/beauty workflows often incorporate blur controls into the tools themselves. Both of these operations will be discussed later on in this series.
Another type of softening, that we will elaborate much on in upcoming insights, is selective softening. This is softening based on detail size/threshold (similar to the previously discussed “level” slider – but can be much more powerful) .
Learning goals for this Insight
- What is Softening? How does it affect our images and pixels?
- How to use the negative side of the midtone detail slider.
- Understanding the Blur tab in the Blur palette.
- Evaluating the Gausian blur and Box blur OpenFX filters.
- Deconstructing Resolve’s Mist tab in the Blur palette.
- How to build a ‘simple’ Unsharp Mask in the node tree.
Additional Downloads

For Premium members, I’m sharing the Basic Unsharp Mask node tree tool from this Insight as an Additional Download.
This node tree should be pretty self-explanatory. However, if you get confused:
- Node 2 is your control node – the one you apply blur to, subtracting (in the first Layer Mixer) the edge data to add back in (the second Layer Mixer).
- Node 2 is the only operation to manipulate for this Unsharp Mask. We will elaborate on this tree/tool in later Insights and add several other control points.
You can, of course, compound this and add it to the end of your grade – which is where texture work is usually done.
How is this series working for you?
How is this Texture Management series is going for you? If you have questions, comments, or observations, use the Comments below.
– Hector
Member Content
Sorry... the rest of this content is for members only. You'll need to login or Join Now to continue (we hope you do!).
Need more information about our memberships? Click to learn more.
Membership optionsMember Login
Additional Downloads
Sorry... downloads are available for Premium Members only.
Become a Premium Member

