How To Upgrade Your Contrast, Pivot, Lift, and Gain Adjustments

July 22, 2022

Learn why colorist Cullen Kelly loves Contrast-Pivot for his contrast adjustments - and how you can upgrade them for more nuanced control.


Series

Flexing Fundamentals Part 2 – Revisiting Contrast

In Part 1 of this series, we talked about the most important adjustment in any image we grade: exposure. Today we’re discussing a close second: contrast. No matter what I’m grading, the very next thing I start dialing in after exposure is tonal contrast, and my preferred tool for this is the contrast/pivot knob pair. I love these adjustments for their simplicity and intuitive operation, but I’ve learned over the years there’s far more to them than meets the eye.

Let’s explore!

Key Take-aways for this Insight

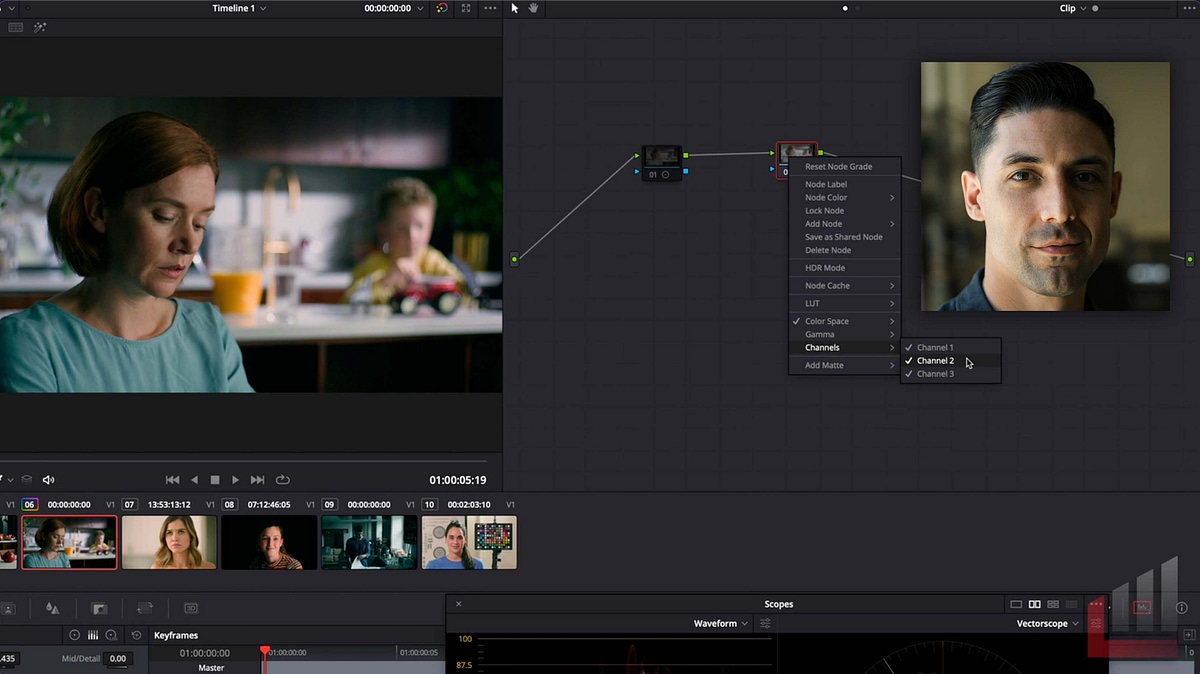
In this Insight we’re focusing on getting the most out of two of my favorite knobs in Resolve: contrast and pivot. Most of us take these knobs for granted, but as you’ll learn, they’re an incredibly versatile pair whose behavior can be tweaked and tuned with just a few simple setup adjustments.

Given how often we reach for contrast/pivot, getting the exact response you want out of them can make a huge difference in your grading results. In this Insight you should learn:

  • Increased awareness of the kind of contrast you’re introducing or removing from the image — linear or curved?
  • The difference between applying contrast to RGB channels vs Y/L channels, and how to set up your node graph to execute either with equal ease

– Cullen

Member Content

Sorry... the rest of this content is for members only. You'll need to login or Join Now to continue (we hope you do!).

Need more information about our memberships? Click to learn more.

Membership options
Member Login

Are you using our app? For the best experience, please login using the app's launch screen


Comments

Homepage Forums How To Upgrade Your Contrast, Pivot, Lift, and Gain Adjustments


  • Rajab Yahya
    Member

    That was so helpful, Thanks alot Cullen, i would love to see more technique like this with other colourspaces such as YUV HSV or HSL also;

  • Very helpful. Tip: You can also try out the contrast tool in the “HDR Wheel” section. It gives similar results (similar, but not the same). It behaves very differently compared to the default contrast tool.

    • Note that the Resolve reference manual says, “the Contrast control in the HDR palette ignores the “Use S-curve for contrast” setting in the General Options panel of the Project Settings.”


      • Patrick Inhofer
        Administrator

        Note that the Resolve reference manual says, “the Contrast control in the HDR palette ignores the “Use S-curve for contrast” setting in the General Options panel of the Project Settings.”

        True, BUT – the HDR Panel contrast always pins the Black point at zero (this makes sense given the HDR Panel’s ‘visual math’ approach to its operations). It’s only the highlights that are allowed to clip. I’ve attached the resulting HDR Contrast adjustment (in a color-managed project).

        This brings up a good point for anyone using the Mini Panel for grading that I’ve been meaning to document on Mixing Light on this very point. I’ll get that Insight out in the next week or so.


  • Jon Coy
    Member

    Really useful technique here, Cullen. I like the idea of this being set up in my fixed node tree in LAB. Will definitely try it on my next grade! Thanks for the insight.


  • Jamie Neale
    Member

    The thing to remember here is if the S curve option is ticked, the response will change depending on timeline colourspace.

    The HDR contrast has a rolled bottom and more linear response in the highlights but make sure to dial in your colourspace on the HDR palette tab to make the most of that feature.

    With the S curve option ticked the LAB/Log C combo tucks the shadows and rolls the highlights. Which makes for a great/fast way to compress your shadows and roll your highlights.

    Great tip Cullen! So many options.


  • Clement
    Member

    Hi Cullen,

    Could you show us how to do the “Lab contrast” technique in Fusion? With a custom tool and color transforms?

    I have been following your Creative color science masterclasses and I would like to add this tool into my lookdev process.

    I am already trying to find out how to do that on my own. No success yet ^^

    Thank you

    Regards,


    • Clement
      Member

      All good. I remember the formula.


      In Lab CS, with a custom tool

      R: (c1 – n2) * n1 + n2

      G: g1

      B: b1


      Silly me.

      Cheers,

  • Thank you for the insight. I found this neat little post about Lab CIE: https://www.xrite.com/blog/lab-color-space

    Thank you for taking me to the 3rd dimension.

  • Hi Cullen, nice tip ! If I’m correct, It’s basically be the same results if I’m adjusting contrast using the Y knobs of the mini panel (although It could be more tedious) ?

    Thanks,

Log in to reply.

1,000+ Tutorials to Explore

Get full access to our entire library of over 1,100+ color tutorials for an entire week!


Start Your Test Drive!
Loading...