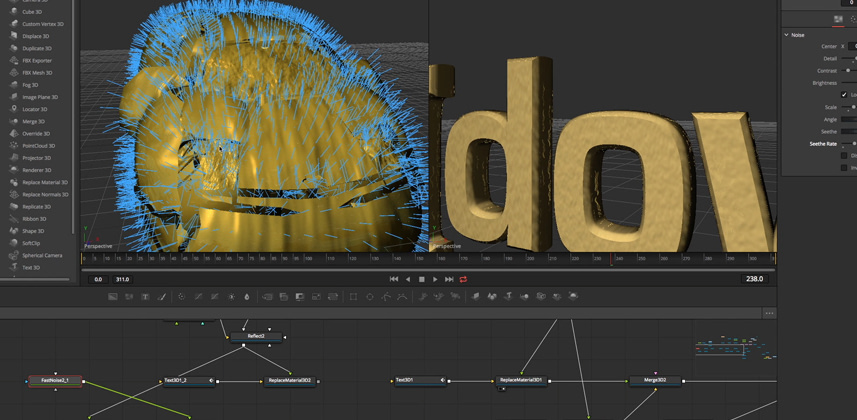
3D Materials & Object IDs in Fusion
In the field of 3D and CGI the subject of shaders and materials is huge. We barely scratch the surface in this Insight. For those who understand these concepts and are wondering how they can be applied in DaVinci Resolve Fusion, this overview gets you oriented. But for those unfamiliar with the world of 3D, start to learn the terms and tools of advanced Fusion compositors. It allows you to create some fantastic looking imagery! Get a glimpse of the workflows and opportunities afforded by Resolve’s integrated toolset.
In this Insight you learn:
- How to extrude 3D text with a bevel.
- Apply different looking materials to text or other 3D objects.
- Use the many template shaders, materials, and textures which come pre-built with Fusion.
- Make something look shiny, metallic, bumpy and reflective.
- Add multiple outputs from Fusion for use in the Color page in Resolve.
Just by adjusting a few controls in the specular highlights of a material we can change the appearance of something from matte to shiny, from plastic to metal. And then, to really make the difference, we add a reflection in its surface.
By applying a bumpmap texture as part of a material, we start to look at the concept of surface and vertex normals.
Auxiliary channels
In the first half of this video, we only consider the four channels that are commonly processed, namely RGB and A (alpha). However, most compositing software and certain file types can contain many more channels than that. For instance, you can use the Z-depth channel, which can be useful to drive the strength of a blur for a depth-of-field effect. Another supported channel which could be very useful to finishing editors and colourists is ObjectID. ObjectID gives you a hold-out matte (or key signal) for different objects within a 3D scene. This can be very useful to a colorist.
I also experiment with using the Normals channels for grading. It allows you to change the lighting on a 3D object after it’s been imported into the Color page in Resolve.
Creating a Normals Shader
It’s worth noting that in the experiments I’ve done here with Object ID and Normals channels the output will not be anti-aliased. After I did this, I came across a useful video from Eyeon software (original developers of Fusion) which explains this and shows how you can overcome the problem if you need to do this for real:
Feeding multiples outputs from Fusion to Resolve’s Colour page
I think the way that you can add multiple MediaOut nodes (tools) in the Fusion page and use those in the Color page in Resolve is something that can open out a world of possibilities, not just related to 3D in Fusion but for matte creation, tracking, etc. Let your imagination (and experimentation) run wild.
-Jamie
Member Content
Sorry... the rest of this content is for members only. You'll need to login or Join Now to continue (we hope you do!).
Need more information about our memberships? Click to learn more.
Membership optionsMember Login


