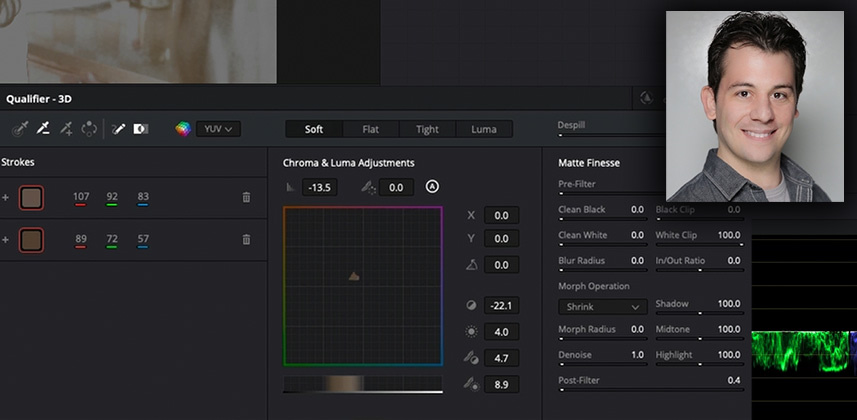
Better Keying Using DaVinci Resolve’s 3D Keyer

July 6, 2022

Are you pulling a key for color grading and Resolve's HSL keyer isn't doing it? This dive into the 3D Keyer may get better results, faster.


Understanding the essential difference between the HSL and 3D Keyers

Like many colorists and editors, I avoided using Resolve’s 3D Qualifier unless I was pulling a chroma key because I assumed it was limited to just that purpose. However, upon further inspection of the Resolve manual and some related documentation, I realized the tool had a lot more potential.

The problem is that the 3D Keyer’s default is for chroma keys. But you can change this behavior with a click and get much better results on non-chroma keys.

In this insight, I’ll show you a few pointers on how to best utilize this powerful tool.

About this Insight

This insight is a deep dive into utilizing Resolve’s 3D keyer qualifier and how it works under the hood. We’ll work through two shots to examine how we can utilize Resolve’s 3D Keyer to pull qualifications in situations where the HSL qualifier falls short.

You’ll also learn how to refine a ‘sloppy’ key using the 3D Keyer’s unique adjustments for defining your key.

My goal is to help you intelligently choose the best tool to utilize when you encounter a tough key in your next project. And to help you get better results more quickly in the 3D Keyer, so you can quickly test it when choosing between the two keyers – and not get lost in its controls.

Question or Comments?

Have you found consistent success (or failure) using the 3D keyer? Do you have questions or comments to share? Please do jump into this discussion as I’d love to hear how the 3D keyer is working for you.

– Jason


Member Content

Sorry... the rest of this content is for members only. You'll need to login or Join Now to continue (we hope you do!).

Need more information about our memberships? Click to learn more.

Membership options
Member Login

Are you using our app? For the best experience, please login using the app's launch screen


Comments

Homepage Forums Better Keying Using DaVinci Resolve’s 3D Keyer


  • Jim Robinson
    Member

    Good topic, Jason.

    I don’t seem to remember anyone covering this tool,  in this much detail before. I have, ( as you mentioned) thought that the tool was self explanatory and just jumped in and started keying.

    I have all kinds of issues with keying though, one of which is that by going that route, I have to then pixel peep every frame in the video. I have been burned in the past with a client asking what all that noise in the corner is about, on a frame that the lighting had slightly changed, and the chatter from the key was creating dancing pixels.

    So I think it is good idea to contain them with a power window as you did in the second example, so that doesn’t happen where something gets by you like that. Especially in a large project.

    But my newest philosophy is to concentrate on the subject and do all colouring and processes directly on that subject, and ignore everything else.

    This includes exposure, my workflow is to set the exposure and balance and adjust color on things like skin tone, and ignore everything else. Then the place where people’s eyes are looking have been given the attention that on secondaries, I can then expose or change colours etc. to the background or things in the frame that are not scrutinized by the viewers attention.

    But I have to say that I will now think about using the 3d keyer more often for some of the keying that still requires it. It is now, thanks to you another option for me.

    Great job as always Jason 


    • Happy to hear its added a new tool to your kit, Jim! It won’t work every time but it’s a great tool when it is the right one.


      • Rajab Yahya
        Member

        Do we have to use the key on the log image or rec709? which one workes best ? and is there some downside using both profiles? thanks


  • Rajab Yahya
    Member

    I have been waiting for tutorial or an explication on how to use the 3d keyer for such a long time.Thanks alot Jason, please make more of this and also  different colourspaces.


  • Marc Wielage
    Member

    One thing I find I have to always do is to turn on the HIGHLIGHT mode and check to see how much “chatter” is going on with the key qualification alpha. Sometimes the 3D mode is best; sometimes the conventional HSL mode is faster. I do appreciate the reminder from Jason on the “Soft,” “Flat” and “Tight”,” which help. The Matte Finesse modes allow me to really refine and stay on top of the keyed area, but I often rely on a tracked garbage window matte to avoid unwanted artifacts. I cheat and use all the knobs on the Advanced Panel, and you can get really fast going that route.

    • If I’m not mistaken –  I noted the following in the new Resolve 18 beta notes. You’ll be able to use your advanced panels with the new keyer soon enough, my friend!

      • Support for matte finesse and 3D qualifier in advanced and mini panels.
  • Great tutorial. I always dismiss the 3D keyer because it seems noisy to me, but I have never use it on the soft mode. I think that people like me, who has been on Resolve a lot,  don’t explore the new tools because they tend to be not fully developed when they put it on the software, and then forget there existence.

    The question I have is why you use another node instead of doing the power window in the same node as the keyer. Thank you!

    • No specific technical reason, but I wanted to remind that you can always use an alpha to pipe your work over to another node. I know some artists who qualify in one node and make adjustments in another, simply for organization.


    • Patrick Inhofer
      Administrator

      Jaime – I’ve gotten into the habit the same as Jason. Separating the power window from the keyer makes for much easier keyframing. If you’re not careful, you can find yourself in the situation where you have to redo the entire stack because your window keyframes are getting caught with your keyer adjustments.

Log in to reply.

1,000+ Tutorials to Explore

Get full access to our entire library of over 1,100+ color tutorials for an entire week!


Start Your Test Drive!
Loading...