Emulating Film Halation in DaVinci Resolve

January 2, 2020

Learn two different methods (with different levels of control) of emualting the beauty of film halation using DaVinci Resolve.


Series
Day 2: 24 Insights In 24 Days – 2020 New Year Marathon!

Elements of a “Film Look”

When people talk about the “look” of film in the context of color grading, it means many different things to many different people. There is no one “film look” – and people’s tastes and styles vary widely. Some refer to the color characteristics of particular print stocks. Others think of grain. Some see it as a soft roll-off in the highlights and shadows.

Photochemical film has many different properties that are different then digital acquisition methods and for creative looks, colorists are often asked to emulate some or all of them in grades.

In thisĀ Insight – I’m going to talk specifically about one aspect unique to film: Halation.

What Is Halation?

Halation is a reddish glow around high contrast edges. In photochemical film, it is caused by light passing through all the layers of film, but the brightest areas bouncing off the back of the film or camera body and into the lower layers of emulsion. Most modern film stocks feature an anti-halation backing, which absorbs most light – but it isn’t perfect and halation still happens.
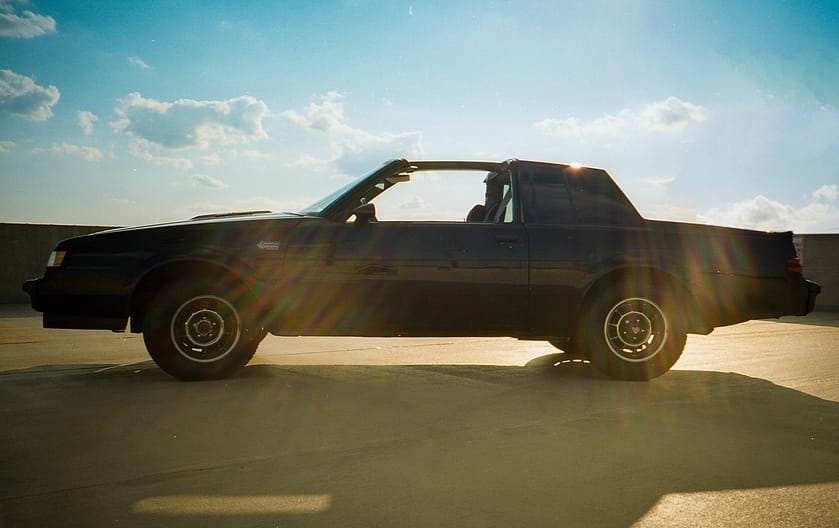
In this film frame, halation is visible around the edges of the car, and the rear tire.

Various film stocks have different types of construction but in most motion picture films, light bouncing back hits the red layers, so halation has a bit of red/yellow-ish tint.

Why Emulate A Defect?

At it’s core – halation is a defect in film acquisition. This is why most film stocks have backings to reduce it. However, like many things in filmmaking – it can be a bit of a happy accident. A lot of people (myself included) think it looks beautiful! This is entirely subjective, but I love the little bit of bleeding around bright edges. I feel like it gives the image a bit of personality that helps make high contrast areas of transition more visually impactful.

Two totally different techniques

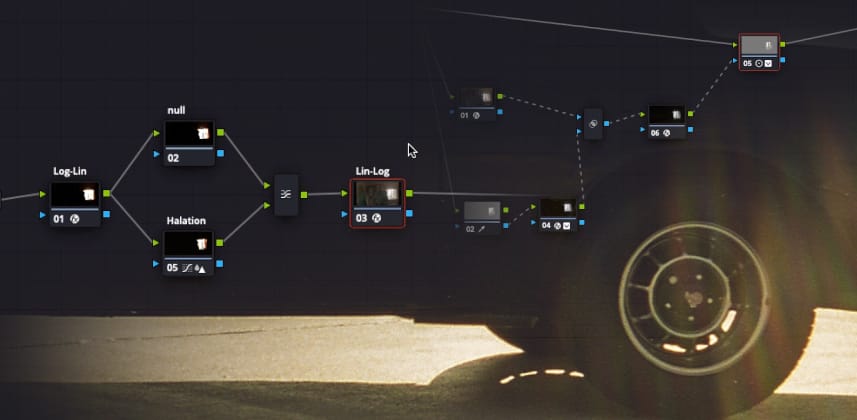
When a member reached out to us asking how to emulate film halation, Dan and I immediately started discussing it as we both love a lot of the imperfections of film. As we compared our methods, we found that we were using totally different approaches. Each yields good results, and in this Insight I’ll walk you through both our techniques so you can decide what is best to use on your projects.

UPDATE: The first technique came from a powergrade that Dan had sent me, and has been using in his projects. We didn’t know the original source of the technique, but after publishing a member pointed us to this thread on Lift Gamma Gain where colorist Matthias Tomasi explains it in more detail. Thanks to Matthias for this great method!

For our Premium members, I’m also including a downloadable PowerGrade of my method for you to use as a starting point.

-Joey

Member Content

Sorry... the rest of this content is for members only. You'll need to login or Join Now to continue (we hope you do!).

Need more information about our memberships? Click to learn more.

Membership options
Member Login

Are you using our app? For the best experience, please login using the app's launch screen


Additional Downloads

Sorry... downloads are available for Premium Members only.

Become a Premium Member
Comments

Homepage Forums Emulating Film Halation in DaVinci Resolve

Page 1 of 2

  • Jean Paul Sneider
    Guest

    Is it just me or there is no video?


  • Pat Inhofer
    Guest

    We’re not sure why it disappeared. But it’s back now.


  • Matt Mahoney
    Guest

    This couldn’t be more timely! I’ve been trying to emulate helation for a while now and I landed on sort of a mixture of these two methods. But I had to tweak it on almost every shot due to a luminance shift that affected the shots and sent highlights into clipping territory. Thanks so much for sharing both of these methods, I’m excited to try them!


  • Joey D’Anna
    Guest

    Thanks! yea thats part of why i like to put it at the beginning of the pipeline, since I’m not adjusting luminance in any significant way – it shouldn’t blow out highlights – it just acts like the halation was there on the original source.


  • Matt Mahoney
    Guest

    I was just messing around with it on a super 16 emulation I’ve been working on for a while. I started the look from scratch, focusing on tweaking the halation to get it looking right on the raw clip, made that a compound node, and then re-built the whole look with a denoise (optional to use but in the first node), the halation on second node, and then everything else after that in my fixed node tree. It’s really responding well, so cool!


  • Jason Bowdach
    Guest

    Wow, really knocking it out of the park to start off the year! Awesome insight, @tao-ml-d98c1545b7619bd99b817cb3169cdfde:disqus . I’ve been using a method similar to the one you said Dan uses but I LOVE the concept of creating a matte with edge detect. Super flexible and may even look better than the Log-Lin + CST method. Thanks again for the great insight and inspiration to experiment !


  • Scott Stacy
    Guest

    Great Insight! And, as usual, the technical aspects and versatility of your signal path is mind expanding.


  • Wietse v
    Guest

    Thanks for this Insight. I might have missed it but did not see a mention from where the linear halation technique originated. As far as I know this technique was first very clearly explained on the LGG forums, by Matthias Tomasi. He also goes deeper on the logic behind this technique than this insight. I don’t mind seeing it repeated here in this video it’s a great technique! But again, no mention of Matthias feels a little wrong since this is paid material.


  • Joey D’Anna
    Guest

    Thanks Wietse for the heads up. I wasn’t aware of a LGG post by Matthias. I’m certainly happy to give credit where it’s due and didn’t mean any disrespect – I’ve added a link to the article to the LGG thread. In talking to Dan it seems like he had a power grade of that technique, but didn’t remember its origin.

    As you can see in the insight, I prefer the method that I show building from scratch. Both methods produce great results – but I feel it’s more accurate to the physics of halation to isolate based not only on brightness, but also on edge-detection, to limit the effect to hard transitions of light, not all bright areas.


  • danny phillips
    Guest

    Hey Patrick, I think the video has disappeared again..?


  • Pat Inhofer
    Guest

    And – it’s back again. Thanks for the heads-up.


  • ZĆ© Maria
    Guest

    Hi Jou,

    I really enjoyed this insight.

    I believe I’m the one who gave the powergrade to Dan (indirectly). I developed that powergrade in Resolve based on what Matthias described on the LGG forum, as his approach was designed in Nucoda. I believe the powergrade Dan is using to be the one I shared on a group you’re also in Joey. I also shared it at the time on that LGG thread.

    I really like your method, I downloaded the powergrade, it gives excellent results, however I still prefer the one I developed based on Matthias’ technique, I think there’s power in it’s simplicity and the fact that it’s converts the log to linear means you can use it with any log curve from any camera, whereas with keying there’s more guess work involved.

    Also I have to disagree with your argument that you cannot customise it: by changing the location of the 100% control point of the custom curve toll on the lower node you can control the threshold of the effect and the intensity is controlled by the amount of blur you dial

    The added contrast you mention can also be avoided solved by using a parallel node instead of a layer node and pulling the top right point of the custom curve considerably to the left on the top node (essentially recreating the add blend mode). I started doing the halation emulation this way since blend modes do not work in an ACES workflow, which I use often.


  • Joey D’Anna
    Guest

    Thanks! And thanks for making the original powergrade as well!

    All great points. I don’t want to say that my method is the only, or even the best method – but it’s definitely given good results for me. I actually haven’t tried mine in ACES- I’ll be curious to see how it holds up there.

    And yea I should have been more specific – both methods are dfinitely customizable, but the customization I was more referring to was to do with the shape of the halation – ie how much you blur the mask, and the different edge detection settings that are available to effect its width, spread, and softness.


  • Michael Y
    Guest

    Mind blown! Will need to watch this a few more times and try it. Thanks!


  • Lawrence M
    Guest

    brilliant

Page 1 of 2

Log in to reply.

1,000+ Tutorials to Explore

Get full access to our entire library of over 1,100+ color tutorials for an entire week!


Start Your Test Drive!
Loading...