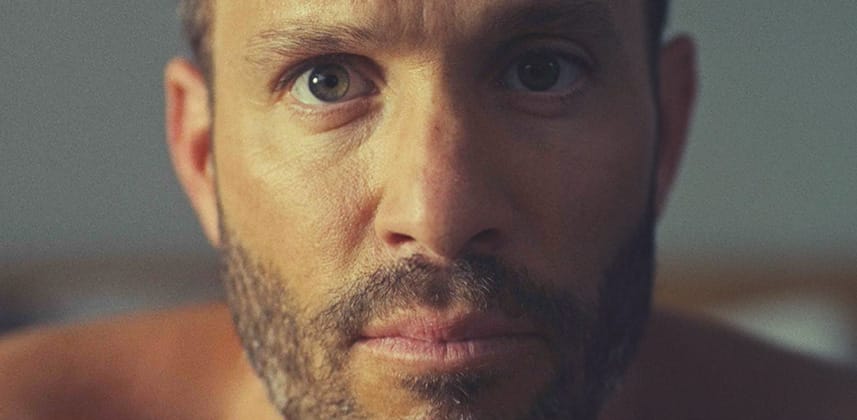
Look Inspiration – Warm Commercial Look

November 16, 2015

Dan shares his attempt at matching the shot on 35mm film warm commercial look of one of his favorite commercials this year.


Series
Look Inspiration – Warm Commercial Look

Matching a beautiful 35mm commercial look

Here in the UK there is an amazing partnership between director Dougal Wilson and colorist Jean-Clément Soret. I find that when they work together they frequently go for a warm commercial look which has been shot on 35mm film.

I have always been a fan of their look and decided to dive in and see if I could build it myself!

Some things to note is that they shot the commercial below on ACTUAL FILM!

No plugins and no grain. Just straight up good old fashioned film.

I do my best to replicate the look from some footage shot on Red Dragon.

Check out the commercial below before watching my insight to get an idea of the look!

Enjoy and hopefully you had as much fun as I did with this look!

– Dan

Member Content

Sorry... the rest of this content is for members only. You'll need to login or Join Now to continue (we hope you do!).

Need more information about our memberships? Click to learn more.

Membership options
Member Login

Are you using our app? For the best experience, please login using the app's launch screen


Comments

Homepage Forums Look Inspiration – Warm Commercial Look

  • Another awesome look breakdown. Love these type of insights, as they help teach recreating a look while evaluating it at the same time.. Thanks Dan!

  • Thanks for this, Dan. Really fun breakdown. JCS definitely comes up with some good stuff. I love his Stella Artois commercials as well which play off this look.


  • Dan Moran
    Member

    It’s hard to put how I analyse a look into words so I’m glad you guys enjoyed it! I’ll make sure to do a few more in the next couple of weeks. A lot of those looks do come from the lighting so it can be tricky to break down an awesome car commercial when I don’t have similar footage etc..

  • while similar, Would you consider doing a colder look? This is a HUGE request and Id love to see what direction you go w a colder image yet keeping the film like qualities.

    Off topic, but recently started watching some 2000 era shows (ex Fringe) and its incredible how much TV has changes since moving almost entirely towards digital capture. While offering a some uniquely cleansharp looks, the most common request I get is to match to a film captured source like your example.


  • Dan Moran
    Guest

    For sure man! I’m actually more of a cold look kind of guy myself so I’ll be able to do that easily 🙂

  • Looking forward! I personally like colder looks myself, but great to know a good variety. Who know what someone might ask for 🙂


  • Paul Willis
    Member

    Great stuff as always. Just shows you how great looks can be achieved with mostly simple lift/gamma/gain adjustments and a great eye. My grading has improved ten fold since adopting some of your techniques.

  • Dan, you’re honesty and humbleness is refreshing and is a big reason I joined. I love your sensibilities and approach when breaking down a grade. Keep them coming.


  • ThomasBurns
    Guest

    Great tutorial, Dan! Can you talk briefly about why some nodes come before the LUT and some after? Also, as a side note, it seems like the green in the background of the reference image plays a big role in complementing her skin tones. Curious if you would in this situation consider using something like “hue vs. hue” to shift our background a bit green?


  • Chris Detjen
    Member

    Agreed, seems like there are nodes after the LUT that affect tonality. I’ve heard you in other tutorials mention keeping those before the LUT. I did see your video about how placing a curve or LOG control before or after the LUT has different effects. Be nice to expound further upon the proper or recommended placement of nodes when using LUTs.


  • hirumhorkweller
    Guest

    Dan, thank you for this insightful tutorial. I made it through to the grain matte you added, but for the life of me I cannot figure out how to get DaVinci (12.5 free version) to call up my grain clip as a matte. Right clicking the node and choosing “Add Matte” does not show the grain as an option, and when I go to the media pool and right-click and choose “Add to Media Pool as a Matte” it still does not show up in the Add Matte dialog for the node. What am I missing?


  • hirumhorkweller
    Guest

    Cancel the above- I just upgraded to Resolve Studio and now it works just fine. Either the free version doesn’t allow this, or my instillation was corrupted somehow.

  • Dan, thank you for the tutorial. Love to see more of this series

Log in to reply.

1,000+ Tutorials to Explore

Get full access to our entire library of over 1,100+ color tutorials for an entire week!


Start Your Test Drive!
Loading...