Optimizing X-Keys For A Colorist Control Surface

Optimizing X-Keys For A Colorist Control Surface

December 6, 2015

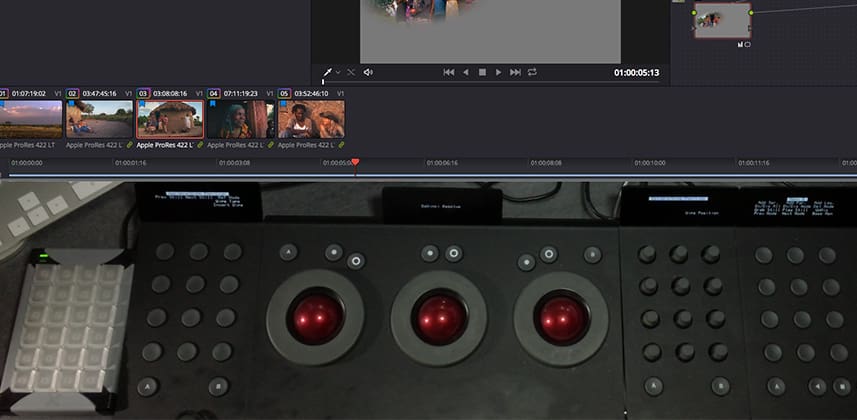
Learn how to maximize your color correction speed if you're using a Tangent Element or Avid Color by optimizing X-Keys, a low cost USB hardware add-on.


Series
Day 5: 25 Insights in 25 Days Holiday Marathon

Optimizing X-Keys: How to Speed Up ANY Colorist Control Surface

I recently wrote an Insight that compared customizing your User Interface to a $25,000 steering wheel for IndyCars. Of course, that analogy can be extended to attaching a colorist control surface to DaVinci Resolve or Adobe SpeedGrade (and even FCPX, which I’ll be talking about in a few weeks).

Unfortunately, for the most part, control surfaces feel like they’ve been grafted onto the software. Even Blackmagic’s $30,000 control surface can be maddening to use since it’s buttons were optimized for DaVinci Resolve 7—and haven’t changed since the software was released on the Mac!

Control Surfaces are not the smooth, integrated extension of the User Interface that you’d expect

Except for the really expensive, Big Iron control surfaces used in only a few hundred suites worldwide, you often feel like you’re pushing twice as many buttons as you need to and you’re not getting quite the experience you hoped for.

Usually, there’s nothing you can do about this lack of integration

We are at the mercy of the software developers and their commitment to supporting these devices. SpeedGrade has one of the best integrations I’ve seen (specifically with the Tangent Element). DaVinci Resolve? That’s another story.

DaVinci Resolve has been neglectful of their control surfaces for 5 years

Yes. They support every brand of control surface that’s developed. But none of the integrations are even close to being optimized with the full-time colorist in mind.

Not. EVEN. CLOSE.

In a cruel twist for colorists who own it, Blackmagic has been most neglectful of their own high-end control surface.

With Resolve, this state of affairs is counter-intuitive

I’ve often thought that the real problem with DaVinci Resolve Free is that with no dollars flowing in from the majority of their user base, eventually they’d lose interest in the app and let it whither. Instead, the exact opposite has happened. The features most actively developed are those for the free user base… and their most expensive, exclusive, high-end and easily tracked (from an accounting standpoint) hardware device across their entire range of products is…

Ignored. Neglected. It’s impossible for a colorist to sit down with the Blackmagic control surface and know what every button does without major assistance from someone else.

But because Resolve doesn’t allow us to remap control surfaces, do we have to live with their frustrating mappings?

It turns out… there is a surprisingly low-cost add-on that can turbocharge your control surface.

A while ago, Josh Petok did a fantastic Insight on using X-Keys to speed up our interactions with our software. He did such a great job selling the utility of that device, both Robbie and I went out and bought one. I really loved the mappings that Josh demoed but I felt like we could kick it up another notch.

Yet, with DaVinci Resolve 11, I just couldn’t access the buttons I needed to get the results I wanted.

Optimizing X-Keys for the Tangent Element

DaVinci Resolve 12’s enhanced keyboard mapping has made the X-Keys device WAY more useful

Now that Resolve allows the mapping of ANY menu item to any keystroke—with a little bit of work, I’ve made my control surface much more efficient. Actions such as versioning, moving through references and navigating keyframes have removed dozens of button pushes per hour.

I’ve even mapped X-Keys to give me visual feedback when Looping, Highlight Mode or ‘Show Current Clip with Handles’ are enabled. I don’t get lost in those modal states half as often as I used to, thanks to some visual feedback I’ve programming into X-Keys.

Paid Insights Library Members will be able to download my X-Keys map and my Resolve 12 keyboard mapping for it

Very shortly I’ll also include a PDF of how my X-Keys buttons are laid out.

Remember: This isn’t just useful for Resolve. The notion of using your X-Keys device to remove one of the buried pages in your colorist control surface? That’s what I’m selling you here. No matter the control surface you’re using or the software you’re using it with… a carefully considered plan-of-attack will make you control surface investment much more valuable.

Here are the links from this Insight:

-pat

UPDATE: December 15, 2015

I’ve uploaded a new set of Resolve and X-Key mappings, appended with ‘v2’. If you’ve downloaded these prior to the Update, you’ll want to re-download. I solved a few little quirks and bugs and have the X-Keys working super-reliably with every button push. Also, my Resolve keyboard mappings were missing a few keystrokes 🙁

Download version 2 of Patrick’s X-Keys Mapping and Associated Resolve Keyboard Mappings

UPDATE: December 16, 2015

This is Robbie and I’ve hijacked Patrick’s post! Pat and Josh’s Insights got me thinking about my mappings.  Since I mainly used the full Resolve control surface at work and the Element in my home studio, I thought about what I wanted to have faster access to or was missing on the Element.  Here is my X-Keys setup and corresponding Resolve shortcuts

Download version 1 of Robbie’s X-Keys Mapping and Associated Resolve Keyboard Mappings

Member Content

Sorry... the rest of this content is for members only. You'll need to login or Join Now to continue (we hope you do!).

Need more information about our memberships? Click to learn more.

Membership options
Member Login

Are you using our app? For the best experience, please login using the app's launch screen


Comments

Homepage Forums Optimizing X-Keys For A Colorist Control Surface


  • Marc Wielage
    Member

    Well-done, Patrick. I couldn’t live without my X-Keys panel. I figure I save about an hour a day with this thing, and you add that up over months, it’s a lot of time. I still think BMD could offer far more keyboard shortcuts for commonly-used operations. Previous Node/Next Node is high on my list.

  • Awesome! You probably know Patrick how the functions can be buried in submenus in the Tangent Wave. Now I know what to ask my wife for Xmas. 😉


  • Patrick Inhofer
    Guest

    Marc – You’re using the larger XKeys panel, yes? And are you using it with a control surface?

    I agree, the shortcut opportunities added in R12 are nice but don’t go far enough. Basically, we need the ability to add shortcuts to everything a control surface can interact with – plus every single sub-panel in the UI. I should be able to program pulling up the Sat vs Sat curve with a button push.


  • Patrick Inhofer
    Guest

    It’s a terrific present to give yourself! If XKeys did endorsement deals, I’d endorse them 🙂

  • HUGE thanks for sharing. Gotta convert it to PC (Macroworks)


  • Marc Wielage
    Member

    Yes, using an X-Keys 80 with an MC Color panel, though I don’t use all 80 keys. I agree, pulling up each of the Curves panels is something I use all the time — Hue vs. Sat in particular. Just bought a new 27″ monitor and now have to reprogram about 75 keys since all the coordinates have changed… 🙁


  • Verne Mattson
    Guest

    Great followup to Jason’s excellent Insight. I have the XKeys 24 which I use with my MC Color panel. I find X-Keys to be a great time saver as well, and in addition to Resolve I have functions for Avid and FCP X. Like Marc I have all the Curves mapped, although I’m going to load up your settings and explore using the double-punch function. I have taken the XKeys 24 on freelance jobs, but because of having to remap mouse clicks on different size screens, I’m now only using it on multiday gigs.


  • Andrew Webb
    Member

    Very good of you to share. Thanks.


  • Patrick Inhofer
    Guest

    If you’ve downloaded my mappings for X-Keys prior to Dec 15, you *definitely* want to redownload them! There were a few quirks with my mappings (such as, switching from the Gallery to the Timeline would always advance you to the next still before making the switch). I figured out what was going on and solved them.


  • Robbie Carman
    Guest

    and I’ve hijacked your post! I added my initial mappings – while not as sophisticated as yours for variety people can try them out. Each button is labeled. I’ve also done some need toggling on a few. Thanks to Josh Petok for the help!


  • JRob
    Guest

    I ordered my own X-Keys 24 after reading this. And I’ve started playing around with Patrick’s mappings. Lots of good stuff in there
    already. I love how the LED turns on when activating Loop mode or Highlight Mode. I’ll probably be keeping most of these mappings and add a few of my own.

    I’ve been experimenting with a cycle action (so instead of a simple toggle that goes ON-OFF, I can have STATE1-STATE2-STATE3…with the sequential press of a single button).

    For instance, I could use one button to cycle through the Media, Edit, Color and Deliver pages (though I like having a dedicated button for each page, so probably not the best example). I’ve done this for Patrick’s Reference Wipe Mode toggle, which toggled between GALLERY and TIMELINE. I now have the same button combination cycle through GALLERY-TIMELINE-OFFLINE. It’s nothing fancy really, just using a Counter Building Block (Calculation) and comparing the output to Constant Blocks. If anybody wants a detailed explanation I can do that.

  • Can you please explain how to show playback on second monitor.

    Thx Greg


  • Andrew Webb
    Member

    I’d be interested in details. andrew@seriousretouching.com


  • Patrick Inhofer
    Guest

    JRob (and anyone else who wants to share their mappings),

    If you want, you can email me your mappings and I’ll place them at the end of this post as ‘Members Helping Members’. Just be sure to include a Read Me .txt so when people open your mappings they know how your mappings differ from what I show.


  • JRob
    Guest

    I’m still improving my mapping as I work with it. Maybe I’ll send it in a few days when I’m satisfied with it.

    The first row is : Media – Edit – Color – Deliver
    But I find I don’t switch pages that often so I might save those buttons for something else

    The second row is for filters:
    All Clips – Graded/Ungraded – Any Flag/No Flag – Common Media Pool Source.
    The last two buttons pressed together cycle through the filters for each Flag color. I tend to use filters and flags a lot, so that’s my favorite row.

    Row three is:
    Cycle through Primary Tabs – Color Wheels page 1/2 – Cycle through Curves subpages – Cycle through other Secondary tabs
    Another winner for me, though I might tweak it a bit.

    The next two rows have two functions on each button. I use the bottom left button as a mode switcher (turns red or blue depending on which set of functions is activated):

    Blue mode:
    Disable Node – Disable all nodes – Bypass grades – Enhanced Viewer
    Add Version – Prev Version – Next Version – Full Screen Viewer (not cinema)

    Red mode:
    Add node after – Add node before – Add Parallel – Add Outside
    Add CPW – Add LPW – Add PPW – Add PCW

    Having two functions per button isn’t as great as I thought. I tend to mix up the modes and call up the wrong function. Anyway, I’m so used to the keyboard shortcuts for these functions that I don’t find it that useful to move them to the X-Keys. I feel the X-Keys shines when doing things I can’t do with shortcuts or when programming multiple steps into one button.

    Last Row is:
    Red/Blue Mode (see above) – Cycle High Soft value to 0/25/50/75/100 – Highlight Mode – Custom Sat vs. Sat

    The Cycle High Soft Value was a test of inputting numerical values into UI fields. I’ll probably use the same logic for other favorite functions.

    The last button (Custom Sat vs. Sat) is very specific to one of the shows I’m grading. It’s shot partly in a sports arena and the saturation on the big LED screens and jumbotron always goes through the roof. That custom Sat vs. Sat curve lowers the saturation on those LED screens without affecting the rest of the image.

Log in to reply.

1,000+ Tutorials to Explore

Get full access to our entire library of over 1,100+ color tutorials for an entire week!


Start Your Test Drive!
Loading...