
Finally! Resolve 17 Has Been Announced
It feels like we’ve been waiting forever! We’ve gotten so spoiled by Blackmagic’s major Resolve releases every year at NAB – that when NAB was canceled and BMD didn’t announce a new Resolve version, nobody really knew what was going on.
Well, now we do. As opposed to getting out a public beta for NAB as they have in years passed – with no NAB this year it looks like BMD decided to focus on spending more time on a jam-packed release later in the year.
Well, the strategy worked – and the release announced today is massive. In this article – I want to focus on my favorite new features and improvements. This is far from a full list (for that be sure to check out the official release notes) this is more of a guide of the things I’ll be reaching for first in my work, and why.
Color Page
I’m going to start on the color page, because as Resolve has evolved from a color-only tool to a fully-featured NLE and finishing tool, I feel like there have always been the nay-sayers, complaining every year that their personal color wish list wasn’t catered to enough, and saying the improved editorial and audio features were a waste of time. I strongly disagree with this – I’ve always preferred an all-in-one solution to a hodge-podge of different applications, and I’m thrilled that Resolve has evolved into such an integrated system.
That said? I feel like BMD was sick of hearing this too – so they put in some incredible new color tools. The biggest? Resolve Color Management has been dramatically upgraded.
RCM Update – A Major Step Forward
This new version of RCM has improvements across the board and utilizes a new, Resolve-specific intermediate colorspace called DaVinci Wide Gamut. It’s similar to ACES – but is native to Resolve, and doesn’t force you into using the ACES RRT. Tone mapping is available across the board, and RCM is improved in all aspects, with much more customization options. To reduce the confusion color management settings can introduce, Resolve 17 includes a number of built-in presets for common workflows.

The presets are a great time saver and a safe way for users who may not be as familiar with color management to get started. But selecting “custom” gets you a ton of great new options. The biggest thing for me? RCM now enables color space aware grading tools.

This has been a major ask from colorists, and it’s a welcome addition. Color space aware tools mean that if you enable the option in project settings, all of the traditional color tools adjust their response curves to cater to the colorspace you are working in. It’s going to make grading in log or HDR much easier. But it gets even better – because, in addition to making the normal color tools colorspace-aware, BMD has added two innovative new color tools:
High Dynamic Range Tool
Don’t let the name fool you – the new High Dynamic Range color tool isn’t just for HDR. At its core, it’s a segmented grading tool that lets you adjust specific, targeted tonal ranges. It also sets these ranges based on the colorspace you are working in. This means you can very specifically target not just lows, mids, and highs, but ranges within those (remember Speedgrade’s 9-way color corrector? imagine that but on steroids!). And you can customize and define as many ranges as you want – so it can be catered to every shot.

The best thing for me? You can use this tool without color management enabled. Now I know this may sound a bit crazy – why would you use a color space aware grading tool without color management? Because I prefer the flexibility of building my own color management pipeline right in the node tree. The HDR grading tool can have it’s working space manually set for each node, which makes it a perfect fit for my custom ACES workflow!

I can have the nodes in the LogC section of the tree set to LogC, and the nodes in the ACEScct section set to ACEScct – and the HDR grading tool will behave perfectly in both colorspaces! This is a huge boost to my color workflow.

Color Warper
The color warper is another totally new tool in Resolve 17. It’s similar to the popular 3rd party Nobe Color Remap and 3D LUT Creator tools – It lets you build complex, volumetric corrections adjusting the hue, saturation, and brightness in targeted ways. It’s a great way to tweak specific colors, to create color separation, or to design stylized looks.

The coolest thing about the color warper is that it includes both graph-based tools, like expanding and compressing color ranges right in the graph (which is great for color separation), but it also has the ability to click and drag in the viewer to grade in context of the image. This gives you instant feedback both in the viewer and on the color warper graph.
Other Color Improvements
There’s a lot more in this release – including some big improvements to masking and keying, but I want to mention two more absolute favorites of mine. These aren’t big headline-makers so it’s easy to miss them in the long release notes – but they are going to be major productivity boosts to a lot of colorists.
First, you can now save smart filters for reuse across projects. This is HUGE! I find myself re-creating the same smart filters over and over again for every project. Things like “group is blank” or “all R3D” are filters I use over and over again. It will be great to not have to re-make them on every project.

Second, the built-in scopes can now be split into a massive 3×3 grid of 9 scopes. Why would you want this? Well if you aren’t using Scopebox or Nobe Omniscope – you are missing out on a very useful thing: vectorscopes split out for shadows, midtones, and highlights.

With the new 3×3 layout – you can build this right into Resolve’s built-in scopes. You may remember Resolve 16 added low/mid/high ranges – but you couldn’t have them all open at the same time. Well now in 17, you can! I still prefer external scopes – but if that isn’t an option for you? This is a great feature.
Edit Page
Having started out in online editing – I’ve used just about every nonlinear editing and finishing platform ever made. I still do a pretty decent amount of editorial work, and about two years ago I switched all of it to Resolve exclusively. I’ve been loving it, and never want to go back to other NLEs. Version 17 has included a bunch of great new edit page features – that are going to take it’s editorial capabilities to the next level.
First – pulldown removal. This is major for people working in documentaries. Often archive sources come in 29.97 interlaced, with a baked-in 3:2 pulldown. In the past, dealing with these sources in a modern, progressive show has been a hassle. Now, Resolve can remove that pulldown on the clip level (under clip attributes) – and leave you with the original, 23.98 progressive source. I’ve been asking for this one for a long time, and I’m thrilled they added it into v17.

Next – scene cut detection has been rethought and greatly improved. While the old media page scene cut detector is still there – it’s now largely unnecessary, as you can now mark an in/out range in the timeline and scene cut detect it in place! No more saving EDLs and importing pre-conform timelines.

Not only does this make it way faster to prep projects that need more than one scene detected timeline, but it’s also really useful for conform workflows on docs – where an individual clip may contain multiple cuts inside (and offline editors don’t always razor these up!) . In the past, you had to annoyingly add these manually. Now it’s as simple as letting Resolve cut the clip for you!

BMD has also added render-in-place, allowing you to force a complex clip to render as its own piece of media (and it can easily be reverted via a right-click option). This is great for caching out Fusion comps, complex color effects, and more. In addition – caching of adjustment clips is now enabled, which will make managing complex sequences that may not play real-time much easier.

You could even use this as a quick way to batch render out a bunch of clips, without going to the deliver page! Render in place will ask you for the destination folder, and render out all the clips selected, then replace them in your timeline with the rendered files. If you want to go back to the original? It’s as easy as right-clicking the clip and selecting “decompose to original”. Your original edits are never lost.

Another really cool new feature – Fusion transitions. This provides a big missing link to Resolve’s Fusion integration and is reminiscent of a feature from my beloved (but long EOL’d) Avid|DS.
If you need to build a complex transition – simply right-click any transition, and convert it to a Fusion transition. Then, on the Fusion page, you will automatically get a MediaIn node for both the outgoing and incoming shot – allowing you to build complex, node-based transitions easily. More importantly – you can easily move or adjust the duration of that transition after the fact. Before, to do this you would need to manually make a Fusion container with the incoming and outgoing shots – which made making changes down the line a much more involved process.
After all that, plus many more improvements? I think my favorite new edit page feature is the absolute simplest one. Timeline management is greatly improved. You can now right-click and disable timelines, which hides them from timeline drop-down menus.

Even better – the timeline dropdowns across the application can now be set to sort by date, alphabetical, or by recent use. This has been an ask from a lot of editors and colorists, and if you work on complex projects with lots of timelines like I do, this is going to make your life a ton easier.

A Smaller Edit Console
In addition to all the new edit features, Blackmagic has announced a new, smaller editing console! The new Resolve Speed Editor is essentially all of the Resolve-specific functions from the fantastic Editor Keyboard, but with a smaller footprint and price tag. It even has built-in batteries and Bluetooth support!
This is going to be a great option for editors and colorists who don’t have space (or budget) for the full Resolve Editor Keyboard. I haven’t used one of these yet – so I don’t know for sure how much of it will work on the edit and color page vs the cut page – but I adore my Editor Keyboard, so I’m excited to try this new console.

Fusion Page
The Fusion page has gotten a lot of love too – but I want to focus on my two favorites:
First – timing management has gotten way better. What do I mean by timing management? Figuring out where and when animations and events should happen in the Fusion page. If you’ve watched my Insight on keyframing in Fusion – you know that Fusion allows for pretty advanced animation. The hardest thing has always been coordinating that timing with the edit page. In the past, this has involved remembering numbers of frames and jumping back and forth between pages – but in v17 it’s gotten way better. Fusion now has both audio playback and audio waveforms available right in the keyframe panel. This makes timing animation to audio cues an absolute breeze. And if you need to get more specific? Markers on the edit page now show up on the Fusion page – so it’s super easy to leave exact timing marks in the Edit page, and use them as a basis for work in Fusion.

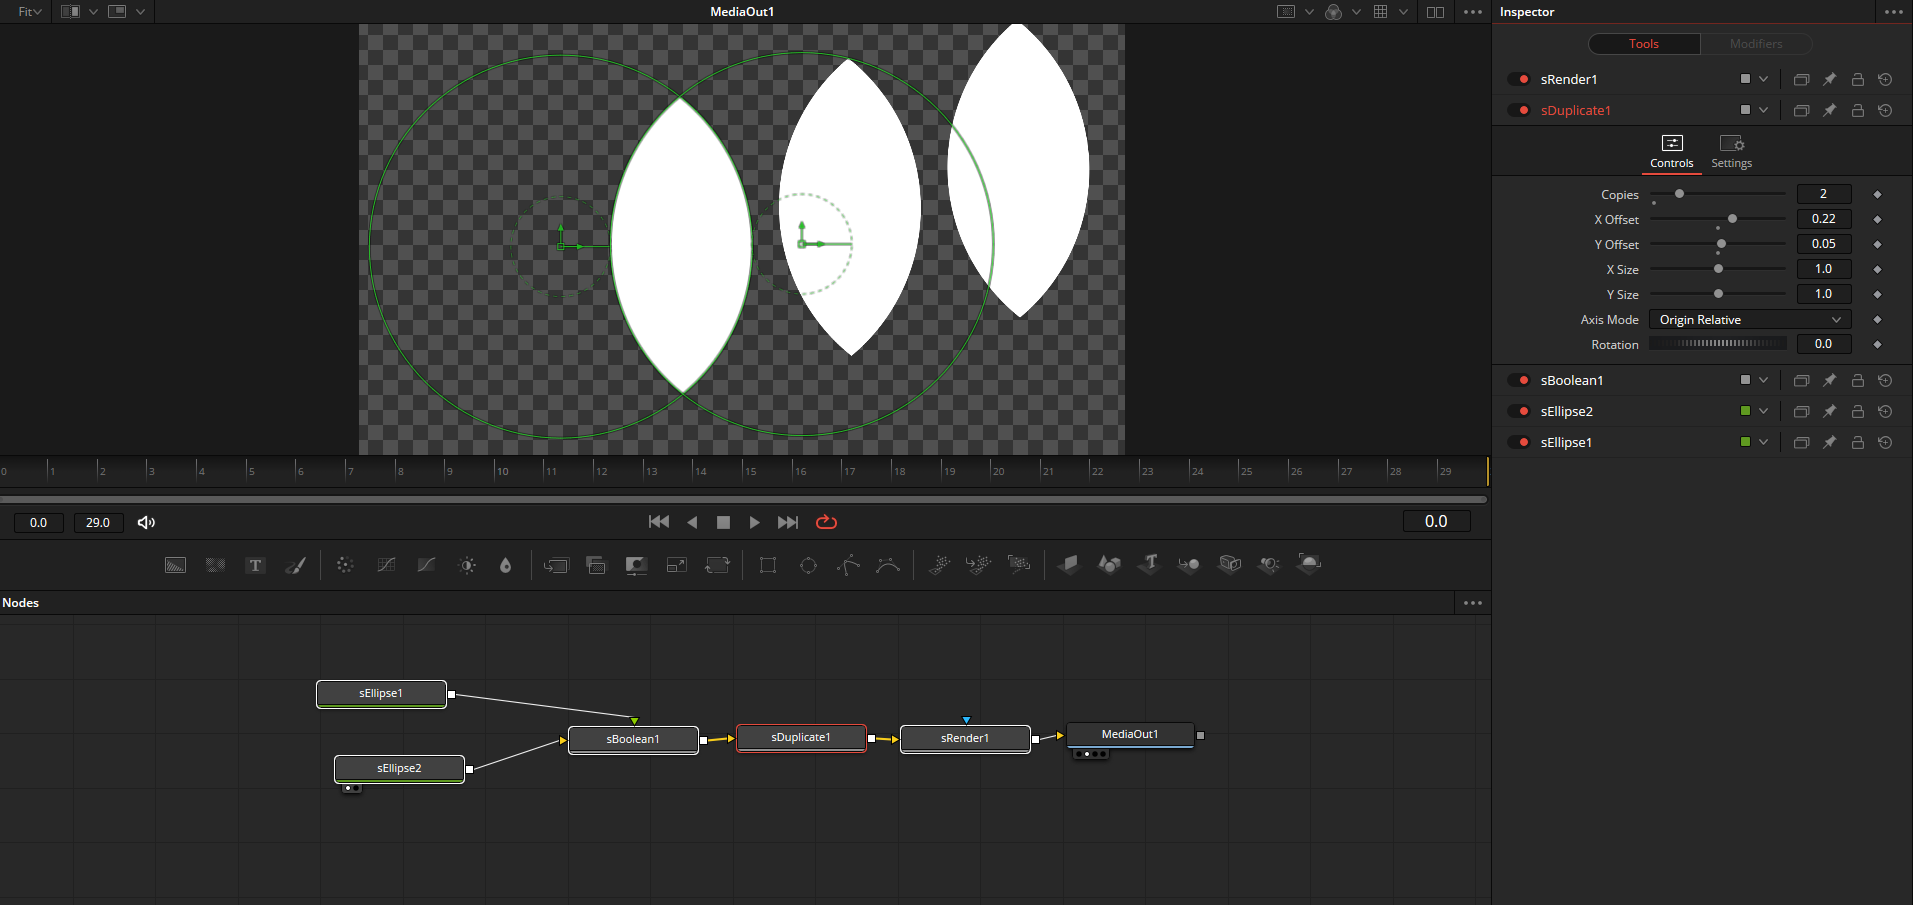
Second – Fusion in Resolve 17 has an all-new, vector-based shape toolset – which is great for masking and motion graphics. As opposed to the old way of adding spline/ellipse/rectangle/etc nodes – and building up shapes with normal merges/transforms/etc, the new shape toolset is all vector-based up until render.

It works a lot like 3D or particle nodes – shape nodes connect to each other, and can be combined, added, subtracted, and adjusted, and animated. Then the combined node tree of shape nodes is fed to an SRender node, which outputs the shape as a rasterized matte. Because it is vector based and GPU accelerated – the new shape tools are massively faster and more interactive. They are also easier to build and modify, and will never lose resolution if scaled up or down inside the shape nodes before rendering.
Fairlight Page
The biggest news in Fairlight audio isn’t only on the Fairlight page – and it’s absolutely incredible news. Resolve is now the single most complete Dolby Atmos editing and finishing solution available in any NLE. I don’t make that statement lightly – the Atmos support in Resolve 17 is staggering. It includes:

Import of all Atmos formats (IMF, ADM, or .atmos) right to the timeline. The Atmos audio data and object positioning metadata is built onto the Resolve timeline, and automation is generated automatically. The Atmos mix can then be adjusted and worked with natively in Fairlight.

You can also now work with Atmos clips as a single clip on the timeline. Atmos mixes can be brought into the media pool and used the same as any other clip. This is a huge deal. Even if you aren’t mixing Atmos yourself – you can now edit, trim, marry, and work with Atmos mixes just like we have always been able to work with stereo or 5.1.

If you don’t have the hardware for Atmos playback? You can change the surround format of the clip under clip attributes, and Resolve will use the Dolby render to playback the Atmos mix to the desired destination format. This means colorists can playback Atmos mixes in stereo, 5.1, 7.1, etc – without any special hardware or software.

The Fairlight page can now also output Atmos master files directly. This means not only can you export a Fairlight created Atmos mix, but you can also cut up, edit, and adjust existing mixes and re-output the Atmos master files easily. In addition to Atmos output, Resolve can now export IMFs with embedded Dolby Atmos mixes. This means Resolve can serve as a complete post production hub – and make deliverables marrying Atmos mixes to the final picture (including Dolby Vision) all in one place.

A New Fairlight Panel
Also announced today – Blackmagic is introducing an all-new, smaller Fairlight console. It is reconfigurable, with motorized touch-sensitive faders, and has context-sensitive encoders and LCD displays for adjusting various parameters. It even has it’s own dedicated HDMI output to show audio data directly on a dedicated monitor! For $3600, it isn’t cheap – but it is way cheaper than bigger consoles, and looks to be BMD’s normal high build quality.

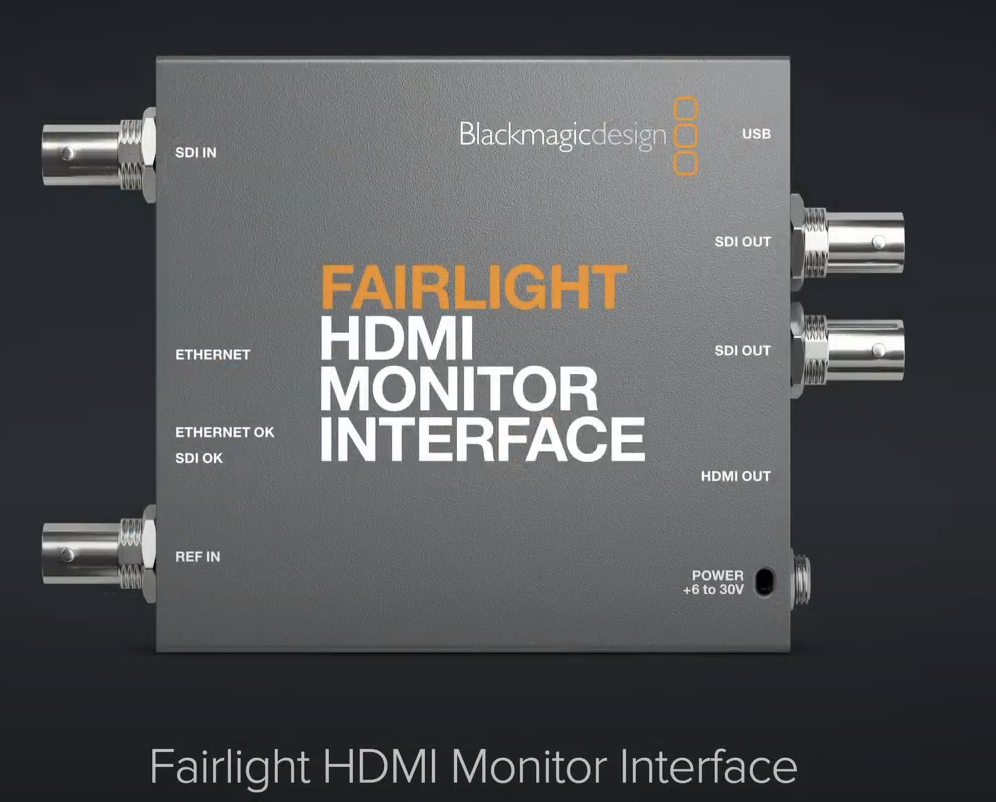
In addition to the new console – if you just want to add monitors for metering, BMD is offering a $295 HDMI monitor interface as well, so you can add your own monitors and build a custom Fairlight meter/monitoring solution.
Other General Improvements
There are a few application-wide things I’m really excited about as well. Resolve is greatly improving both its input and output capabilities – but also becoming more expandable.
First – BMD has introduced what they are calling “Workflow Integrations”. These are custom panels that can be written by 3rd parties and launched right from Resolve. Essentially making it easier for plug-in vendors, pipelines, and facilities to make custom integrations with Resolve. Since I dabble a bit in scripting, the possibilities here are really big.

Second – BMD has added support for 3rd party encoder plug-ins. This means plug-in makers will be able to expand Resolve’s output format capability with custom plug-ins, without BMD needing to add support for every format. I’m really excited that BMD is leaning into making Resolve more open and expandable.
Third – You can now import/export individual timelines and bins. Just like .DRP projects, these make .DRB bin files, and .DRT timeline files. This is going to make managing projects and sharing assets across multiple machines a ton easier.
And finally? Probably the simplest new feature in the entire list – but it’s one I really like. Anywhere in the software that there is a numeric field? You can now increment and decrement it using the up and down arrow keys. This makes precise adjustments fast and easy – but the way it is implemented is way better than I’ve ever seen it in any other software. Instead of adding modifier keys to make the adjustment coarser or finer – simply use the left/right arrow keys to move the decimal place in the numeric field. It makes switching from big moves to small moves super interactive and easy. Sometimes the simplest improvements can have a big impact on the day to day work.
Conclusions
Like I said in the beginning – this isn’t close to a full list of new features. These are just my favorites! There are hundreds of new features and improvements, so spend some time reading through the release notes. We will of course be following up with many more specific Insights on Resolve 17 – but overall, I think it is an absolutely impressive release, and well worth the wait.
I don’t want to hear any more complaining that BMD is leaving colorists behind just because they are adding other features. These new color tools are fantastic! And I’m equally as excited for improvements across the other tools as well. I think Resolve 17 is going to be a huge boost to my workflow, and with the new color, edit, Fusion and audio features – there simply isn’t another finishing tool that comes close in my opinion.
Resolve 17 is available for download as a public beta – just remember, best practices for beta releases still apply! So be sure to backup your database, and don’t upgrade in the middle of a critical project. Also be ready for some growing pains until this is a final release.
Obviously, all of us here at MixingLight will be releasing many more in-depth Insights about Resolve 17 in the coming days and weeks, so go through the release notes and let us know in the comments what you want us to tackle first!
-Joey
