A Simple Plug-In Allows For Quick LUT Exports
I take a lot of photos.
My Lightroom catalog tells me last month I took over 4000 – which when you have to sort through them feels like a lot!
Because of how many snaps I take, you can imagine that I spend quite a bit of time in Adobe Lightroom perfecting my images.
In previous Insights we’ve discussed applying LUTs in Photoshop, exporting LUTs from Photoshop, and stepping into the way back machine, Dan detailed a way using the semi-antiquated Trim LUT in Resolve to move corrections from Lightroom to Resolve or other grading applications that support the .cube format.
Over the past few years, Adobe has put a ton of emphasis on color management and color workflows with most of its applications.
Still, in Lightroom 5, there is no way to export a Look-Up Table natively from within the application.
After all, it would be nice instead of having to jump over to Photoshop to enhance a photo and then export a LUT, one could do that same process from within Lightroom.
Well, with the help of a simple and very affordable plug-in for Lightroom you now can easily export LUTs to use in other grading applications like Resolve or SpeedGrade.
Export LUT Plug-in from John R. Ellis
In the comments of the Insight (linked to above) on exporting LUTs from Photoshop, there was a comment from John R. Ellis about a new Lightroom Plug-in that he developed to allow you to Export LUTs natively without having to jump over to Photoshop. It looks like from his site, John also makes several other plug-ins and I love small developers so please support his work!
John has developed an extremely simple plug-in for Lightroom that for $10 is a no brainer.
There is a trial version available but that’s limited to a 4x4x4 sized LUT – not very useful for good looking color grading.
The purchased version can create LUTs up to 256x256x256!
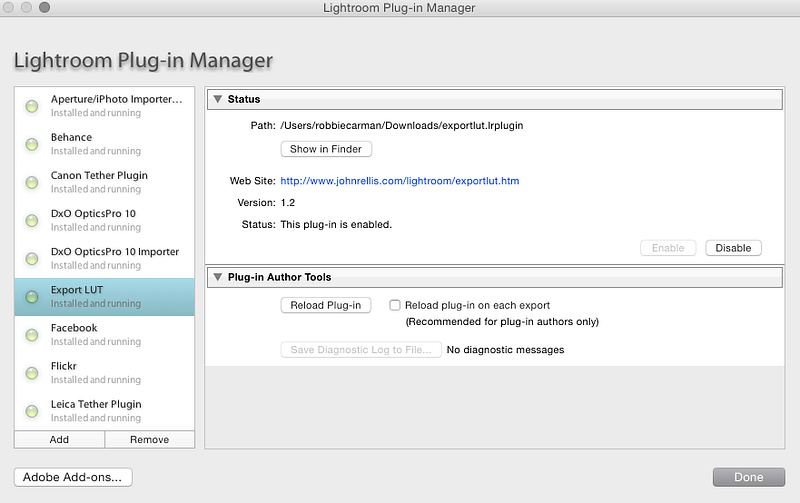
After downloading to install the plug-in from within Lightroom choose File > Plug-in Manager.

In the dialog box that pops up, click the Add button and navigate to where you downloaded the plug-in to. Lightroom plug-in files use the extension .lrplugin. Choose the plug-in to add it to Lightroom.
You shouldn’t have to restart Lightroom, but I do just to make sure all plug-ins reload on startup.
Remember, It’s A LUT!
If you’re thinking “Wonderful! Now all my Clarity, Vibrance and Grain settings in Lightroom make it over to Resolve or SpeedGrade!” Think again!
While John’s plug-in allows you to export a LUT from Lightroom, it cannot bend the space-time continuum and change what’s possible with using Look Up Tables.
Look Up Tables can support contrast, saturation and other basic correction manipulations like curves, but when you start getting fancy and use Lightroom corrections that don’t have a direct 1:1 pixel effect and depend on pixels around them, etc., that’s when things start to breakdown and not be supported by a LUT.
So in that regard, exporting a LUT from Lightroom is useful for overall primary type corrections but not useful for detailed work that you want to share between apps – there just isn’t a way to really do that, you have to recreate those things in your grading application.
A Simple Workflow With Two Gotchas
If you understand the limitations of using a LUT to transfer image data from place to place then John’s plug-in works really well.
It even allows you to preview a Preset that you might have installed in Lightroom, but taking away the things that aren’t supported in a LUT.
However, there is one thing you need to be aware of that can trip you up using this plug-in if you’re not paying attention.
The plug-in needs to place the image data and the LUT it creates into a color space profile. You’ve no doubt seen these on your computer before – .ICC files.
ICC files can be used for lots of stuff like the printer and on-screen characterization.
If you’re reading this Insight you’ll most likely want to be using a REC709.icc profile or DCI/p3 profile.
I’ll show you how this works in the video, but don’t skip over this pulldown as your results can vary A LOT if you’re not placing the image data into the right .ICC container.
Also like many of you, I prefer to shoot Raw.
While I didn’t do extensive testing, the plug-in documentation and the couple tries I did use Sony .ARW files from my A7II confirm that creating a LUT from a RAW file doesn’t work all that well.
LUTs created from my RAW files seemed to have some color/contrast shift.
This shouldn’t be an issue if you shoot hi-res JPEGs, but if you shoot Raw, to get the best results you’ll want to convert your Raw files to something like a Tiff (.tif) (like I did in the movie below) or a high-quality JPEG prior to making your corrections and trying to export a LUT.
I’m not quite sure what’s technically at play but I’ll be dropping John a line to get a better understanding of what’s up with Raw files.
As always, questions or other thoughts, please use the comments below.
-Robbie
Member Content
Sorry... the rest of this content is for members only. You'll need to login or Join Now to continue (we hope you do!).
Need more information about our memberships? Click to learn more.
Membership optionsMember Login


