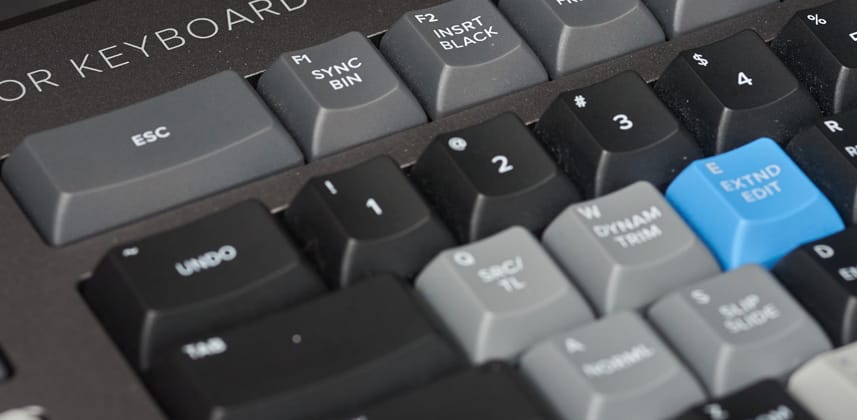
At NAB 2019, BMD sort of surprised everyone by introducing the new Resolve Editor Keyboard. It is a dedicated keyboard for Resolve, with a shocking (to some) price-tag of $1,000. Along with the keyboard, they also introduced a streamlined editing interface called the Cut Page, designed to work hand in hand with the new hardware.
In this article, I’m going to go through all the reasons I love the keyboard, talk about some of its shortcomings, and talk about its use in the Color Page. This is obviously going to be pretty edit-focused Insight, but it’s relevant to conforming and on-lining as well. However – If you truly only care about the color page? Skip down to the bottom where I’ll walk you through what it can do there!
A Bit Of History And Nostalgia
When I first laid eyes on the new keyboard, I took one look and knew I was going to own one. No matter what it did, no matter what it cost. I was hooked at first sight. I bought one the day they started shipping, and it has been the keyboard on my main Resolve system ever since.
This is because I started my career in linear online editing. If you never worked in a linear suite before – the concept is that all editing is done tape to tape, with players and recorders precisely starting, stopping, inserting, assembling, etc.
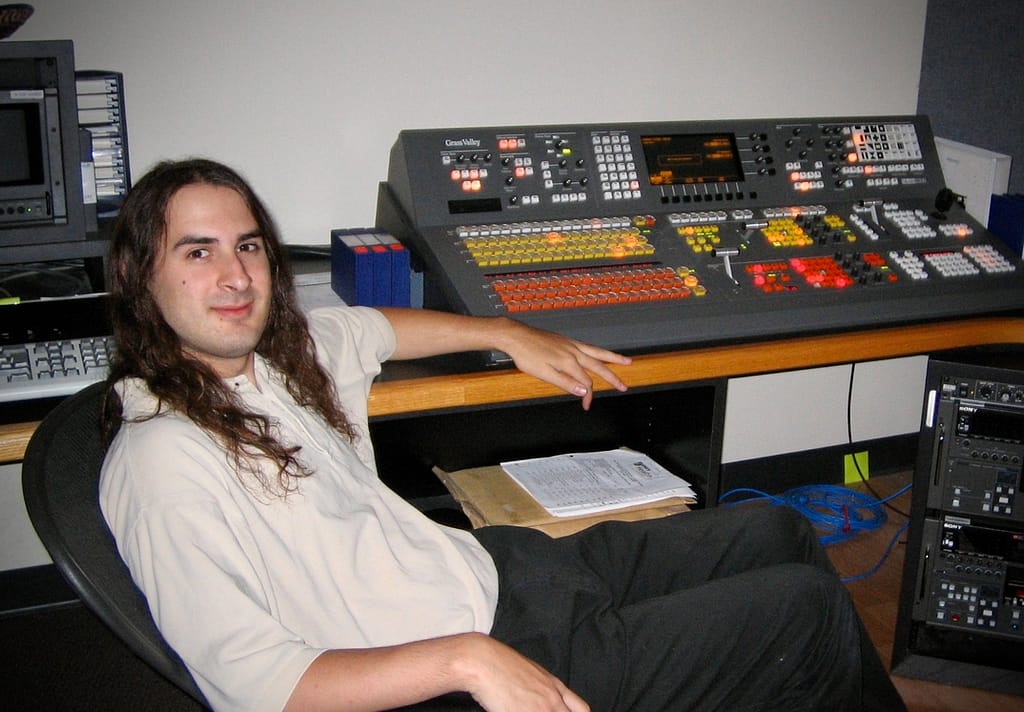
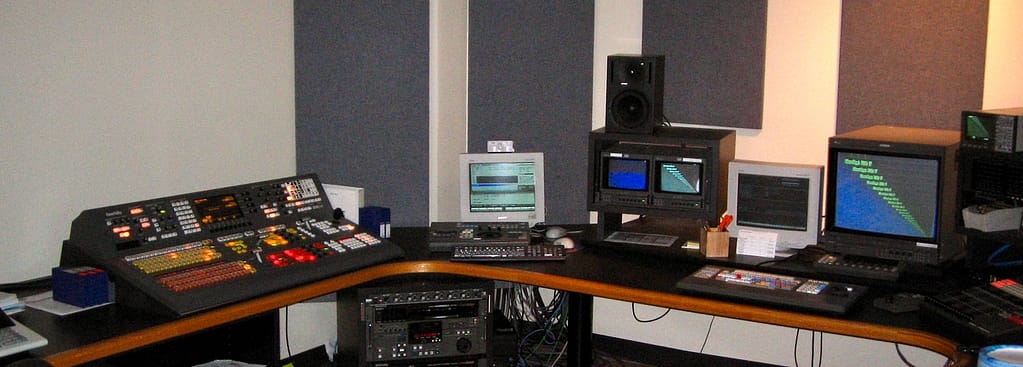
As opposed to today, when everything is inside a computer and you manipulate it all there – a linear suite was truly a “suite”. Multiple devices did different jobs. This often meant:
- An audio mixer controlled audio
- Various monitors showed picture or scopes
- DVE provided digital effects like repositioning and more
- A video switcher cut between sources and did keys or layers and fades
- Multiple playback tapedecks and record tapedecks
- An edit controller – which was the heart of the suite. It connected to all of these devices in various ways, and told them what to do, and when to do it – with precise, frame-accurate timing.
The edit controller was what you really spent the most time with, and like modern editing systems of today – it had its own specific user interface that had to be learned and mastered. My weapon of choice? The Sony BVE-9100.
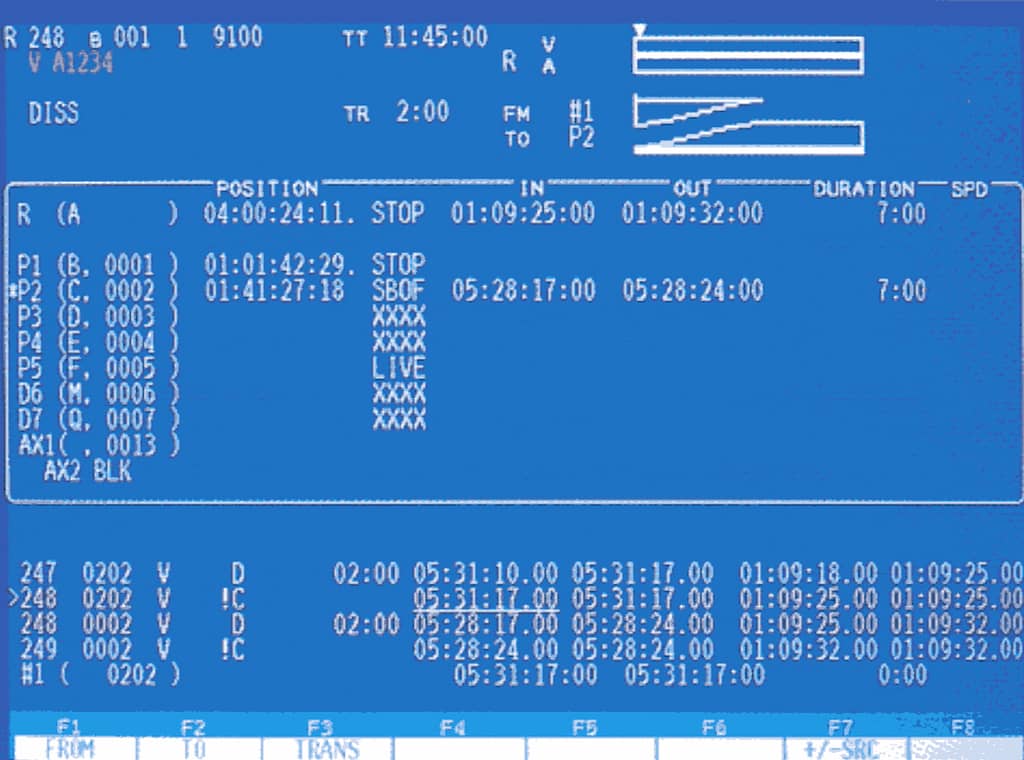
This computer-controlled editor was incredibly advanced, had a fantastic software interface – and most importantly – an incredibly precise hardware user interface, centered around a jog/shuttle wheel on the keyboard.
Physical Control – It’s Not Just For Color Wheels!
As colorists know – having physical knobs and wheels and dials to control the image is a HUGE timesaver.
We make so many precise adjustments to so many different things – doing it all with a mouse and keyboard, like you’re building a spreadsheet, just doesn’t work. It’s too slow, it’s too uncomfortable. This is why companies have always developed physical surfaces for us to interact with our color controls. Well, in the linear days – we had it for editing also. The jog/shuttle wheel was a precise instrument, that depending on its mode and how fast you spun it in which direction, could nudge frame by frame with ease – or fly through a scene quickly, easily narrowing into the perfect in- or out- point.
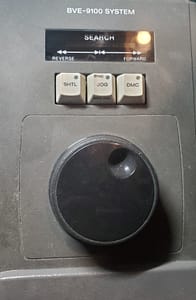
Using a jog wheel is totally different than any other method of navigating footage or timelines because it has precision and inertia.
For example, oftentimes you may be scrolling through a long clip in shuttle mode – when you see what you were looking for. Instantly you jam the jog key, and the playhead stops immediately, just a bit ahead of where you wanted to be. Then with a flick of the wrist, the jog wheel is off to the left, spinning on its own – and it will keep spinning for quite a bit depending on how hard you flicked it. When you get to your desired shot or scene then just grab the wheel to stop it! Now you can precisely, slowly, accurately, dial the playhead to the exact frame you want. In practice, it is way faster and more comfortable then zooming in and out or trying to scrub through with a mouse and keyboard.
The Non-Linear Dark Ages
As linear editing faded away due to the many huge and obvious advantages of non-linear editing and finishing, one item seemed to never come along with the upgrade to nonlinear – that intuitive, physical control. Things like Wacom tablets and macro keypads have helped a lot – and won’t be entirely replaced by a jog wheel, but the truth is (with very few exceptions like Lightworks) – the options to intuitively control a timeline/edit system with a jog wheel disappeared with the linear editing suite.
Yes, there have been cheap devices like the contour shuttle – but these generally work by pressing hotkeys instead of actually integrating with the software, and their response is unusably slow and clunky. Moreover – the hardware is so cheap they aren’t worth even bothering with since they can’t take the abuse.
Design
Looking at the BVE-9100 – you can see exactly where the inspiration for this Blackmagic new keyboard came from. It’s obviously designed to bring some of the lost physical transport controls of the linear days into the nonlinear world.
First things first – the editor keyboard is HUGE. It’s not a low profile unit by any means. The additional features, buttons, and jog wheel make for a very wide unit. It is also surrounded by a lip allowing for recessed mounting in a desk and features a built-in soft-touch wrist rest (which is not removable).
Overall build quality is absolutely top-notch. The chassis is a nice textured aluminum, and the wrist rest feels fantastic. The lip also is perfectly sized to tuck the top edge of a Wacom tablet underneath it, making it easy to use a Wacom and the keyboard simultaneously.
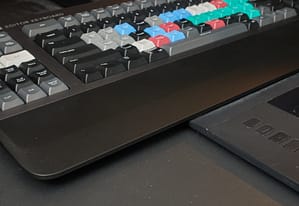
The keys themselves are cherry style mechanical switches. They have a satisfying feel and sound, and the keyboard is very well built.
The keyboard connects with a single USB-C cable and works on both USB-C or USB-3 ports. It also provides a convenient built-in USB hub, with 2 additional USB-3 ports available on the back. These are great for connecting a Wacom, mouse, or dongle.
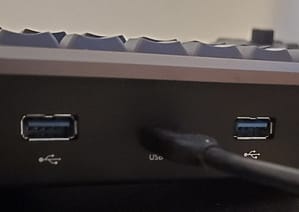
Plugging the keyboard in, it immediately works with no software or driver installation required. You can even plug it in while Resolve is running and it will wake up and work!
The Most Important Part: The Wheel
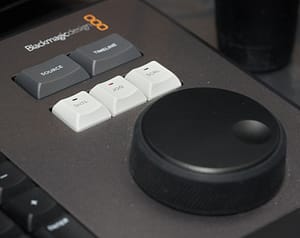
The jog wheel has a fantastic feel to it. The smooth top features a nice sized indentation to place your finger for precise control, and the perimeter is covered in a textured, grippy soft rubber. This makes holding and using the jog wheel possible in many different ways, from a single finger to wrapping around the wheel with your hand, to using 2 or 3 fingers to rotate the top or bottom. As you use the wheel – you’ll learn that you do all of these different holds for different purposes.
Above the jog wheel are shuttle/jog/scroll selectors which change the mode of the wheel. They are lit to show you the currently selected mode at a glance. It’s an easy, one finger reach from the jog wheel to the selectors, and changing modes is accompanied by an incredibly satisfying clunk as the magnetic clutches engage or disengage to change the physical response of the wheel.
Jog and shuttle behave exactly as you would expect.
Scroll is sort of a combination of both – when moving the wheel slowly, it navigates slowly, but if you move it fast, the speed increases. This is really useful for quickly scrubbing through really long takes or files.
Above the mode selector are nice wide SOURCE/RECORD buttons. This is a HUGE timesaver for quickly jumping between the source and record viewers – both for editing, or for on-lining and checking conforms. I’ll often leave an offline reference in the source monitor, and scrub through the timeline on the record side with the viewers ganged. With quick taps of source/record, I can instantly see on my reference monitor if the conform is lining up properly.
Using The Keyboard
So it’s very pretty and extremely well built…but how do you use it? How is it different than any other top quality mechanical keyboard?
The keyboard was very much made to accelerate the new cut page, which it does very well. But since I work in finishing – I find myself on the edit and color pages much more often. Thankfully it still is VERY helpful there as well.
Preview during editing? Auto track selectors?
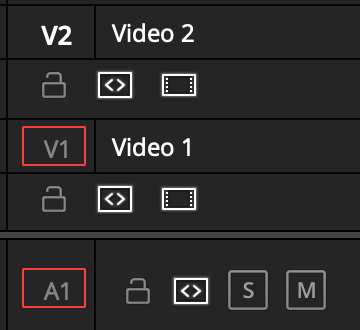
When using the keyboard’s various functions – its important to understand 2 critical Resolve features. “Enable preview during editing” and the auto track selector icons.
Enable preview simply changes viewer behavior when adjusting clips. When enabled, during trims or slips – the viewer will change to a 2 up or 4 up view showing the in/out frames of the operation. While that is useful sometimes – usually I want to see the operation’s effect on the current frame under the playhead.
With conforms, for example, I’ll usually leave a reference video on top with a difference blending mode. Then if I have a clip that isn’t lining up? I’ll use the editor keyboard’s jog wheel to slip that clip, while watching the frame under the playhead on the viewer. To do this – simply disable “Enable preview during editing”. Honestly? I leave it off all the time – but if you like the 4 up view as an option? You can easily bind it to a key to quickly toggle it on and off.
The auto-track selectors govern what tracks are affected by your operations. These become WAY more important to keep track of as you get faster and faster with the keyboard. For example, you may want to do a roll edit, but find it grabbing a bunch of audio clips you don’t want. The same can happen when adding a transition, or slipping a shot. That’s because those tracks all had their auto-track selectors enabled. I bind keys to toggle these on and off both by track number and quickly turn on/off all video or all audio. (The keyboard does have dedicated video-only and audio-only buttons – but they currently only work on the cut page – so this is a sort of workaround for that)
The keys
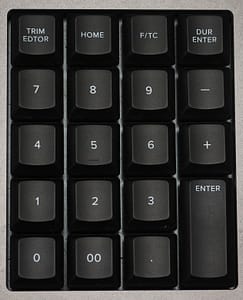
First – there is the number pad. It’s big, nicely placed, and has a dedicated double-0 button for entering timecode. You also get +/- keys, f/tc, dur, home, and trim editor. So how is this different than a normal keyboard? It’s designed for timecode manipulation specifically.
Trim editor launches the trim editor interface – but be aware, this is only on the Cut Page. On the Edit Page it doesn’t do anything. The other keys? They are VERY useful on the Edit Page.
Here are a few examples:
- Do you have a transition or shot that you want to be a certain length? Select it, type the length in timecode, and hit the “DUR ENTER” key. Instantly the transition or clip is retimed. And it works if you select multiple clips as well!
- The F/TC button temporarily switches between frame number and timecode. So to move the playhead 1 second forward, you would type +,1, 00, ENTER. If you want to move by 100 frames instead? To go into frame mode, just hit F/TC before typing the number: +,F/TC,1,00,ENTER. This works on duration as well.
- The HOME key is the same as the normal home key on any keyboard. You may notice there is no corresponding END key. To hit end, press Fn+HOME. This took a bit of getting used to but I don’t mind it now.
Above the Numpad are 4 other Resolve specific keys. These instantly sort your current bin, without you having to mouse over to the bin and click on a column to sort by. Pressing them again will reverse the sort order. You can sort by timecode, camera, date created, and name instantly.
To the left, along the top of the keyboard is a row of very useful shortcut keys. Some of these are cut page-specific, but many work great on the edit page. It’s worth noting – these keys replace the traditional F1-12 keys. To access those keys, hold the Fn key and press the desired F key.
- INSERT BLACK will instantly drop in 2 seconds of black at the playhead. This is helpful if you quickly need a dummy clip or generator and don’t want to open the effects pallette.
- FREEZE will instantly make a freeze-frame on the currently selected clip, at the current time on the playhead.
- SWAP easily swaps shots left to right, keeping duration the same. To use it, just hold the SWAP key – and then roll the jog wheel. You can interactively position the clip in the timeline wherever you would like
- INSERT, O/WR, REPLACE, FIT TO FILL are your normal insert/overwrite, etc modes. But they are placed and labeled in a fast and convenient spot.
- RIPL DEL is the same as the backspace key normally is. It deletes a clip and ripples the timeline.
Moving to the far left – there is an entire grid of Resolve specific keys. And this is where the keyboard really becomes super fast for both editing and conform/online work.
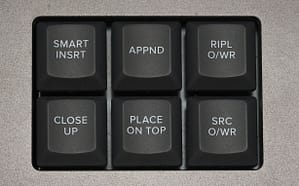
On the top-left, you have access to additional edit modes.
- SMART INSERT inserts a clip at the nearest edit point. If you are quickly throwing together a sequence with the intent to clean it up later, this is a great way to get started fast. Use the source/record toggle and the jog wheel to roughly position the timeline playhead, and press smart insert. It will automatically insert at the nearest cut. Unfortunately, this is only on the cut page as of now.
- APPEND appends the marked source clip to the end of the timeline. I use this all the time, and it works great on the edit page.
- RIPL O/WR is a cool way to do a 4 point edit on 2 different length clips. Instead of forcing the edit to end at the bounds of the timeline marks, ripple overwrite will ripple the timeline to make the longer or shorter source clip fit in the spot marked on the timeline. This can be a timesaver, as it replaces multiple edit operations – but be careful! It can also be destructive if you don’t know what tracks you are rippling. Keep an eye on those auto-track selectors and make sure you are doing the operation you want.
- CLOSE UP will place the source clip on top, with a default 2.0 punch in on the inspector. This can be subsequently changed easily, but it’s a nice shortcut to have
- SRC O/WR – stands for SOURCE OVERWRITE. This is a really cool one. Source overwrite places the source clip as marked, on top of anywhere in the timeline that matching timecode exists. This has a ton of uses, from multicam editing without making complex multicam groups, to online or conform. This is also great for matching high res footage to low res footage – if the timecode lines up.
Then there are big wide IN and OUT keys. My left hand normally rests near this, so marking in/out points is super quick. They also function as clear in/out if you double-tap one quickly. No need to reach for another shortcut key.
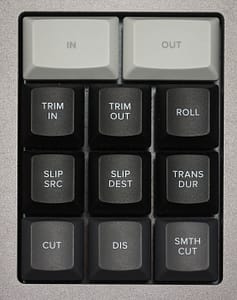
Below IN/OUT – are some of the best functions you get with the keyboard. Most of these combine with the jog wheel for interactive control. I use these not only for editing but for adjusting/fixing conforms and scene detected timelines.
- TRIM IN and TRIM OUT will grab the head or tail of the clip nearest the playhead, and the jog wheel will trim them in or out.
Finally, at the very bottom of this section, are keys to add cuts, dissolves, and smooth cuts. Smooth cut is something I very rarely use, but I do use the dissolve key to add dissolves in scene-detected shows. My only complaint? The CUT key isn’t really a cut key. It removes the current transition, leaving behind a cut. But if nothing is there? It won’t add a new edit. That is still a separate shortcut.
But What About The Color Page?
Obviously – the editor keyboard is very very geared towards editing. That’s no surprise. However, it does have two really cool tricks up its sleeve on the color page!
Jog wheel
If you’ve used Resolve a long time – you know that jogging a clip in the color page hasn’t always been entirely smooth. It’s gotten way better over the years, but really the only good way to get a nice jog navigation to scroll through a clip – to check for exposure changes, make keyframes, etc – has been to use the $30,000 Advanced Panel. Not anymore! The editor keyboard provides a buttery smooth interactive jog/scroll through the color page timeline. It even works with multiple playheads. It’s a huge timesaver when comparing shots, animating color changes, fixing exposure bumps or dealing with difficult tracks.
T-bar
This one is huge. If you’ve used the Advanced Panel – you know how popular the T-Bar is. You can use it to instantly dial in and out a reference wipe, from a still or offline reference clip. Over the years I’ve seen many people try to reproduce this behavior with clever mouse macros, but its never the same. Well, with the editor keyboard – if you have a wipe up? The jog wheel becomes the same as the T-Bar, and interactively adjusts the wipe.
Layout In The Suite
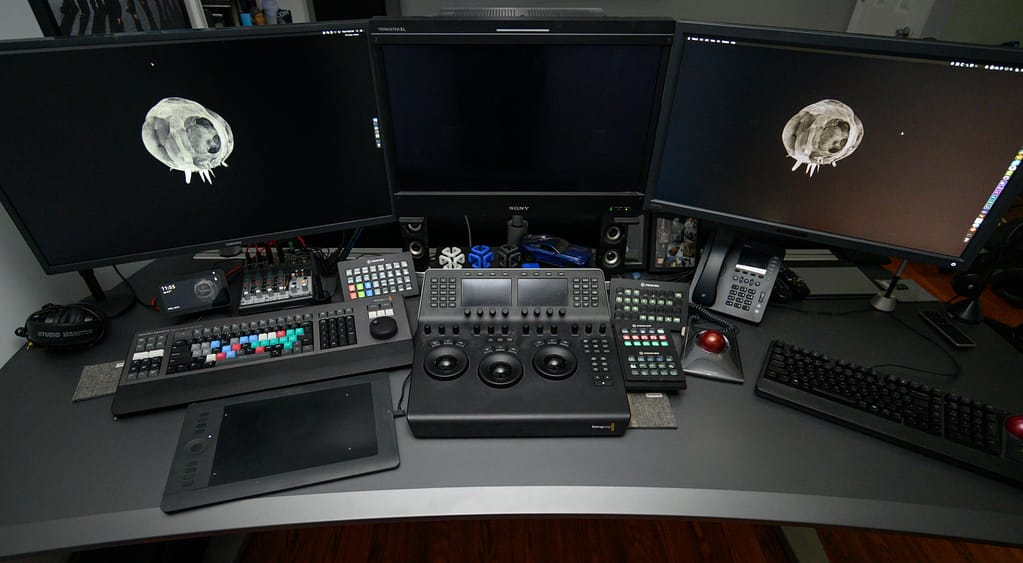
As you can see – the keyboard itself is very big, so it’s worth thinking about how/where you would place it on your desk. In my case – my suite is designed to be pretty dual purpose, both editing/conform/online, and color. When I’m editing, I sit in front of the UI monitor, and use a Wacom. When I’m grading, I sit in front of the reference monitor and color panel. So I’ve placed the keyboard to the left of my panel. This lets me edit with it easily – but most importantly it puts the jog wheel immediately to the left of the mini panel. This means using the jog wheel on the color page to wipe stills or move the timeline, feels like a natural extension of the mini panel.
The Future? My wishlist.
There are some improvements I would love to see – but thankfully they are all software and mapping related. I think the hardware itself is perfect and I wouldn’t change a thing. My current wishlist includes:
- Video/Audio only buttons activated on the edit page
- The CUT key to add an edit in addition to removing existing transitions
- Some way to use the scroll wheel to move a transition start point
- A preference to invert the F key/Fn behavior – making F1-12 default, and the special functions require the Fn key.
As for the future? I had heard some rumors of them making a version of this that was only the transport section. I think that would be a fantastic option for colorists, or for editors who want to keep their own keyboards but still get some of that jog wheel goodness.
Conclusion – Should I Buy It?
That’s the big question: is the editor keyboard right for you?
If you edit in Resolve at all – I think the answer is a resounding yes. It definitely doesn’t replace normal keyboard and Wacom navigation – it augments it. Day to day I’m using normal shortcut keys, the Wacom, the jog wheel, the special BMD keys, all together for different things at different times. It’s a valuable timesaver in a ton of ways – and it doesn’t preclude me from using traditional UI elements either.
If you only grade in Resolve? It’s a bit more complicated. The use of the wheel on the color page is a huge thing. I love it, but if that was all I was getting and wasn’t going to use the rest? I think I would still want it – but I do see that it’s a lot of money. On the other hand, if the only other way to get the jog wheel and T Bar is to spend $30,000 on the advanced panel? The editor keyboard is worth it if you really want that functionality.
So all in all, a year later I still love this thing as much as the day I got it. My minor wishlist could all easily be implemented in software, and it has been more than worth the purchase price.
If you have any questions or something to add to the conversation please use the comments below
-Joey

