Learn How To Build Your Custom Film Print ODT

March 9, 2023

Cullen Kelly shows you how to build a custom transform by combining a film print LUT with basic color science - to add style to images.


Series

Creating a custom film-emulation-based ODT

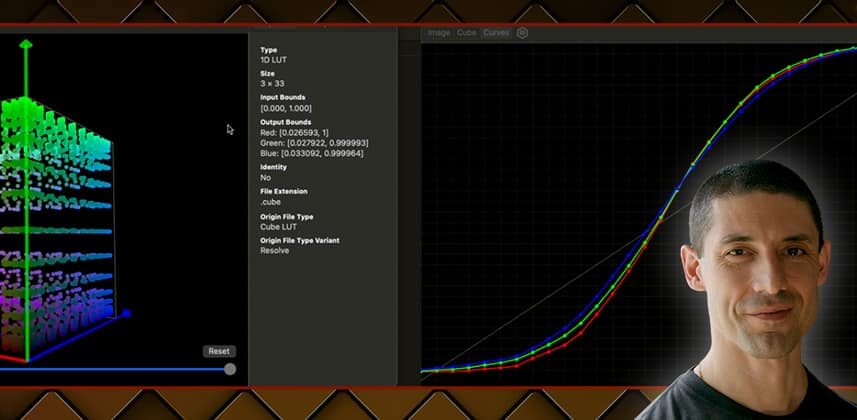
Wrapping up our series on custom color management, this is our most ambitious color management approach yet: building a custom transform by combining a film print LUT with some basic color science.

After years of working with various color management frameworks and deploying modular scene-referred looks within them, I’ve had the itch lately to develop a single-step output transform that incorporates creative and technical components. So in this Insight, we borrow the tone curve component of one of Resolve’s shipping Film Looks LUTs (Rec709 Kodak 2383 D65), and pair it with a gamut transform we’ll create within Resolve.

Key takeaways from this Insight

By the end of this Insight you should understand how to:

  • How tone curves and matrices are used to move between color spaces
  • Each of the technical steps that take our image from grading space to display space
  • How to leverage this knowledge to construct our own grading space to display space ODT

Related Mixing Light Insights

  • Getting to know Lattice – With LUTs so commonplace in modern color grading, sometimes you need to visualize and convert them – Lattice can help!

Additional Downloads for Premium Members

Premium members, be sure to grab the PLogLin DCTL that is featured in this Insight. I’ve also provided the 1D LUT that I generated out of Lattice.

Questions or Comments? Leave a comment!

Is this Insight useful to you? Let us know! Mixing Light is all about community discussions and we’re curious if you found this helpful, if you have something to add, or if you have more questions you need answered?

– Cullen


Member Content

Sorry... the rest of this content is for members only. You'll need to login or Join Now to continue (we hope you do!).

Need more information about our memberships? Click to learn more.

Membership options
Member Login

Are you using our app? For the best experience, please login using the app's launch screen


Additional Downloads

Sorry... downloads are available for Premium Members only.

Become a Premium Member
Comments

Homepage Forums Learn How To Build Your Custom Film Print ODT


  • Marco Paba
    Member

    The result is identical without the second CST (->709) because the linearization is inside the CST transformation

    [->LIN: Input Color Space: DaVinci Wide Gamut, Input Gamma: DaVinci Intermediate – Output Color Space: Rec.709, Output Gamma: Linear]


    • This reply was modified 2 months, 3 weeks ago by  Marco Paba.
    • This reply was modified 2 months, 3 weeks ago by  Marco Paba.

  • Scott Stacy
    Member

    Hey Cullen,

    Thanks for the great insight. Very nice, innovative utility.

    I found that this will work in a Davinci YRGB Color Managed workflow for those of us who do not use CST in our node tree.

    In Color Management > Color Processing Mode = Custom > Input colorspace = ARRI Log3 > Timeline Color space = Davinci WG/Intermediate > Timeline Working Luminance = Custom 10000 nits > Output Color Space = Rec. 709 2.4 > Limit Output Gamma to = Output Color Space > Input DRT = None > Output DRT = Luminance Mapping (the next three boxes all checked).

    After your 1D LUT > CST Input Color Space = Rec 709 > Input Gamma = Rec. 709 > Output Color Space = Davinci Wide Gamut > Output Gamma = Davinci Intermediate > Tone Mapping Method = Luminance Mapping > Adaptation = default 9.0. No boxes are checked below.

    • This reply was modified 2 months, 2 weeks ago by  Scott Stacy.

    • Marco Paba
      Member

      • Scott Stacy
        Member

        Hey Marco … Thanks. I will give this a shot.

      • Something I’ve found very important is I often need to tweak that Max Input nits up to above 100 nits (often around 115, higher doesn’t seem to hurt) some 709 sources clip out when converted like this and are hard to fix in any other way so giving this head room is a good cure.


        • Marco Paba
          Member

          I agree


        • Scott Stacy
          Member

          Well … updated to 18.1.4 and it fixed the anomaly. I will edit my post above.

          • This reply was modified 2 months, 2 weeks ago by  Scott Stacy.

  • Marco Paba
    Member

    Btw… for Tone Mapping Method I prefer DaVinci


  • Jim Robinson
    Member

    I have often wondered why Resolve doesn’t have a combo color management where you can just turn off the output in their color management, if need be? Then we could just then add the CST anywhere in the node tree (most likely would still be at the end of the node tree.).
    It always seems to me that a lot of people like the camera placement and meta log conversions, but the output is something that under color management is difficult to pull out of or gets added twice under the hood. So I find myself not using Resolve project color management and using the node based CST management.
    I realize that is a little off topic with this insight, but wondered if there was a reason why that isn’t a viable idea.
    Thanks Cullen. This was really interesting.

    • Jim, have you tried simply keeping the output color space in the same space you are working? I’ve never tried it in Resolve’s own color management, but in ACES it works perfectly (setting output transform to ACEScct, same as the working space).

Log in to reply.

1,000+ Tutorials to Explore

Get full access to our entire library of over 1,100+ color tutorials for an entire week!


Start Your Test Drive!
Loading...