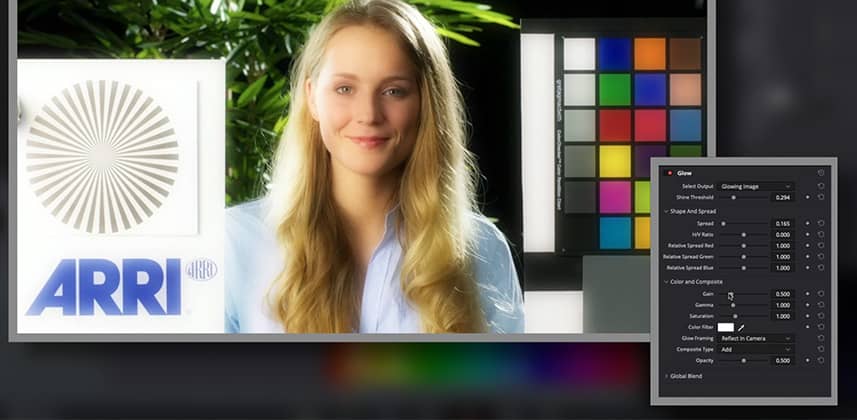
Learning To Work Quickly Using The Glow Resolve FX (in DaVinci Resolve)

July 26, 2022

Glow effects are versatile - but you can waste time fiddling with their controls. Learn how to work with the Glow Resolve FX, intentionally.


Series

Glow Series Part 1: An introduction to Resolve’s native glow effect

Glows are an extremely popular effect. They are simple to use and extremely versatile. With a few simple adjustments, you can add just a touch of elegance or put the audience into a nightmarish hellscape.

In this Insight, learn the key parameters for adjusting DaVinci Resolve’s native Glow Resolve FX (found in the Resolve FX Light category) that is included with all versions of Resolve. After a brief walkthrough of the important controls and adjustments available within the effect, we’ll discuss some artistic methods we can utilize during the grading process.

The main goal of this Insight is to help you stop fiddling with all the controls of this effect and start working more intentionally. This allows you to work efficiently and stay focused on your images rather than the user interface.
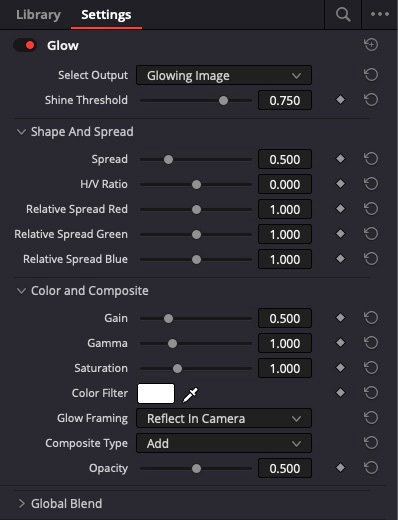
DaVinci Resolve's Glow FX control panel
The Glow Resolve FX ships with all versions of DaVinci Resolve. You can learn to manipulate it very quickly for a wide range of looks and effects.

Composite Mode Cheatsheet

To learn more about composite modes, generally, read Chapter 50 “More About Composite Modes” in the Resolve 17 and 18 user manuals. Here are the composite modes I discuss in this Insight:

  • Add – Use this for “Hot” specular glows. Be aware that it will likely introduce clipping in the highlights.
  • Overlay – Useful for more subtle glow diffusion that’s a mix of ‘Screen’ and ‘Multiply’ composite modes.
  • Softlight – Not quite as harsh as Add and more intense than Overlay; I like this mode because it works in a wide range of circumstances and images.

Key take-aways from this Insight

  • Get a general introduction to the Glow ResolveFX and how you might work with it during color/finishing sessions
  • Remove the “fiddle until it looks good” mentality and provide a repeatable approach to using this ResolveFX plugin
  • The importance of choosing your composite mode before dialing in the final look

– Jason


Member Content

Sorry... the rest of this content is for members only. You'll need to login or Join Now to continue (we hope you do!).

Need more information about our memberships? Click to learn more.

Membership options
Member Login

Are you using our app? For the best experience, please login using the app's launch screen


Comments

Homepage Forums Learning To Work Quickly Using The Glow Resolve FX (in DaVinci Resolve)


  • Jim Robinson
    Member

    Hey Jason. Thanks for this tutorial – OFX are by far the hardest things to get information on in Resolve. The manual as great as it is, kind of just skims over all the effects.
    I have been asking BMD ( in the forums ) to consider not going with the alphabetical representation in composite modes ( blending modes ).
    There is a reason that Photoshop has them grouped. The lists in Photoshop are – Normal, Darken, Lighten, Contrast, Inversion, Cancellation and Component. So if you know what you want the composite to do, you can then go to the correct group and then start auditioning the results of the math that needs to be applied.

    I think Glow is a favorite of many because it emulates diffusion and the perception of being more cinematic by taking the video edge off the footage. But as most things, some people take it to the point of being distracting and everything then looks like a dream sequence. And there a couple of popular youTubers, that for awhile was putting it on everything.

    I thought for sure that you would have included ( maybe you still will ) saving , titling and reusing the effects by creating a series ( or parallel) of nodes with different parameters set on each for Glow. I think that using it that would create a faster workflow to either grab all the different set glows and audition them, or grab the node from a “Display Node Graph” and drag it on to the node tree.
    Anyway, thanks for this Jason, looking forward to the rest of this series.

  • Darken mode with a glow can get you a nice effect too, I think it’s stumbled upon a Harry Potter flashback look with that once…

  • For me it works best when i set it to Screen, the response is far more natural and it doesn’t shift my contrast. Doing so I can apply it (or not) at the very end of my node tree before the CST without compromising the work that has been done before. Let me know your thoughts about!

Log in to reply.

1,000+ Tutorials to Explore

Get full access to our entire library of over 1,100+ color tutorials for an entire week!


Start Your Test Drive!
Loading...