| Series |
|---|
Day 22: 25 Insights in 25 Days 2019 New Year Marathon!
Meet the ASC-CDL (Color Decision List): The Theory
In a previous Insight, colorist Rob Bessette talked about his experience coloring dailies after a career in commercial color grading. One of the comments he made was about restricting his color corrections to be CDL-compliant. What precisely did he mean, being ‘CDL compliant’? Why is it important for dailies colorists to restrict their toolset? I’ll explain the theory behind the Color Decision List (CDL). And at the end of this article, we look at why DPs typically combine a LUT with a CDL to achieve their final looks. But before we get there, we need to understand what precisely a CDL is designed to do.
What is a CDL?
The ASC-CDL, more commonly expressed and known simply as the CDL, was created through a joint operation between the American Society of Cinematographers’ Technology Committee, production/post-production vendors, and color scientists to standardize the exchange of primary color adjustments. The specification was first released around mid-2007 and is now widely adopted among several software and hardware manufacturers.
The CDL stands for Color Decision List. Like an EDL communicates basic edit data, a CDL carries a subset of color-correction data.
Although all color-correction systems offer their basic grading controls, ‘Lift,’ ‘Gain’, and ‘Gamma’ are implemented differently from vendor to vendor. Their definitions of LGG can vary in sensitivity and response. The strength of a CDL- based workflow is its software-agnostic nature. CDL-compliant hardware and software can create, modify, and reproduce consistent color results exported from any other supported platform. In other words, it’s about the perfect interchange of color modifications.

The parameters of a CDL replace the traditional Lift, Gamma, and Gain you’re probably used to manipulating. However, each set of CDL controls behaves very differently from one another!
- Slope is to Gain
- Offset is to Lift
- Power is to Gamma
You may be wondering why the ASC-CDL sequence is expressed as ‘S-O-P’, as opposed to ‘O-S-P’ to match the more commonly known ‘LGG.’ That’s because, in CDL math, the arithmetic of SOP-S is calculated in that precise sequence. This is extremely important, if you think back to high school math class, you’ll remember that even the slightest change in the order of operations will result in something else entirely different!
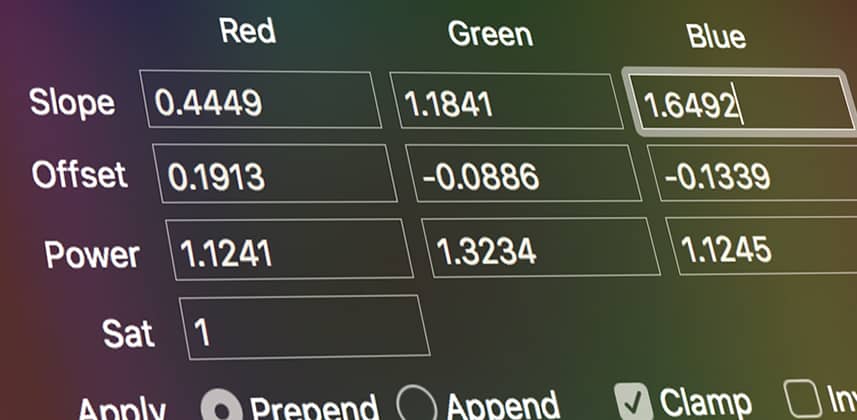
Slope, Offset, and Power (referenced here as SOP), are transfer functions applied to all three independent channels of R, G, and B. An end result is a group of nine separate operations in a single CDL; each SOP operation has three color components.

Those with attentive eyes will notice an extra feature in the above screenshots. That’s right, a tenth designation that solely controls Saturation was added in Version 1.2 of the ASC-CDL and affects the entire combined result of RGB after all SOP transfer functions have been applied. That’s why it’s called SOP-S.
We’ll look at these individual operations in a few moments.
Less Is More – What a CDL Isn’t
Like LUTs, CDLs do not affect spatial or temporal adjustments – power windows, tracking, secondaries, and all plugins are out of scope. The key takeaway with CDLs is that they are primary-only color corrections with the added saturation slider.
This primary-only set of controls may initially feel like a restriction, but it is deliberate. Remember, a CDL is not meant to compete with an entire 5- or 10-node color grade. It does not replace a 3D LUT. If anything, it’s designed to side-step proprietary color grading exchange formats such as the .drx (DaVinci Resolve Grade) or .blg (BaseLight Grade). Any software that offers CDL compliance will generate the same precise results when reading a CDL.
What makes CDLs so vastly compatible? It’s a simplified design. Software engineers can easily reverse-engineer the conversion between SOP and LGG.
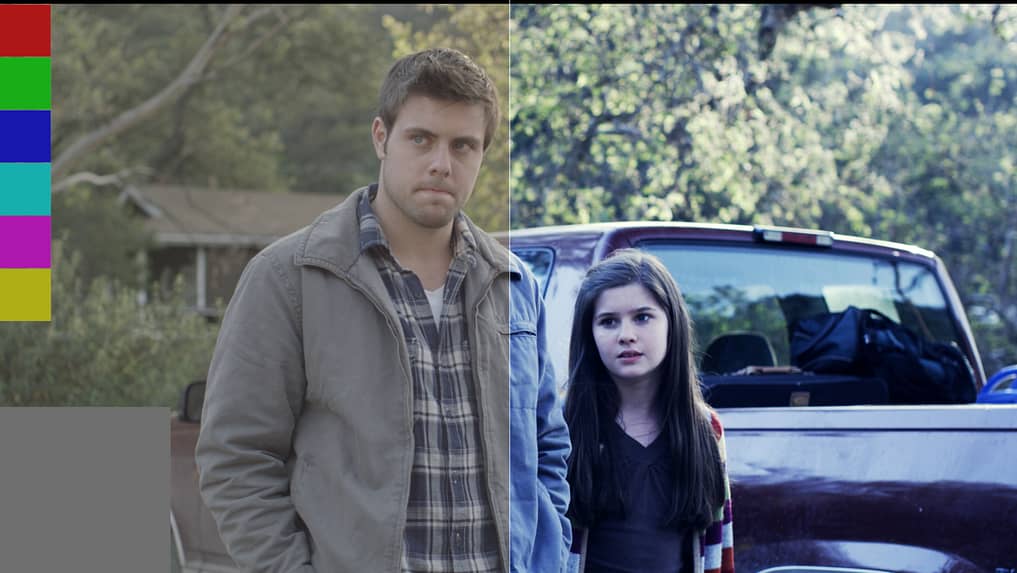
However, as powerful as CDLs can be (they are only metadata themselves), they are pretty featureless when communicating other pieces of information. A CDL knows nothing and transmits nothing about the recording format, exposure, and color space of input data. Since the CDL does not communicate any other vital details, clear communication and precise look management are essential. Otherwise, matching pictures between post-houses, VFX artists, and finishing artists – and all the different software they use – is nearly impossible. But even with its simplicity, the key to success in a CDL workflow: Test, test, test!
When to use a CDL?
Some of you may go through your entire color-grading career and not use a single CDL! This is because only some workflows require CDLs to begin with. To appreciate the problems that CDLs solve, we first look at the context we see them being used.
Production is where most CDLs are born. They are created while live grading on set by the DIT while collaborating with the DP. Or while grading dailies at a post house the evening or the day after the shoot. At its best, on-set / near-set / dailies grading preserves the cinematographer’s intent and protects his or her creative ideas and intellectual property down the line. Before systematic look management existed, there were written notes, photos taken on set, and magazine cut-outs to refer to. CDLs are one of the few modern ways to close this creative gap.
As with solving other technical problems, CDLs avoid unintentional changes to creative color choices later in the post production process.
Check out our on-set tutorials in our Insights Tutorial Library
From understanding Dailies to round-tripping CDLs in DaVinci Resolve, there’s more to explore!
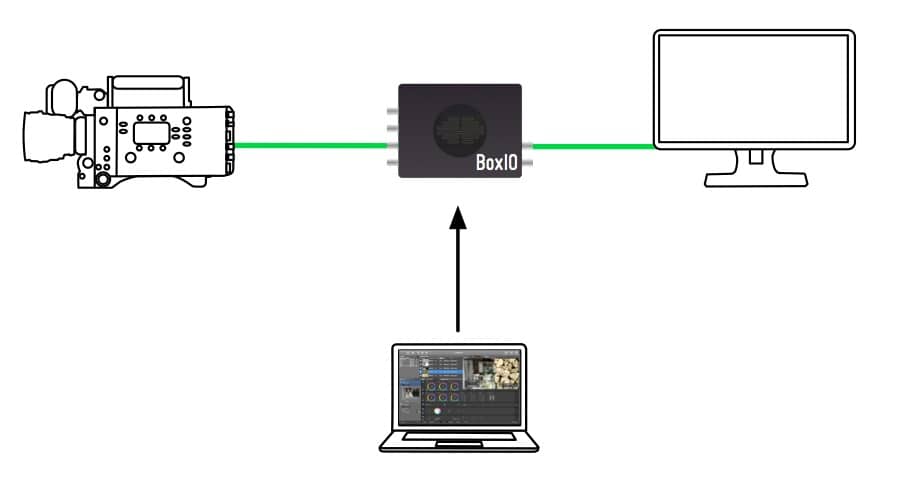
Depending on the production, either the DIT or the dailies colorist exports CDLs to provide offline editorial with first-light graded material. This is later used as a starting reference point for post in final color grading. The very same CDLs are also used by the visual effects department, applying the CDL adjustments to their plates and assets. This helps dozens of artists and technicians see the same image, for example – during compositing in Nuke.
Even if the entire production and post pipeline strictly stays inside of Resolve, Baselight, or any other ‘hero’ system, a CDL workflow is still preferred for dailies. It keeps the post process flexible. It also side-steps version incompatibility between workstations (think: one post-house on Resolve 14 with another on Resolve 15). CDL workflows also preserve maximum compatibility if the project needs to move outside of the initial hero system. With proper communication and color management, CDLs are guaranteed to deliver consistent results.
I hope you are starting to appreciate how CDLs fit in the overall production to post production workflow. But before we wrap up our discussion, let’s dig a little into the actual definition of Slope, Offset, and Power.
How a CDL works: Slope, Offset, and Power
The math behind each of the SOP operations is, essentially, open source – explaining the wide adoption of this interchange format.
Slope
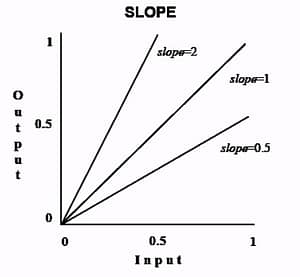
Slope alters the image without affecting the black level. The default slope value is 1.0. Slope is best thought of as a Gain or Contrast control that pivots at 0.
Offset
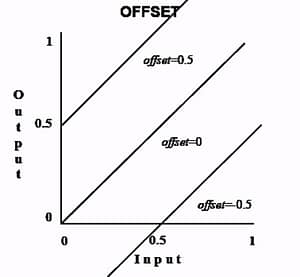
Offset operations happen after the Slope. It raises the luminescence of the entire picture while keeping the slope constant. Think of it like a master pedestal that shifts the curve up or down the y-axis. You can think of the Offset as an exposure control, where the default value is 0.0.
Power

Power is calculated after Slope and Offset. But while both Slope and Offset work linearly, Power does not. It’s a non-linear power function, which is where it gets its name from. The default power value is 1.0.
Saturation – Employs Rec 709 weightings, raising and lowering the entire picture’s colorfulness after SOP calculations. Saturation is applied after Slope, Offset, and Power. The default value is 1.0, where 2.0 is maximum and 0.0 is total desaturation (grayscale).
Why not just us a LUT?
Seeing the limitations of the CDL’s SOP-S operations – if you’re schooled in using LUTs then you probably wonder, why not skip the CDL and just use LUTs? The answer has to do with the inherent nature of both correction pathways – CDLs allow the artist to make creative changes. Whereas LUTs are set and fixed. But here’s the thing: It’s not an either / or choice.
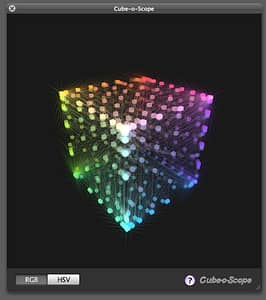
In a typical color pipeline, a LUT can be very simple (strictly transforming the picture from a log space to a viewing space). Or, a custom LUT can be created and approved by the DP that incorporates the final look they’re trying to achieve. In both cases, using a combination of CDL + LUT allows creative adjustments to the image without affecting the LUT directly. This works out quite well since 3D LUTs consistently make precise contrast and color adjustments that the DP desires while the CDL can tweak the image to match cameras or impart the precise look / feel that the DP wants at that moment.
For DaVinci Resolve colorists, it’s just like stacking two nodes together.
In these workflows, the LUT does the heavy lifting while the CDL does the fun stuff!
In almost all cases, the CDL is placed BEFORE the Show LUT. This allows the CDL to modify the picture to its best potential before pixel values are transformed by the Look Up Table. It also keeps the LUT from clipping ‘out of bounds’ data, which the CDL can pull in before passing it off to the LUT.
Closing Thoughts
Now that you are properly introduced to the essentials of CDL theory, you have a better understanding how and if the CDL workflow is appropriate for your color pipeline. The single big take away about grading with CDLs is: Keeping it simple, for compatibility.
In the next insight, you get a practical look at the few different file formats for CDLs and some hands-on with how to get CDL grades into and out of DaVinci Resolve.
-ryan

