 Loading...

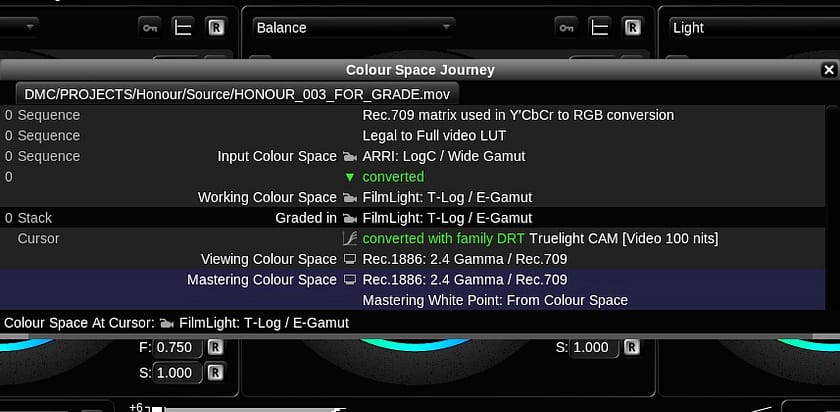
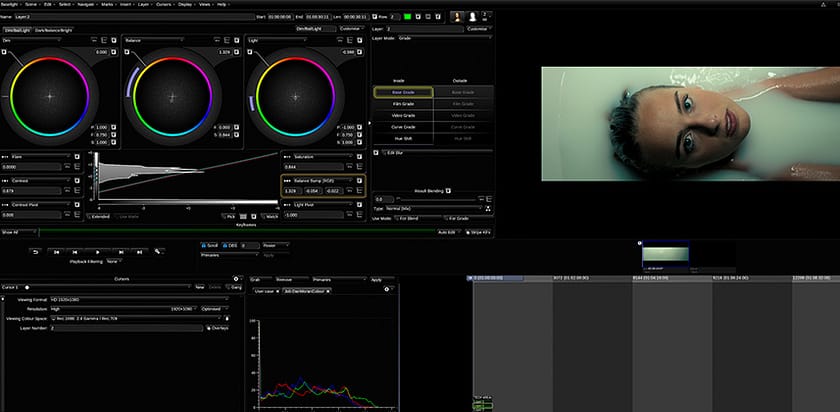
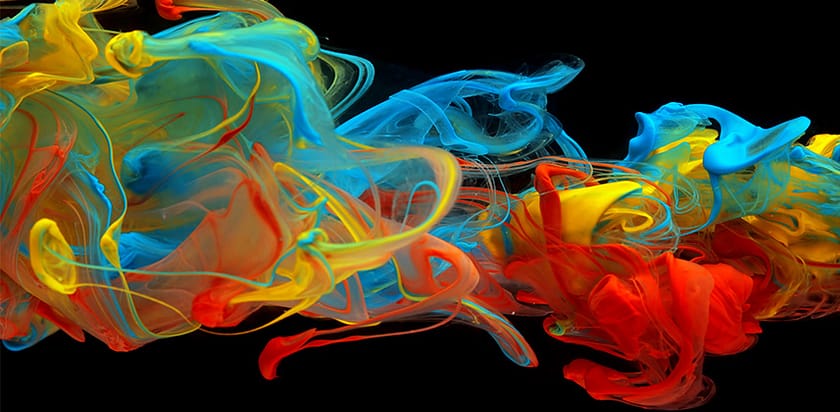
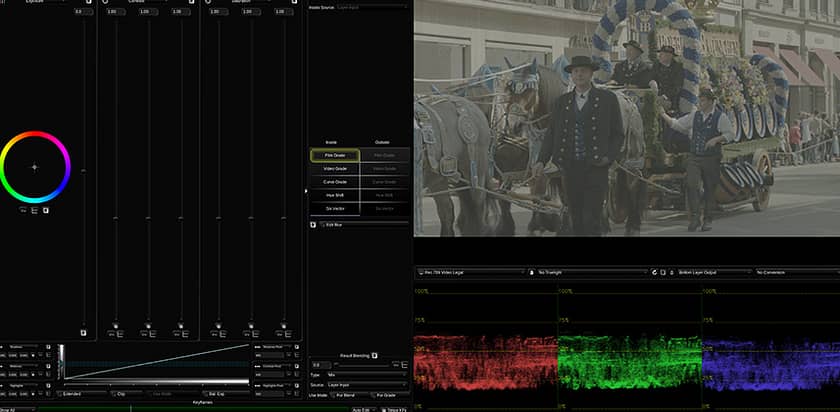
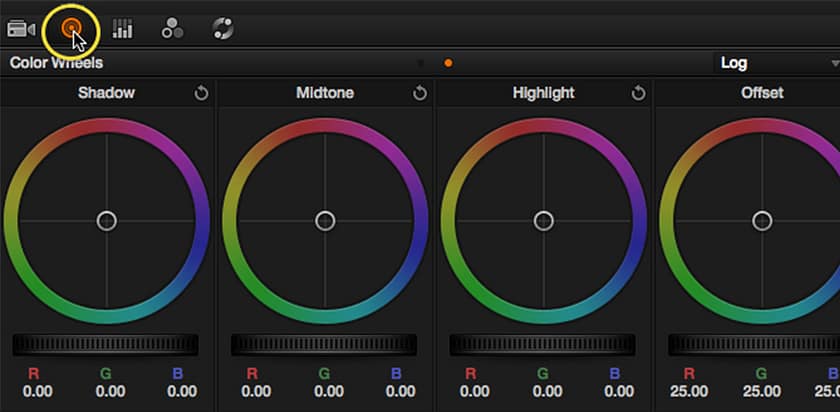
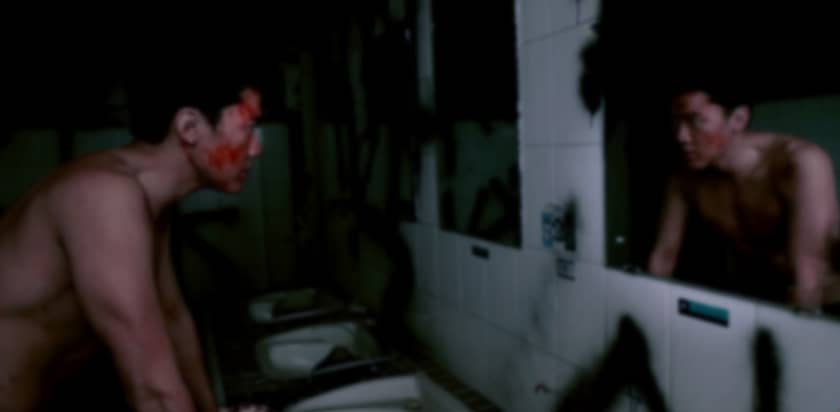
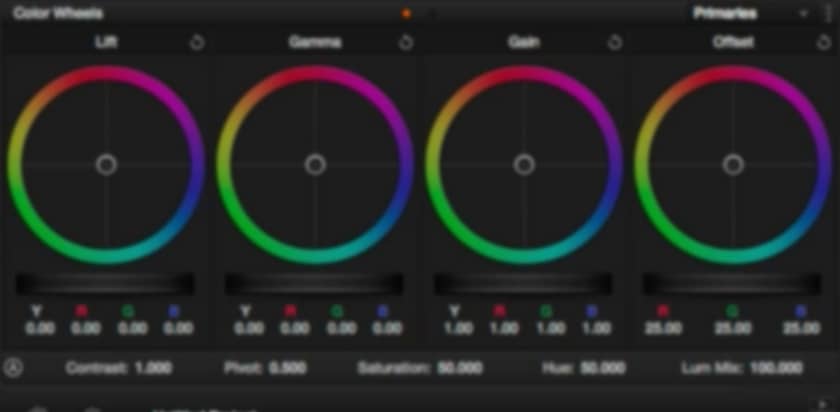
Understanding and Using The JPLog2 Color Space
JPLog2 is a powerful working color space for pro colorists. Dado Valentic unpacks why it will impact the future of grading.
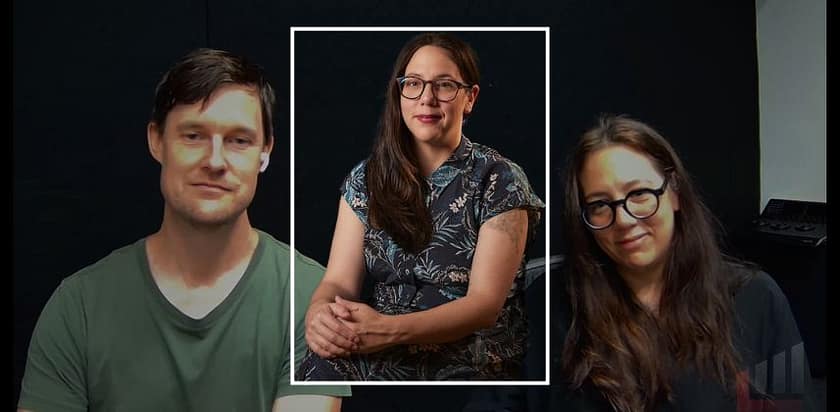
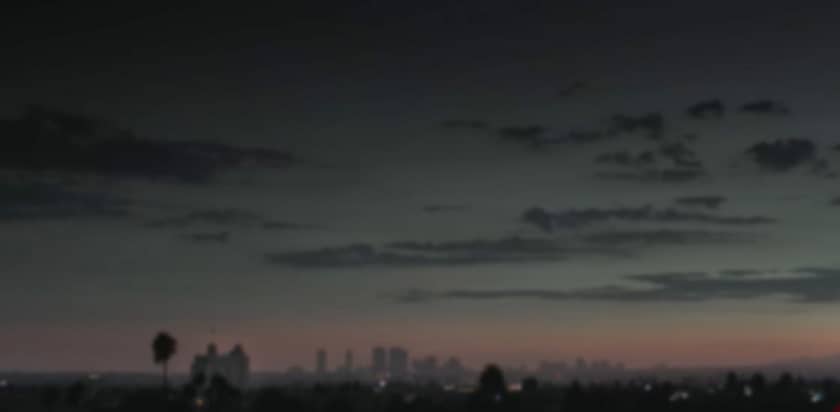
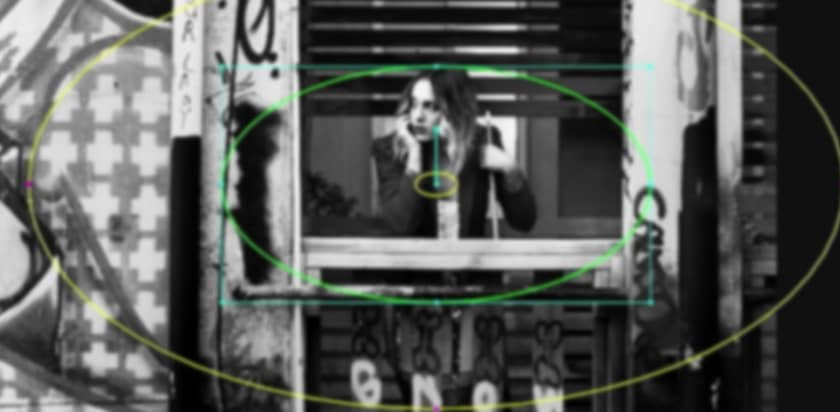
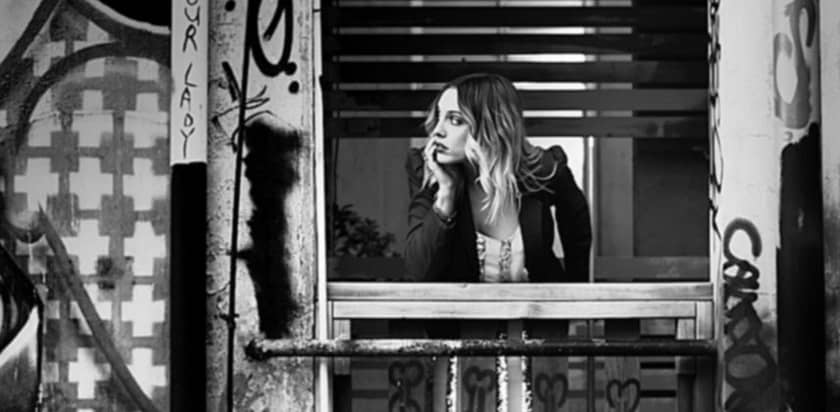
Working Life as an Independent Freelance Film Colorist
Kali Bateman, CSI, shares what it's really like to be a freelance colorist who works from a custom-built grading suite but also on the road.
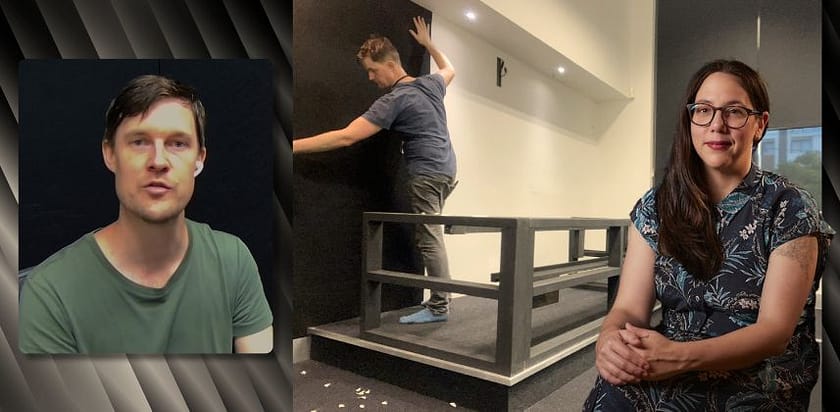
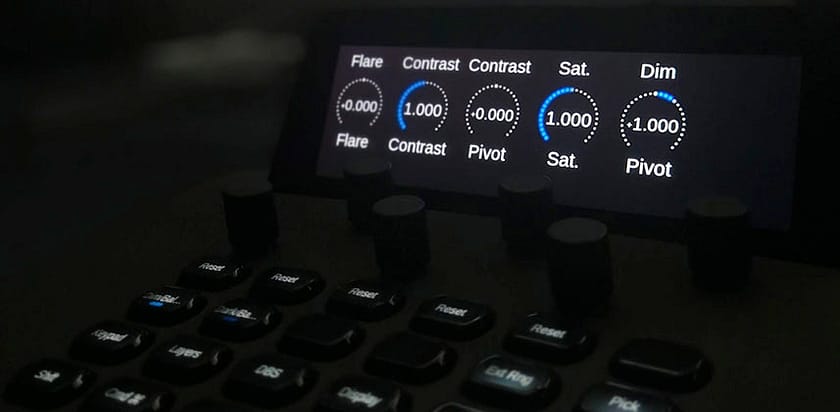
Building a Professional Custom Color Grading Suite from Scratch
What do you need to build a professional color grading suite from scratch? Post Professional Sam Lowe shares his in-depth design secrets.
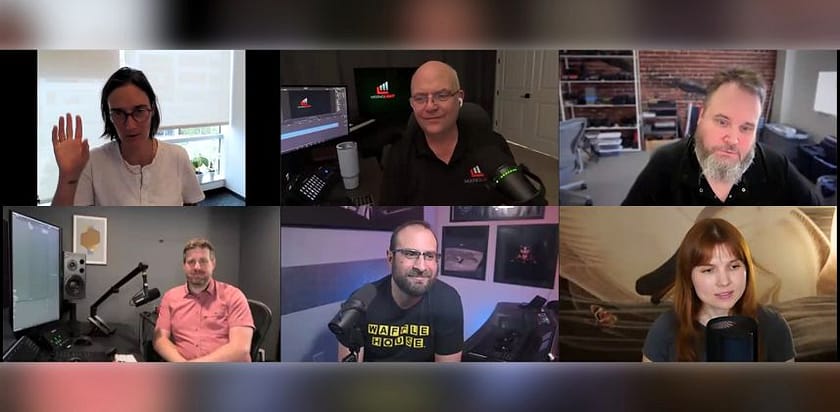
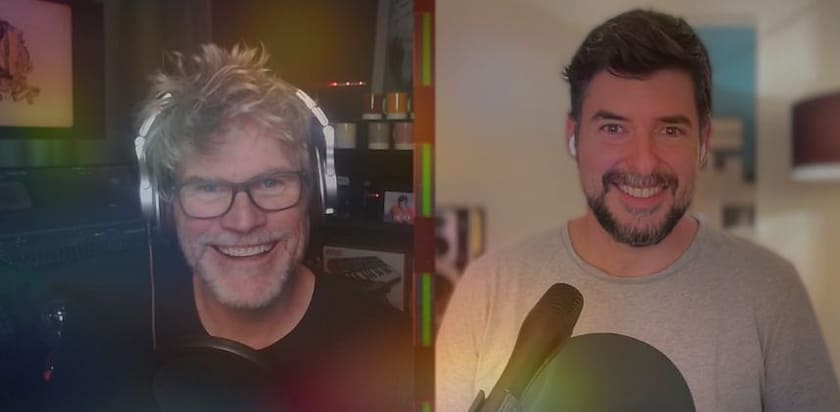
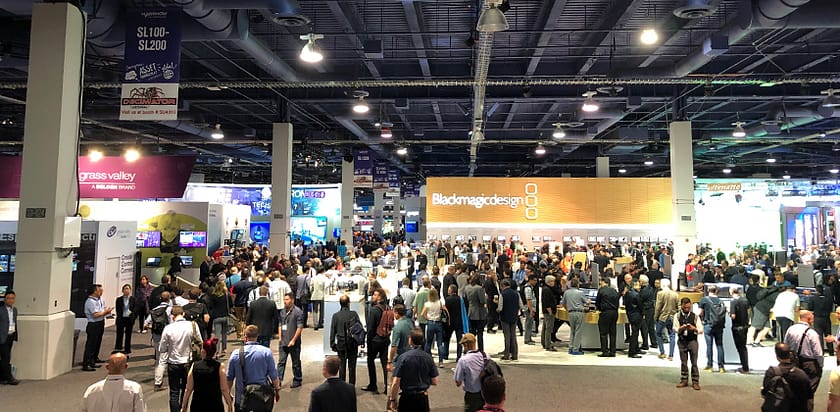
Office Hours LIVE – NAB 2025's Biggest News & Takeaways
Mixing Light Contributors share their professional perspectives on NAB 2025, the show's future, the best updates, and the impact of AI.
The Art of Color Grading Animation with Keiran Lee
Supervising Colorist Keiran Lee reveals insights on the technical and creative differences in grading feature animations and VFX-heavy films.
Chatting with FilmLight Baselight Workflow Specialist Andy Minuth
Baselight specialist Andy Minuth mixes deep technical knowledge of image processing and color management with nuanced creative instincts.

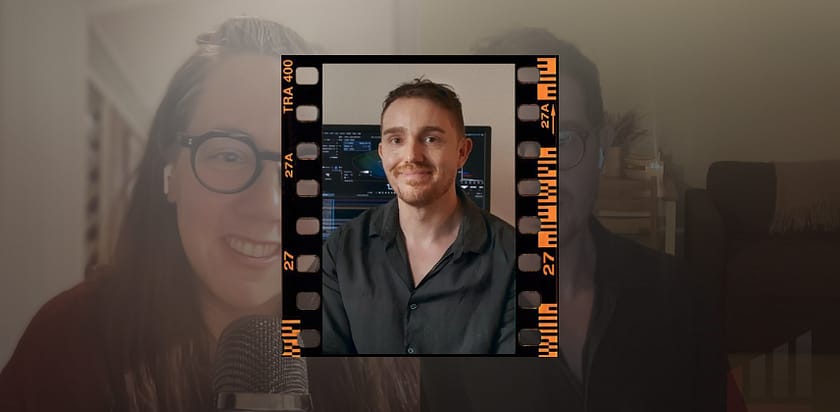
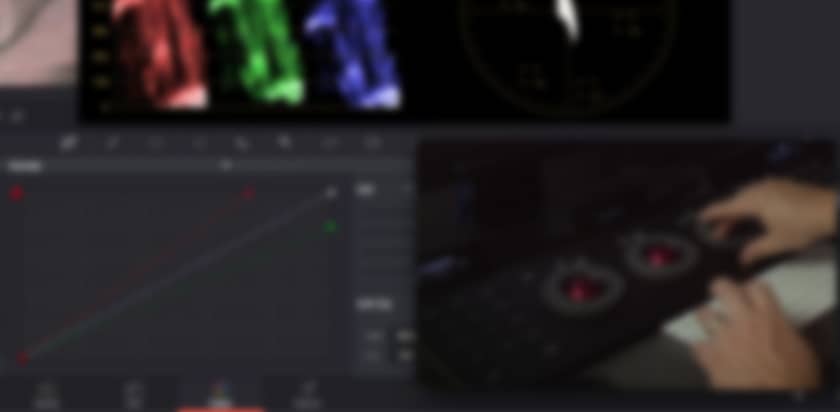
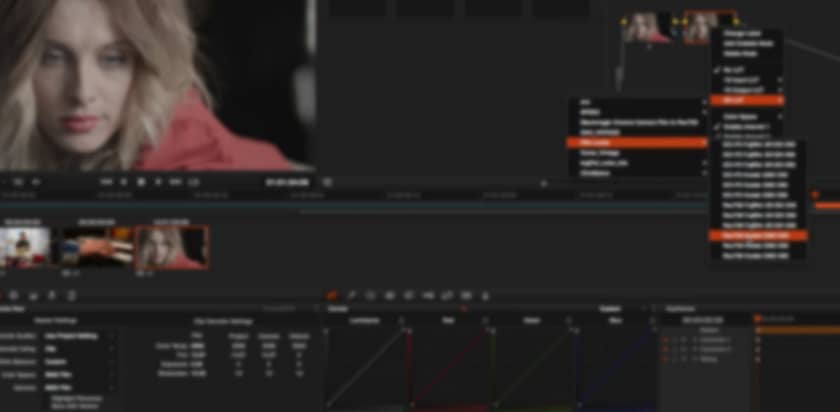
Using Baselight’s New Look Development Tool: Chromogen
Colorist Luke Ross explains how to use Baselight's new Chromogen look development tool to quickly craft custom film emulation looks.

Color Grading Animation with Seasoned Colorist John Daro
How does color-grading animation differ from live action? Find out in our discussion with veteran editor and DI Colorist John Daro.
A Career Empowering Colorists: Talking with Peter Postma
Peter Postma of FilmLight shares his involvement in creating foundational color grading tools and standards at Kodak and FilmLight.
DaVinci Resolve Printer Lights VS Baselight Base Grade Bumps
Explore and compare DaVinci's Printer Lights tool with Baselight's Base Grade Bumps controls, mapping either tool to a keyboard number pad.

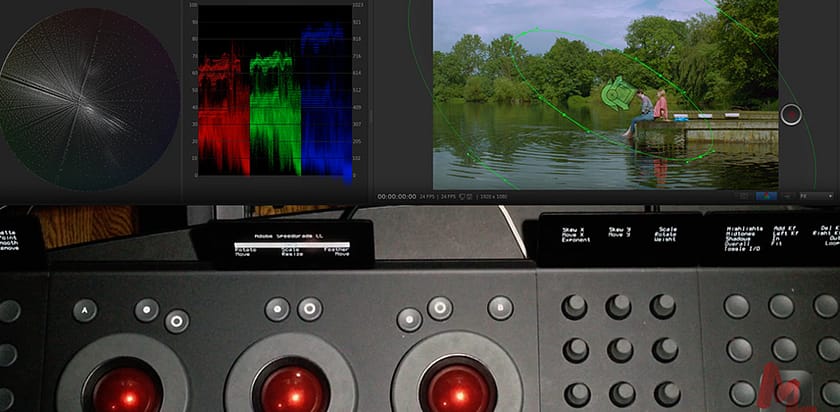
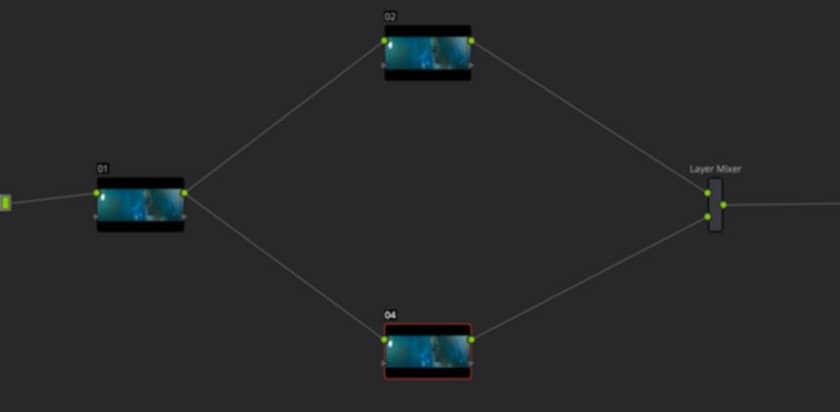
Conforming in Baselight? Start here.
Learn the Conform tool in Baselight. Luke Ross solves importing a problematic EDL and eye-matching reference clip using two play heads.
Fixing Oversaturated and Out-of-Gamut Colours in Baselight LOOK
Colourist Luke Ross is back with Part 18 of his 'Learning Baselight Look' series. Learn how to fix oversaturated and out-of-gamut colours.
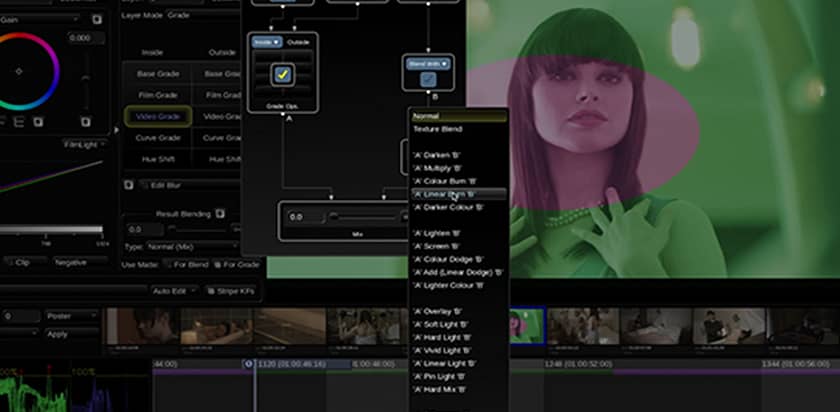
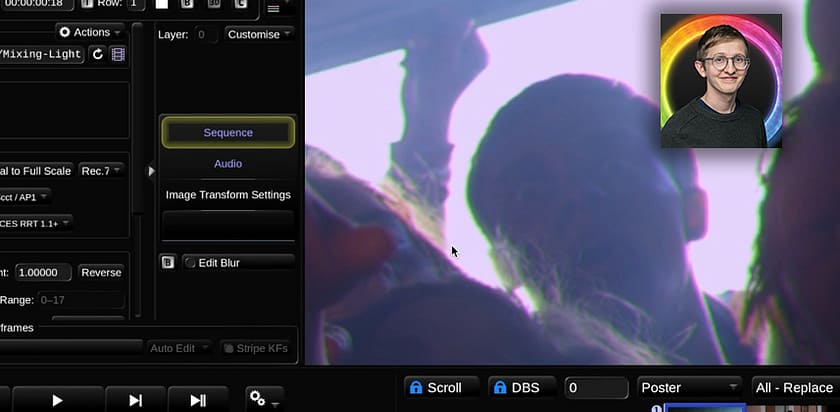
An Overview Of The Mind-Blending Control Panel In Baselight Student
Luke Ross teaches you how to use Blending Strips in the free Baselight Student. Plus, go down the rabbit hole of the Blending Control Panel.
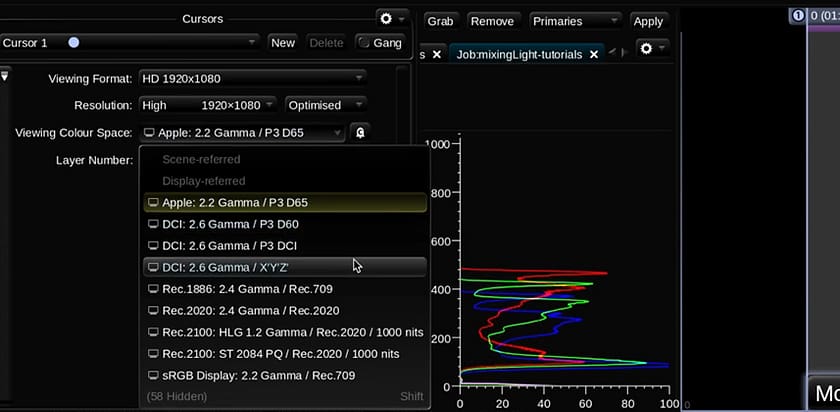
Understanding Baselight Student's Colour Management Framework
In Part 8 of our series, learn the three colour space options that are essential to correctly colour grading in Baselight Student.
Colourlab Ai - Working In A Color Managed Workflow
In Part 3 of this series, Jason Bowdach demonstrates how to use Colourlab Ai in a color-managed workflow in Resolve and shows new features.
Baselight Student – Importing Media Using The FLUX Manage Viewer
Learn how to import media, bookmark folders, preview and edit footage into a sequence, using the FLUX viewer. Plus - recovering from a crash.
Diving Deeper Into The Colourlab AI Ecosystem - Part 2
In part two of this series, we explore fixed node structure workflows with ColourLab AI as well as two OFX plugins that are a part of the ColourLab AI ecosystem.
Computer-Assisted Shot Matching with Colourlab AI - Part 1
In Part 1 of a new series, Jason Bowdach shows you how to get projects to ColourLab AI and how to build a match across a scene using this powerful tool.

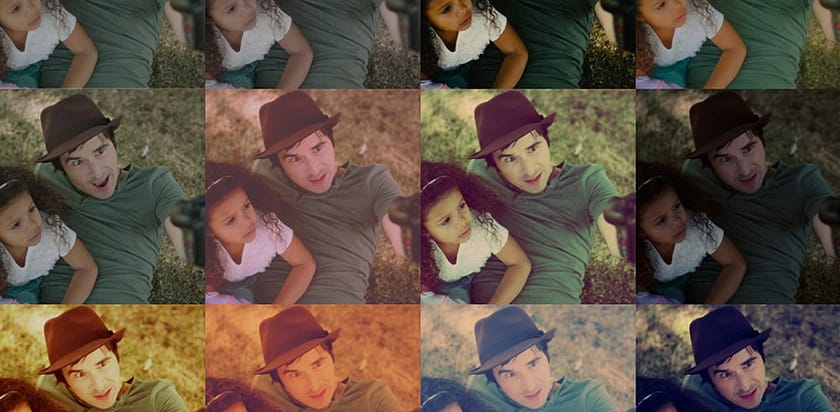
Color Grading Challenge – Tri-X Style Black & White
Dan briefs you on a Black & White Tri-X look. If you grade to his brief and post in the comments, he'll play 'client' and offer feedback.
Behind The Curtain – GH5 Music Video In Baselight Part Two
How easy is it to do final finishing in Baselight? Dan shares his approach to adding titles, audio, compositing and rendering
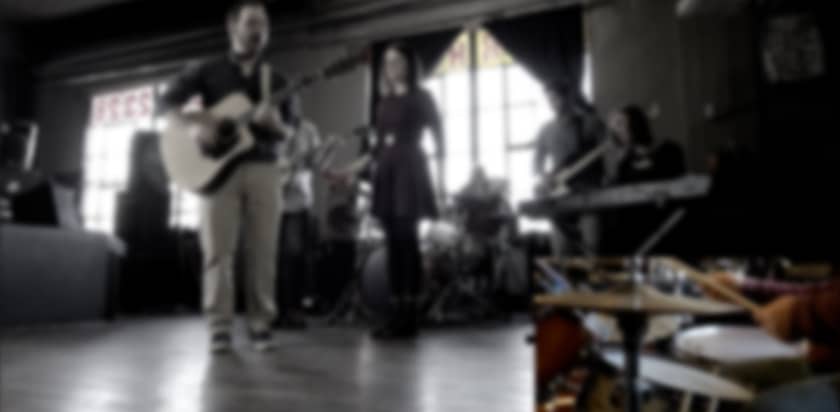
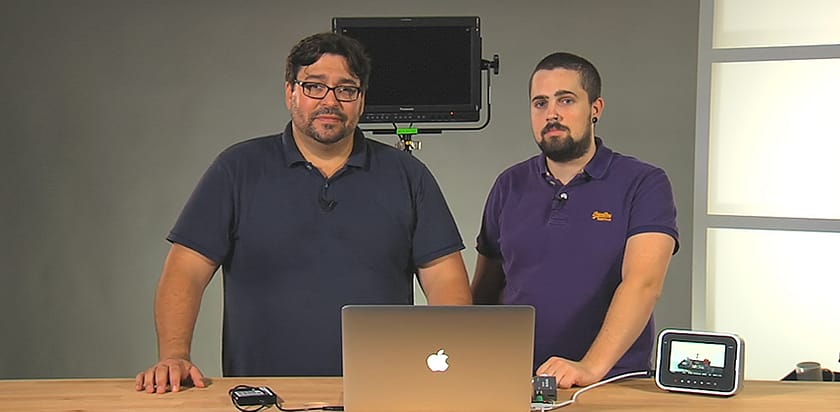
Behind The Curtain - GH5 Music Video In Baselight
Grading a one-shot music video shot on the Panasonic GH5 was challenging. Check out this Insight to learn Dan's approach.
Moving To Baselight Fulltime
In July I started the proecess of moving to Baselight full time for my grading. As a 10 year Resolve veteran I need to let go of the past
Baselight Start to Finish – Project Creation & Conform
Everything you need to know from project creation to starting your grade including, colour management, project management & Scene Detection
Baselight Start to Finish - Series Overview Kodachrome Inspired Look
An introduction into building a Kodachrome inspired look on Arri Alexa footage using Basegrade, Looks, Grain and Color Crosstalk
Grading Challenge – Baselight Sci-Fi Grade
In this insight Dan reviews your submissions and shares his own Sci-Fi look using primarily Baseilght Base Grade
Grading Challenge – Modern Sci-Fi Brief
Dan plays client and dishes out a grade brief for a Modern Sci-Fi film that he'd like you to execute. Remember there are no wrong looks!
What I Learned (and Surprised Me) in 5 Hours at NAB 2019 - Part 1
At NAB 2019 with 5 hours of 'me time', in Part 1 learn what I though was significant in Resolve 16 and Mistika Boutique.

Revisiting the Versatile RGB Mixer (in DaVinci Resolve)
Mixing the R, G, and B colour channels is a versatile color grading technique. Using Resolve's RGB Mixer, learn its simplicity - and power.
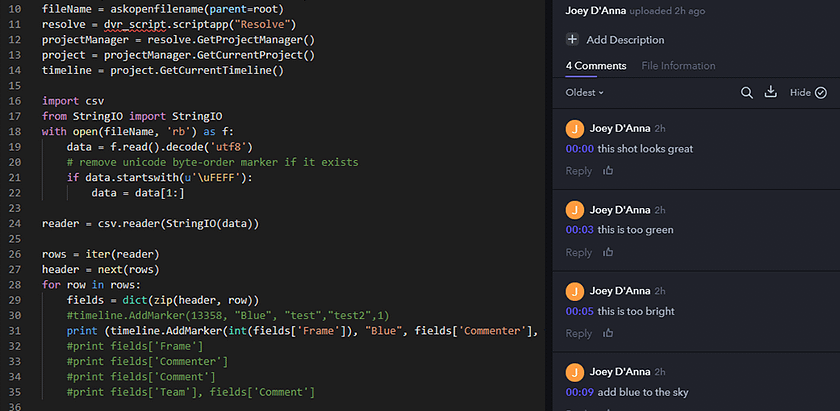
Using Python and Expanding DaVinci Resolve's Functionality
Resolve's new scripting APIs open up exciting new possibilities. Learn how to get started by using Python to import comments from Frame.io.

A Month Later: Team Mixing Light's Take On NAB 2018
It's been a little over a month since NAB 2018. We discuss what we saw including Resolve 15, new HDR monitoring, control surfaces and more.

From The Grading Suite: From Short Form To Reality
Dan shares the tale of his attempt at grading long-form reality television after spending 10 years being a pampered commercial colorist.
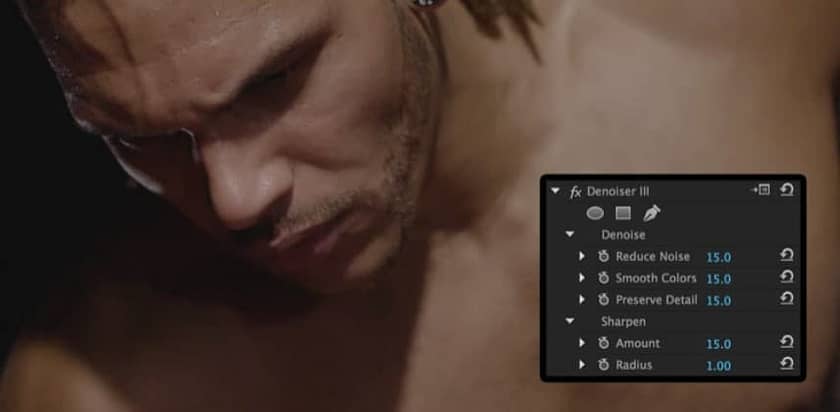
Using Denoiser III On Challenging Footage (Compared to Neat Video)
Part of Magic Bullet Suite, Denoiser III has been rewritten from scratch. Its simplified UI makes it easy to use. But can we expect the same kind of results than a more expert plugin like Neat Video? Let's get a closer look and make comparisons.

Grading Challenge - Reviewing My Car Brief Grades
In this insight Dan is reviewing your efforts on his car brief and also sharing his attempt at the shot to show his approach to the grade.
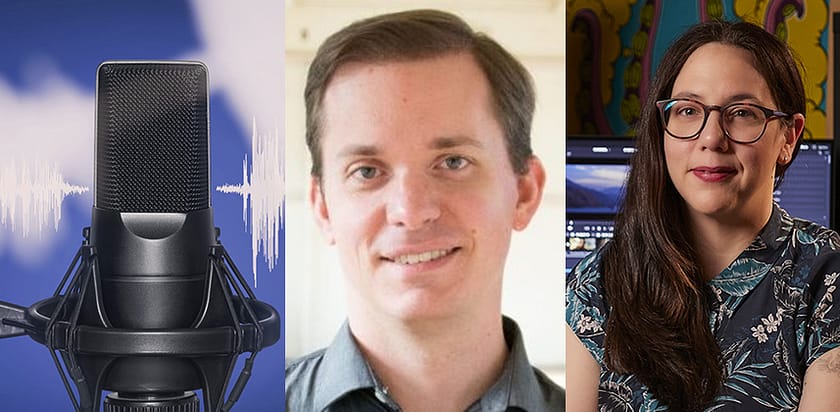
Colorist Podcast Episode 013: Vanessa Taylor
In this installment of the Colorist Podcast, Josh is joined by colorist Vanessa Taylor. From balancing tech & art, grading HDR this is a great listen!

DaVinci Resolve 14: The Mythical Collaborative Workflow Has Arrived
Like flying cars, the 'Studio' concept of post-production was promised for generations. At NAB 2017 we have the first actual implementation in Resolve 14.
Color Correction Gear Head: Review of the Resolve Mini Control Panel
In this installment of Color Correction Gear Head veteran colorist Marc Wielage provides his impressions of the new Resolve Mini Control Panel.

Getting To Know The EasyDCP Resolve Plugin: Streamlined DCP Creation
Want to make a DCP directly from Resolve? In this Insight, Robbie explores the essentials of using the EasyDCP Resolve plugin.

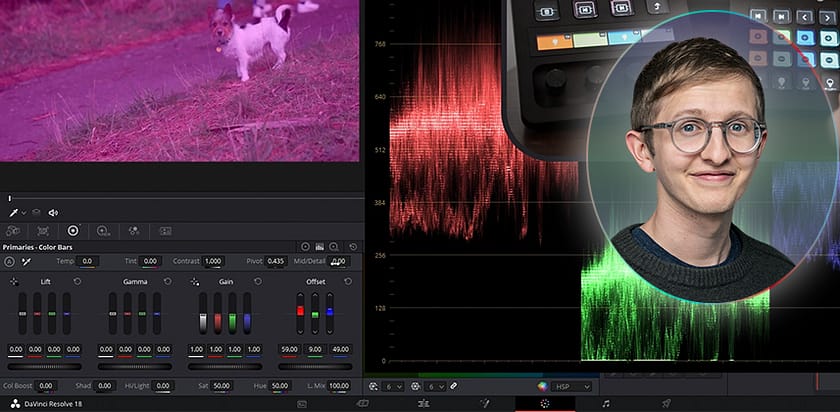
Getting To Know ACES Part 4: The Latest In ACES Updates
Continuing our introductory series on ACES, you learn about the latest updates to ACES, including a working color space added to the ACES 1.03 specficiation: ACEScct. Plus, how it effects DaVinci Resolve colorists.

Colorist Podcast Episode 005
In Episode 5 of the Colorist Podcast, Josh talks to well-known online editor & colorist Terence Curren about his work & other sujbects
How to Work Around the 'Mouse Math Bug' in DaVinci Resolve
In an earlier video we showed you the 'mouse math bug' when color correcting in DaVinci Resolve—now learn how to work around it.

Getting To Know The New Flanders Scientific BoxIO
Color management can be complex. We talk to FSI's Bram Desmet about their new BoxIO Lut box and how it can help on-set & in post.
How to Color Grade With Client Revisions In Mind
Sometimes we get lost in the heat of the moment and over complicate our grades. Dan shares his tips for responsible grading when time is short
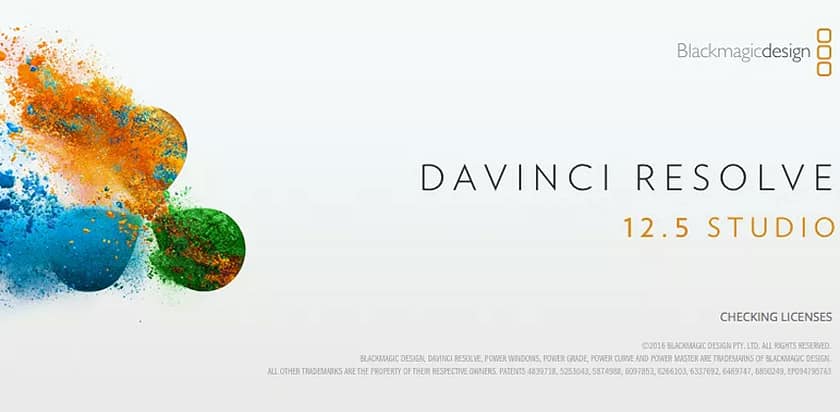
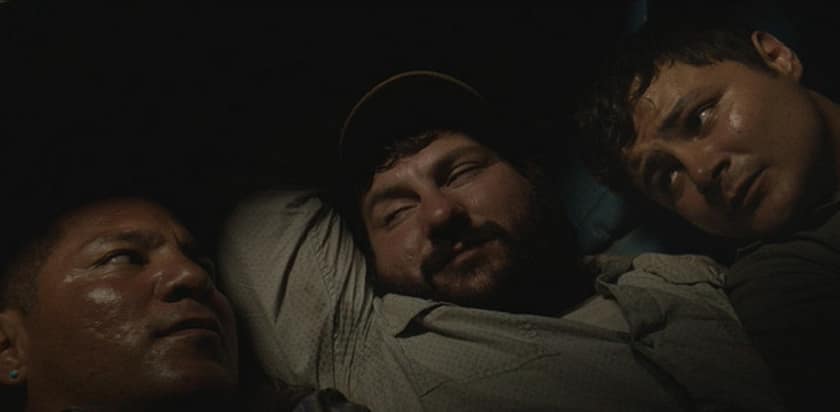
12 New Features in Resolve Studio 12.5 (that are worth paying to upgrade)
These 12 New Features in Resolve Studio 12.5 may finally get you to upgrade to the paid version. See some of them in action.
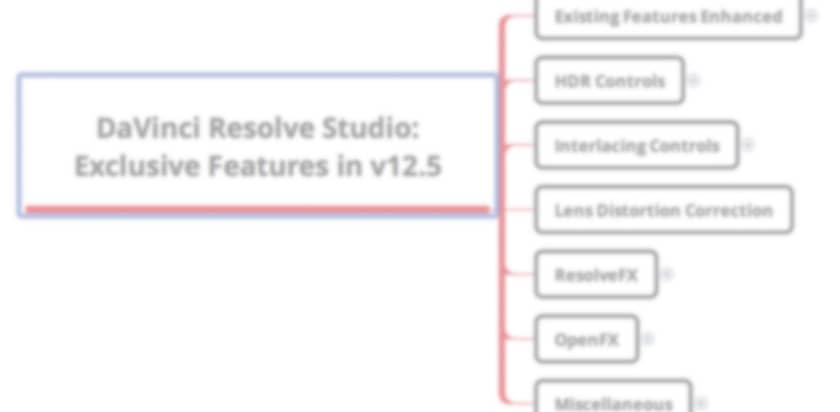
DaVinci Resolve Studio - Exclusive Features for the Paid Version
Learn how Resolve Studio 12.5, the paid version of Resolve, is starting to get siginificant features that free users will want.
Resolve 12.5 - Dan's Favorite New Can't Miss Features
Resolve 12.5 is here and Dan shares his thoughts on the exciting brand new features and how they can be used to help you colour correct better.
Resolve 12.5 First Look - Patrick's Gems You Need To Know
This DaVinci Resolve 12.5 First Look shares a working colorist's initial thoughts about the big new update to this color correction software.
From The Grading Room: Turning A Session Around
not every session can be amazing and Dan shares his tips on turning a session around and winning over a client when things don't go your way.
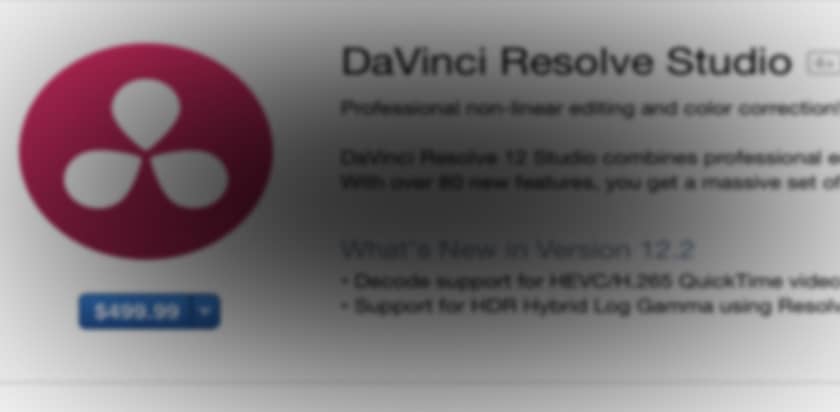
Is DaVinci Resolve Studio on the Mac App Store Worth It?
Is DaVinci Resolve Studio on the Mac App Store worth the $500 upgrade over the free version? Or should you buy the more expensive 'dongled' version?

Edge Sharpening & Denoise Workflow
In this installment of From The Mailbag we discuss how to isolate and sharpen edge details, and discuss a proper video noise reduction workflow

Christmas Clean Up: Refresh Your System
In this Insight Dan explores some things to think about when it comes to doing a refresh of your system.
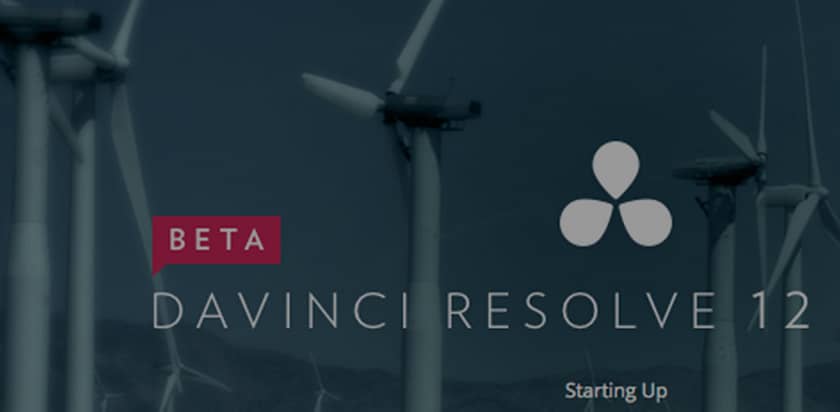
DaVinci Resolve 12 Public Beta 1: Special Report
Three colorists discuss DaVinci Resolve 12 including: What it means to use Beta software; favorite features (so far); areas of improvement
DaVinci Resolve 12 First Look : Colorist Crash Course Mixing Light
Resolve 12 is here and this insight is aimed to get experienced colorists up and running as soon as possible with some tips from Dan
Baselight For Avid: Initial Thoughts on Primary Corrections
Dan shares his first thoughts on making primary corrections using the Baselight for Avid color correction plug-in.
From The MailBag Episode 25
A couple weeks after NAB 2015, Team Mixing Light breaks down NAB 2015 - the gear & other amazing stuff from the week.
Damage Control - Creating A Look With Difficult Footage
Grading high quality is fun but what happens when you have difficult footage to begin with? Dan takes a look at Damage control when grading

Rediscover The Basics - Node Operations
Have you ever paused to think of the order that you place your nodes? Dan shares his approach to getting the most out of your image.
Advanced Beauty Grading Part Two : The Fashion Look
Time to take the image into the next level with a fashion look in part two of the series on advanced beauty grading.

Creating LUTs From Adobe Photoshop
You've been able to apply lookup tables in Adobe Photoshop for a while, but a new feature gives the ability to export LUTs. Learn how!
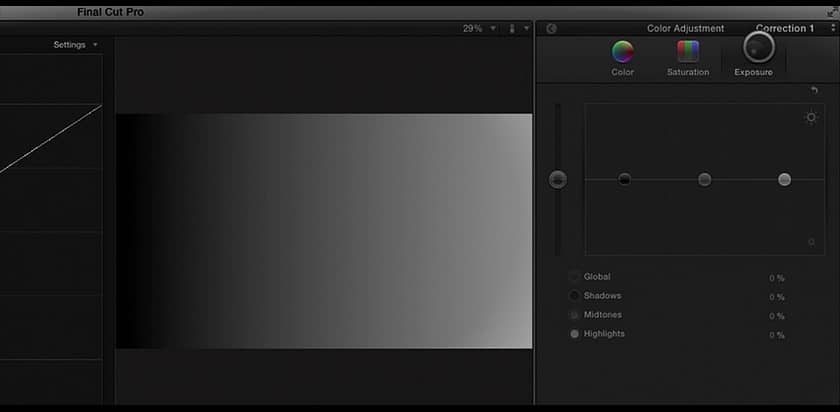
Final Cut Pro X Color Correction Challenge
What if a professional colorist were required to color correct in Final Cut Pro X (without plug-ins)? We start by exploring Exposure.
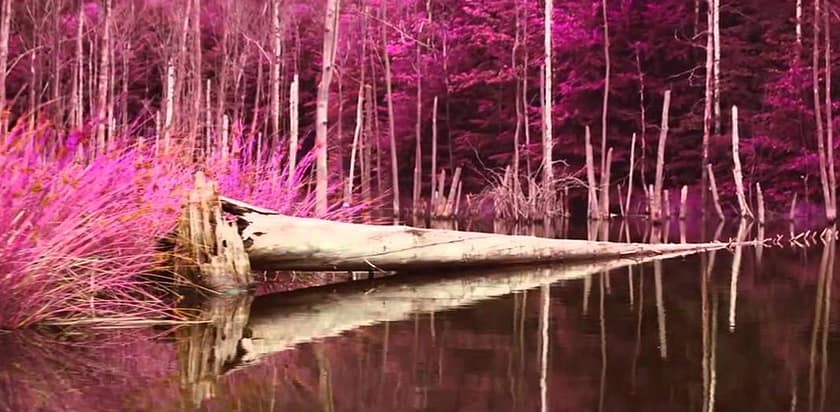
Infrared Look - Emulating Aerochrome
Building an Infrared Look can give you some beautiful results if you have the right projects and feel adventurous!
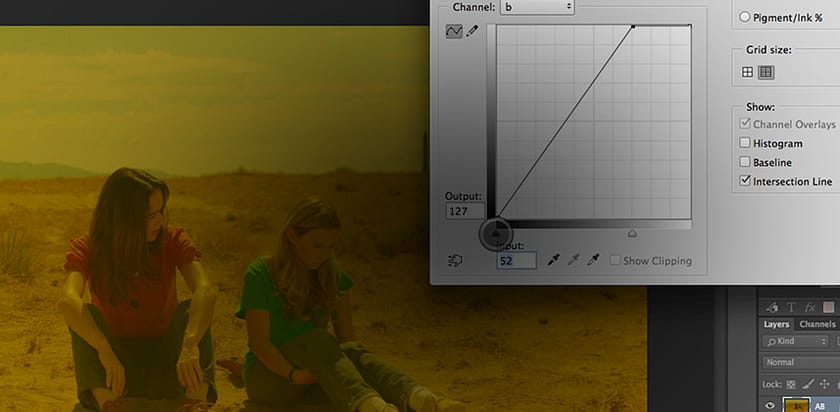
LAB Color Correction Foundations - Photoshop
Learning how to color correct in LAB color space with DaVinci Resolve is easier if we start with how the Photoshop experts are doing it.
Color Correction Breakdown - Spanning the Ages
Commercial Breakdown - Rolo. Dan shares another instalment of his series of behind the scenes insights. We build looks for different eras.
Look Library - Halloween Slasher
Dan shows you how he built a Halloween Slasher Look inspired by classic 80s movies for a recent teaser commercial for Halloween.
Advanced Windows - Difficult Shape Masking
We take a look at difficult shape masking and combining multiple windows in DaVinci Resolve to give you total control over difficult images.
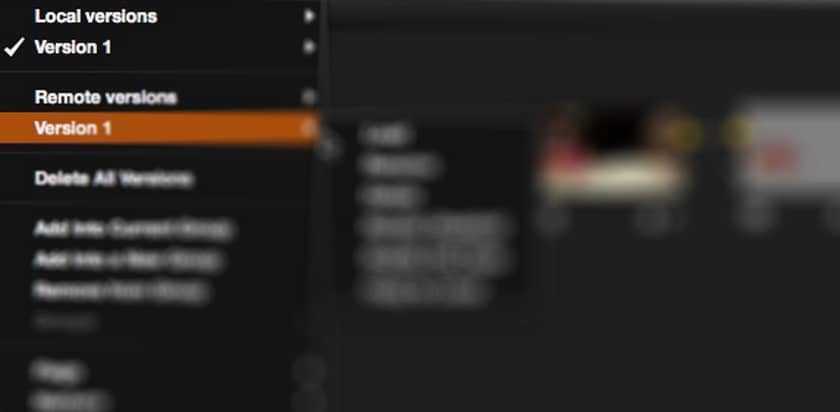
Remote Versions: Sharing Grades Between Multiple Timelines
If you have to color correct multiple versions of a timeline, DaVinci Resolve's Remote Versions is a feature you need to know.
DaVinci Resolve 11: Broadcast Safe + Grouping LUTs
In this episode of From The MailBag, learn about Resolve 11's new broadcast safe option & how to use LUTs while Grouping.
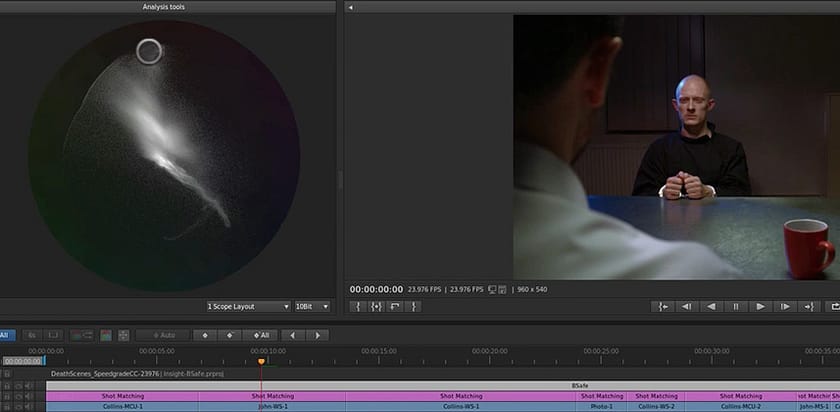
Shot Matching - Working With Skin Tone
Making people look as good is part of the dayjob for colorists. Working with skin tone can be tricky but Dan shares his tips and approach.
Resolve 11 Highlights And Shadows Controls
New Tools For Resolve 11 Are The Highlights And Shadows Controls. They offer up new creative options for setting the contrast in your scene.
Resolve 11 - Softlight Blending Mode
New to Resolve 11 the softlight blending mode gives you a great new way to add texture and depth to your image.
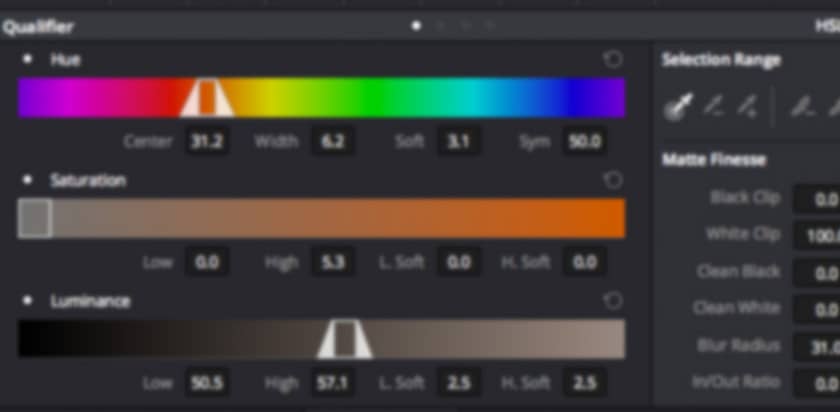
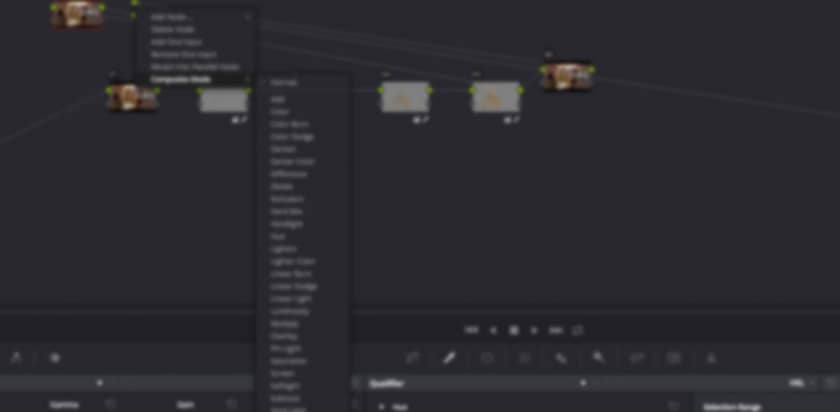
Resolve 11 - New Matte Finesse Controls
Resolve 11 - New Matte Finesse Controls brings some great refinements to the qualifier controls. Clipping and noise reduction make pulling keys easier than ever!

Resolve 11 - Introduction To Lab Mode Grading
Introduction To Lab Mode Grading in Resolve 11. This new way of working gives us lots of new creative options when grading.

Working With The Clone Tool
Working With The Clone Tool in Resolve 11. Dan will be showing you how to paint and clone out elements of your footage.
Resolve 11 - Dan's First Thoughts
Dan Moran takes you on a tour of his favorite new DaVinci Resolve 11 features including grading tools, render caching and much more
Legalizing With No Legalizer & R3D Trimming
In this installment of From The Mailbag we discuss two questions about video legalization & using R3D trimming in Resolve with Remote Grades
Sky Replacement Challenge
Using a sky replacement we change a simple beach scene into a moody tropical sci fi establishing shot
The Tangent Element In SpeedGrade & Good Skin Tone
In this episode of From The Mailbag, we discuss using the Tangent Element In Adobe SpeedGrade & what goes into getting good skin tone.
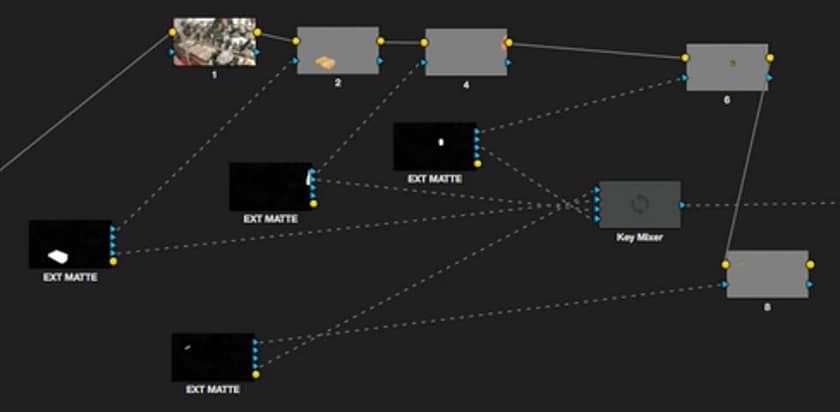
Using External Mattes In DaVinci Resolve
When you need precise separation using External Mattes from a Rotoscope artist makes precise grading in DaVinci Resolve a breeze

Using Color Trace to Copy Color Grades in DaVinci Resolve - Part 1
Learn how to copy color corrections from one timeline to another timeline using Color Trace in DaVinci Resolve.
Colorist Circuit Training Part 1
In Colorist Circuit Training Part 1 we take a look at some exercises to help strengthen your style and color grading skills.
Legalizing Video in SpeedGrade CC Part 1
If you're wondering how to legalize video in Speedgrade CC, this video will show you.
Color Grading Picture-In-Picture Effects in DaVinci Resolve
Color grading composites, like picture in picture effects, from a single render is hard. Learn how to attack these shots in DaVinci Resolve.
Mailbag: Resolve vs SpeedGrade & Managing Versions In Resolve
In this Episode Of From The Mailbag, we discuss the pros and cons of Resolve vs SpeedGrade. As well as how to manage versions in Resolve.
Resolve Live Grading Essentials
A powerful new feature in DaVinci Resolve 10 is Resolve Live. Learn the essentials of how to his feature works & can help you on-set.
Using the Tangent Element with SpeedGrade CC
Why do professional video colorists love controls surfaces? Watch the Tangent Element with SpeedGrade CC highlighting a few advantages.
Mailbag: Beating A Creative Funk & Consolidating Reels
In this episode of From The Mail Bag we discuss getting out of creative funk & consolidating a multi-reel project in Resolve.
Analysing Your Footage : Pieces To Camera
Get the most out of your 'Pieces To Camera' (on-camera Stand-Ups) using power windows and curves on footage that needs to look normal.
Podcast: Mixing Light In 2014 + Grading A Single-Take Film
In this episode of From The Mail Bag we discuss what's in store for Mixing Light in 2014 & discuss how to grade a film shot in one take.
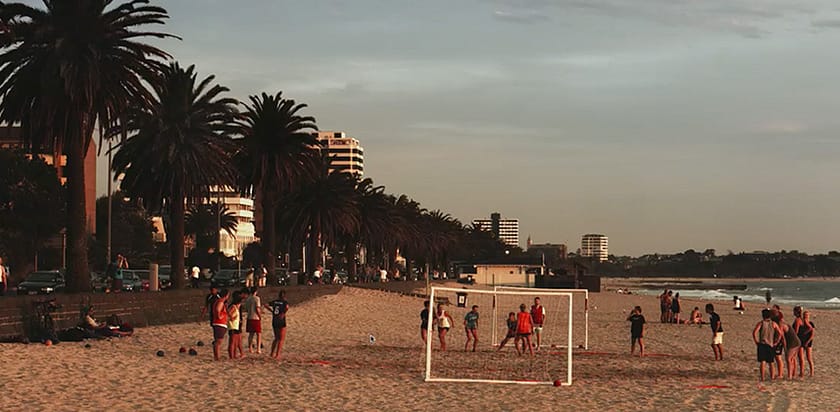
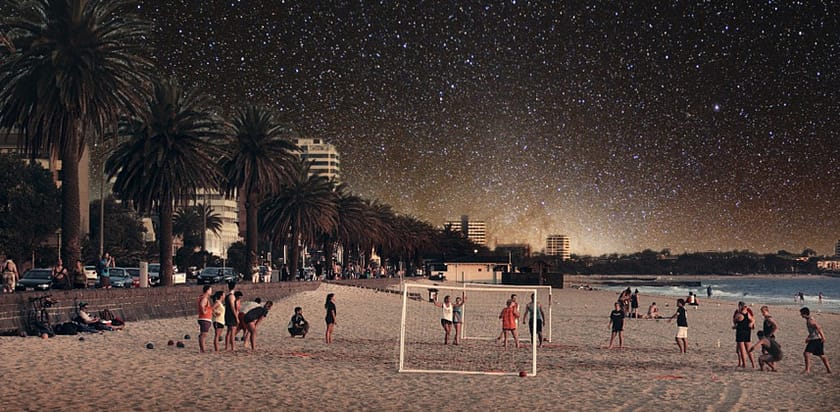
How To Analyse Your Footage For Color Correction: Beach Sunset
Learn how a professional colorist analyses an image. Learn what they focus on and how they grade using contrast, color and secondaries.
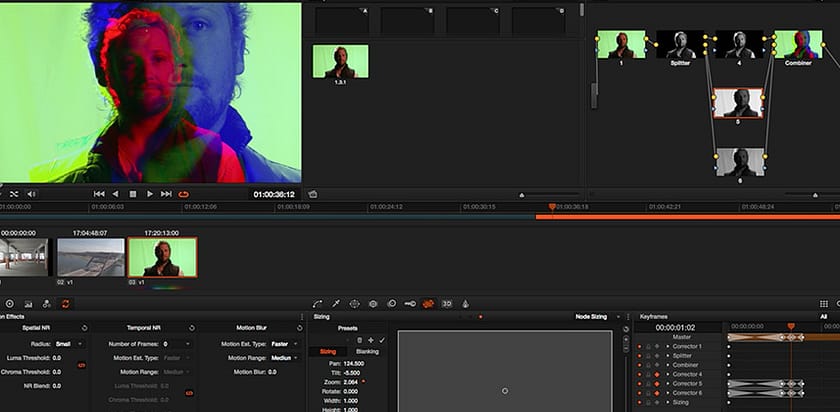
How To Creatively Use DaVinci Resolve's Splitter-Combiner Nodes
Learn how you can easily add some fun 'video distortion' to a music video or commercial using some creative Splitter-Combiner techniques in DaVinci Resolve.
Digital Video Noise Reduction: Targeting Individual Color Channels
In DaVinci Resolve, video noise reduction targeted to specific color channels lets us balance between sharpness and noise reduction.
Color Correcting A Film Trailer: Simple Compositing (in DaVinci Resolve)
Can you perform simple compositing in DaVinci Resolve? Yes. Plus, you can use blending modes and alpha channels to add visual effects or graphics.

Basic Visual Effects & Online Editing in DaVinci Resolve 10
Learn how to perform basic online editing tasks in DaVinci Resolve 10. This tutorial looks at compositing, titles and Sapphire plug-ins.

Color Correcting A Film Trailer: Sony FS700 Footage
In this color correction tutorial, we explore color correcting FS700 footage in our Fake Film Trailer. We'll also use Sapphire plug-ins for DaVinci Resolve.
Color Correcting A Fake Film Trailer: Grading RED Dragon Footage
In this installment of the Fake Film Trailer, I start color correcting Red Dragon footage. It's my first time working with this camera.
Video Noise Reduction In DaVinci Resolve: The Neat Video OFX Plug-in
We explored video noise reduction in DaVinci Resolve 10 earlier. In this tutorial you look at the OpenFX plug-in, Neat Video, and compare the differences.
How to Prepare A Film Trailer For Color Correction
Learn how a professional colorist evaluates a project (film trailer) before a single shot is color corrected - a critical step for smooth sessions.
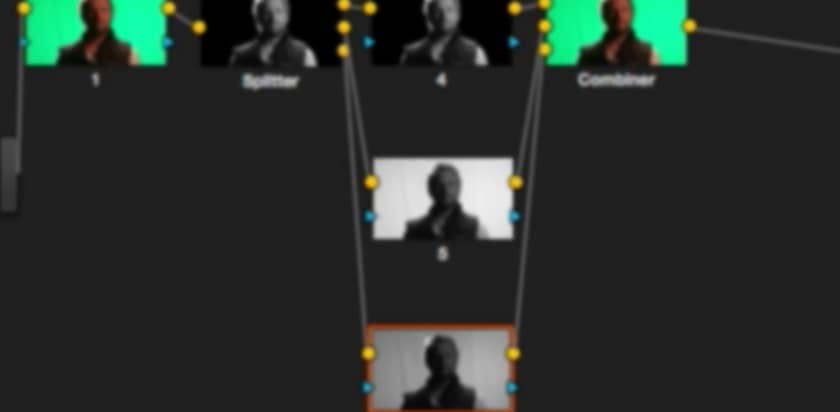
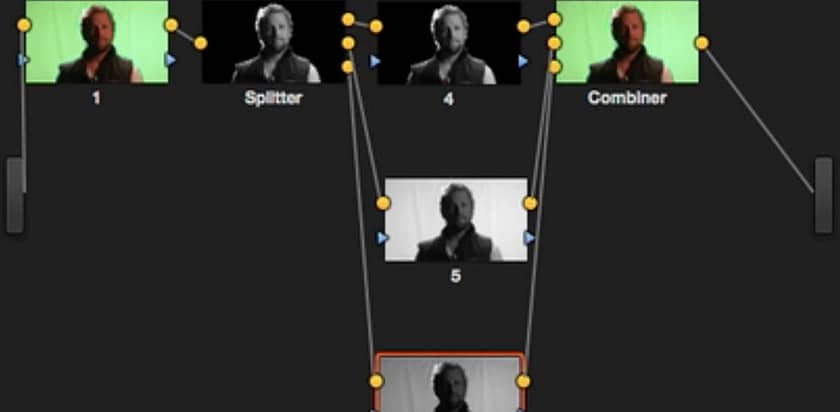
How to Use DaVinci Resolve's Splitter Combiner Nodes
Learn how to split color channels into RGB, YUV or LAB with the Splitter Combiner nodes in DaVinci Resolve. Watch me put them to work.
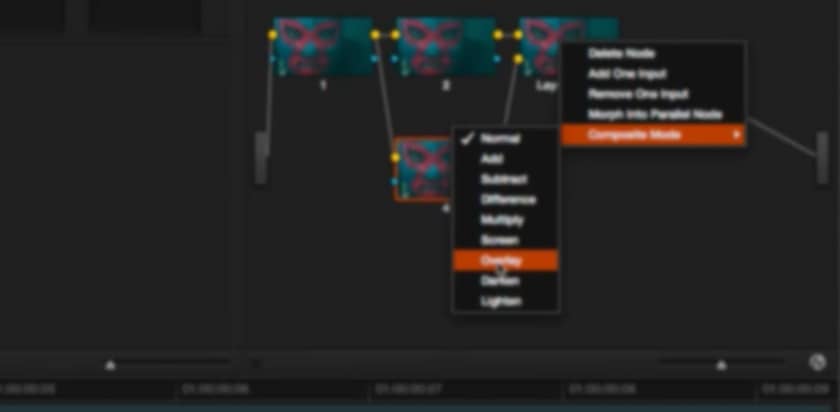
How To Color Correct With Blending Modes : The Overlay Mode
You can use the Overlay blending mode to add grain and get great colour and contrast pop, with the click of a button. Watch me put it to use.
How to Create a Custom Log Grading Keyboard Shortcut
In Davinci Resolve, learn how to create a custom Log Grading keyboard shortcut - giving quick access to this 3-Way Color Correction panel.

How To Color Correct Green Screen Footage (in DaVinci Resolve)
I like to work with background plates in Resolve. This allows me to color correct my product or actor in place, allowing creative choices. Watch me work.

Color Correction Looks: Creating Black and White Looks
Creating a Black and White Look seems like an easy prospect, initially. But they can be some of the most difficult jobs. Learn how to execute this Look.
Using Node-Based PTZR For Lens Spot Removal (in DaVinci Resolve)
Learn how you can create a window and use the new node PTZR controls hide a dead pixel, water spot or other unwanted item in that shot.
Understanding Time Remapping in DaVinci Resolve 10
New feature in Resolve 10 include frame blending, motion flow, rippling your timeline and varispeeds via XML. In this video I cover all these features.
Creating Color Correction Looks: Emulating the Film Look
Has a client ever asked you to create a 'Film Look'? Yes, us too. In this video, learn how we get to this Look using some new features in DaVinci Resolve.

Building Color Correction Looks: Tinting Your Shadows
Sometimes when you're color correcting you need to give the job an extra wow factor. My favorite technique at the moment is tinting the shadows. Learn how.
Playing 720p23.976 Inside DaVinci Resolve
DaVinci Resolve doesn't officially support the specific combination of a 720p frame size playing back at 23.976. Learn how you can force this playback.
Secondary Corrections in DaVinci Resolve
'Secondary corrections' are isolations to areas of an image to make specific color corrections. Here are tips on getting quick results.
The Fundamentals of Power Windows in DaVinci Resolve
Learn the recent updates and feature refinements for Resolve's Power Windows, including a new gradient window and unlimited shapes per node.
HEY—Where's My Master Session (in DaVinci Resolve 10)?
DaVinci Resolve 10 hides the 'Master Session' by default. Why do I rely on it when color correcting commercials and music videos? How do you find it again?

Color Correcting Food for Commercial Clients in Digital Video
How does a professional colorist color correct food? Our guest colorist Rob Bessette shares his secrets and the keys for a successful session.
Tips & Tricks for Time Remapping in DaVinci Resolve 9 & 10
Dealing with Time Warps in a color correction workflow is difficult to manage. I found a workflow, saving time and money for you and your clients!

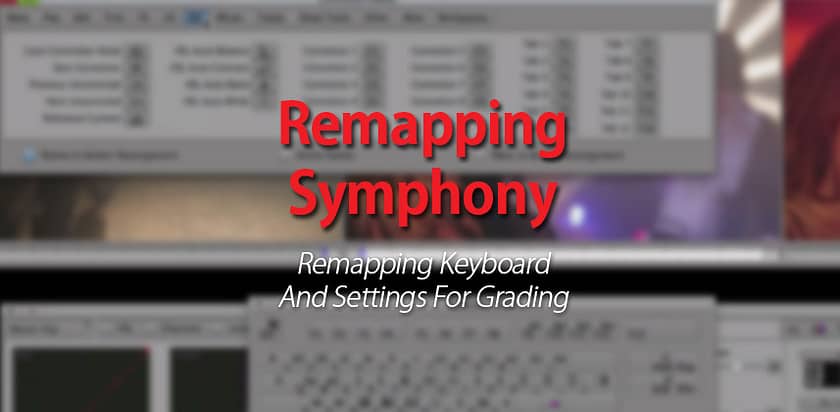
How To Copy Color Corrections Between Sequences in Avid Symphony
Do you know how you can copy / merge color corrections in Avid Symphony from one sequence to another? This video shows you the process.
Using Resolve Track Nodes: Controlling Uncontrollable Light Sources
Learn how to make a global correction to the brightest and most intensely saturated areas of an image without tediously creating nodes for each shot.
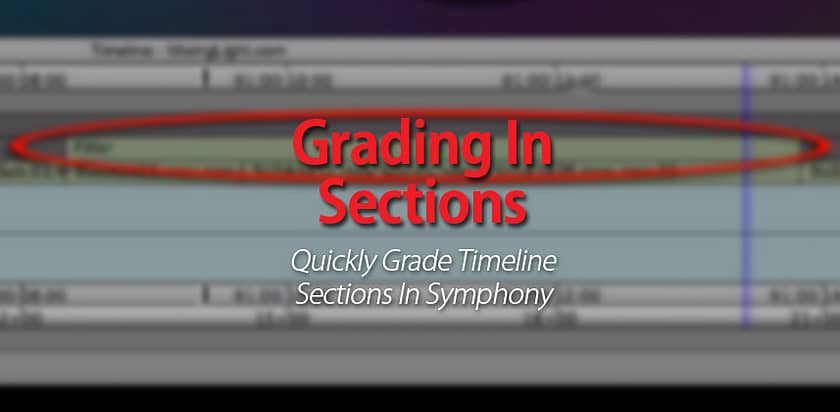
Color Correcting In Sections with Avid Media Composer
If your client is asking for changes in your color corrections that effect entire scenes then here's how to quickly make those fixes in Avid.
Preparing A Color Correction Session For A Commercial Client
You can learn my tips and tricks to prepare for a client-supervised commercial color correction session. it's not just about your skill. Preparation counts.
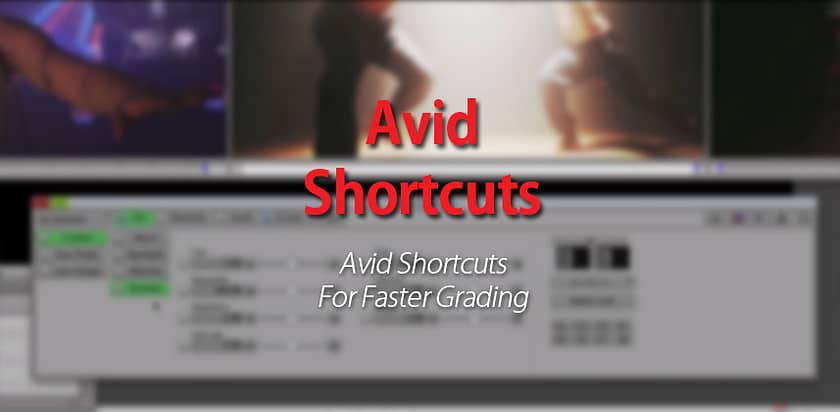
Color Correcting In Avid: Work Faster with Keyboard Shortcuts
Do you want to learn how to color correct faster on Avid Media Composer? Build on our earlier customizations with these super-fast Avid shortcuts.
DaVinci Resolve: Working With 'Handles' While Color Correcting
If your clients are asking for you to render out 'handles' after color correcting their job then this Insight will help sidestep some pitfalls.
How Do You Customize Avid Media Composer (for Color Correction)?
The key to being fast in Avid Symphony is mastering the keyboard and interface. Learn how you can customize Avid, tuning it for color correction.
How to Color Correct the Blackmagic Pocket Camera
Are you looking for ideas on how to color correct the Blackmagic Pocket Camera? I share how I work with it in DaVinci Resolve.

Color Correction Tips: Matching Shots To A Brand Logo
Have you ever been asked to color match a shot to a reference image for their video? Here are a few ideas on how to do that in DaVinci Resolve.
DaVinci Resolve Tools: Using The Key Mixer Node
You will learn two ways to use the Key Mixer Node: How to set it up as a master control for multiple masks; and how to build garbage masks for cleaner keys.

Trimming RED Footage Using DaVinci Resolve's Media Manager
Learn how you can trim RED footage and copy to your hard drive only the portions of your clips needed to recreate your timeline, saving hard drive space.
Color Correction Looks: Creating The 7D Korean Horror Look
If you're looking to create a Look and want something a bit different (and even noisy)... here's how you can create the 'Korean Horror' Look.
Tracking Power Windows: Tips and Tricks in DaVinci Resolve
Learn how you can track foregrounds, backgrounds + copying and pasting tracks and how to deal with objects moving behind other objects while tracking.
Color Correcting with Log Controls in DaVinci Resolve: An Overview
Have you wondered how to use the Log Controls in DaVinci Resolve? This video is an overview of all the controls and some basic theory of how they work.

How To Blend Between Color Corrections Into The 'Day For Night' Look
DaVinci Resolve's node tree makes it tough dissolving between two completely different Looks. Learn how to do it easily, without getting lost in keyframes.
How to Build A 'Day For Night' Look - Color Correction Technique
What does it mean to shoot film or video as 'Day for Night'? Learn the terminology and how to do it in this video tutorial.

How to Build a Vintage Look For Your Videos
Recently, clients have been coming in asking me to create a 'vintage look' for them. What is that? And how do I go about it?
How To Apply Custom Aspect Ratios In DaVinci Resolve
When a client asks for a specific pixel dimension or Aspect Ratio learn how you can precisely set it up in DaVinci Resolve, even if no preset exists.

Using LUTs in Adobe Photoshop: Applying Grades To Still Images
Learn how to use a color correction exported as a LUT and use it in Photoshop. Plus—a small caveat in this workflow (about how Photoshop applies LUTs).
Adding Depth-of-Field to Video: Sharpening & Blurring In Action
As part of our series on adding Depth-Of-Field while color correcting, learn my final step when executing this technique, making the image look sharp.
How to Composite Graphics in SpeedGrade CC
Compositing graphics in SpeedGrade - even in a Native SpeedGrade project - is easier than you think! Learn how you can do it.
Adding Depth To Video : Putting Theory Into Action
After my 3-part series on the theory of Depth-of-Field and techniques simulating it, the theory is put to action—learn how you can use these techniques.
How to Work with Arri Alexa Footage in Premiere and SpeedGrade
Are you working with Arri Alexa Footage in Premiere Pro or SpeedGrade? This tutorial will walk you through the workflow.
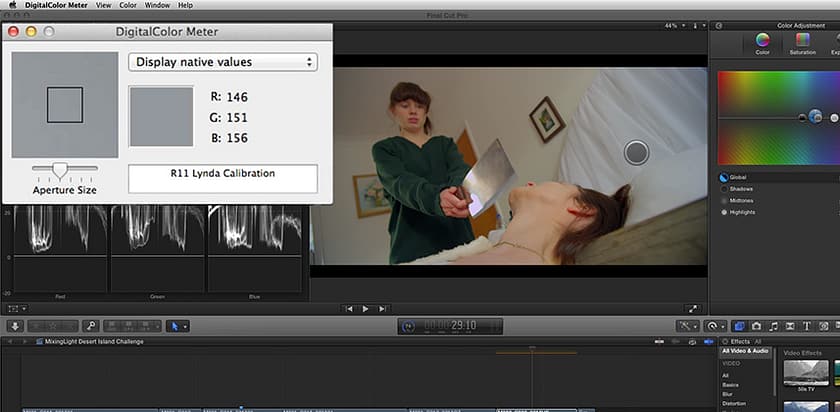
Understanding the Color Pucks In The FCP X Color Board
Are you struggling with getting good results from the FCP X Color Board? Learn how to analyze its image processing and build a custom workflow.
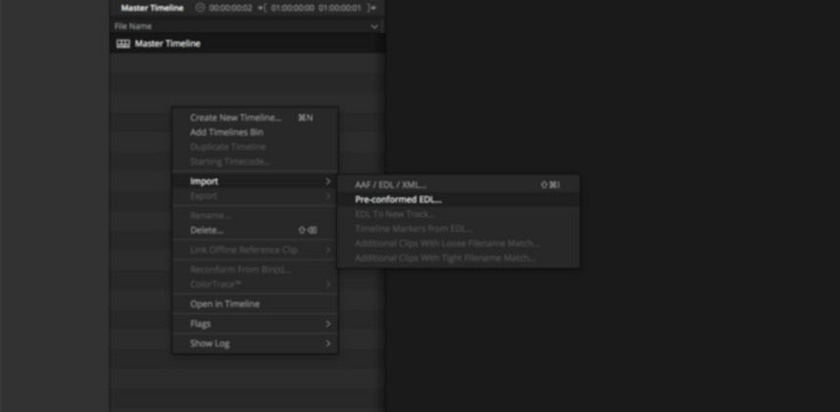
On Overview Of The "Pre-Conformed Workflow" In DaVinci Resolve
This workflow is an ultimate timesaver and involves getting a single flattened video clip of the project you're grading and using Resolve to slice it up.
How to Split Your Brightness and Color Channels For Creative Control
When color correcting, learn how to split your image into separate brightness and color channels for creative reasons (and additional technical benefits).
How To Build Your Own Custom Render Cache in DaVinci Resolve
If you're having trouble getting real-time playback in DaVinci Resolve then try this tip for creating your own custom render cache.
Understanding the FCP X Color Board Exposure Controls
Are you using the FCP X Exposure controls efficiently? Is there an approach to improve your results? Most likely, yes. Click to learn more.
The 3-Band Technique for Enhancing Boring Exterior Shots
Flat boring outdoor shots are very common when color correcting. What can you do to fix it? Learn a technique based on Classical painting theory.
Premiere Pro Adjustment Layers: Applying A Look To An Entire Scene
Adjustment layers can be used for many things—a favorite is color correcting and applying a Look to a few shots, a scene or an entire timeline.
How to Setup Speedgrade CS6 for Stereo 3D Color Correction
Learn the essentials of the 3D workflow in SpeedGrade CS 6 - from organizing footage to auto-aligning eyes and rippling grades between the video streams.
Creatively Using Soft Clipping in DaVinci Resolve
'Clipping' image detail is considered bad. But learn how to use DaVinci Resolve's 'soft clipping' control for great creative effect.

What is a LUT (and how do you use a LUT for color correction)?
Look-up Tables are mathematically precise. Understanding LUTs requires you to accept that a single LUT can NEVER be used for all your shots.
Three Strategies for Backing Up DaVinci Resolve Projects
You're going to learn 3 useful and easy methods to protect your work from hard drive catastrophe by saving your Projects, Stills & Databases.
How To Be Absolutely Sure That You Color Corrected All Of Your Shots
If you are color correcting a long timeline in DaVinci Resolve then how can you be sure you didn't miss a shot? Learn how to never miss a shot again.
How to Quickly Flip Between Corrections in DaVinci Resolve
The Versions feature in DaVinci Resolve will help you build different grades for the same shot—and then flip between them quickly.
DaVinci Resolve: How to Organize Your Color Corrections with 'Still Pages'
On big jobs, organizing your saved 'stills' in DaVinci Resolve can save you a lot of time and energy. Learn how Resolve's Gallery can help you stay focused.
Curves Color Correction: Avid Symphony vs. DaVinci Resolve
What is the difference between the Curves interfaces in Avid Symphony and DaVinci Resolve? Learn how to simulate Avid Curves in Resolve.

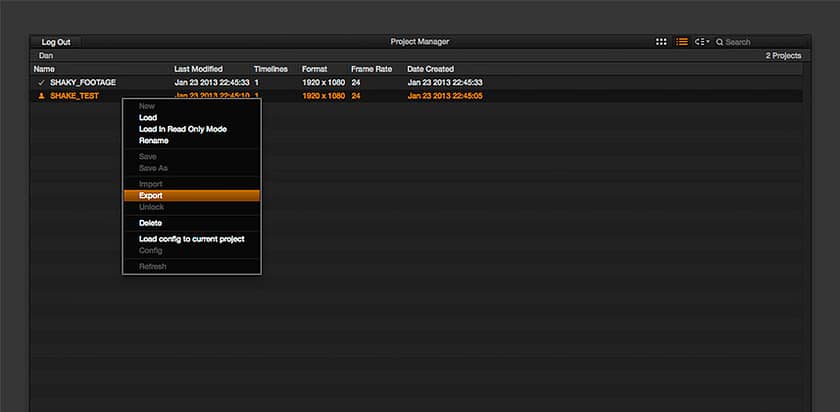
How You Can Add Camera Shake in DaVinci Resolve
If you want to add Camera Shake in Davince Resolve then it can be tricky since there isn't a 'shake' tool. Learn a quick workaround to achieve this effect.