| Series |
|---|
As an experiment, this series is being cross-posted to Mixing Light’s YouTube channel – Insights in this series will appear on YouTube one to two weeks after being first released into the Insights Color Library. Our goal is to publish a new episode weekly.
Part 6: We’ve got a ‘baked file’ – how do we slice it up for grading?
Imagine this: A client walks in the door with a complex project. The deadline is looming and you don’t have the time (or they don’t have the money) for a day or two of conforming your timeline using the camera originals. Conforming can be a tedious process as you – the colorist – need to be sure the reconstructed timeline is frame-for-frame 100% accurate to the locked picture that’s been approved. This can be a tedious process. But there’s an alternative workflow that many colorists and finishers call it the ‘baked workflow’ or the ‘flat file’ workflow.
Conforming made easy with the ‘baked file’ or ‘flat file’ workflow
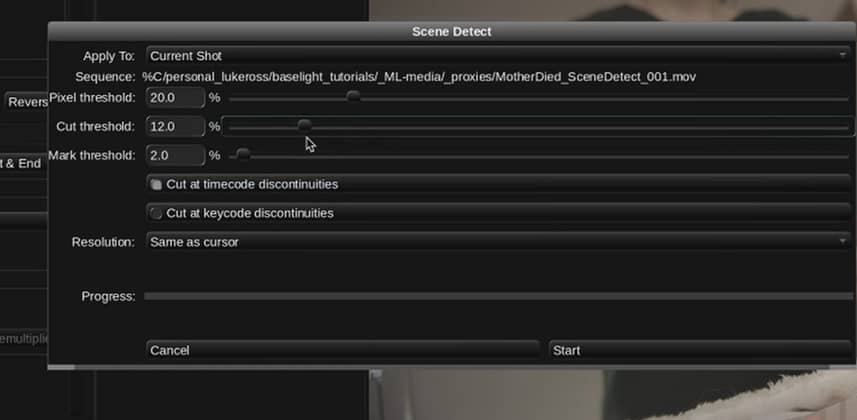
In this workflow, your client renders out a single high-quality movie (the ‘baked’ or ‘flat file’) of their locked picture – with all graphics and color effects removed. Then that movie gets imported into Baselight and you add edit splices that perfectly match every edit in the timeline. Then, you start color grading each shot individually, even though there’s only a single master video file. Obviously, the most tedious part of this process is adding in those edit splices. This is where the Scene Detect Tool comes into play.
This tool allows you to import a single file, automatically splice it into individual shots, and then color grade each shot – separately, as if every shot is coming from an independent video file. Baselight has its own unique workflow to make this happen, and massively speed up your conform time (you can find an Insight on a similar workflow for DaVinci Resolve here).
What are we covering in today’s Insight?
- Importing a Quicktime file via the Flux Manage Tool
- Renaming this file with a Baselight expression in the Shots View.
- Correctly tagging our Input Colour Space.
- Explaining the Scene Detect Tool in detail.
- The key differences between the Pixel, Cut, and Mark Thresholds.
- How to check back your results to ensure no mistakes have been made.
- How to cut and join clips in the timeline.
- How to jump between Timeline Marks.
Cheers!
– Luke
Member Content
Sorry... the rest of this content is for members only. You'll need to login or Join Now to continue (we hope you do!).
Need more information about our memberships? Click to learn more.
Membership optionsMember Login


