| Series |
|---|
As an experiment, this series is being cross-posted to Mixing Light’s YouTube channel – these Insights will appear there one to two weeks after being first released into the Insights Color Library. Our goal is to publish a new episode weekly.
How Do You Properly Setup A Scene In Baselight?
Today we’re going to cover the essentials of setting up your scene.
When you create your first Baselight scene, the challenge is you get confronted with a lot of options.
- How should you set up your Working Colour Space?
- What is the Working Format?
- If you’ve just imported a clip and changed your scene directory, why did the footage suddenly go offline?
If you’re a beginner to Baselight or if you’re new to colour-managed pipelines, these options can be a bit intimidating – and they’re just the start of the set-up process! Whether you’re a colourist or a colourist assistant, it’s important to the basics of preparing a scene before you start importing media and jump into grading.
What are we covering in today’s Insight?
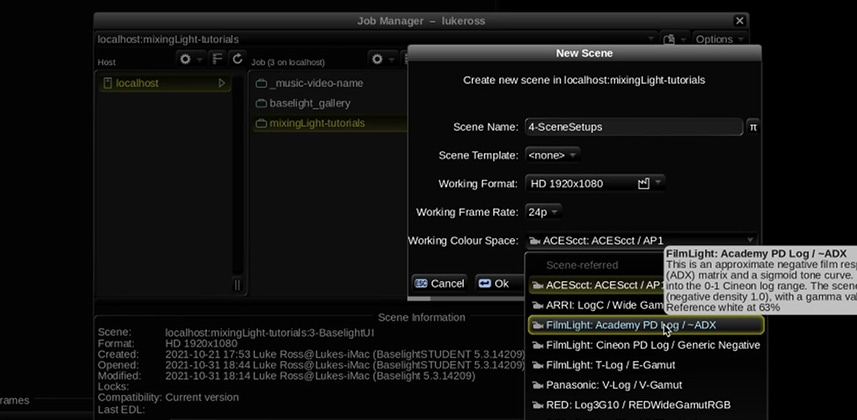
- To start with, we are going to open up the Setups Editor and ensure that our Video Output, Viewing Colour Space and Frame Rate are correct. We’ve already covered this a little bit in the second Insight of this series but we’re digging deeper here.
- You’ll learn about the essential default settings in the Setups Editor to save time and to prevent errors when creating new scenes – a nice quick trick!
- Next, learn how to create a new scene and select the right Working Format, Working Colour Space and Frame Rate for your project. Be careful, once you select your Frame Rate you can’t change it!
- Finally, we’ll cover some essential Scene Settings including how to set the scene timecode, how to tweak your project’s colour space, how to attach scene audio independent of your camera footage and how to set up and understand your image container.
If you’re following along with me on Baselight Student, make sure you’ve watched the second insight in this series where we talk about initial Baselight Student Installation, as we’ve covered the Setups Editor and the Preferences Editor in more detail.
As always, leave your comments, thoughts, rants and compliments below 😉
Cheers!
– Luke
Member Content
Sorry... the rest of this content is for members only. You'll need to login or Join Now to continue (we hope you do!).
Need more information about our memberships? Click to learn more.
Membership optionsMember Login


