| Series |
|---|
Fusion Chroma Keying Part 4: Learning to simplify chroma keying by tackling different problems independently
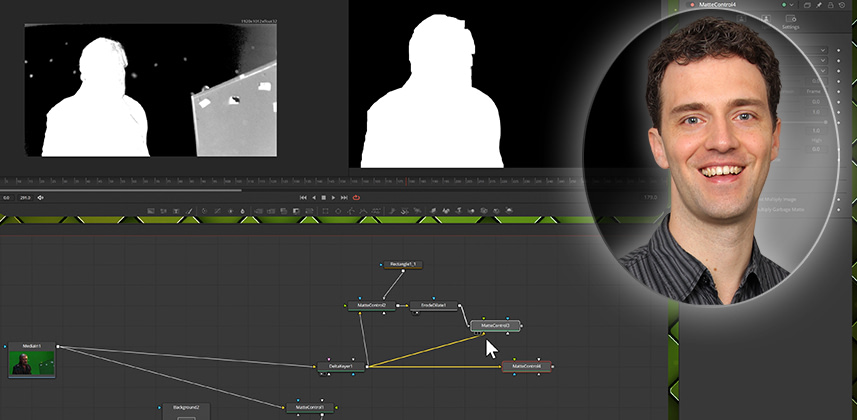
When different areas within the frame exhibit different challenges, you should combine different keying techniques. Learning how to combine two different keys – or adjust one key in different ways – to address all issues in the best way possible is an important skill to master. One great example of this is a technique known as ‘Hard Comp—Soft Comp’.
What is ‘Hard Comp—Soft Comp’?
In chroma keying, the best key to extract a hard edge usually differs from the ideal key that retains soft hair detail. A key that removes tracking markers in the background is often different from a solution that ensures a reflective foreground stays fully opaque.
This is why, within a single shot, we frequently combine different keying techniques to get the best possible result.
Sometimes, the solution is to post-process the same matte/alpha channel in two different ways. For example, a soft mask that gives us great hair detail might also exhibit holes in the actor’s clothes. On the flip side, we can shrink the same matte/alpha channel into a harder mask that stays clear of the edges. We then combine the hard mask to fill in the holes of the soft mask with the soft mask that retains the edge detail.
This approach, sometimes called ‘hard comp—soft comp,’ gives us fully opaque areas where we need them (in the clothing) without deteriorating the soft-edge detail (around the hair). But there are other situations where you need to completely isolate your comps and then combine them together.
Isolate and attack
You might find that different settings in the Key tab of the Delta Keyer work best for different areas of the frame. For example, you might benefit from Pre-blur for harder edges but not for hair detail. In this scenario, you work with two independent keying nodes and combine the resulting mattes as a final step.
Key takeaways from this Insight
By the end of this Insight, you should understand:
- How to use one chroma-keying solution in multiple ways to address multiple challenges
- How to combine different Delta keyers tuned for different areas of the frame
- Why you should consider de-spilling in a separate operation
Download the footage and follow along
In Part 1 of this series, I shared the download link for the footage I’m using so you can follow along and practice. After logging in, any active Mixing Light member has access to the download.
- Chroma Keying Part 1: Quick Chroma Keying Using Resolve’s 3D Keyer—Click to this Insight and scroll down to the ‘Follow Along’ section to grab the footage I’m using in this series.
Related Insights
- Alpha Channel Manipulations 101 – DaVinci Resolve Fusion Fundamentals – Learn the fundamentals of alpha channel manipulations, including tonal adjustments, blurs, and combining masks from VFX artist Bernd Klimm.
- Expert Tips For Rotoscoping in DaVinci Resolve Fusion – Bernd Klimm teaches rotoscoping fundamentals by analyzing movement and creating shapes that can be animated efficiently and consistently.
- Using Paint and Rotoscoping Tools in Resolve Fusion – Learn how to create a clean plate to remove an item using Fusion’s Clone Brush. Then, mask an area, replace it, and track the replacement onto the shot, with Jamie Dickenson..
Questions or Comments? Leave a comment!
Is this Insight useful to you? Let us know! Mixing Light is all about community discussions and we’re curious if you found this helpful, if you have something to add, or if you have more questions you need answered?
– Bernd
Member Content
Sorry... the rest of this content is for members only. You'll need to login or Join Now to continue (we hope you do!).
Need more information about our memberships? Click to learn more.
Membership optionsMember Login


