
| Series |
|---|
It’s Been While. So, Here Are – 5 Awesome Pieces Of Gear!
You know when you start a new exercise plan and for the first few weeks you’re going to the gym every day and feeling pumped? But then just a few short months later you’ve fallen off and are eating Cheetos on the couch again?
Well, that’s how the Color Correction Gear Head Series has been in 2017 – bang out a couple months in a row and then I’ve been absent in the series. My sincere apologies! One of my goals for 2018 is to never miss a Gear Head article – consider this warm up!
In this installment of Color Correction Gear Head, I’d like to cover 5 new pieces of gear including a micro PC, some useful rack cooling fans, some new LED bias lights and more!
Intel NUC
An Intel what? NUC – Next Unit Of Computing
Intel NUCs are very small footprint PC’s – available as complete builds or just the motherboard that you can build around. They’ve been popular for custom home theater builders for a while (think Plex Server), as they can handle with ease home theater transcoding duties.

For some time, I’ve depended on Mac Mini’s for lots of tasks around the studio like an FTP server, Resolve Database server, running Scopebox and more.
The fact is that Mac Mini’s have fallen behind the curve with the last model release in 2014, coupled with the sad loss of a Mac Mini in my machine room that was acting as my FTP and Resolve Database server (logic board died), I was looking for a replacement. However, I wasn’t keen on purchasing another Mac Mini that was already 3 or 4 years old.
While I’m sure Apple will release new Mac Mini’s sometime soon as Tim Cook has even said the Mac Mini is important to Apple, I had an immediate need a month ago. Just before I was about to suck it up and order a new (2014) Mac Mini, a friend of mine mentioned the Intel NUCs.
After some research, and swayed by the compelling price and performance, I decided to order one.

The NUC that I ordered is what they call the bare bones ‘tall’ model. Bare bones meaning that all it has is the processor, motherboard, ports and case. It’d be up to me to add memory and storage. Tall refers to the case design – this model allows for both an NVMe SSD and a 2.5in laptop HD (including SSDs) For $479.00 for the base unit, I was content to do a little more building myself.
Here are the specs:
- Dual Core i7-7567U
- Intel Iris 650 Graphics (there is no discreet GPU)
- Up to 32GB of RAM
- Headphone Jack
- 4x USB 3.1 ports
- HDMI 2.0 (will run 4k monitors)
- Gigabit Ethernet
- Thunderbolt 3
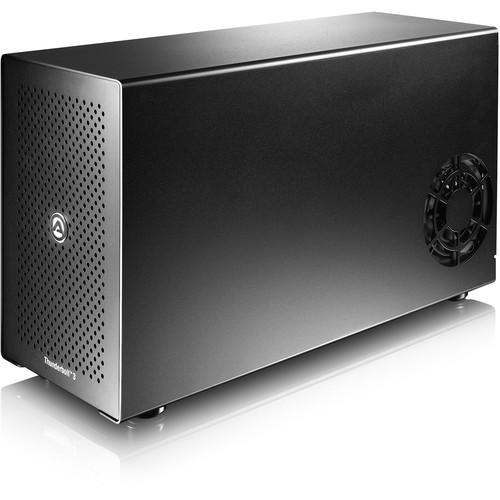
A few things to keep in mind. First, there are no dedicated PCIe slots but the addition of the Thunderbolt 3 USB-C port allows for expansion of all sorts. Right now, I’m using an Akito Node Thunderbolt 3 box with a 10GBe card in it to get to my SAN. But, you could use eGPU boxes and other Thunderbolt gear to make this machine more than capable for many tasks.
Second, I mentioned the machine didn’t come with RAM or storage. I added a Samsung 960 M.2. NVMe SSD and for RAM, I went with 16GB of Crucial RAM.
For less than $1000 (not including the 10GBe card and expansion box that I already owned) I got a machine that can run circles around the currently shipping Mac Mini.
The only bad thing I can say is that under heavy load this machine is about 25% louder than a Mac Mini running with fans on high. This doesn’t bother me as this machine sits in my machine room, but if it’s in your room with you it might bother you if you’re sensitive to fan noise.
Procool Rackmount Fans
Staying back in the machine room for a few more minutes, the next product I want to tell you about this month is the amazing Procool/Rackfans.com rackmount fan.
We all know the importance of keeping gear cool, and airflow around that gear is vital to its health. Especially in tightly packed small racks heat can be a real issue.
Available 1U & 2U form factors, the Procool guys have a lot of different models available. The two factors that separate their products are Airflow (listed as CFM, or Cubic Feet Per Minute) – essentially how much air the fan can move, higher numbers mean more airflow. The other factor is noise rating (in decibels). The lower the dB rating the quieter the fan.

For the racks in my machine room where noise isn’t an issue, I wanted the maximum amount of airflow in and out of the racks, so I went with a few (different racks) of the 2U TV480 and TV480-E. The E part is important. While you’ll want to pull cool air into the rack you’ll want to get hot air out of the rack too. The exhaust model is the same physical model with the fans reversed – pumping out hot air in the rack.
While I wouldn’t classify the TV480s as ‘loud’ they’re not silent either, and at 2U they take a up a good amount of space, especially in smaller racks.
In my home setup I don’t have a machine room, but rather a small TBC consoles rack that sits next to my TBC desk. So having a big 2U loud fan wasn’t going to work. Luckily Procool has some great 1U options. I went with SX640 and SX640-E

While these fans don’t pull/push as much air as their larger cousins, a rating of 36CFM is still a good amount of airflow and they are silent (21.77 dB)! Seriously, my computer case fans make more noise!
Because I have a ductless A/C unit in my machine room I wasn’t expecting to see huge temp reductions, but I was wrong! Over 7 days using Open Hardware Monitor I saw my average machine temp go down about 4.96 C degrees compared to a week before without fans – that’s significant. At home, I saw a smaller drop (3.11 C), but that’s nothing to balk at either.
If you put your gear in rack, and want that gear to last for a long time, I can’t recommend the Procool fans enough!
Cinemaquest Ideal Lume Pro LED Bias Light
Soon after you start to get serious about color correction, you start getting serious about color-critical environments to do your color correction in.
From a gear standpoint, the bias light (also known as the surround light) plays a crucial role in setting up a color critical room. In fact, SMPTE has just published an updated spec about viewing environment that is worth a look.
Years ago, bias lights were only available in huge fixtures and then later shrunk down to much more manageable (in size) CCFL ballasts. The problems with many of the CCFL ballasts and bulbs that were available was that they were really expensive, couldn’t be dimmed, the bulbs had a short life, they were not all that accurate and ran hot.
A quick trip to your local hardware store will tell you that LED lighting is all the rage these days and this is also true when it comes to bias lighting. LED lights are super energy efficient, run cool, but until recently haven’t been all that accurate.
Cinemaquest has recently come out with two LED products – their Ideal Lume LED and Ideal Lume Pro.

Allan at Cinemaquest was nice enough to send me an evaluation unit of the Ideal Lume Pro LED Bias light and while I haven’t completed my evaluation, I can say that the Ideal Lume Pro LED is a terrific successor to the previous Ideal Lume Pro.
With a significantly smaller overall size than the previous Pro Ideal Lume, the Pro LED improves on its predecessor with a significantly higher C.R.I. (97) and better actual measured CCT (6500k).
The unit includes a baffle (removable) and the LEDs are housed in a compact rigid case. As a pro model, you’d expect to not have to pay more for additional items that you’ll need to put the unit into your suite. Cinemaquest doesn’t disappoint – they provide a tabletop dimmer (a remote would have been nice), mounting tape, and brackets, a 3 prong to 2 prong step down adapter and a very detail spec sheet describing the setup of the unit.
I’ve been using the Ideal Lume Pro LED in my home suite for the past two weeks and I can clearly tell a difference in the quality of light vs. my older Ideal Lume Pro CCFL unit. One of the biggest advantages to me about the new LED unit is that it doesn’t take 40min to stabilize. I can be confident that within 5 or so min the LEDs are spot on.

Is the $299 price tag worth it? Let me put it this way – if you require a robust lighting fixture that has amazingly high CRI and correlated color temperature in a package you can trust, then 100% yes. But on a visual comparison (which is a crap way of doing these things) I can’t tell the difference between other LED D65 high C.R.I. lighting that costs significantly less. Don’t get me wrong, I don’t think the Ideal Lume Pro LED is a ripoff – far from it, but $300 is a lot of money for a light.
The question comparing other similar bias lights to the Ideal lume Pro LED is more analogous to a Lamborghini vs. a Ferrari – its hard to go wrong!
Behringer Monitor 1
As a colorist I get a lot of unmixed program audio – one minute the volume is fine; the next minute the speakers are about to blow!
While I’ve used small powered mixers for a long time in all my setups, fumbling for the right knob on a small unlit mixer in a dark room has lead to many times me stopping playback, turning the lights on and a spending 2min looking for the right knob!
It wasn’t until recently that one of the audio mixers at our shop (thanks, Jeremy!) mentioned a passive volume controller or as a lot of audio folks refer to them – big knobs!
Palmer, Mackie and others make passive volume controls, but I recently picked up a couple of the Behringer Monitor 1 Passive Volume Controllers.

As the name implies, these units are completely passive meaning they don’t color or alter the audio signal and the Monitor 1 doesn’t require power.
The top of the unit has a large knob that is very smooth in its action. As a bit of an added bonus, the knob has a 5dB scale around it making setting a precise level and getting back to it easy the top of the unit also features a handy mute button a mono button to quickly sum to mono if needed to check a mix.
The back of the unit features 2 XLR inputs and 2 XLR outputs for going directly to your speakers. In my setup, I take the XLR main outs of my mixer into the Monitor 1 and then from the Monitor 1 to my speakers. In other words, I’ve just inserted the Monitor 1 between the mixer and my speakers.

Compared to other units like the Mackie and Palmer, the Behringer doesn’t have multiple speaker outs. Many mixers will have full-range speakers and smaller ‘home’ type speakers. Additionally, the Monitor 1 doesn’t have multiple inputs so it can’t really act as pseudo mixer like some of the other units.
If you need these additional features you’ll need to look elsewhere than the Monitor 1.
In practice, I’ve been really happy with the functionality and simplicity of the Monitor 1. In the middle of a session, with crappy offline audio, I can quickly adjust the output level without having to search for the right knob on my mixer or stop playback. For the price, it’s a really affordable piece of gear to add to your suite.
Cameras + Formats By Gray Hour Media
One of the hardest things to do as a professional colorist is to stay up to speed with the plethora of different cameras out there, and the size of their sensors, formats, and resolutions they shoot, etc.
A few years ago for a fleeting moment, I thought about building an app to catalog all the various aspects of popular cameras, but then I pushed that idea aside as it was definitely going to be a lot of work! And besides, the fine folks at Gray Hour Media have created an amazing iOS application that far exceeds anything I could do!

On the Cameras tab of the application, you’ll find a lengthy list of popular cameras – from Apple iPhone to Sony a7Sii. Clicking a camera will reveal information about lens mount, dynamic range, native ISO and other technical data like supported resolutions, and the formats that in can record like ArriRaw or Prores.
The formats tab of the app lets you explore technical information about codecs.

One thing that is neat about the app is that in both the camera and format tabs clicking on an item will also list compatibility and workflow information in regards to different NLEs – at the moment that doesn’t include Resolve, but if you provide Gray Hour Media feedback like I have, they might add Resolve.
Finally, there is a calculator tab that operates like many other data rate calculators allowing you to enter codec, frame size, frame rate and duration. But, one feature I do like about Cameras + Formats is the ability to have all that info pretty much autofill by choosing the camera that you’re working with.

I’ve found that that app is updated pretty often to stay current and I have auditioned many apps like it, it’s absolutely the one I prefer. The only real limitation is that its iOS only, perhaps the dev team might consider an Android version in the future.
In The Next Gear Head
In the next installment, I want to dive into gear for HDR workflows – my shop is diving into the deep end with HDR10 and Dolby Vision and as with any new turn in technology there is a lot of gear to talk about!
Until then, if you have questions or something to add to the conversation please use the comments below.
-Robbie
-
Color Correction Gear Head – New Toys For 2022
-
Color Correction Gear Head: The Stocking Stuffer Edition (November 2020)
-
Color Correction Gear Head: January 2020 Edition
-
Color Correction Gear Head: January 2019 Edition
-
Color Correction Gear Head – May 2018 Edition
-
Color Correction Gear Head: November 2017 Edition
-
Color Correction Gear Head: Review of the DaVinci Resolve Mini Control Surface
-
First Look: Resolve Mini Control Surface
View All
