| Series |
|---|
CalMAN Part 2: Reference Display Calibration Series
How to Create (and Verify) a 3D LUT for an RGB OLED in CalMAN
Note: This Insight series is a follow-up to our Display Profiling series. If you haven’t watched that series then you should start here to learn the essentials of CalMAN and LightSpace.
CalMAN Studio: The Color Cube (3D LUT) Workflow
Display calibration isn’t a one-size-fits-all solution. Depending on the exact colorimeter you use and the exact display technology of your reference display, you’re going to modify your display calibration workflow. This series covers multiple display technologies (OLED and LCD). But we have to start somewhere, so we’ll start with a display that’s both one of the most customizable and the one that I use in my shop, the FSI CM250 RGB OLED.
About the RGB OLEDs
FSI’s 24″ OLEDs are top-emission RGB OLEDs. They support uploading 3D (and 1D LUTs), which make them ideal for the 3D LUT workflow you’re about to learn in this Insight. But if you use a LUT box to calibrate your reference display, you follow the same basic workflow as outlined here. But all top-emission RGB OLEDs suffer from a human perception problem called Metamerism Failure.
About Metamerism Failure
As Robbie explains in this Insight on Perceptually Matching two displays, “Put simply, Metamerism Failure is a phenomenon that even when two colors are measured to identical values with a calibrated instrument, they still look different [to the human eye].”
In other words, if you perfectly calibrate any LCD and any RGB OLED and place them side by side then they’ll look different from each other. To deal with this problem, an offset to the white point of RGB OLEDs is applied, which generally overcomes the metamerism failure. This offset is known as the Judd Voss Modified White Point.
About the Judd Voss Modified White Point
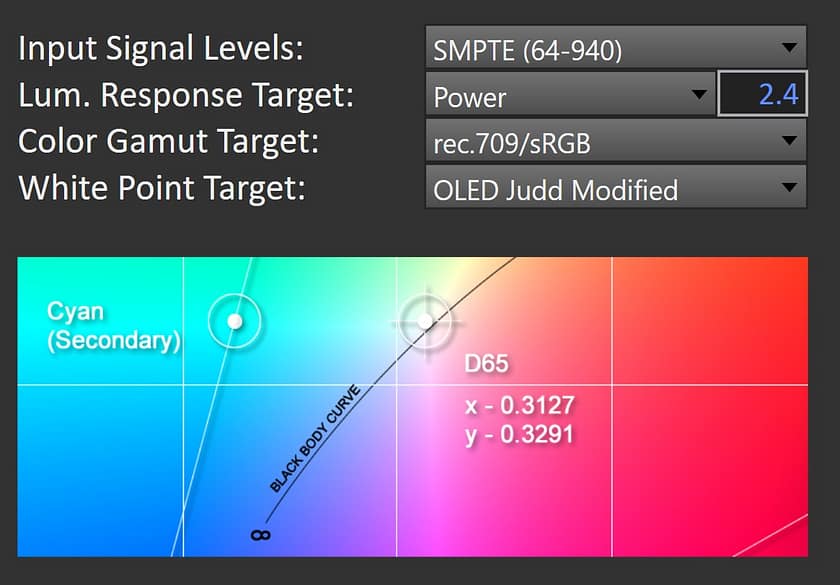
The Judd Modified white point doesn’t effect the color gamut of a display… the primary RGB coordinates stay the same. It’s only the white point that changes. As you watch this Insight it’s important to note: The Judd Modified white point only effects RGB OLEDs, almost exclusively found from reference display manufacturers such as Flanders Scientific and Sony. Consumer OLEDs (for example, from LG or Samsung) use a different OLED display technology and the Judd Voss modified white point doesn’t apply.
For a history of Judd Voss, check out this page from Light Illusion.
How to select the proper Luminance Response Target for your display?
Calibration Settings for an RGB OLED
In this Insight, I set Power 2.4 as my Lum. Response Target (or gamma target). That’s because the FSI CM250 is an OLED. Since OLEDs have true blacks, their native response is a gamma 2.4 and directly plugging that in as the Lum. Response Target gets you the best results. But if you’re on an LCD? You’ll make a different choice.

Calibration Settings for a typical LCD
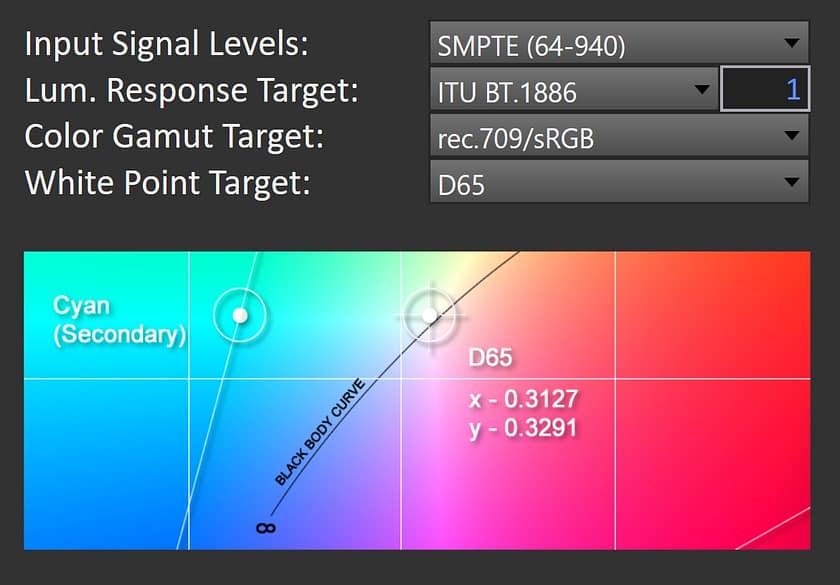
If your Reference Display is an LCD then you’ll modify your settings. You’ll use the standard D65 white point. And you’ll use the BT.1886 Lum. Response. Why BT.1886? Because LCDs don’t have pure blacks and the 2.4 Power setting will compromise your calibration. Instead, BT.1886 allows the calibration software to measure how ‘bright’ the blacks on your display are – and then modify the gamma response of the calibration to fit your specific display.

What about the Input Signal Levels?
Should you choose SMPTE (64-940) or Full (0-1023)? The answer is simple: This setting needs to match whatever your reference display is set. For most of you, SMPTE is the correct answer. BUT, not always. Check with your display manufacturer if you’re unsure. Also, the 3D Color Cube workflow in CalMAN has a test to help you determine if you’ve made the correct selection.
Coming Up in Part 3 of this Calibration Series
In the next Insight, we compare the two different calibrations we did in this Insight… and then kick it up by adding a 1D LUT to our calibration and see if it improves our already excellent results!
Member Content
Sorry... the rest of this content is for members only. You'll need to login or Join Now to continue (we hope you do!).
Need more information about our memberships? Click to learn more.
Membership optionsMember Login


