Understanding Color Management and Export Settings In Premiere Pro CC

How Do You Finish at the Highest Possible Quality in Premiere Pro CC?

June 18, 2019

Premiere Pro has strict, but hidden, color management. Learn how to setup the software and hardware for proper color management & finishing.


Series

Premiere Pro Is Color Managed at 32-bit Float (with the proper options selected)!

Yes, I know … the Intertubes are filled with statements that Premiere Pro is not a color-managed application or that it only works at 8- or 10-bit color depth. But that is quite false.

Premiere Pro is actually a very tightly color-managed bit of software. But very few of those color management options are user selectable. What most of us never realized is that Premiere Pro is designed around a solid core of engineered color management. Unfortunately, the documentation and explanations of how it works are mostly non-existent. So for users, this color-management-through-obscurity feels like a complete lack of color management.

What is Premiere’s color management scheme? Premiere Pro is designed … hard-coded in fact … to be viewed on a pro-level broadcast computer system with fully calibrated profiled monitors set to long-standing broadcast standards. It follows all the formal standards for the format/codec combinations of media it is designed to handle. If you use the proper options and follow the proper workflow, Premiere Pro works internally at 32-bit float, honors the bit-depth of your source footage, and exports at the highest bit depth of the codec you’ve selected.

BUT – if you misconfigure a few settings (some of which are named in a way that confuses) or don’t pay attention to the plug-ins you’re using then your final renders won’t have the final quality you expect. It’s also important you understand how to view your images since Premiere Pro’s default assumption is that you are following a broadcast delivery (and viewing) pipeline.

Premiere Pro’s internal color management assumes a broadcast Rec.709 pipeline:

  • Video sRGB color space (sRGB color primaries and white points match the SMPTE Rec. 709 specification)
  • 2.4 gamma
  • 100 nit peak brightness

These are not the only assumptions hard-wired into Premiere. There are others that most users will not anticipate. So in this Insight, l work through those issues – from setting up the computer and viewing system, to the input, processing, and output pipelines.

In this Insight, you also learn what settings to ignore (or not) in the Export dialog box, with the when and why. Including, why almost everybody gets an option in that Export dialog box wrong!

You also learn the details on Premiere’s scopes and how to set the scales on those scopes. We destroy misinformation about Premiere’s 8-bit vs. 32-bit float processing pipelines. We also hit such things as using metadata-driven media from RED and other RAW codecs. This Insight covers all the various SDR and Rec.709 color management goodies that are user-accessible.

The Premiere Pro team says they are busy making changes to give users a lot more color management settings. But that is sometime in the unknown future, Adobe always being … well … Adobe. If Adobe wants to make Premiere a fully customizable color management tool then users need to be able to set monitor management, color space, and output profiles. But these features haven’t yet “shipped” here in 2019. So for now, this is Part 1 of how to set up and work within “Premiere Pro CC 2019 (and earlier) Rules of Color Management and High-Quality Exporting”.

Premiere Pro HDR Insight coming next!

This Insight is the first of two parts on the subject of color management using Premiere Pro. Part 2 has sections on non-Rec.709 workflows, including a lengthy bit for you Mac users with P3 monitors, and a section on using HDR. Specifically, Part 2 covers:

  • When to use the “Enable Color Display Management” option, including cautions.
  • Why the Apple P3-Display is a fascinating but very different viewing system.
  • Setting up your computer system to work with HDR media, proper HDR viewing setups, and the required gear.
  • The specific exporting steps to get HDR media out of Premiere.

Special Thanks to Adobe’s Patrick Palmer and Francis Crossman

I owe a huge debt of gratitude to Patrick Palmer, Adobe Senior Program Manager, and to one of Adobe’s color engineers, Francis Crossman. Patrick assigned Francis to me for this project, and we spent hours in screen share and phone calls … and in person at NAB. A good bit of the information included came from engineer’s notes and other internal documents that have never formally stated before. Enjoy, and profit!

Mentioned in this Insight

-Neil


Comments

Homepage Forums How Do You Finish at the Highest Possible Quality in Premiere Pro CC?

Page 1 of 2

  • Mickey M
    Guest

    Ok so if someone is finishing web content in premiere, and they want it at gamma 2.2, would it be proper for them to convert to 2.2 after their final export out of premiere? Or should the colorist still provide a 2.2 export to them to import into premiere? (Let’s day the final export is ProRes422HQ)


  • Scott Stacy
    Guest

    Good question. I never finish in Premiere, but a lot of my work goes back to Premiere. If you export 2.4 gamma to the web, your video is going to look washed out. I often pass on graded clips that are going to go to the web (to non-broadcast sRGB monitors and cell phones) and TV, at 2.2 and 2.4 respectively. The Premiere finishing artist gets both gamma renders. What is Premiere doing with the 2.2 gamma renders?


  • Pat Inhofer
    Guest

    Premiere will assume a 2.4 gamma unless the codec informs otherwise.

    My advice in this workflow if I were the post supervisor: The colorist grades and renders at 2.4. But they put an adjustment layer at top for a 2.2 gamma correction. They can toggle it on / off for a final trim pass to make sure the grade works in both situations. The finishing editor takes the 2.4 render, finishes the show, and ‘burns in’ the 2.2 gamma adjustment as the final deliverable.

    Since PrPro is built around a 2.4 assumption, I’d keep it 2.4 through as much of the pipeline as possible.


  • Scott Stacy
    Guest

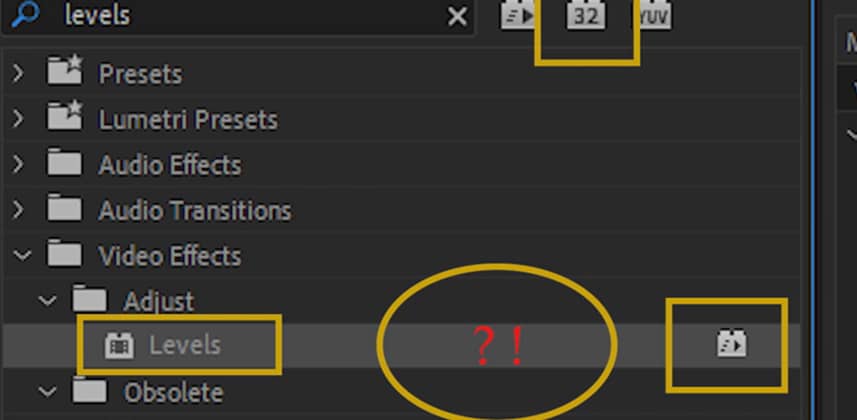
    Thanks for pointing me in the right direction, Patrick. I am complete Premiere novice. This is an interesting gamma adjustment layer. Very different than a Resolve CST or RCM process: Levels 1-28 with, I am assuming, the default of 10 is 2.4? The editor/finisher is a bit puzzled as to what would be the right mathematical conversion in the 1-28 scale that would be equivalent to gamma 2.2? Am I asking the right question? See screen shot to ensure that I got the editor to the right spot. https://uploads.disquscdn.com. Again, thanks for your help.


  • Pat Inhofer
    Guest

    Oh no – not THAT gamma correction. I have no idea what those increments are and wouldn’t assume anything. Instead, use the Lumetri effect and load a technical LUT that does the gamma correction.


  • Scott Stacy
    Guest

    Figured that was something weird. Now, you’re talking 🙂


  • Andreas U
    Guest

    At last someone sheds light onto this obscure topic. Thank you so much, Neil, Patrick and Francis!

    Following up, I have two questions:

    1) How does Premiere Color Management work in tandem with Dynamic Link (After Effects)?
    2) Why is there a (tiny) color shift for Dynamic Link Compositions?

    Inspired by this article, I did a small test on my system (Windows 10, CC 2019): I took a self rendered .mov that contains DNxHR 10bit, 1080p25, put it in it’s own sequence, duplicated the clip it on a second track above itself and sent the duplicate to AE via “replace with After Effects composition”. Then I opened the scopes and toggled “enable” for the Dynamic Link clip. Result: The scopes show a slight shift in levels.
    I then tested parallel in AE with different working spaces and bit depths (Color managment). From not managed at all to Rec709 (2.4) to sRGB (2.2) to Adobe RGB and others. After each config change I had a look in Premiere and did the toggle for the DL clip against it’s original twin.
    Result: The level difference stays exactly the same, no matter what working space AE is set so. Further, the working space in AE has no effect whatsoever onto its DL child in Premiere.

    How can these two effects be explained or interpreted in light of this article about Color Management in Premiere?

    Best,
    Andreas


  • R. Neil Haugen
    Guest

    Matching Premiere and Ae is at times an intriguing situation. The in-house folks never seem to have issues, so the standard answer is it’s in the users settings. Essentially, Ae’s color management options have to be set to the video sRGB/Rec.709/2.4 controls within Ae, and supposedly it’s supposed to match.

    One other thing that is an issue I’ve seen for some … is whether “Composite in Linear Color” is toggled on or off both within Ae and Pr. I know of people that have finally matched their two apps by working with the “CiLC” options in both apps. You might give that a try.

    And thanks for asking about this, as it is an on-going issue for many users. I’ll contact Francis Crossman about this for further info to pass on.


  • R. Neil Haugen
    Guest

    Patrick’s got the best practical workflow I think. Work in 2.4, add that AL with a slight gamma ‘lift’ and toggle visibility.

    Then in the Export dialog, apply a LUT to mod the file to the preferred gamma. Weird thing in the Export dialog, the Effects tab, is when you hit the drop-down line, it goes to the Lumetri Presets Universal SpeedLooks list. But you can of course choose to navigate to wherever you have your own choice of LUT waiting. A bit of warning … they don’t have any LUTs ‘built-in’ that are set to specific output gamma. You’ll have to roll your own.


  • Jason Bowdach
    Guest

    HUGE thanks for shedding light on this topic. Its been a huge pain for myself and I’m sure others to “guess and check” with Premiere and I feel more confident about whats going on under the hood after watching your explanation. Much appreciated!


  • Scott Stacy
    Guest

    Hey Patrick … I consulted with Nick Shaw about this and he had a very novel and non-destructive way of mathematically converting gamma 2.4 to 2.2 with an adjustment later via the ASC CDL effect whereby you adjust the power level of the RGB channels to 1.090909. Works great.


  • Jan K
    Guest

    Thanks for this episode Neil. It does answer some important questions about Premiere and color.

    It still leaves me with one question though for a frequent and specific use case I have, and Premiere’s assumptions about Rec709.

    Here’s the use case: I do a lot of color work for digital beauty content, most of which is shot with various RED cameras in RED Raw. Almost all of it gets edited in Premiere by other people for I get handed the files. For logistical reasons I often do not get the actual RAW files (frequently more than 1.5TB per job and longer distances between offices). So I get ProRes 4444 renders from the editors which I run scene detection in Resolve on and finish color, then send them back the rendered color for final assembly in Premiere.

    Originally they would apply the RED Raw settings in the Masterclip and send me what is essentially Rec709 footage for grading, which is of course less than optimal, especially if there are issues with the footage. So I’ve been working with the editors to do their ProRes 4444 renders with different master clip settings, which leave the footage in IPP2/3Log10/RedWideGamut on the timeline and render that in ProRes 4444. The theory being that this should maintain much of the log data in the footage, and then I can apply the RED 3Log10/RWG LUT in Resolve at the appropriate point in the node tree and we get good color results with a more efficient workflow.

    The question I have related to this episode, if the RAW settings are such as not to output Rec709 to Premiere’s timeline, is Premiere’s assumptions of being built around broadcast color still messing with the color space and gamma in a way that it’s not the same as if I imported RAW into Resolve and arrive at 3Log10/RWG there?

    I assume this may be the case, because applying the RED LUTs has resulted at time in some weird things.

    And if this is not the correct way, is there a better way of dealing with this use case where there is footage in Premiere that has more data than Rec709 and getting this out at the other end for a color workflow without distortions?

    Looking forward to your thoughts.


  • R. Neil Haugen
    Guest

    I’ve posted a couple questions about this sort of thing to Francis, but emailed to him just as they went on their mid-summer corporate shutdown. So maybe in a couple days as they’re back to work I’ll get a more detailed answer.

    I had some lengthy discussions with Francis about this sort of thing, and … it’s … frustrating at the moment. From a couple comments from various folks, I think they might be in the midst of re-working their color management for both chroma and luma. But Adobe being Adobe, that’s guessing on my part. We’ll all know they’ve done something when they announce it. For now, I’ve got a bit of the RED demo clips I could test with, but I’ll hazard a guess here first. Won’t be back in the studio for a couple days.

    What you’re trying to do is preserve data in ranges significantly exceeding the Rec.709 color space for both chroma and luma. And it sounds like what’s happening is the data is of course getting ‘squeezed’ into the Rec.709 bottle by the editors, and you are trying to coax it back out into a bigger bottle in Resolve, then export back. Yea, that can work with some clips, and others, not so much. If our media was as flexible as taffy, it would just work for everything, right?

    The only way I can think of at the moment for assured proper workflow with this is if you get the original media and conform it to the edit, old-school fashion. But again, that’s more data to move as you note. It would be guaranteed to work, if … with the pain of conforming media.

    Premiere can export higher data range media, with the HDR capabilities it has at the moment, and this might … MIGHT … work as a workaround. It would take some testing of course. And I’m winging this from memory as I’m away from my notes. This will be covered extensively in the HDR Round II color managment tut we’ll be starting to record this week.

    The editors would need to set the scopes (if they look at them … sigh) to “HDR” in the little drop-down to the right of the Scopes panel. Choose the Rec.2020 color space by right-clicking in the Scopes panel, and set the Waveform to YC No Chroma. Then in the Lumetri tab, click the three-bar menu icon at the top, and select “HDR”. Pretty much leave most things alone there, I’m guessing.

    Then with the Master Clip settings, adjust the media so it covers a range in the YC No Chroma Waveform scope maybe up to 150 or so for a top in the left-side nits scale. At this point, the lighter parts will probably be a bit blown out in the Premiere Program monitor, but ah well. As long as the YC No Chroma (or many just YC which has a blue ghosting for chroma) shows solid signal all the way, it’s fine.

    For the editors exporting from Premiere, my guess is the best quality option for your needs uses JPEG2000 files, which are 12-bit. In the Export dialog, try the JPEG200 MXF 0P1a Format … in the Video tab options, select the 12-bit PQ option for “Chroma and Depth”, and for “Color Primaries” try the “P3D65” and “Rec.2020” options … see which one works best. I’m not sure how much smaller those will be from the original files … but maybe some? Easy enough to test.

    This … should! … get wider chroma and luma out of Premiere.

    I’ve got another idea I’d need to test even before suggesting.

    EDIT: just saw a note from Jarle Leirpoll, who suggests that there is a possibility that the Sequence Settings Max Depth button may be needed with RED material to have Premiere see more than 8-bit data on import to a sequence. Puzzling comment to me, but then … I trust Jarle more than most people, so I’ll be testing this in a couple days back at the office myself.


  • James L
    Guest

    Is it always necessary to make a separate 2.2 gamma master for web use? I pestered an engineer at Vimeo about it a couple years ago and he claimed that their encoder assumes everything coming in is 2.4, but who knows if that’s true. He might have been mistaken. And who even knows what Instagram and Facebook video encoders assume as an input?


  • R. Neil Haugen
    Guest

    Andreas, I forwarded this on to Francis, and tried it myself. Neither of us could repro on our setups … so I’m trying to figure out why you got this. Would love if anyone else having this chimed onto this discussion.

Page 1 of 2

Log in to reply.

1,000+ Tutorials to Explore

Get full access to our entire library of over 1,100+ color tutorials for an entire week!


Start Your Test Drive!
Loading...