Day 10: 25 Insights in 25 Days Holiday Marathon
Magic Bullet Looks 3 – An Overview
Creating Looks in FCPX
We are approaching the end of the FCPX Desert Island Challenge and I’m wrapping up my look at plug-ins that can help us create ‘Looks’. And the granddaddy of them all is Red Giant’s Magic Bullet Looks 3. It’s billed as ‘powerful looks and color correction for filmmakers’.
What is color correction for filmmakers?
As opposed to say, color correction for editors or color correction for colorists?
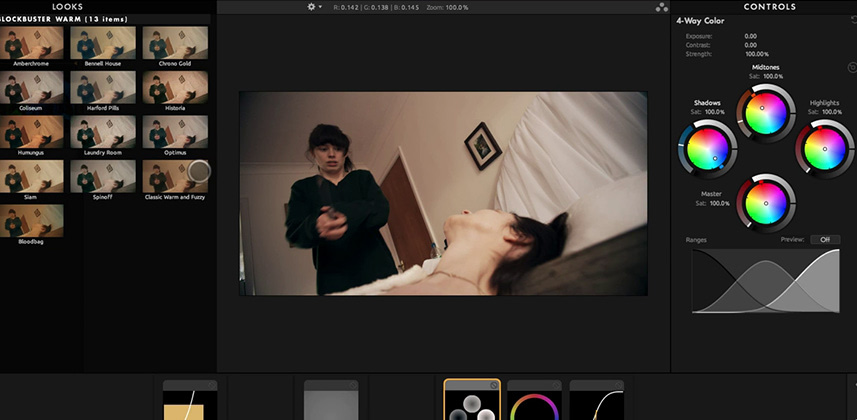
Essentially – it’s color correction in a point-and-click playground. Looks 3 has a ton of Looks presets, that all instantly update to the current frame you’re sitting on—so you can quickly scan dozens of Looks and hone in on a few that are interesting to you. From there, you apply the preset and then start tweaking.

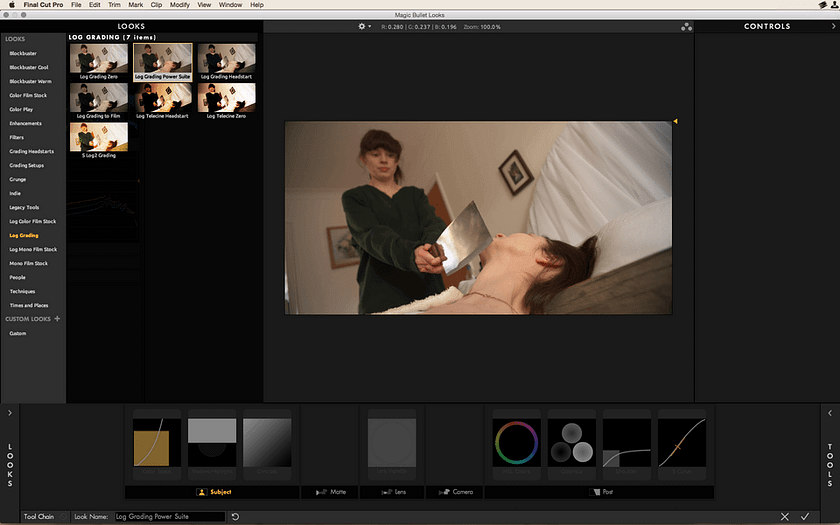
It’s at the tweaking stage that the ‘for filmmakers’ moniker is painfully evident. As shown in the screenshot above, the filters applied to our images have two levels of ordering designed to make sense to filmmakers who think in terms of the camera, lights and lens. The first level of ordering is called ‘The Toolchain’ and is split between Subject / Matte / Lens / Camera / Post. Color correction filters are applied at specific points in the Toolchain.
In other words, we apply filters in the order light transmits it into our cameras
For each level of the Toolchain there are color correction filters hand-picked that in some way make sense to the filmmaker not used to traditional color correction workflows. In the ‘Subject’ set of adjustments, there are filters such as Fill Light and Spot Fill. In the ‘Lens’ adjustments are the Anamorphic Flare, Swing-Tilt and Lens Vignette filters.
Makes sense, right? There’s a certain logic to Magic Bullet Looks that makes it unique among color correction tools.
But the logic also gets stretched thin
Should the Color Space tools for converting from Log to Video be at the Subject level, where it is now? Or at the Camera or Post level, where they are NOT accessible? Meanwhile LUTs can be applied at the Subject, Camera and Post levels.
To my thinking, the choice of colorspace is a Camera-level choice. That’s where those filters belong, logically.
Chromatic Aberration is another filter at the Subject level that seems strangely out of place. Wouldn’t that more correctly be a Lens distortion?
My guess: The logic gets stretched thin because we frequently want certain color correction operations performed at specific places in our ‘chain’—and Looks is willing to break its own ‘mental model’ to make that happen (although, I still think color space conversions should also be placed at the Camera level, which not only makes more sense but gives us more control).
New in Magic Bullet 3: Emphasis on Log grading tools

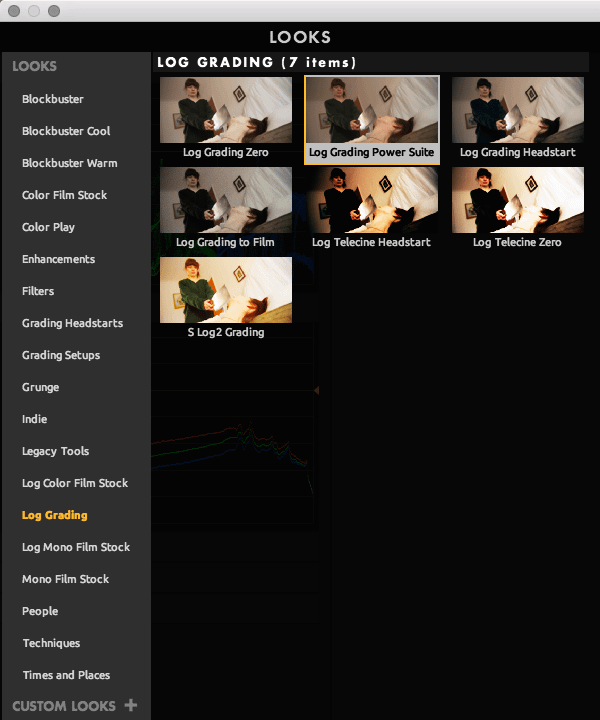
As you can see in the screen shot, there are whole sets of Looks designed for Log workflows. It’s an interesting addition to Looks and reflects the in-roads that the Log-recorded workflow has made in the indie filmmaking community. The problem? As a professional colorist and coach, I’m not ‘down’ with the concept of doing my initial contrast / saturation expansion at the same moment I’m doing my Looks creation.
As I’ve emphasized every time I teach color correction anywhere… you’ll get much better results by breaking down your workflow and leaving Looks creation after you’ve done your base color correction and after you’ve matched your shots together.
Also new in Bullets 3 is the integration of Colorista 3 (which we’ve previously looked at in two Insights in this Desert Island series) plus Magic Bullet Mojo and Magic Bullet Cosmo—which previously only existed as stand-alone filters.

Notable in Magic Bullets 3 are the Toolchain Headstarts. Above is the Log Grading Power Suite – which has a set of core filters you’d want if you were grading a Log-recorded image. There are several of these types of Suites and Headstarts to save you the time of hunting down and apply each filter you’d want to work with. I’d like to see these types of presets combined into a single menu with all their settings in the neutral positions. I find that too many of these Headstarts already have a Look applied – so that the ‘S Log2 Grading’ isn’t just for getting me out of SLog2 but it also puts me into a Look, forcing me to turn off filters to understand what they’re doing to my image.
Magic Bullet Looks is now available in DaVinci Resolve
This Insight may be part of the FCPX Desert Island Challenge, but a recent update to Looks has it now working in DaVinci Resolve as an OpenFX plug-in. Looks works the same in Resolve as it does in FCPX, so if you’re interested in Magic Bullet Looks for Resolve this Insight is also for you!
In the Video Insight below, I’ll show you my favorite way of working with Magic Bullet Looks 3
I’ve been using Looks since v1 of its release. It’s always been innovative. But I don’t use it the way you’d think. For reasons I’ll explain below, I use it at a very specific point in my workflow, in a very specific manner. And there’s one big gotcha, that isn’t the fault of Magic Bullet—but is annoying anyway.
Coming Next: Wrapping up the FCPX Desert Island Challenge
I’ve been working on this FCPX series for a year. It’s time to recap everything we’ve learned plus I’ll share what one single plug-in I’d buy if I could only pick one plug-in to supplement the core color correction filter set in FCPX. To be clear, I’ll continue looking at plug-ins in FCPX—but there are far more solutions than I have the time to evaluate and this seems like a good time to end the race and share with you my conclusions.
-pat


