A Huge Release
Last night, Blackmagic Design released DaVinci Resolve 17.4. You may think this is a simple dot release, but looking at the release notes – this is a huge upgrade for all Resolve users. In this Insight, I’m going to show you a few of my favorite new features – really focusing on the ones I think are going to make the biggest impact on my day-to-day work.
Apple Silicon

First there are some major headlines for those who have ordered the new MacBook Pro systems. Updates include major performance improvements on all ARM/Apple Silicon platforms and native HDR support in the UI viewer on capable Mac systems. Resolve also supports 120hz UI on the new MacBooks – which could make for some really smooth timeline navigation!
Does this mean you should grade HDR on a laptop without a reference monitor? I don’t think so. But it is a very welcome addition for anyone who wants to explore HDR grading, and for editors or VFX artists who need HDR monitoring.
It also signals that BMD is obviously throwing their support behind Apple’s new architecture – which is important to note as Apple expands their ARM-based product offerings.
Color Page
Despite adding great editing, audio, and effects feature sets over the years – Resolve started out as a top-level color grading system, and colorists want the best tools available. Thankfully 17.4 has some absolutely fantastic new color page updates, starting with some clever GUI enhancements.
GUI Changes
Drop-down optimizations
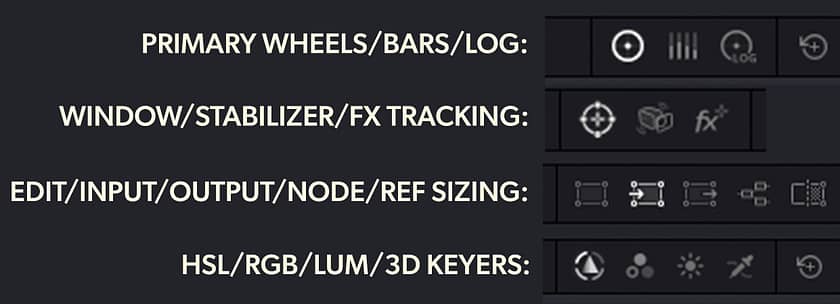
Keen eyes will notice some subtle changes in the Resolve user interface. Most of the drop-down menus have been replaced with easy-to-find single-click controls. This includes changing tracking modes, primary color correction modes, qualifiers, and sizing.
This may seem like a small thing – but I love it. Think of how many times you switch from window tracking to the stabilizer (and back) in a day? Every time took two clicks, one to drop down the menu, then one to make a selection. This small optimization will add up to a lot of time saved in long sessions.
Layer Mixer and Parallel Node optimizations
Layer and parallel mixers also got a great efficiency upgrade, as they now automatically add inputs when nodes are connected to them. It’s no secret that I like to build some extremely complex node trees, and this is another feature that is going to save me a ton of clicks in my day-to-day work.
Tracker and Qualifier improvements
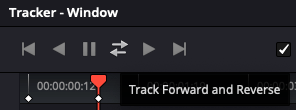
Also new to all of Resolve’s tracking panels – a dedicated button to automatically track both forward and backward with a single click. That is another one of those “I’ll use that a million times in a day!” kind of improvement which cuts down on extraneous clicking.
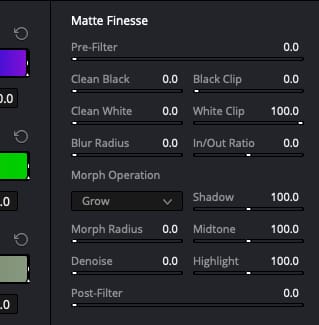
The qualifier tools have also been updated with a new and improved UI. Now all of the matte refinement tools that were locked away behind a second page are available instantly on the qualifier panel. Again, BMD is reducing the number of clicks needed for common, day-to-day tasks – and I love it.
New 3D Keyer visualization
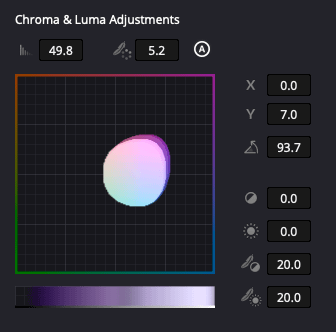
Finally, the 3D keyer has been enhanced to give live feedback as you draw selections. This is a quick way to visualize if you are heading in the right direction with a key – and should be a nice timesaver. The 3D keyer also has new features – allowing you to manipulate the key interactively right in the panel.
New ACES Tools & Support
Upgrades and optimizations to the UI are great – but what about new color tools? Well, Resolve 17.4 delivers. One major upgrade is full support for ACES 1.3, including the Academy’s new gamut limiting features. You may have used these in various DCTLs that have been going around for a while now – but as of Resolve 17.4, they are built into both ACES color managed projects and the ACES transform tool.

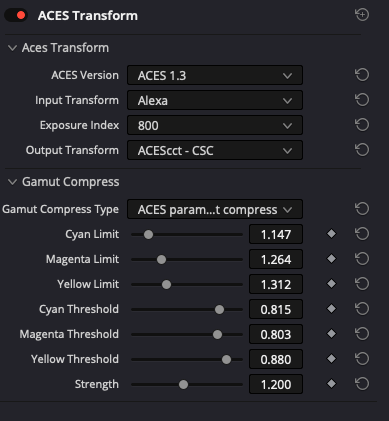
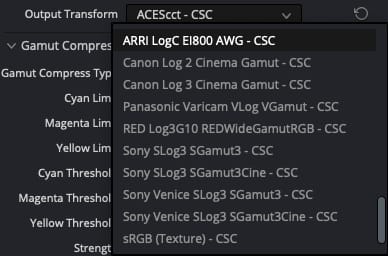
The ACES transform has also been updated to allow you to use the ACES math to transform from IDTs to other camera spaces – not just to ODTs. I’ll have to experiment with this one a bit – but it could make dealing with multiple camera formats in node-based ACES projects a bit easier.
New ResolveFX
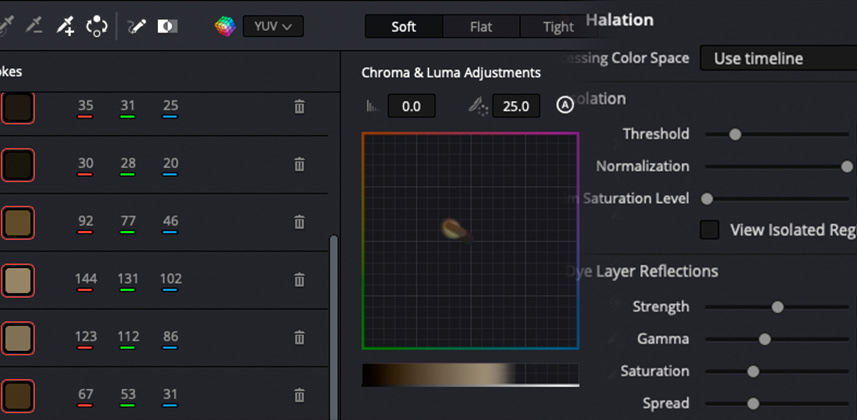
Resolve 17.4 has two fantastic new ResolveFX plugins that I am super excited about. The first is a great solution to a problem I’ve had to solve manually in the past – film halation.
Halation
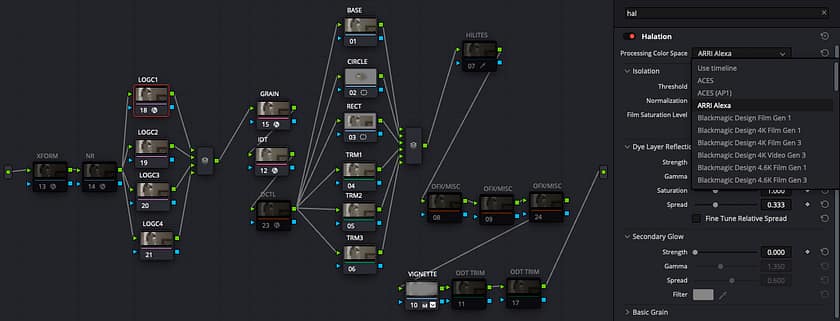
Resolve 17.4 includes a built-in halation tool that has a lot of the exact same features I built into my much more complex halation node tree. You can adjust thresholds, size/shape of the halation, saturation, spread, even add additional glow and grain. The halation effect is deeply customizable to get get the exact look you want.
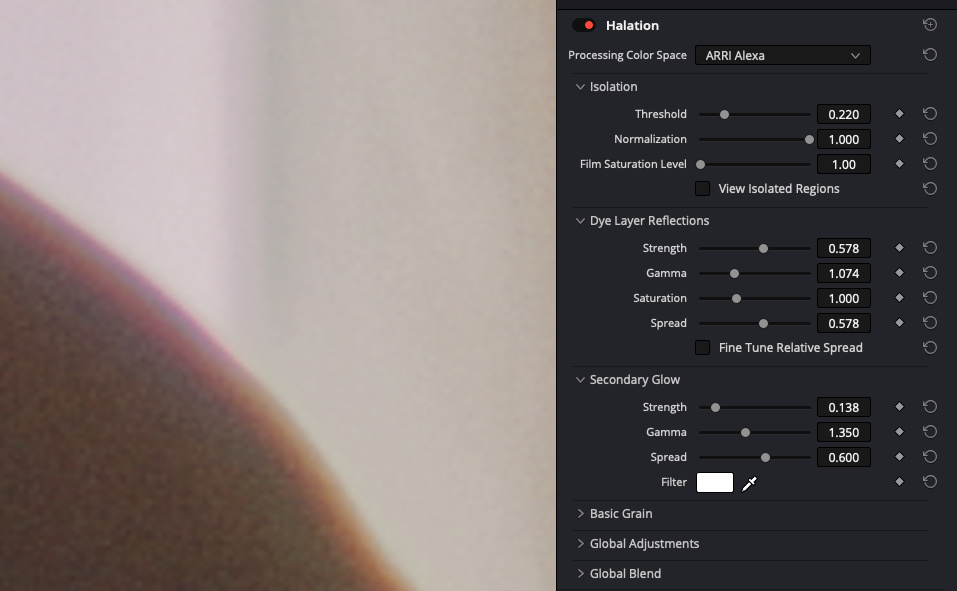
I’ve been experimenting with it – and not only does it look great in SDR, it also looks fantastic in HDR! This is because unlike most halation effects or methods – the new ResolveFX is color-space aware. This means you can select the color space you are working in – and it will render accordingly.
I tested it in my Custom ACES node tree, applying the halation in LogC camera space before my ACES IDT, and even with minimal tweaking – the results were very good looking both in SDR and HDR.
Custom Mixer
There is also a new Custom Mixer ResolveFX. This one is super cool – it allows you to apply any blending mode, with any proportion of R G and B channels, to combine two inputs right on the color page. It’s like a layer mixer on steroids. The best part? Just like the halation effect – the custom mixer is also color space aware. This is going to go a long way to solving some of the headaches that blending modes add to ACES workflows.

Dolby Vision Clip Filters
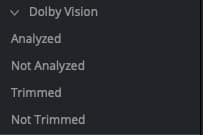
In another case of “Wow, I think they are reading my mind” – Resolve 17.4 adds clip filters for Dolby Vision projects. If Dolby Vision is enabled in color management, you can now filter in the color page and lightbox based on if a clip is analyzed or trimmed.
This is going to be a big time saver for long, complex Dolby Vision projects. In the past, I’ve resorted to various manual methods of tracking where I am in a Dolby Vision project, from clip colors to flags or markers. Filtering is much easier, and the data is also available for creating custom smart filters.

Edit Page Improvements
There’s also a lot to be excited about on the edit page. Again, my focus: What new features and improvements are going to save me time every day?
Mark Gaps
First – and probably my favorite is a simple thing I’ve always wanted: Marking Selection For Gaps. This means when you single click in a gap in a timeline, you can now use the Mark Selection key to automatically mark its in/out points.
I know it seems like a small thing – but if you are editing in Resolve, trust me – this is going to be a huge timesaver. It’s something I’ve reached for many times and had to work around it not being available.
Timeline tab improvements
Another simple but great new feature? Timeline tabs can be closed by middle-clicking. I work on some pretty complex projects with lots of sequences, and I regularly get frustrated trying to nail the tiny “X” to close unused tabs. Middle clicking to close is going to add up to save a lot of time.
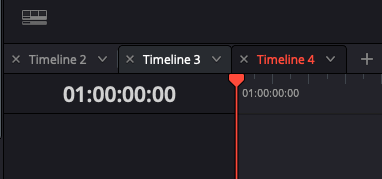
Another tabbing improvement: navigation is now available as a bindable keyboard shortcut, which will make switching between lots of timelines much faster.

Render In Place
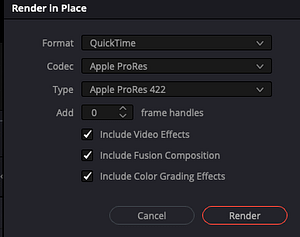
Render in place is also improved – there is now an option to bake down color effects or not. This can be very useful for rendering heavy Fusion comps or raw debayers, but keeping the color grade live. More flexibility in render in place will be very useful for roundtrip workflows and effects heavy grades.
.
Per-shot deinterlace settings
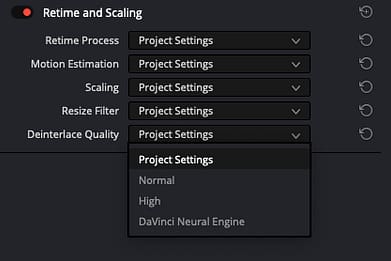
Another time saver – clips in the timeline can now have individual de-interlace quality settings. This is accessible in the Inspector and is great for those of us working in docs, non-fiction, or anything else involving a lot of legacy interlaced footage.
The DaVinci neural engine de-interlace offers excellent quality but is very render-heavy. It used to be a project-wide setting, but not all clips will need it. Being able to set it only on the clips that do need it will save a lot of time rendering.
So Much More…With One Downside
As you can see there is a ton of really useful new features in Resolve 17.4 – and I’ve barely scratched the surface. There are also improvements in Fairlight, Fusion, Media Pool, and Deliver pages. If you can’t tell – I’m super excited to dig into this release and start using it. Though I have to admit – there is one downside. On Mac systems, Resolve now uses the macOS built-in fullscreen functionality – so running Resolve in full screen has changed a bit.
The menu bar at the top now automatically hides, and Resolve becomes its own desktop on the mac – making switching desktops much more difficult. To be honest – I’ve always really hated how MacOS handles full-screen applications, so I expected this to happen eventually. I hope that in a future release – BMD adds an option to retain the old full-screen behavior.
Comments, Questions, Your Favorite New Features?
What are your favorite new features that you are excited to try? Let us all know in the comments below!
Joey

