ML658_Banner

Design Essentials: Another Perspective On Suite Design

August 11, 2017

In this Insight, Joey D'Anna shares some of what went into the design of his color suite, why he loves Aeron chairs, TBC consoles and more!


Series

Exploring My Approach To A Color Suite

I’ve been following Pat’s series on how he is building his suite with great interest – because I’ve always really loved the topic of suite design, ergonomics, and building a workspace that is both comfortable to use and feels premium and professional. I firmly believe having a comfortable space to work that you actually enjoy being in helps you do better work. The right suite setup can go a long way towards letting you focus your energy on where it should be – on being creative.

I worked at one of the biggest post house in Washington DC for over a decade, and in that time I played various roles, from engineer to editor to colorist, so I was always heavily involved in how the suites were laid out and set up. When it came time for me to build a suite of my own, I took in the experience of all the different suites I’ve worked in over the years and designed a space that I truly enjoy working in.


This is my home suite. My house had an unfinished basement, so I had a contractor finish the basement specifically for how I wanted my suite to be laid out.

So after watching Pat’s insights, I wanted to add to the conversation that he started. So in this Insight, I’ll give you a brief tour of my suite, and talk a bit about why I laid it out the way I did, and about some of the input devices, furniture, and equipment I chose.
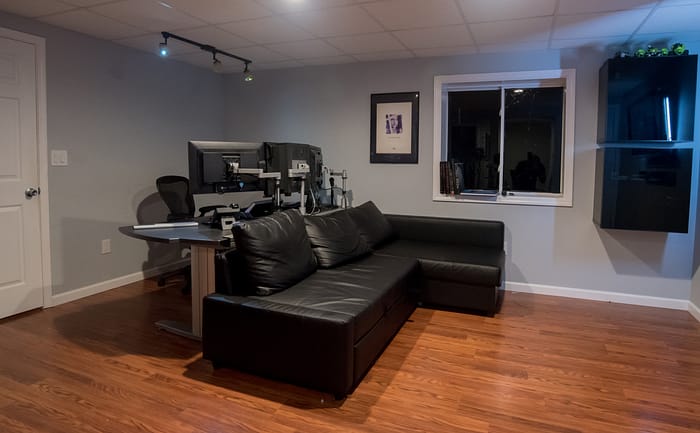
As you walk in, my desk is situated at the rear of the suite with client seating ahead of it. The door to the left is the equipment room housing my computers and storage.

About Chairs And Desks

I talk a lot about my desk in this Insight – and with good reason. Your desk is where you interact with every tool you use during your day to day work, and if it doesn’t “feel” right – it’s going to be a huge pain-point.

When I first built my suite, I used a cheap off-the-shelf desk that I modified with a cheap and somewhat flimsy triple monitor arm
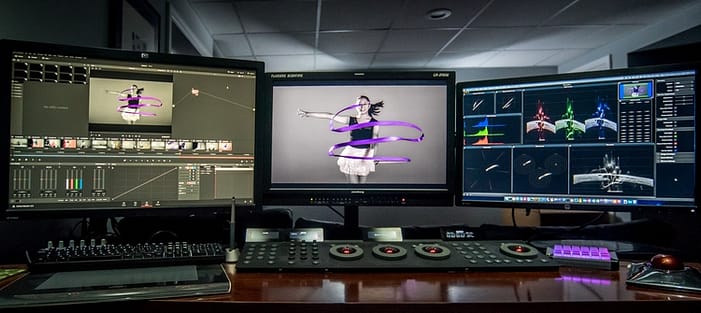
My original desk was functional enough, but it was ugly and uncomfortable. I knew I needed something better.

While it worked as a starting point, I was never really happy with it. The monitor arm wasn’t quite the right eye-level, the desk felt cheap, and there was cabling all over the underside. I was also really cramped for space with all the stuff on my desk.

Upgrading to a Sony reference monitor was the impetus for me to seek out a much more serious solution. The Sony OLED is very heavy. I knew my home-made cheap desk/monitor arm setup wasn’t up to the task of supporting it.

I decided on a purpose-built console from TBC Consoles, and it’s one of the best purchases I’ve made. In the video, I’ll explain some of the reasons why.
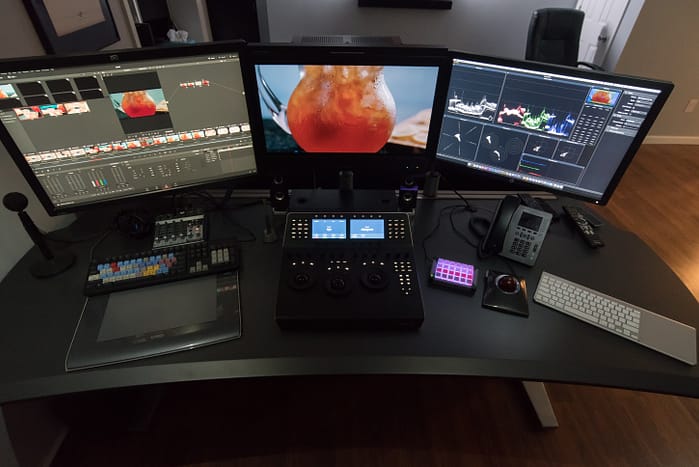
The ST3 console from TBC took the ergonomics, style, and functionality of my suite to a new level. It’s one of the highest-quality pieces of production furniture I’ve ever used.

For my chair – I chose a Herman Miller Aeron (Size B, with adjustable lumbar support and armrests).
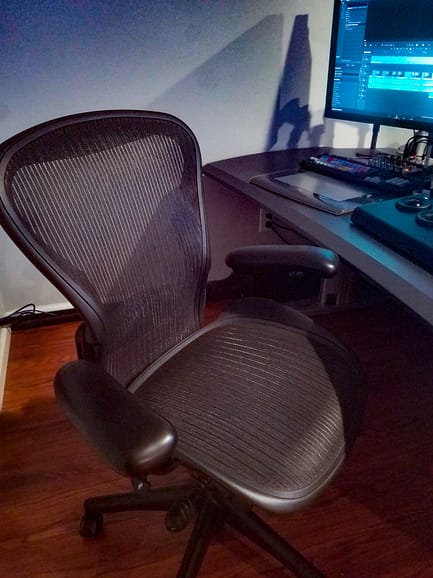
To me, the Herman Miller Aeron is the ultimate chair. They are a mainstay at post-production facilities around the world.

A few quick notes about the Aerons:

  • They are very expensive but worth it. In my view, there is no chair more comfortable. But this is deeply personal, and you should definitely see about trying out any high-priced ergonomic chair before dumping a huge amount of money on it.
  • They are available in multiple sizes, and Herman Miller has a chart available to help you decide (Sizing Chart)
  • They may be pricey, but there are deals available. Aerons are super popular in corporate offices, so very lightly used or even brand new in the box chairs are available for big discounts if you are willing to risk not keeping the original factory warranty. Keep an eye on eBay or Craigslist, my chair had a retail price of over $1,000, but I bought it brand new in the box for only $500 on eBay.
  • The castors that come with the Aeron do not work well on hard floors like hardwood or tile, so if you have a hardwood floor (like I do) – special hardwood floor castors are available and inexpensive. 

Links To The Products I Use In My Suite

Video

In the video below, I’ll walk you through the how and why of my suite setup. I’ll show a dual-purpose workflow, allowing me to easily transition between online/conform/prep work, and color grading. I’ll also talk a bit about why I prefer using a trackball instead of a mouse for my UI interactions while grading, and I’ll dive into the many things I love about the TBC console.

-Joey

Member Content

Sorry... the rest of this content is for members only. You'll need to login or Join Now to continue (we hope you do!).

Need more information about our memberships? Click to learn more.

Membership options
Member Login

Are you using our app? For the best experience, please login using the app's launch screen


Comments

Homepage Forums Design Essentials: Another Perspective On Suite Design

  • Seems like you may be slouching a bit I folded a body pillow on my chair and found it straightens my back and shoulders

  • The Aeron has an (optional) really nice adjustable lumbar support which works really well for me – I’ve had lower back issues most of my life and I can sit in that thing for hours on end without any pain or fatigue.

  • For me the pillow is at the top of my chair and more geared to straightening my upper back
    I use the CXO chair which is also really nice and heavy
    https://www.amazon.com/Mesh-Heavy-Office-Chair-Fabric/dp/B0043BKX72


  • rneil@rneilphotog.com
    Guest

    Thanks … loved the views of your layout, the reasonings, and how it’s working.


  • Ron B
    Member

    a quick question on the panel, how do you switch on and off your BM mini panel? Just simply with pulling AC cord off or yours is connected with Poe eth?

  • I actually just leave it on. Yes mine is connected with PoE – so unplugging that would power it off, but I just leave the thing running instead of unplugging and plugging it every day


  • Ron B
    Member

    Thanks!


  • Greyson A
    Member

    This is an extremely helpful insight into a well designed color suite setup. I’ve been coloring for a short while and have just now begun to refine my preferences for panels, monitor arrangement, etc., so this insight is great!

    I do have a question concerning your client viewing setup: Most color suites I’ve seen have their client TVs a good distance away from the colorist’s desk. Do you use this TV as a reference when grading, or is it primarily for the client? If so, how often do you look at the TV compared to your Sony OLED? Also, what is your preferred distance for the TV from your desk? Thanks!

  • Glad you liked it!

    I never look at the client monitor while grading. (FYI the monitor in these shots is temporary anyway, I’m replacing it with an OLED client monitor soon)

    From where I sit – my Sony is high enough up that I cant even see the client monitor unless I stand up.

    In general – I like to always have only one master picture monitor in view (especially for clients – you never ever want to hear “which monitor should I look at” – because that is almost immediately followed by “but I like X one better” and you’ll be chasing your tail all day).

    Even if two monitors are dead perfectly calibrated and matched – they may look different when viewed at the same time just because of them being at different viewing angles – which could lead to a lot of unneeded confusion.

    As far as distance goes – there’s a lot of opinions on that out there. The ideal viewing distance is usually quoted as 1.6 times the diagonal of the screen. But personally I like to be a tiny bit closer then that, because I’m really critically looking at things like noise/grain, and detail in qualifiers.


  • Jay Smith
    Member

    Really love the online/colour grading configuration you have! Was that a major factor in moving to the narrower mini panel vs your Elements?

  • Thanks!

    The narrower footprint of the mini panel was definitely a big bonus for my layout – but even with the elements – I could still have a side by side online/color workflow – the desk was just a bit more crowded.

    For me the big reason for switching to the mini was it’s better Resolve integration – and curves on the panel. That was probably the biggest factor. I love using curves on the panel. But since I moved to the mini – i’ve been really happy with the additional desk space.

Log in to reply.

1,000+ Tutorials to Explore

Get full access to our entire library of over 1,100+ color tutorials for an entire week!


Start Your Test Drive!
Loading...