| Series |
|---|
updated: July 25, 2016 – The original video on metamerism was replaced with an updated video (since the old one disappeared).
Choosing A Room Is Just The Start – Gear Setup Is The Next Step
In part one of this series we took at look at grading suite design considerations including room size, controlling light, furniture and lighting essentials, along with a few other tidbits.
In part 2, I want to get a little more technical about the room setup including looking at making the choice to have computers and other gear in or out of the room, some ergonomic essentials, reference, client and computer monitor selection, bias light positioning and setup, audio for a color suite and few other bits of info.
While much of the information in this Insight is based on published recommendations, some of it is also my opinion.
In other words, topics in this article can be considered a ‘guide’, but not necessarily dogma – as a wise colorist once told me – when it comes to technical room setup, perfection is hard, but getting close is usually pretty easy.
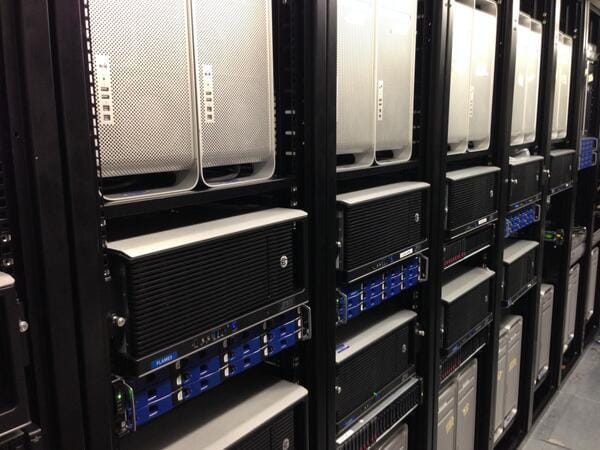
Gear In the Suite Or A Dedicated Machine Room?
So you have your room picked out, have protected the suite from ambient lighting, have the perfect desk and chair and you’re all set to get all your gear in the room and connect everything, right?
While every grading suite is bound to have quite a bit of gear in it – monitors, control panels, etc., one decision you’ll need make that does impact other equipment choices is whether you’re going to have computers, RAIDs, and various other pieces of gear – legalizer, hard disk recorders, etc., in the room with you, or in a separate machine room.
In my opinion there are quite a few reasons to consider putting gear into a dedicated machine room:
- Noise – Computers, RAIDs and pretty much most gear used in postproduction makes noise. Personally, I find the whine of a RAID or some other fan from a piece a gear that I spend 10-12 hours a day with intolerable.
- Heat – What do you think all those loud fans are for? Gear makes heat and having a comfortable climate in your grading suite is something that you and your clients will appreciate.
- Connective Possibilities – Especially if you have a lot of gear or other rooms each with their own set of gear, having computers, I/O devices, etc. all in one place makes routing and patching easy. Even if you aren’t going to route and patch things via a central patch bay, having everything in the same room makes for short direct cable runs and easy connectivity.
- Temperature Controlled – One thing that every machine room needs is air flow and cooling – after all you have a lot heat generating equipment. In my facility, we have a large ductless cooling unit attached behind our gear racks. Having a temperature controlled room that runs on the cooler side can actually lengthen the life of your gear.
- The Neat Factor – It’s amazing how having the majority of your gear in a machine room can make your suite feel more like an inviting, comfortable place rather than a technical operating room. Less gear in the room makes your room feel more tidy, and with less gear in the room there is also less cabling to manage (read hide). The other part of the neat factor? Clients think machine rooms are impressive. Indeed, large facilities use their machine rooms as showcases for client tours.

Of course with those positives there are some negatives about having gear in a machine room vs in the actual color suite:
- Space – While quite often a storage space or even large closet (assuming there is cooling in it) is often workable as a machine ‘room’ you might not even have that and taking up another normal sized room just for gear might not make sense.
- Cost – Having a dedicated machine room while convenient also carries with it some cost. Racks, patch bays and or routers are pretty affordable, but cooling units and installation can get pricey. In addition, there might be some construction needed to route cables and vent cooling units.
- Cabling – While to certain degree having a lot of your gear in a machine room makes connectivity and patching easy you’ll need to consider what cabling you’ll need back to your room. Almost assuredly this will mean multiple SDI runs, but what about HDMI? How far is the run? If it’s further then say 100-150ft you may have consider adapters, active cables, or even going to optical connections. While the new crop of 4k+ computer monitors look amazing you may be limited because of HDMI issues or if you’re running DVI monitors you may have to consider optical or DVI over Cat 5/6 cabling and even still there are resolution restrictions. What about USB connectivity for control panels? Do you need Thunderbolt in your room? Remember, all of this gear needs to connect back your computer in the machine room. Below I have a small shopping list of gear I’ve been using to do these extended runs to rooms in my shop.
- The P.I.A Factor – While my personal preference is for a machine room setup, there is something nice about just leaning over and plugging in a client supplied drive, or other common tasks that you do with equipment all the time. So, there is a certain pain in the ass factor about a machine room – need to plug something in? Well, you have to get up and walk down the hall. Drive didn’t mount. Yep, walk back down the hall. At least you’ll get some exercise!
If you choose to have your gear in your room with you that in no way means that you’re not as sophisticated or less high end than a shop with a machine room. But I do think it’s worth making sure you think about keeping tidy and organized. Small under the table racks or even larger wood racks to go in a corner work well.
Member Content
Sorry... the rest of this content is for members only. You'll need to login or Join Now to continue (we hope you do!).
Need more information about our memberships? Click to learn more.
Membership optionsMember Login


