| Series |
|---|
Quick Summary
Comparing ACES 1.3, ACES 2.0, and DaVinci Resolve’s Resolve Color Management (RCM) using a single demanding shot from the Blackmagic Design sample library. Examines split versus unified rendering transforms, ACEScc vs ACEScct toe behavior, RCM SDR/HDR processing modes, Output DRT options, and how each pipeline handles extreme saturation and shadow elasticity.
Facing Off: How three color management systems handle the same demanding shot
Welcome to the heavyweight championship of scene referred color management. For years, the Mixing Light community has watched a classic two-way rivalry.
In one corner stood ACES 1.3, an open source standard defined by a split Reference Rendering Transform (RRT) and Output Device Transform (ODT) designed to guarantee cross-software mathematical consistency. In the opposite corner stood Resolve Color Management (RCM), a proprietary pipeline operating exclusively within DaVinci Resolve and offering several tone-mapping pipelines tied directly to the software’s internal image processing sequence.
Now the dynamic has shifted into a three-way title fight.
Enter the highly anticipated challenger ACES 2.0. This modernized architecture steps into the ring with a completely rebuilt core, aiming to bridge the gap between open standardization and the aesthetic flexibility professionals demand.
“For years the Mixing Light community has watched a classic two way rivalry. Now the dynamic has shifted into a three way title fight. Enter the highly anticipated challenger ACES 2.0. This modernized architecture steps into the ring with a completely rebuilt core, aiming to bridge the gap between open standardization and the aesthetic flexibility professionals demand.”
Billy Causey, Colorist, Cinematographer

This article provides ringside commentary on the mechanical differences between ACES 1.3, ACES 2.0, and RCM. We will analyze the legacy split-transform model of the older Academy standard and contrast it directly with the new unified Display Rendering Transform (DRT) in version 2.0. We will evaluate the trace behavior of ACEScc versus ACEScct to map the exact toe mechanics, and then explore the routing options within RCM, including SDR, HDR, custom configurations, and using an ACEScct working space within a Blackmagic color management system.
But every title fight needs a proving ground.
To stress-test each contender’s color science, we will use a demanding shot from the Blackmagic Design sample library, featuring two women in a highly saturated red room. This specific shot forces each pipeline to manage extreme boundary colors and heavy channel saturation.
We will:
Our goal: To discover which color management system takes the title belt for your specific post-production color grading and finishing needs.
Key Takeaways
By the end of this Insight, you should understand how to:
Related Mixing Light Insights
External Links
Round One: ACES 1.3 (Split Transform Architecture)
Stepping into the ring first is the established legacy standard. The Academy Color Encoding System version 1.3 was built to provide a universally standardized and predictable pipeline. The primary objective of this architecture is to ensure that a colorist working in DaVinci Resolve and a compositor working in Nuke view the exact same image data without translation errors.
Image Transforms
When you look at the DaVinci Resolve project settings for your color management configuration, this stage requires an Input Device Transform (IDT) and an Output Transform from the dropdown menus.

Under the hood of the ACES 1.x specification, these dropdowns execute three critical mathematical steps. The Input Transform dropdown handles the IDT independently. The Output Transform dropdown executes the combined RRT and ODT.
The mathematical sequence begins with:
Because this underlying mathematical process is rigid, the default tone curve feels highly contoured.
Handling the Stress Test
Evaluating our Blackmagic Design sample shot of the two women in the red room reveals the practical limitations of this architecture. The sample shows that some values of the shot seem to approach the extreme bounds of our trace and are heavily compressed. Values hit both the ceiling and the floor on the waveform.
Without intervention, the intense red lighting will skew toward orange and yellow as the luminance increases.
To mitigate this artifacting, you can use a fix within the DaVinci Resolve UI by enabling the Reference Gamut Compress checkbox. This is a separate mathematical operation designed specifically to compress extreme boundary colors back into a workable domain before they hit the output transform. It is an effective fix, but it remains an add-on rather than a fundamental part of the core rendering math.

Evaluating the Toe: ACEScc vs ACEScct
While the input and output transforms define the boundaries of your pipeline, you must define the working color space in which you actually grade. This choice dictates exactly how your primary grading tools react to the image data.
In DaVinci Resolve, you are choosing between ACEScc and ACEScct.
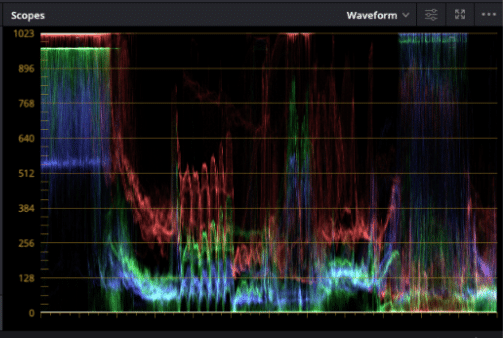
If we pull up the trace scopes and evaluate ACEScc, we see a pure logarithmic curve. The math allows shadow values to extend downward into negative infinity. While this provides immense data retention for external visual effects pulls, it creates a difficult environment for the colorist.
In ACEScc, grabbing your lift wheel and attempting to elevate the absolute blacks feels abrasive because the curve never flattens out at the bottom. Near-zero values stay where they are.
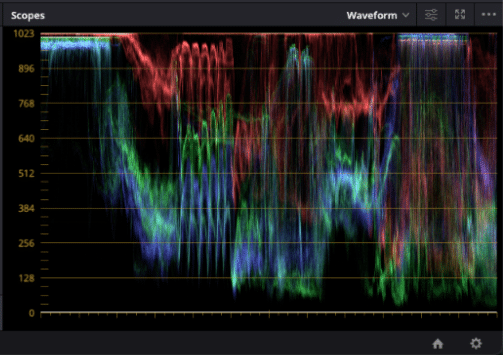
 Baseline Waveform
- ACEScc waveform, lifted
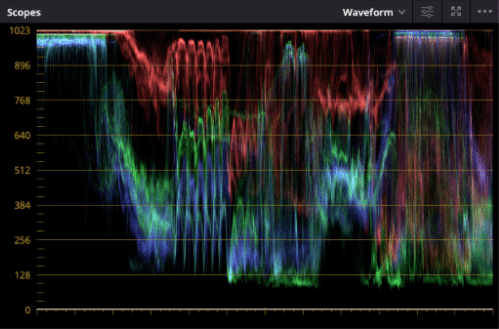
- ACEScct waveform, lifted
ACEScct was developed to solve this specific operational friction. The t stands for toe.
By introducing a linear segment at the very bottom of the curve, ACEScct prevents the shadow data from plunging into severe negative values.
Looking at the trace scope for ACEScct, you will notice the bottom of the scale mirrors the toe of a traditional Cineon log curve. When you adjust the lift, the shadows roll up organically. This provides a tactile, predictable response that feels familiar to any colorist accustomed to standard log grading environments.
Round Two: ACES 2.0 (Unified Display Rendering Transform)
Moving forward into the modernized standard, ACES 2.0 represents a complete mathematical rebuild of the rendering pipeline. The objective of this update is to maintain the predictability of the Academy standard while fundamentally fixing the aesthetic and technical limitations that colorists experienced in previous versions.
Member Content
Sorry... the rest of this content is for members only. You'll need to login or Join Now to continue (your career will thank you!).
Need more information about our memberships? Click to learn more.
Get Answers, Join Now!Member Login

-
ACES From Camera to Completion – A Beginner’s Workflow
-
ACES 2.0 Volumetric Gamut Mapping – In Action
-
ACES, ACES 2.0, and RCM in 2026 – Which is the Winner??
-
Getting To Know ACES Part 4: The Latest In ACES Updates
-
Getting To Know ACES Part 3: Visual Effects Workflows
-
Getting To Know ACES Part 2 : Terminology and DaVinci Resolve
-
Getting To Know ACES Part 1: Introduction