| Series |
|---|
Day 3: 25 Insights in 25 Days Holiday Marathon
Working in LAB Colorspace: Is it effective?
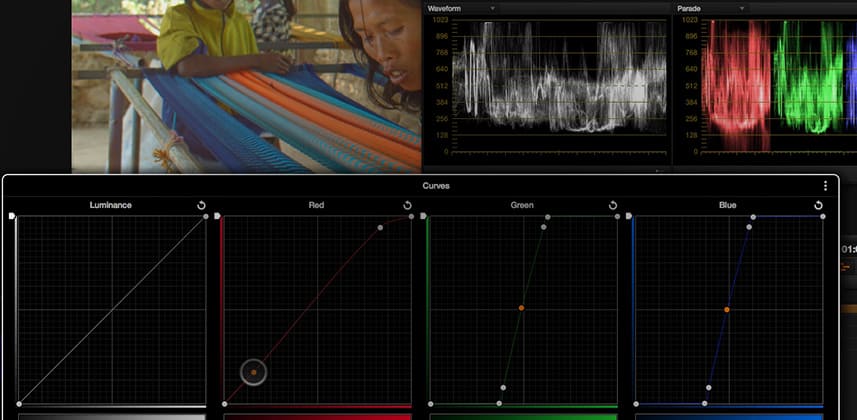
In our series on LAB color in DaVinci Resolve we’ve been looking at the theory of color contrast expansion in LAB. We’ve also looked at some of the limitations when it comes to drawing curves for LAB Color in DaVinci Resolve. Now let’s try applying the basic contrast expansion ‘formula’ to a variety of shots and see what we think?
Recap: LAB Colorspace – The Rules
As you watch this video Insight, keep in mind all the shots I’ve selected are either RAW (developed into a flat LOG profile) or recorded as LOG.
Remember, the initial rule of thumb is that we want to start with images that are flat and colorless—since that’s what the ‘Photoshop guys’ say tend to be the best candidates for these types of LAB color corrections. Later in this series, we’ll look at LAB with full-color images and see if we agree with that analysis when color correcting moving images inside the LAB colorspace. But for now, let’s keep to the recommendations which for us video peeps—LOG style images clearly fit the recommended image profile.
Recap: My Basic Node Structure
Also – one of the restrictions I’ve placed on myself for this Insight is to keep our LAB ‘moves’ contained within a single LAB node. And because of how ‘contrast’ and ‘saturation’ work on all three LAB channels, I’ll be avoiding them and sticking to working mostly in Curves. In an upcoming Insight, I’ll explore alternate node structures that will open up the tools we can use in Resolve—at the expense of slightly more complicated node trees.
LAB Color in DaVinci Resolve: Beyond Still Life
As mentioned in earlier Insights, LAB colorspace has traditionally been relegated to still life photography of natural expanses of landscapes. The concept being that LAB is very good at expanding color contrast in the Reds / Orange / Yellow / Green side of the spectrum.
As a colorist, restricting LAB to just those types of scenes doesn’t make it a compelling colorspace to spend time developing my skills. Outside of Nature documentaries, the stories I’m hired to help improve involve people.
And it just so happens, faces and skin tones tend to fall in the same range that LAB is most suited for effecting.
For this Insight, I’m selecting shots that feature people and lots of skin tone, to see if it gives me results that would be difficult to replicate in the RGB colorspace. I’m pulling in shots that I’ve previously graded using our default RGB colorspace and comparing those results with my new LAB toolset.
Treating a LAB node like a LUT node
One point I make in this Insight is that I’m starting to put the LAB colorspace node at the same point in the node tree like I do when I’m using a LUT. Not surprising, since we’re using both of them here to perform the exact same operation—expanding contrast and adding color!
If you’re not familiar with my approach to LUTs, watch this series on working with LUTs in DaVinci Resolve and you’ll be up to speed on my philosophy in no time.
– pat
Member Content
Sorry... the rest of this content is for members only. You'll need to login or Join Now to continue (we hope you do!).
Need more information about our memberships? Click to learn more.
Membership optionsMember Login


