| Series |
|---|
Adapting A Gaming Device To Supplement Your Control Surface
As longtime Mixing Light members can attest to – I have a bit of a problem when it comes to gear and gadgets. While some of these items are purely for fun, most of the gear I buy has two purposes – working faster and more accurately.
Over the past few years, I’ve made a considerable effort to replicate the functionality of my main color suite at home. This allows me to have more family time, spend less time commuting and greater availability for clients.
In my main color suite, I use the DaVinci Resolve Advanced panels, and while my pursuit to replicate my main suite at home is the goal, even I couldn’t rationalize spending 30k on a set of Advanced Panels for my home suite.
After a few years with Tangent Elements, I’ve moved on to the excellent Resolve Mini Panel.
In my opinion, the Mini Panel is a fantastic tool, but like any smaller panel, it has a few buttons and knobs missing. For the first few months that I had the Mini, I was using my trusty X-keys 24 unit to supplement the panel. But then good friend, collaborator and Mixing Light contributor, Joey D’Anna, gave me a call and in a very un-Joey way couldn’t contain his enthusiasm for a new piece of gear to supplement his Mini Panel – The El Gato Stream Deck.

After a few minutes of listening to Joey, I decided to give the Stream Deck a try and I’m glad I did. In this Insight, we’ll explore the basic functionality and setup of the Stream Deck. In Part 2, Joey will take things further and discuss in-depth how to extend the functionality of the Stream Deck with some more advanced scripting.
Basic Design & Connectivity
At $150 the Stream Deck is affordable, especially for what you get compared to the X-Keys 24.
The Stream Deck features 15 completely customizable LCD screens. While this is obviously less than the 24 of the X-Keys, each key can literally be anything you want (more on designing the buttons later). This is infinitely better than the silly pieces of paper you had to insert on the X-Keys to label the buttons.
While on first blush 15 keys might seem to be limiting, by creating folders (up to 14 of them) you can have 14 additional pages each with 14 buttons (one button is reserved for going back to the main button level).
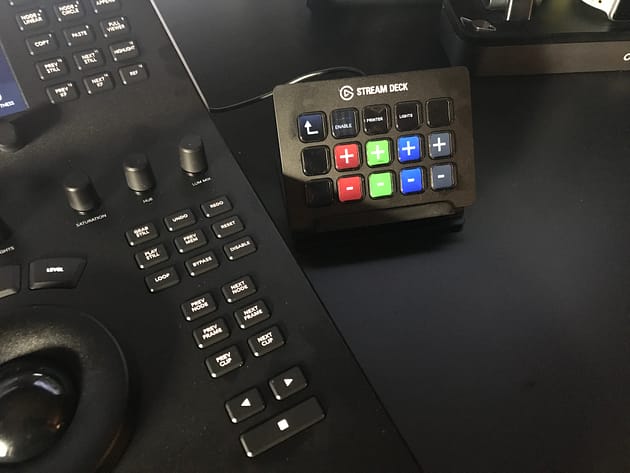
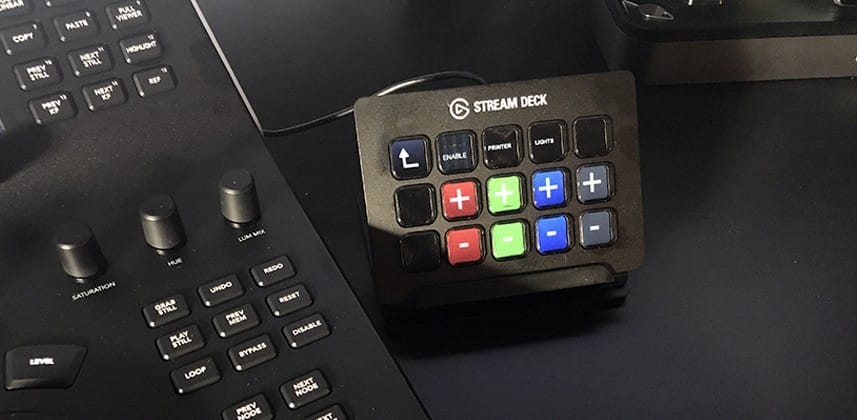
Physically, the Stream Deck is smaller than it looks in pictures coming in at 4.6 x 3.3 x 0.8 in. It comes with an approx. 6 foot USB 2 cable that is attached to the unit. While the Stream Deck does not require external power, because it uses LCD screens that require more power than the typical USB device, plug the unit into a port on your computer or into a powered USB hub.
The Stream Deck also includes a nifty stand that can be adjusted to have the unit lay flatter or more upright depending on your preference.
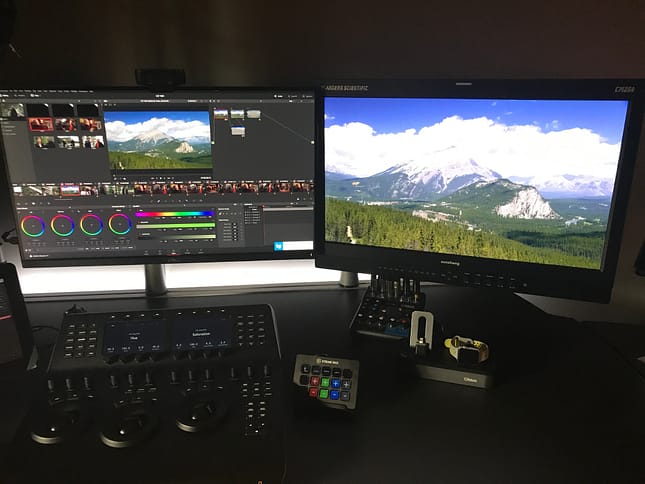
The Stream Deck App works with Windows 10 and Mac 10.11 or later and is available in pretty much all of the electronic stores that you find such stuff. I ordered mine from Amazon.
The Stream Deck App
The Stream Deck app (free) is the way that you configure the functionality of each individual button and the unit on a whole. After installing, the app will automatically launch and load the last profile on restart – this allows the unit to work right away without having to launch the application first.
The application is divided into several ‘zones’ of functionality:
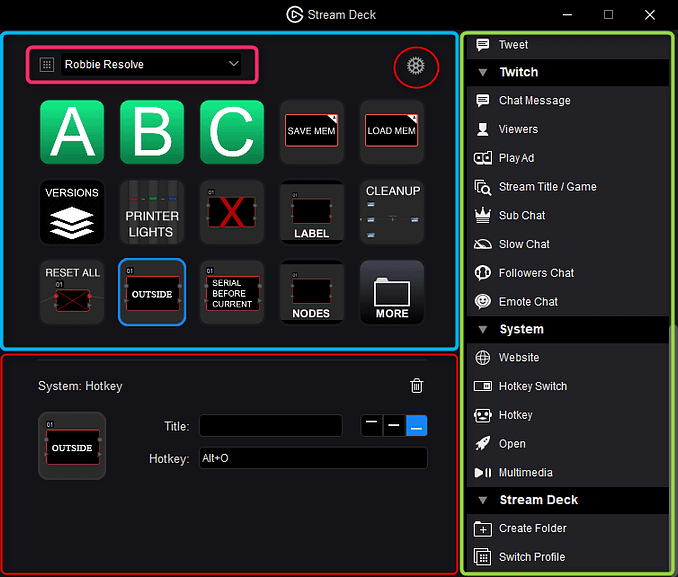
- Profile Menu – The Stream Deck supports multiple profiles or layouts. You could have one for Resolve, one for Fusion, one for Photoshop, etc. This menu lets you quickly switch between these profiles. If the idea of having to open the app to switch profiles is not appealing, new in software version 1.4.2628, you can assign a button for Profile switching
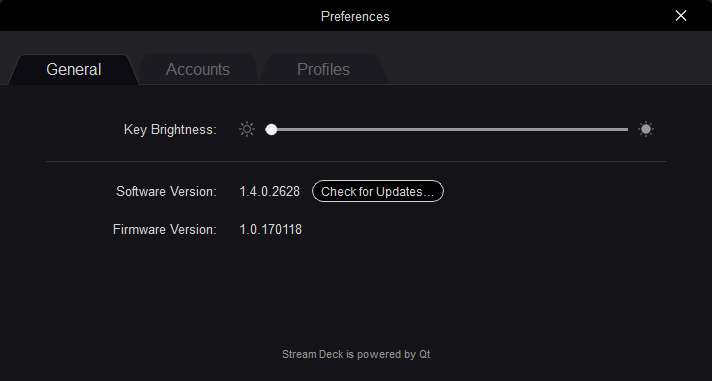
- Preferences – Like every software manufacturer, El Gato uses the familiar gear icon to indicate preferences. Preferences are divided among three tabs – General allows you to adjust the overall key brightness (every key) as well as check your software/firmware version and check for software updates. Accounts let you link Twitter, Twitch and Tippee Streaming/Social Accounts – this is geared for one button responses and actions on these services. Profiles allows you to create new profiles and change the default order of those profiles. You can also import and export Profiles you’re using.
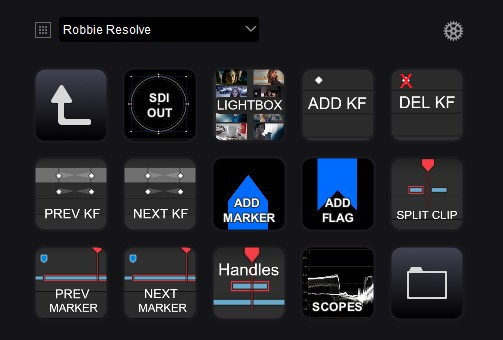
- Buttons – In this zone, you can see buttons and folders you’ve setup. Selecting a button loads its settings into the configuration zone right below. It’s important to note that button layout/profiles live on your computer and not in flash memory on the hardware itself.
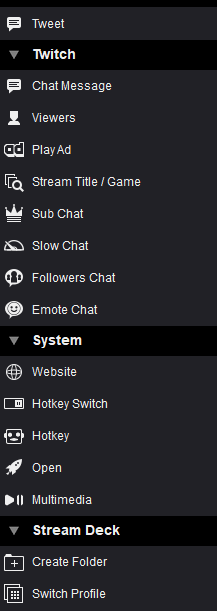
- Actions – The right-hand side of the app contains a list of actions that are assignable to buttons. Most of these items are useless to the colorist and are geared to specific apps or needs like Game Capture, OBS (Open Broadcaster) Studio, Twitter, Twitch, and basic system functionality (volume). For the purposes of supplementing a larger control surface – Hotkey, Open, Create Folder, Website & Profile are the most useful. To add functionality to a button, simply drag an action to a button well.
- Configuration – after dragging an action to a button and selecting it, you can configure its settings in this area. For example, if you dragged the Hotkey Action you can set its icon using the icon well, add text to button if your icon doesn’t contain text, adjust the alignment of the text and input the shortcut. Another example would be using the Open action to fire of a script for a more complex operation.

I’ve found the hardest part of building my layout/profiles is just thinking where I want things! Fortunately, the Stream Deck supports drag and drop reordering – like a smartphone you can drag a button to another spot in the layout and it will swap positions with whatever’s in that button location.
To delete a button entirely, you can press the delete key on your keyboard with the button selected or press the trashcan icon in the configuration zone.
Simple Shortcut Functionality
Programming simple shortcut functionality with Stream Deck is very easy. And to be honest, for many users it might all you need.
Let’s explore a few different possibilities.
Simple Shortcut
I’m a big fan of memories, but right now the Resolve Mini Panel doesn’t support saving or loading memory positions. Let’s say you’d like to create a few buttons to save memories A B, C and then recall those memories. Setting this up is simple:
- Locate the Hotkey Action from the list of Actions on the right-hand side of the Stream Deck application and then drag it the button of your choosing.
- Select that button to reveal the configuration zone for the selected button.
- In the title field, type ‘Memory A’. You can use the three buttons to the right of this field to adjust the position of the text within the button.
- Place your cursor in the Hotkey field. You’ll notice that the text changes to ‘Observing Keystrokes’.
- Using your keyboard use the keyboard shortcut to save a grade to memory location A. Alt+1 (Windows) Option+1 (Mac).
- With Resolve open, test the button out – if all is set up right, you should see your current clip saved to memory location A in the gallery.

Repeat these steps for memories B and C. Of course, you can set up buttons to recall/apply the memories in exactly the same way.
For this basic shortcut functionality, having the keyboard/shortcut editor open in the app you’re trying to configure shortcuts for is extremely useful as a reference tool.
Keep in mind, if you use a custom keyboard layout in Resolve or whatever other app and you use the shortcuts in the Stream Deck application, your custom keyboard layout must be loaded for the Stream Deck to work properly.
Open & Basic Scripting
On its surface, the Open action seems pretty simple – open up an application.
You could assign buttons to open Resolve, Photoshop, or any other application on your system, but the open button is a really powerful way to extend the functionality of the Stream Deck by opening up scripts or executables of saved scripts.
In part two of our look at the Stream Deck, Joey will take a much deeper look at scripting. But for now, let’s take a look at a super simple script.
First, there are few very important things to know:
At the time of the publishing of this Insight, the Stream Deck application itself does not allow for creating scripts/macros. A 3rd party application must be used.
On Windows Autokey is the most straightforward application for performing advanced scripting – it’s free, has fantastic documentation, and scripts can also be saved as .exe so your script can be self-contained and not editable.
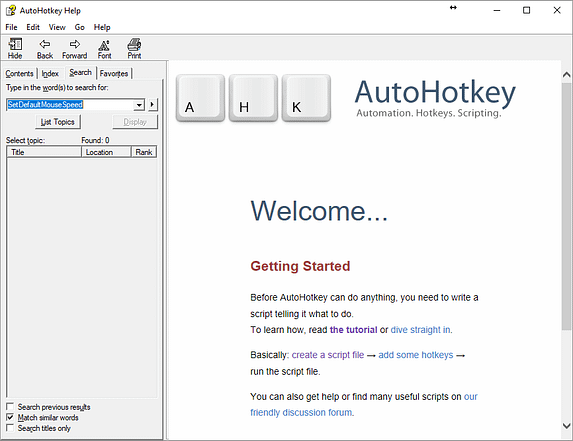
Neither Joey or I have used scripting apps on Mac, but Keyboard Maestro has been recommended by several people – I cannot verify its abilities or its compatibility with the Stream Deck.
Ok, with the disclaimers out of the way, let’s create a simple script to press a button for which there is no default shortcut.
I often find myself annoyed with the clip timeline in Resolve (the timeline underneath the clip timeline), especially on projects that have a lot of layers – it takes up valuable on-screen real-estate. However, it’s useful for seeing where you are in a project dragging through a clip, etc. – I just don’t want it visible all the time.
- At the top of the Resolve interface, there is a dedicated button for a toggling the visibility of the clip timeline, but I don’t want to have to grab the mouse every time I want to toggle that timeline. Instead, a simple script will do the trick.
- In Windows, Auto Hotkey scripts can be created with a right click on the Desktop (or any location) by choosing New > Auto Hotkey Script. This will create a new script at your active location. I renamed this one to ‘Timeline Hide’.
- Right click on the script and choose Open With > Notepad (or a Text Editor your Choosing).
- Move your cursor below the default entries that are in the script (don’t delete these!).
- Probably the most simple action you can script is an Event. Events can be lots of different things, but in this case the Event we want to script is a left mouse click at a specified on-screen location.
- Auto Hotkey ships with a small utility to get on-screen states – it’s called Active Window Info and it’s located in the Auto Hotkey application folder. This utility will float on top of other active windows, so its perfect for grabbing on-screen coordinates.

- With Resolve active, hover your mouse over the Timeline Button at the top of the interface. Notice in the Mouse Position section of the Active Window Info app you get an x,y, coordinate. For my screen resolution that position is 191,42.
- Back in the script document itself, here is the command I want to type SendEvent {Click, 191,42}

- Save the script – a good rule of thumb is to save the script to a location that will always be accessible to your computer. I have a dedicated folder on my Dropbox. While you can get fancier with the script including stopping any ongoing mouse movement, adding pauses, etc., for now, this simple script will work just fine.
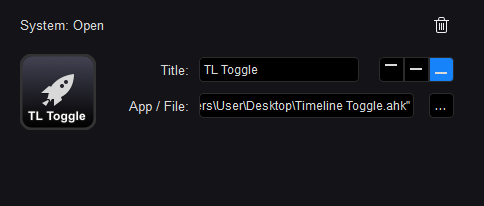
- Back in the Stream Deck application, locate the Open action and drag it to a free button.
- Like the previous examples, you can add a title for this example. I called the button TL Toggle and you can position the text how you like.
- In the App/File field, click the ellipses button and navigate to the saved script location and choose the script.
- In Resolve position your mouse away from the Timeline button and then press the key. If all is programmed correctly you should see the mouse move to the Timeline button and click. Pressing the button the Stream Deck again will make the click again effectively acting as a toggle of this option.
Using a tool like Auto Hotkey, the possibilities of what you can do are really limitless – with a little time and practice you can create macros to do pretty much anything.
Designing Buttons
In the previous button setup examples, I used the title field to name the button and accepted the default icon for the Action used. But what fun is that?!
I think the coolest thing about the Stream Deck is how each screen is an LCD screen. This means that you can pretty much put anything on those buttons (I don’t think a video is possible yet).
Creating a button is easy as long as you keep your design to a square. 72 x 72 pixels is the default resolution. Taking a screenshot of a piece of UI and adding a title to it (either embedded on the icon or with the Stream Deck title field) makes your layout much more intuitive and easier to look at.
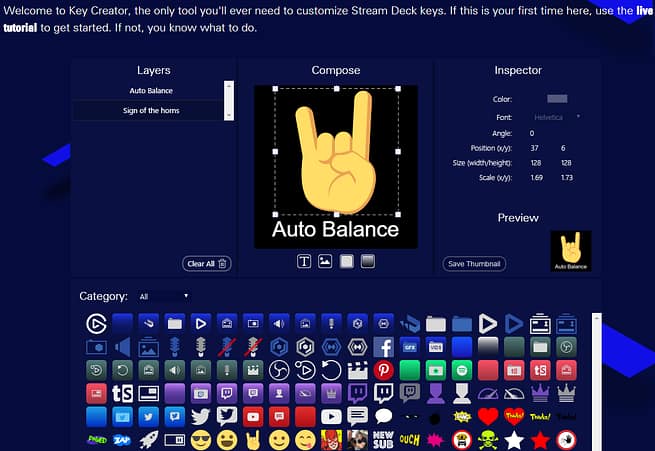
El Gato recognized that not everyone is a Photoshop wiz and has a free key creator online app that you can use to create buttons and then download those graphics to assign to your Stream Deck. I like to save my graphics for the Stream Deck in a subfolder in the same place that I save scripts and profiles.
Creating Folders
As I mentioned at the top of this article, 15 buttons might seem limiting, but you can extend a number of usable buttons by using folders.
Folders create new pages of blank buttons. However, just be aware that in a folder, one button will automatically be assigned to as an ‘up button’ to go back to the previous folder level.
Folders can be created in two ways. The first way is to drag two buttons on top of each other. When you do that a small plus button appears on the icon you’re dragging indicating a folder will be created.

The other way is to add a folder action to a button and then drag previously created buttons to that folder or create new buttons within the folder.
Profiles & Importing/Exporting
If you’re like me, the first few days you have the Stream Deck you’ll do a lot experimenting with button functionality and layout. Once you have a layout that works (or at least you think it does!), make sure to export it so that if you screw up you have a pristine version of the layout.
To do this, open up the Stream Deck Preferences and go to the Profiles page and then click the ellipses button next to your active profile and choose export. As you might have guessed, I save my profiles in subfolder alongside my scripts and icons.
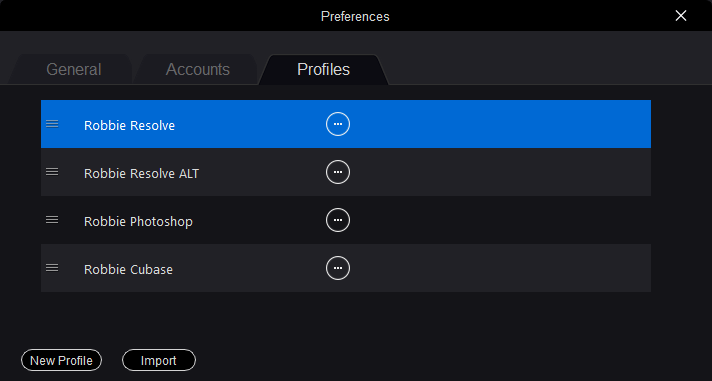
On the profiles page, you can also create (or duplicate) new profiles. You might use profiles for different applications, but I’ve found that I have different profiles within a single application (Resolve) depending on what I’m doing.
I have a default general Resolve profile, but then one for editing, and one for audio.
You can switch between profiles from the main Stream Deck page, but recently El Gato added the ability to switch profiles with an Action.
The profile action lets you choose a specific profile or simply toggle through your profile list (you can reorder the list in Profiles pane of the Stream Deck Preferences).
I’ve decided that I don’ t mind opening the application and manually choosing a profile instead of taking up space with a button, but its nice to have that option.
Downsides & The Future
No device is perfect – but you already know that.
I think if I had to pick one major downside of the Stream Deck, it’s simply available buttons. Sure you can program folders, but many colorists don’t want to page through options.
Indeed, many colorists I know have purchased the large 60 + key X-Keys units for just that reason.
Here’s the thing. I don’t believe El Gato really understands what they have in their hands. A $350 thirty key version or a five hundred dollar 50 key version would sell very well to the colorist/media market – but that market compared to the gammer and streaming market is very small.
WIth that said, both Joey and I have been trying to whisper in the ear of El Gato.
The other obvious downside is the reliance on 3rd party tools for creating Macros/Scripts. To be really viable, I think El Gato will eventually have to integrate scripting within the Stream Deck application.
On the plus side, El Gato seems to be really quick on their development of the Stream Deck. Since i purchased it, there have been two major software updates and that was just month and half ago. Like any other company, the more they sell of the Stream Deck the more resources they can dedicate to its development.
In Part 2
Now that we’ve covered the essentials of the Stream Deck, in Part 2, I’ll hand it over to Mixing Light Contributor Joey D’Anna and he’ll discuss more with scripts and taking Stream Deck functionality to the next level.
As always if you have questions or more to add to the conversation, please use the comments below
-Robbie

