Better Blurring In DaVinci Resolve: Part 2

August 9, 2020

In the second part of his series on better blurring, Joey jumps into Fusion to explore its powerful capabilities to create natural-looking blurs.


Series

Advanced Paint and Blur In Fusion

This series is all about adding value for your clients, by taking blurring and paintwork to a higher level of quality. In Part 1, I focused on color page techniques. These work great for a lot of shots – for almost every shot I encounter, I can usually do a really solid blur or logo removal right on the color page.

Bringing In A Bit More Power

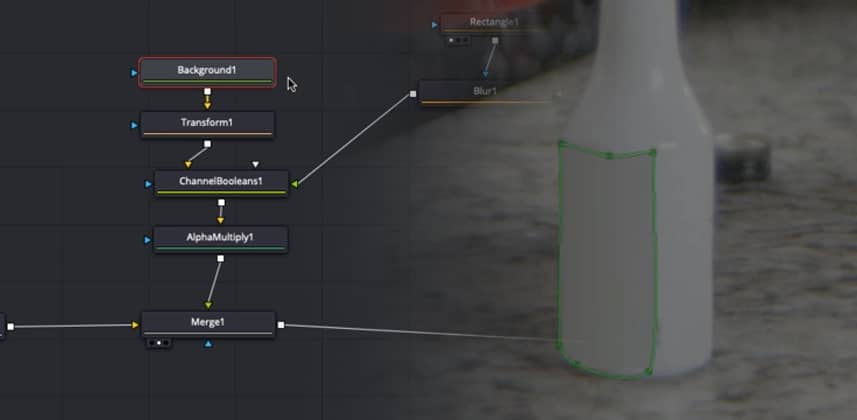
While most shots can be handled on the color page – every so often a blur or logo removal proves to just be too difficult or complex for it. That’s when Resolve’s node-based compositing environment – Fusion – can be brought in for more power. In this Insight I’ll show you:

  • Why it’s good to do blurs/paints underneath of a grade
  • How to use 4 point gradients to make color-matching patches
  • Masking with polygons to precisely place the patch
  • How to combine multiple masks and blurs together to customize softness
  • A way to combine masks and patches so they can be moved/tracked together easily
  • How to connect a patch to a tracker’s unsteady position to match camera motion

Keep in mind – this Insight focuses on some pretty advanced usage of the Fusion page, so If you aren’t familiar with Fusion it may be a good idea to go over some of our earlier Fusion Insights for an introduction.

As always – leave me any comments or questions below!

Thanks!

Joey


Member Content

Sorry... the rest of this content is for members only. You'll need to login or Join Now to continue (we hope you do!).

Need more information about our memberships? Click to learn more.

Membership options
Member Login

Are you using our app? For the best experience, please login using the app's launch screen


Comments

Homepage Forums Better Blurring In DaVinci Resolve: Part 2


  • Evan A
    Guest

    Nice job!


  • Greg Greenhaw
    Guest

    Would it be easer to just add a color fill filter in the color page and a gradient mask to darken half then just make a compound node from those and mask/track the compound node and layer it over the main video?


  • Joey D’Anna
    Guest

    I like the 4 corner gradient because it can help capture the more subtle variations in color on things like labels or signs or license plates. Plus fusion will always have more flexibility – for example if i wanted to go even deeper with painting out that label, I could have mocked up some text to make it look like the second bottle, and put it on a 3d cylinder and tracked that in as well.

    but in general – yea i would rather do it on the color page, but some shots just need a bit more horsepower


  • Jamie Dickinson
    Guest

    Don’t forget, another way to get variable softness for your mask is the Make Double Poly (‘D’ icon) to get an outside softness spline to get an inner and an outer. Use Tab to toggle which spline you want to select when they’re very close together.


  • Joey D’Anna
    Guest

    Oh snap, now I feel dumb! Didn’t know that was in there. I do in general prefer to use multiple simple shapes instead of less, but more complex shapes. But thats a nice option to have.

Log in to reply.

1,000+ Tutorials to Explore

Get full access to our entire library of over 1,100+ color tutorials for an entire week!


Start Your Test Drive!
Loading...