| Series |
|---|
Optimizing the i1 Display Pro OEM in Lightspace: Part 2
How to Use Custom Offsets with the i1 Display Pro OEM to Radically Improve Its Results
Earlier this year a family member underwent a Bone Density test, to measure the strength (or brittleness) of their bones. The result was interesting because they couldn’t actually make any decisions based on a single result.
The result told my family member that their bone density was ‘slightly below average’. But since they never had this test done before there was no way to know if this was a long-term improvement or a more recent degradation? This first test was merely a baseline.
Going forward, they’ll take annual bone density tests to see the trendline. And then the trendline will give them actionable information.
Using Generic offsets that ship with our colorimeters is like that Bone Density test
The reports we generate in Lightspace (and CALman) using the generic offsets are not absolute values that tell us, “Yes this display must be recalibrated”.
Why? Because we can’t trust the raw Delta E’s using those generic offsets—they’re too generic!
A major resource I’ve been relying upon throughout this Profiling 101 Series is Flanders Scientific. They were very happy to share the Generic Offsets you should use for their full line of displays. I’ll be happy to update this Insight with the proper pull-down selections for other lines of reference displays if you want to leave them in the comments.
Flanders Scientific Generic Offsets, i1 Display Pro:
Wide Gamut CCFL: LM-2461W, CM240
RGB LED: CM171
White LED: BM210, BM230, BM240, BM090, AM420, AM550, CM320TD, CM420TD, CM500TD
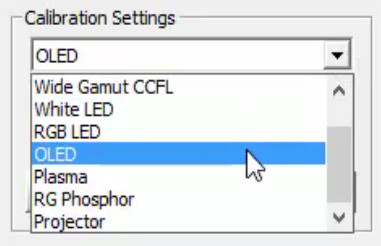
OLED: AM250, CM250, DM250, CM172
The Profile results generated from generic offsets are merely baseline measurements.
If you’re using a generic offset then you need to do multiple Profiles over time and compare the relative drift as the display ages.
Stated again: Using the profiles that ship on your colorimeter (including the i1 Display Pro OEM) you need to ignore the raw Delta E values and only rely on how those values drift over time in comparison to an initial baseline Profile.
The best way to create your baseline Profile is immediately after your display is professionally calibrated
Your display will never be more accurate than immediately after calibration by a professional calibrator. THAT is the moment you need to run a profile using your colorimeter – and you must save those results to use as your baseline.
This Profile is bypassing the generic display offsets:
If I were to read this graph as being accurate, it would force me to fire my professional calibrator! Except I’m measuring with a Colorimeter and a Colorimeter requires offsets to be applied to account for the display technology that’s being profiled.
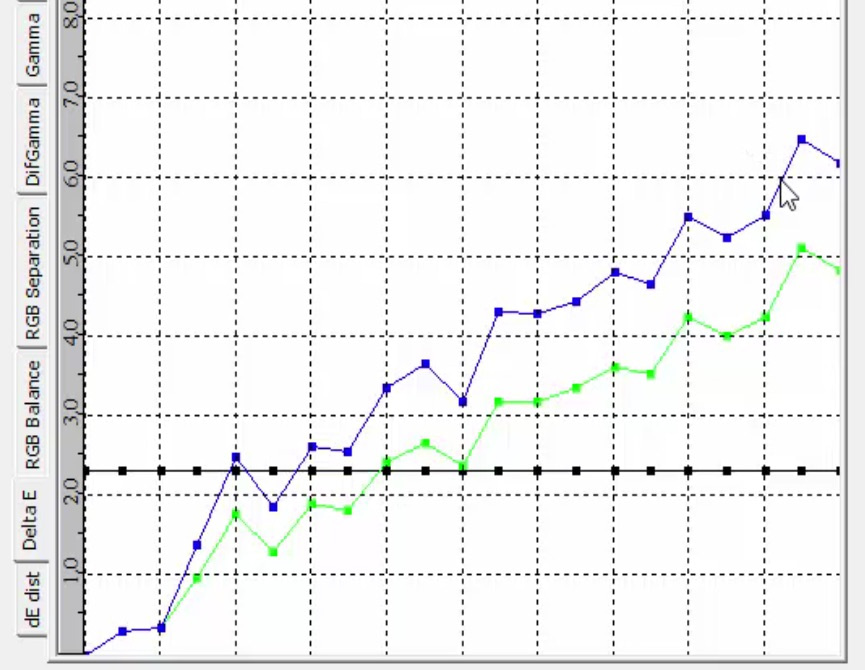
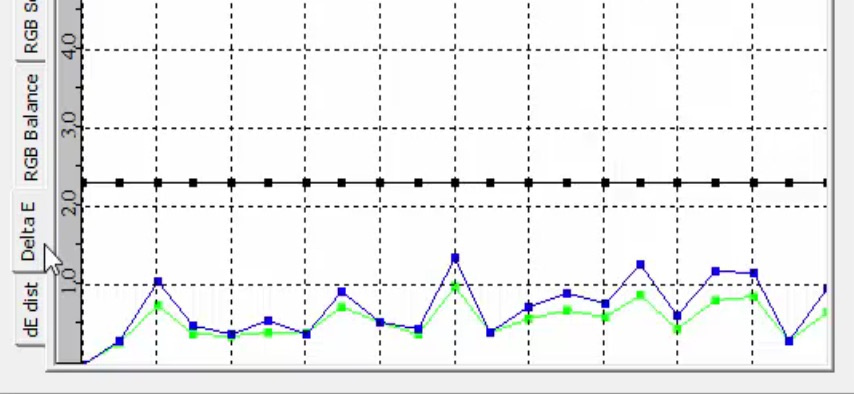
In this graph, we’ve enabled the OLED generic offset that ships with the i1 Display Pro OEM and re-Profiled the CM250:
MUCH better! The previous two graphs were generated immediately after a full Calibration LUT was created and uploaded to this display. Now, looking at the graph immediately above with a generic OLED offset applied I’d still be pretty tempted to do a full calibration to fix those Delta E values in the brighter part of the grayscale.
Except, I can’t (and shouldn’t) trust the raw results of this graph
As this Insight is designed to demonstrate, there’s too much variability between different makes and models of reference displays and the ‘generic’ profiles and too much variability between the actual colorimeters themselves to trust these raw Delta E values.
But the graph above can be used as my Baseline Profile!
In the months to come, the previous graph shows me how my specific i1 Display Pro reads my FSI CM250 OLED when perfectly calibrated, using the i1 Display Pro OEM’s generic OLED offsets. As this display ages and drifts, I can compare new Profiles to this Profile to determine if it’s time for a re-calibration.
But what if you want more accurate results and graphs from your i1 Display Pro OEM (or any other colorimeter)?
In this Insight, you’ll learn how we can generate Profiles with graphs that are nearly 100% accurate.
What’s really interesting about all this, we can turn our $300 X-Rite i1 Display into a nearly precise measuring instrument!
What we need to do is Characterize our display from a much more accurate Spectrometer. We then compare the results of the Spectrometer to the results of a Characterization from our Colorimeter and generate Offsets that remove the errors from the Colorimeter (we’ll do a later series on how to actually generate your own Custom Matrix in this manner).
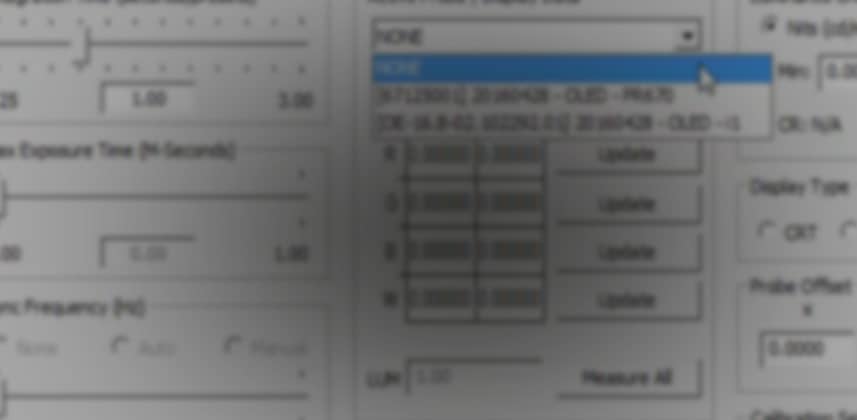
Lightspace allows us to load data from a Spectrometer and a Colorimeter, both measuring the same reference display
Lightspace then generates a Custom Matrix. And the Custom Matrix allows us to create graphs that are nearly identical to using a much more expensive, much more accurate and a much slower Spectrometer.
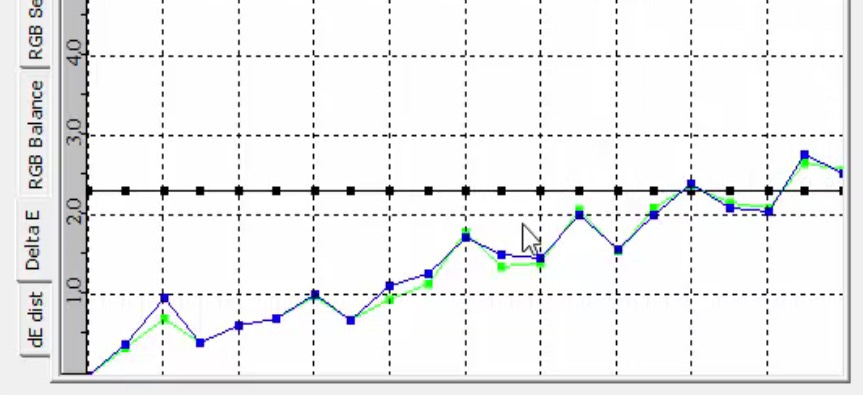
The image below shows our Delta E graph with the exact same i1 Display Pro OEM, but with a Custom Matrix applied at the time of the Profile:
This graph tells a MUCH different story than the earlier graphs. This graph tells us there’s almost no room for improvement. This CM250 is well below any threshold that would require a recalibration.
If you use Custom Matrices with your i1 Display Pro OEM you can trust the actual graphs you generate (for a while)
There’s one caveat – over time, all colorimeters drift. About once every 12 months you’re going to need to generate a new set of offsets for your colorimeter – or you won’t be able to trust your graphs any more than you can trust graphs using the Generic Offsets.
How do you get these Custom Matrices for your i1 Display OEM?
This is where things get a bit tricky:
- To my knowledge, Flanders Scientific is the only display manufacturer that allows their customers to send in their Colorimeters and Spectrometers—and will email you custom offsets, for free (you pay the cost of round-trip shipping). But obviously, they only do this for their own brand of displays.
- Most of the major markets have a high-end calibrator who owns a Spectrometer – you can have that person come in, calibrate your display and use their Spectro to create the offsets for your Colorimeter (which will probably incur an additional fee).
- Rent a Spectrometer and create a Custom Matrix yourself.
However you get your custom matrix created – if you can figure out how to get that matrix, whether you use Lightspace or CalMAN, it is definitely worth the extra hassle (and peace of mind) and greatly enhances the value of your investment in the i1 Display Pro!
Coming Up Next: Intro to CalMAN ColorMatch
In the next Insight in this Display Profiling 101 series, we are switching gears to the other major player in the display calibration space, the free CalMAN ColorMatch. It’s a VERY different piece of software – but in the end, it’ll get you to the same place—figuring out if you need to recalibrate your reference display.
-pi
Member Content
Sorry... the rest of this content is for members only. You'll need to login or Join Now to continue (we hope you do!).
Need more information about our memberships? Click to learn more.
Membership optionsMember Login
-
Are You Wasting Time Using Low Cost Colorimeters and Spectroradiometers?
-
Top Calibration and Display Setup Questions (with Bram Desmet)
-
How to Create a Virtual LUT (and what it’s good for)
-
Optimizing for CalMAN: The i1 Display Pro and SpectraCal C6 for CalMAN
-
Getting Started with CalMAN’s Colormatch Workflow
-
Custom Offsets with the i1 Display Pro OEM in Lightspace DPS
-
Optimizing the i1 Display Pro OEM for Lightspace
-
Graphs in Lightspace DPS: Reading your Profile Results
View All
