| Series |
|---|
The Premiere Pro CC Desert Island Challenge: Part 1
Welcome to the kick-off Insight of the Desert Island Challenge for Premiere Pro CC! If you haven’t been following along with the FCPX version of this series, the concept is simple:
What if you dropped me on a desert island with nothing but the core Premiere Pro CC software, a project loaded up and asked me to color correct that project—how would I do it? How would I take everything I’ve learned as a professional colorist and apply it to Premiere Pro CC? What workflow would I design? What tools would I use (and which tools would I avoid)?
This series will leverage the research I did in preparation for teaching at Adobe Video World 2015. Across two months, I sat down and examined every single slider on every single Color effect, to determine how Premiere Pro CC processes its images. I was curious if there were gotcha’s to avoid and if there were clear workflows to pursue (and the answer is: Yes. and Yes).
If you’re not careful, Premiere Pro CC can be a challenge when color correcting
Premiere can be confusing. Different color correction filters name the same type of ‘color correction move’ differently. Some effects can easily ‘break’ your image if you’re not careful. And there’s a lot of duplication of features among the core filter set that ships with Premiere Pro CC. In fact, I called Robbie Carman (who is a Master Adobe Trainer) several times, very worried about being able to find a logical, structured Premiere Pro CC color correction workflow that I could endorse.
Luckily, Robbie walked me off the plank several times while I got my Premiere Pro ‘sea legs’ under me. And that’s what I’m here to do for you in this series.
I’m happy to report that the new Lumetri effect/panel is the key to color correcting in Premiere Pro CC 2015
This new color correction panel, and the widgets and sliders it contains, was developed by engineers from the SpeedGrade team. But unlike SpeedGrade, the Lumetri panel is definitely developed for editors. If you’re an editor, that’s terrific news. If you’re a colorist being forced into color correcting within Premiere Pro (as I am in this Desert Island Challenge), it’s… a challenge.
The design choices of the Lumetri panel will keep editors from damaging their images. But those same design decisions will also frustrate a full-time colorist, who expects a greater latitude of controls in their color correction toolset.
This series is designed for editors who want to add
color correction as a professional skill-set they can sell
We’re making the assumption your clients generally don’t want to leave Premiere, yet you want to upsell them on an extra day (or five days) of color correction and finishing work within Premiere (15 years ago, this is how I got started with clients who wanted me to edit in Final Cut Pro Legacy and not go into Avid Symphony for finishing). We’ll start this series by first examining the design of the color correction plug-ins/filters that ship with Premiere Pro—including how to optimize sequence settings for high bit depth image processing. Then, you’ll learn the workflow I’m advocating, designed around the strengths of Premiere’s filters while avoiding its weaknesses.
Once you’ve learned an organized color correction workflow for Premiere Pro CC, we’ll start exploring 3rd party plug-ins
Just like in the FCPX Desert Island Challenge, we’ll explore the realm of plug-ins that enhance the color correction experience with Premiere – with an eye to picking one essential plug-in that everyone should consider purchasing… with maybe a runner-up or two.
The FCPX Challenge has been running almost a full year now, and I’ll be wrapping it up soon. You can expect it’ll take me some time to do the same for Premiere Pro CC. There’s a lot to go over. And I tend to be methodical about this process. But even more so than FCPX, I think those of you using Premiere Pro as your primary editing and finishing tool will be surprised by what we find here.
This Video Insight is Part 1 of setting up Premiere Pro CC 2015 for color correction success
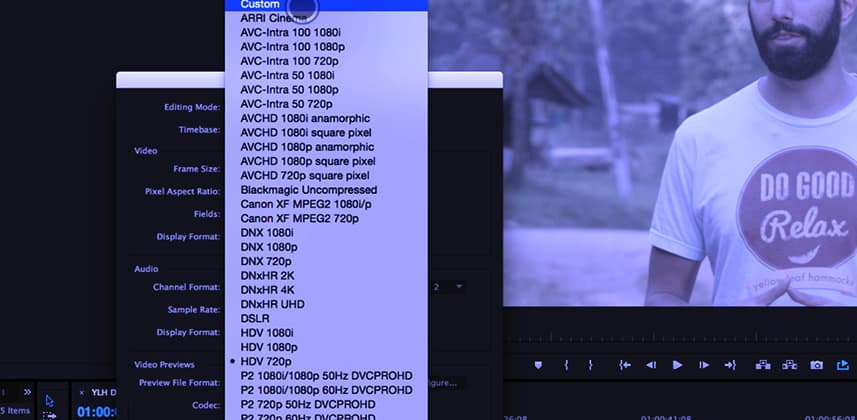
As I learned very quickly early in my research, Premiere Pro defaults to working in an 8-bit colorspace. Even those effects labeled as 32-bit float? They’re not float by default. You’ve got to go in and make some changes to optimize sequence settings. I’ve also found that I tend to need to render out Previews while I’m working – and again, if you don’t make some key changes to your Sequence Settings, you’ll likely be previewing in an 8-bit codec… or worse yet, an 8-bit long GOP codec.
In Part 1, we’ll set up our sequence for 10-bit (or better) Previewing and effects processing. You’ll learn how to optimize sequence settings.
Coming Next: Premiere Pro Workspaces
In Part 2, you’ll learn how I like to create a few custom Workspaces for maximum color correction speed in Premiere Pro CC 2015. While the default ‘Color’ workspace is a terrific starting point, to get really fast you’ll need to make some changes.
Questions? Suggestions for topics in this series?
Use the comments below—I will rely heavily on Member comments as to what topics I cover in this series, beyond the core topics outlined above. Now’s the time to ask!
-pat


