| Series |
|---|
Fusion Connect Part 2 – Deciding On Your Workflow And Color Management
Fusion Connect brings Blackmagic Design’s node-based compositor directly into the sequences of Avid Media Composer users. Those with a Fusion Studio or DaVinci Resolve Studio license (license key or dongle) can download Fusion Connect now at no additional charge. In Part 2 of our Insight we’re exploring multi-layer composites and moving a composite from Media Composer into DaVinci Resolve. In case you missed it, check out Part 1 in the series for an introduction into Fusion Connect for Avid.
In Part 2, I want to give you a more in depth look at how the Fusion Connect plug-in works, the several different decision points that have a big effect on the final image, and how you can re-use your work in Fusion Connect for Avid if you’re sending your timeline for final finishing in DaVinci Resolve.
Learning Goals for this Insight
- How to properly set up your Fusion Comp using the Avid AVX effect
- Understanding the ‘export media’ and ‘reference media’ workflows
- Anticipating the color management implications of ‘export media’ vs ‘reference media’ workflows
- How to move your Fusion comp from Avid into DaVinici Resolve for final finishing
Clip Effect or Filler – Your First Decision
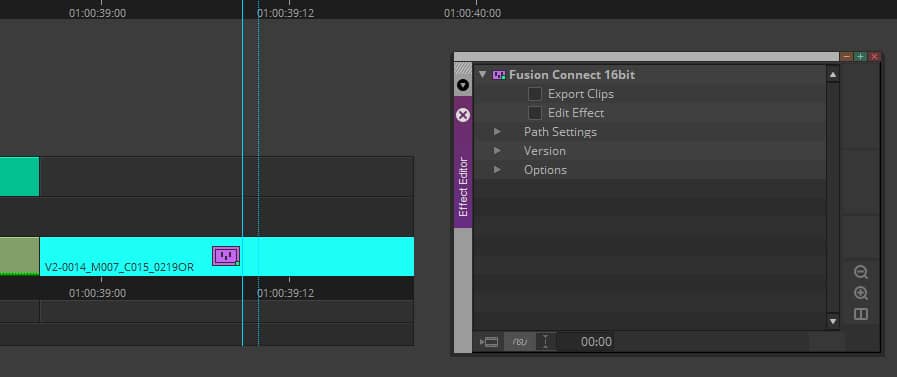
The Fusion Connect plug-in functions just like any standard AVX effect inside Media Composer. This means that the effect can be applied either at the clip level, or as a Filler layer resting above a clip (similar to an adjustment layer).
Personally, I use Filler layers as it helps visually with organizing a sequence. Operationally, either approach works, offering the same end result. Here’s what the two approaches look like:


An Example Project: Multi-layer Compositing
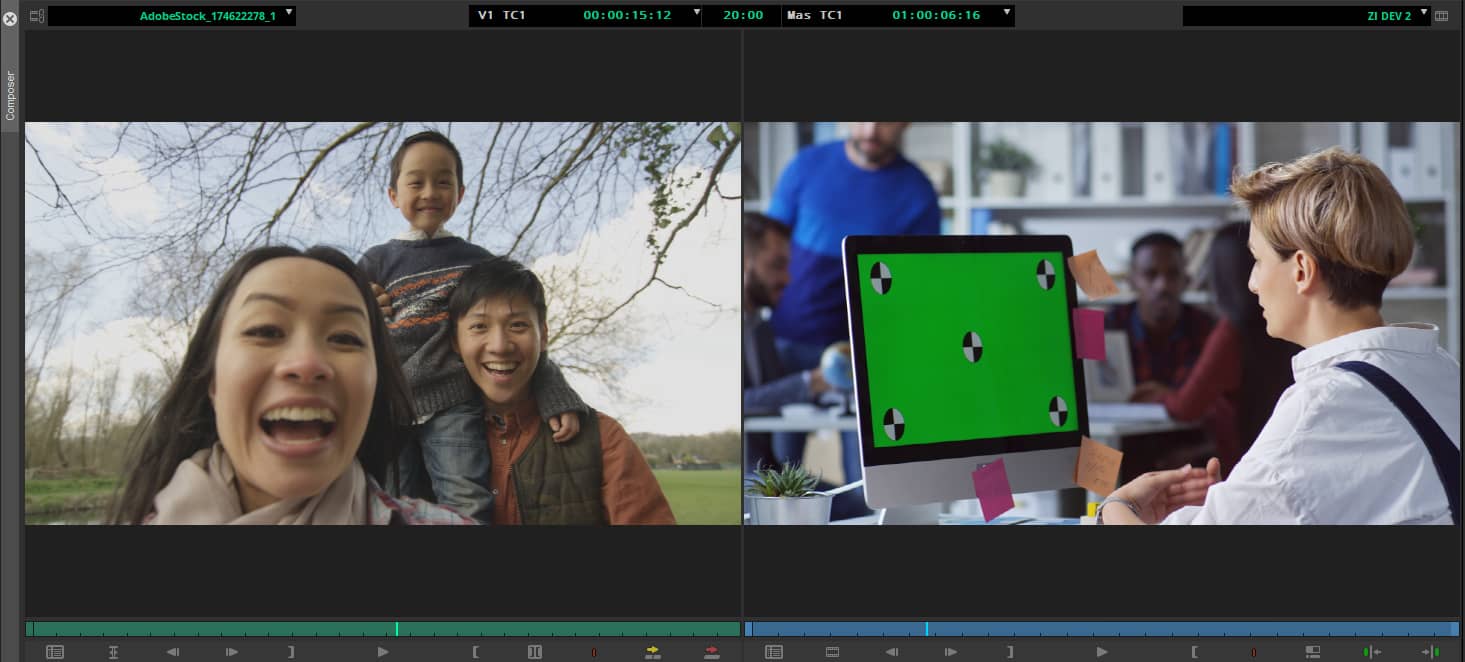
More than one video track can load into Fusion at a time. In this example, I have an iMac-using office worker on V1, and the selfie-stick family on V2. Fusion can very quickly do a picture-in-picture composite like this, to mimic a family Facetime chat.

Beware: There is a unintuitive gotcha with this composite
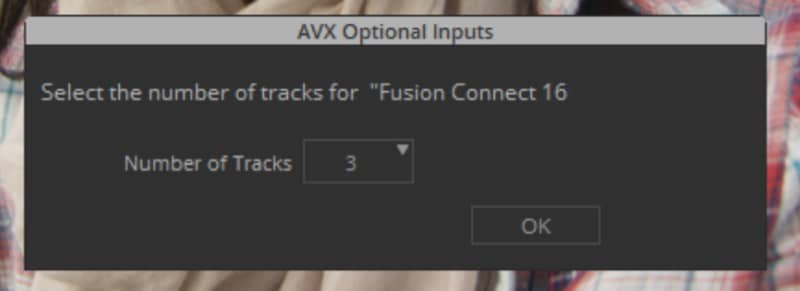
The track layout for this simple effect looks like this – so do you call this a 2-layer effect or a 3-layer effect when setting it up?
- V1 is the office
- V2 is the phonecall
- V3 is the effect applied to a Filler clip.
In our case: During the Fusion prompt asking “Select the number of tracks for Fusion Connect” be sure to select 3.
The Filler layer always gets included in the layer count!
If you only select 2 tracks, the topmost layer gets grabbed twice.

Decision 2: Launching into Fusion Connect using the Exported Clips workflow (or not)
Member Content
Sorry... the rest of this content is for members only. You'll need to login or Join Now to continue (we hope you do!).
Need more information about our memberships? Click to learn more.
Membership optionsMember Login


