Ideas For Custom-Mapping External Control Surfaces Enabling More Targeted Color Corrections
Do you color grade in Premiere Pro? If so, I’m going to encourage you to build, what I call, a Premiere Color Grading Toolkit. This toolkit uses 3rd-party external hardware. The hardware is custom-mapped to the Lumetri panel, giving you controls that go way beyond anything you can do using only a mouse.
Now, since the math behind Lumetri is the same, either using a mouse or a control surface, why am I making this suggestion to you?
Lumetri’s tools are, generally, a bit too broad.
There are no pivot points to control the center, the range, or the blending of multiple sliders. I’ve spent a great deal of time thinking (and experimenting) with adding new functionality to Lumetri. I find myself wanting to work one or more Lumetri tools against each other – providing more targeted/narrow correction. But the Lumetri user interface makes that difficult:
- The Lumetri panel is divided into several tabs.
- Each tab has only a few tools.
- You can only work in one tab at a time.
- When using a mouse, only one tool can be manipulated at a time.
While Lumetri is a huge upgrade to Premiere’s color grading workflow. The arrangement of its tools can feel very limiting.
So how do you modify Premiere Pro to get targeted work done accurately and quickly?
Step 1: Get a control surface, gain enhanced productivity!
My first suggestion: Stop using that mouse or Wacom pen. Premiere Pro allows for extensive custom user mapping for every control surface it supports, unlike the fixed layout of control surfaces for DaVinci Resolve. As a Premiere Pro user you have many choices for external control surfaces:
- Tangent Elements: This expandable set of surfaces offers the greatest possibilities for customization and a sheer number of buttons, knobs, and wheels.
- Tangent Wave 2: This is the latest iteration of a larger mobile solution.
- Tangent Ripple: If you’re looking to step your toe in the external control surface waters then the Ripple is for you.
- Loupedeck: This is a general-purpose set of external control surfaces that integrates with a huge number of ‘creative apps’.
- Monogram: Similar to the Loupedeck, it also prides itself on serving many different creative markets that can make use of external surfaces but is easily mappable to Premiere Pro.
All of these surfaces do two things similarly: First, they let you work faster. Secondly, and just as important, you can do things with these control surfaces that you can’t do using a mouse/pen. In this Insight, I’ll demonstrate this with my Elements panel (which, before my customizations, is already a massive improvement in my Premiere color toolkit).
If you’re using any of the Tangent devices, you can download Tangents mapping tools from their website. They support almost two dozen different software suites, including plug-ins. The things you see me do in this Insight can be replicated in many different software applications.
Elements to the Rescue!
The Elements panel is around $3500 US new, but even at that price it’s a fantastic tool and isn’t limited just to enhancing color grading workflows. It’s supported in nearly all video post apps. Tangent’s software mapping tool also has a version that’s currently in beta which expands its capabilities to audio and graphics functions. I can tell you, mapping the Audio Track Mixer to my twelve knobs is sweet! And even graphics items can be sized, moved, and rotated via the Elements panel controls. I hope this beta software will be generally available soon.
Ripple down the timeline!
A Tangent Ripple is smaller. It’s very portable. And a Ripple packs a ton of usability in Premiere for less than $400USD. I use mine with my laptop whenever I’m out of the shop but need to work in Premiere. And it keeps me from blowing a gasket struggling with just a mouse. A step up in cost and capability in the Tangent line is the Wave 2.
How about a tablet version of these external control surfaces?
Another option from Tangent is an interesting, and inexpensive app for your tablet is the Tangent Element-Vs. You can download and install it for either Android or IOS for $7.99 USD. It makes your tablet a virtual surface via a WiFi connection with your computer.
The Tangent Element-Vs sets its mapping in the Tangent Hub mapping app. It emulates any of the Elements panels you choose: the trackballs, knobs, buttons, or multi-function panel. It’s pretty spiffy for as cheap as it is. It is best when coupled with a Ripple or Wave 2 panel. At that point, you can almost emulate working with a full Elements panel for well under $400USD!
Yes, you can expand your color toolkit without breaking the bank!
Step 2: Get Some Technical Media!
The next thing you need: Clips to evaluate precisely what the various tools do. I’ve created one that I like and I use it in this Insight. It’s available for download HERE. It has both a standard ramp (on the right half of the image) and a stepped-block section on the left. When you adjust any tonal or color control, you can see the precise areas being expanded and compressed. This is our prime evaluation tool as we design our Color Grading Toolkit.
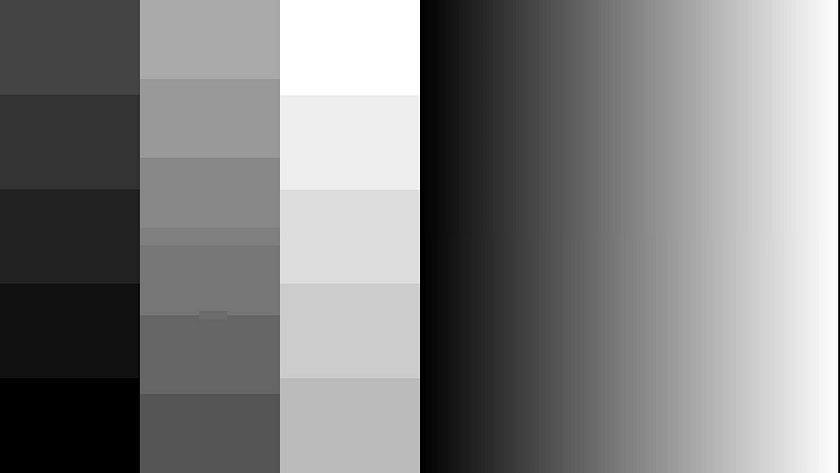
The left-side stepped blocks show on the RGB Parade as separate stacked lines in three separate groups of shadows, mids, and highlights. You see where things are stretched, where they’re compressed. You see exactly where the pixels started from, and where they ended up.
Pat Inhofer has also displayed and shared some of his favorite technical clips for checking various color and tonal tools and settings. It’s good to have several things of different types. No color toolkit for any app is complete without technical clips!
Step 3: Start copying my mapping ideas… and modify them to your preferences
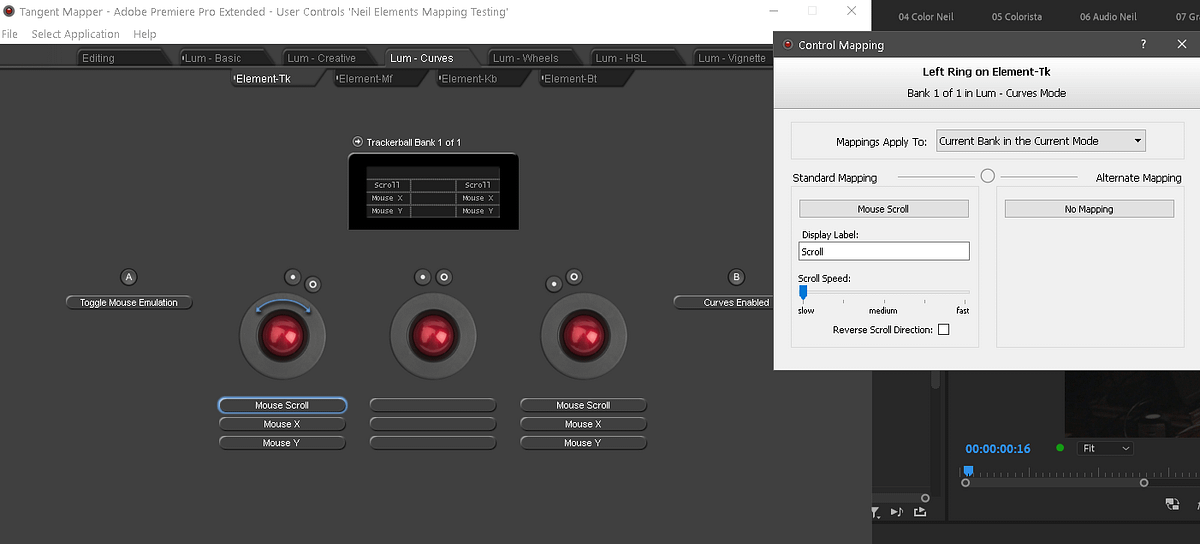
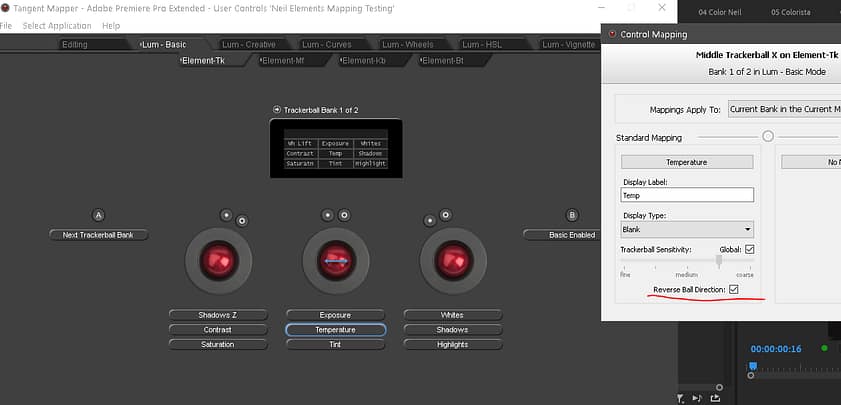
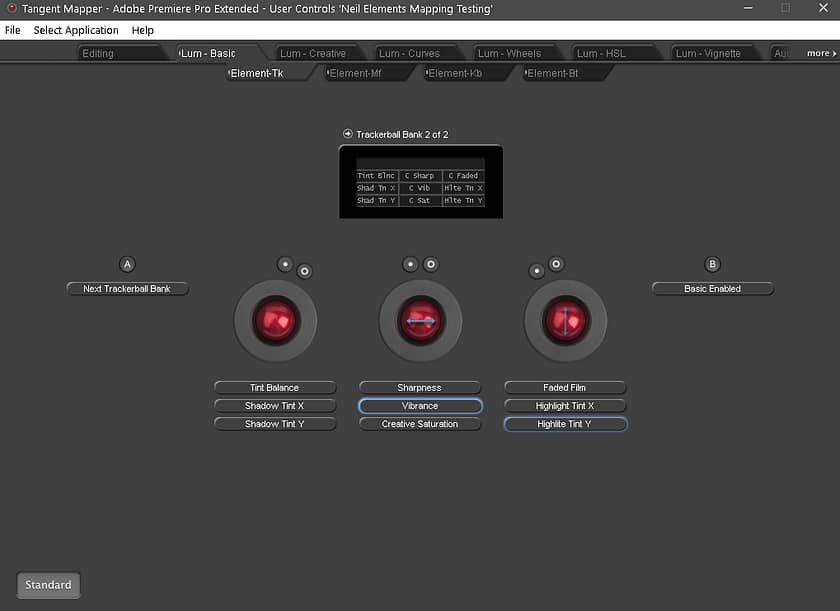
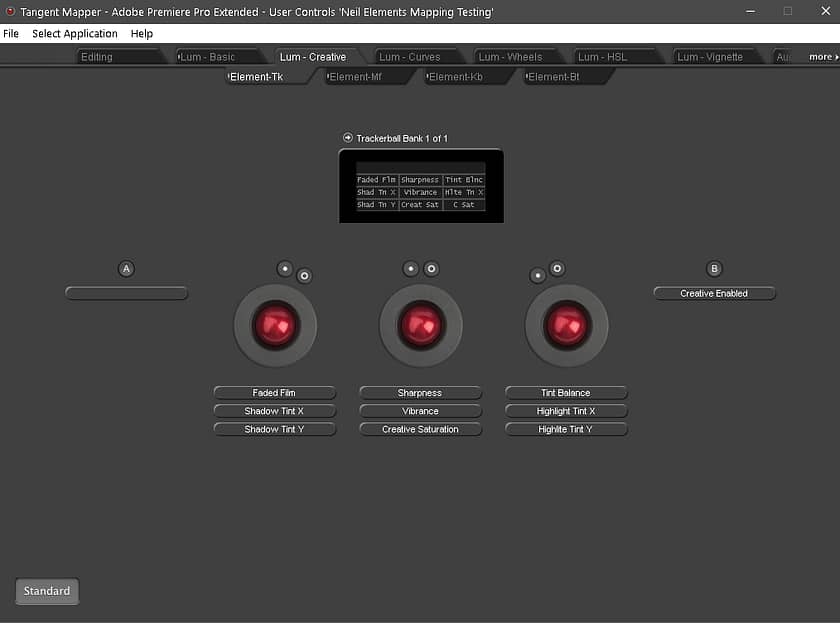
Here are my mapping layouts that I demonstrate in this Insight:
Do you have comments, questions, or suggestions?
Use the Comments below and let’s chat! You can also subscribe to any Insight’s comments by pressing on the ‘Subscribe’ button at the bottom left of the discussion section. You’ll get emails when new comments are added.
Related Insights
Mixing Light has covered external control surfaces for almost a decade. Dig deeper with some of these favorites:
- Getting Started with the Tangent Element Colorist Control Surface
- First Look: Resolve Mini Control Surface
- Hands On the Tangent Element and Premiere Pro CC
- Speed-Boosting Resolve’s ‘Mini Panel’ With Gaming Keypads
-Neil
Member Content
Sorry... the rest of this content is for members only. You'll need to login or Join Now to continue (we hope you do!).
Need more information about our memberships? Click to learn more.
Membership optionsMember Login

