A Little Work Up Front Can Pay Off Big Time When It’s Time To Dive In
Of the dozens of questions we get each week from members, one of the most consistent themes is about working faster.
It’s no secret that clients with ever-shrinking budgets are asking colorists to do more, and work faster. Of course, there are many color correction techniques that can speed up your work, but for me, being able to work faster in a supervised session or when I just have to sit down and crank out a grade on a show, has always come down to pre-grade prep. In other words, the things I do getting ready for the grade are more impactful on my overall speed on grading a project than any single grading technique.
In this Insight, I thought I’d pick 5 of the pre-grade things I do to speed up my sessions. No doubt, there are more things to add to these tips – so if you have your own pre-grade techniques not listed here, please share them for everyone’s benefit down in the comments at the end of the Insight.
Spotting Session
I’m constantly amazed by how many colorists just dive into a grade without ever watching the project completely through – at least once. Not watching a project down before you start grading is the equivalent (to me) of buying a car you didn’t test drive!
Not only does the watch down get you familiar with content – mood and feel, but also gives you an idea of pacing and problems that you’ll encounter in the project.
I like to take my simple watch downs and transform them into something a bit more involved – a spotting session. Spotting sessions (that name) are common in the audio world, especially with music composition. The idea is that during the spotting session you should be able to get comfortable with the project – understanding the flow of the project, defining scenes & problems as well as, and most importantly, understand your client’s suggestions, pain points and overall approach to the project.
A spotting session is important for you to get familiar with the project, but when done with a client, the time-saving benefits down the road are huge. Spotting sessions probably have their largest benefit for long-form projects like features, docs, and TV shows, but the same methods can be used for short form as well.
Here’s how I handle a spotting session:
Client Attended – Watch Down In Resolve
For a spotting session, I always prefer to have the client in the room with me and depending on the project I will sometimes offer to do a spotting session even before being awarded the project – as spotting session can be a good prognosticator if you’re the right fit for the project and if you gel with the client. Spotting sessions are also a good opportunity to sell! But most of the time, the spotting session takes place after being awarded the project.
If the client is the room, I load up the project in Resolve and I utilize two Resolve features; markers and data burn-in.
During the spotting session I use markers for:
- Defining scene boundaries – so I can later quickly navigate scenes. Be sure to number or name the scenes by editing the marker name – this makes using the edit index set to show markers a quick way to jump between scenes without searching or scrubbing the timeline. You can also filter the timeline to show these Red markers to go the first shot in that scene easily. I tend to use Red markers to define scene boundaries.

- Notable problems – low resolution, watermarked stock shots, extreme exposure & noise problems. I use Blue markers for these items.
- Shot specific client feedback – when a client and I stop on a shot and they have very specific things to say about the shot, I’ll use Yellow markers and name them all Client Note and then enter the specific comments in the marker notes.
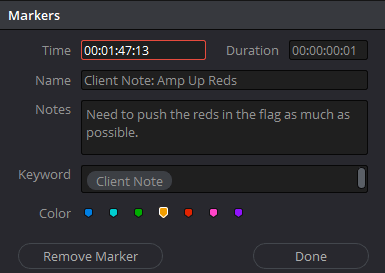
- Potential hero shots – there are key shots in every project. I identify these shots as ‘hero’ shots that I’ll grade before anything else and use to get client approval. I use Pink markers for these shots.
Along with markers I use data burn-in for with two specific settings:
- Record Timecode – makes it easy to see where you are in the timeline, makes timecode specific notes and more often than not to tell the client where a problem is/allow them to take their own notes.
- Source Clip Name – I like having this option turned on when doing a spotting session on a conformed project (flattened files it would show the same name for all shots). It allows me to quickly reference shot names and make notes on specific shots i.e. Wide Landscape.mov in the 5 times it appears in the film is always blown out.

Avoid The Grade!
It can be tempting in a spotting session to just start grading – trying things out, getting a taste for a clients likes and dislikes and in general, starting to learn a client’s general tendencies.
While I see the value this seems to hold, I feel like grading during a spotting session is a mistake for several reasons:
- If you struggle in the test grade it erodes trust in your abilities
- Sets a benchmark/approach for a grade when further testing & exploration might result in better grades
- Sends you down a creative path that might not be right at such an early stage
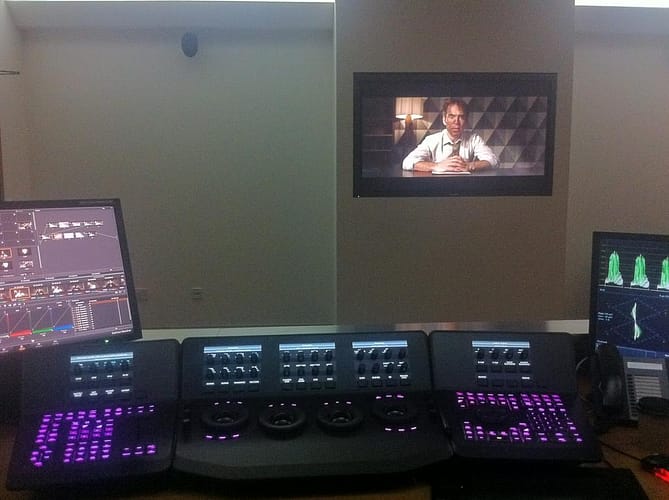
If you have to touch the grading controls – do so lightly and with a specific purpose and never use affirmative phrases that put you down a certain path. Also, if you do start grading shots in spotting session, be sure to frame the work you are doing as ‘experimenting’ or ‘trying things out’. If I do a grade in a spotting session, I usually reset the shot back to the upgraded shot very quickly as to not burn that work into client’s mind.
Remote Client – Video Review & Approval Systems
Clients can’t always make into your studio to do a supervised spotting session. And while the supervised spotting session is ideal, the plethora of online review and approval tools like Frame.io, Wipster, and others are a good option for getting client notes about the project.
I will still utilize the techniques mentioned above on my Resolve setup, but will ask the client to add comments to the file about their wishes, pain points, etc.
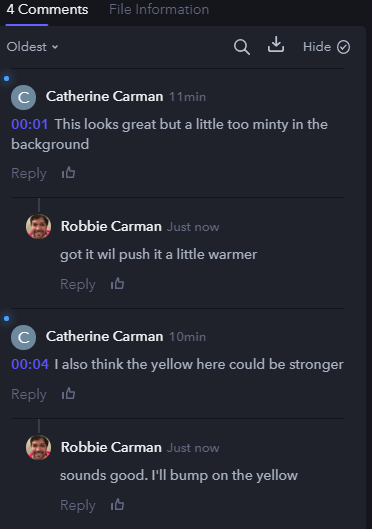
Getting those comments into Resolve is another story…
As of right now, I’ve found no easy out of the box way of getting comments from the major review services into Resolve without significant work in ‘washing’ the exports through another application like FCP X or Premiere Pro. So, for now, unfortunately, I simply copy and paste comment text into markers in Resolve.
However, Mixing Light contributor Joey D’Anna is always up for a challenge! As an introduction to Resolve 15’s new scripting capabilities will soon be publishing an Insight detailing how to import Frame.io comments as markers into a Resolve timeline – I don’t want to steal is his thunder so stay tuned for that Insight!
Hero Shots
There are no worse words a colorist can hear from a client in a review session than ‘yeah….that’s not the direction we were going for’…
Almost every colorist has unfortunately heard this phrase or one like it – but here’s the thing – feedback like this can/should be easily avoided! How? Approval on hero shots.
Don’t get me wrong, you can’t avoid critical and sometimes mean feedback entirely, but by using a hero shot workflow PRIOR to grading the entire project you greatly reduce the chances that your work is not in the ballpark and doesn’t meet the client’s wishes.

As mentioned in the section on spotting a project, I’ll use markers to spot hero shots. Once these shots have been identified I will:
- Filter the timeline to only show the hero shots
- I usually do 3-5 grades depending on the client – each grade gets its own version that I’m careful to name and be descriptive in that naming – it doesn’t matter how many versions you do, but don’t make the choice binary for the client – they’ll always choose the one you don’t like!
- After creating the different grades I’ll save each version as a separate still to a Stills folder I create called Hero Shots (more on still organization later). I’m careful to name them, the same as the version
- I will export each still as a JPG and email the client with them. If it’s a large project where I have a ton of hero shots, I’ll organize them as a contact sheet in Lightroom or Photoshop and email a PDF to the client.
- Depending on the client I will also render out MP4s of each version
Once a client provides you feedback on the different versions it’s your job to integrate a ‘final’ version to start the rest of your grade. More times than not, clients will pick one version over another, but sometimes they do ask for parts of one, and parts of another. In either case, get them to approve final hero shots before continuing on with the rest of the grade. I store these approved hero shots in a separate approved heroes still folder.
Long Form – Smart Filtering & Grouping
For years, I was a memories guy with long-form TV shows and documentary films. What I mean is that I’d find the first instance of an interview, grade it, and then save to say Memory A . When next came to that interview, I’d press A to apply that grade on my control surface to apply the grade (you can do the same thing with keyboard shortcuts or external control boxes like the Stream Deck). I repeated this process for each interview or similar type shot.
About 3 years ago I started working closely with Mixing Light contributor Joey D’Anna and after some convincing, Joey brought me on board with the filter and group technique for getting a project organized prior to grading. These days, I group everything!
If the project is using a baked/flat file workflow, the process of grouping is a bit manual, but if it’s a conformed project grouping can often be accomplished by using Smart Filtering.
Smart filters can be created from the Color page by choosing Clips > Create Smart Filter

Here are my approaches to Smart Filtering:
- MediaPool Properties > File Name > Contains – Often Interviews and like shots will be from the same source file. You’ll need to create multiple lines per file name.
- MediaPool Properties > Video Codec Or Format > Contains – Depending on the project, you’ll often be able to filter based on codec or format to create a group. As above, you’ll need to create multiple filters per format or codec.
- Media Pool Properties > Resolution > Is – Again, like the above filters, resolution can often be an indicator to like clips.
Once a filter has been created, you enable it from the color Page by choosing Clips and then choosing the filter near the bottom of the menu.
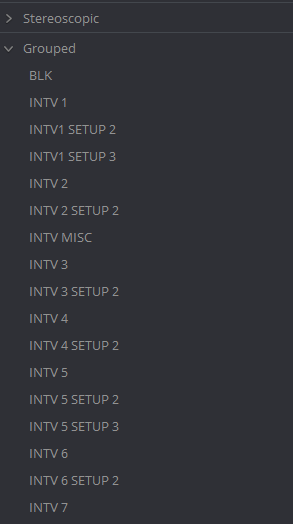
My preferred method of seeing smart filters is actually from the Light Box.
In the upper left-hand corner of the Light Box, you can reveal the Clip menu and one of the options in this listing is Custom/Smart filters at the bottom of the listing.
Creating Groups
If you use Smart filtering, you can select all the clips in that smart filter and create a new group – easy!
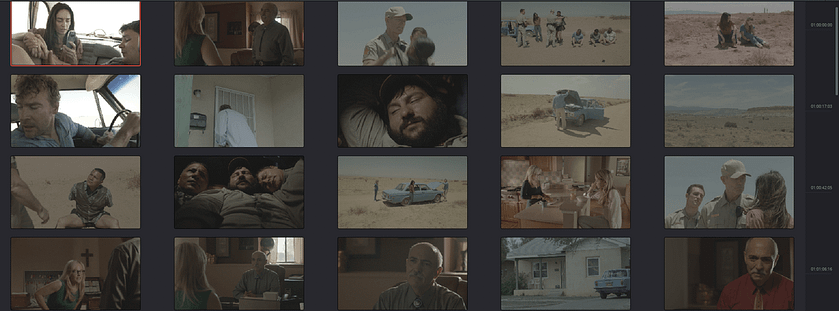
If you can’t filter, as is the case with a flat/baked file workflows, then the Light Box offers a large thumbnail view of all the shots in a project. This view can also be output via SDI – which makes viewing clips in the Light Box easy. In addition, you can scrub the thumbnail of each clip to help you identify the clip’s content.
Control or Command-clicking clips allows you to select non-contiguous clips. Once selected you can create a group of the selected clips.
Short Form – Color Swatches, Palettes & Product Examples
That’s not the right color!
If I had a dollar for every time a producer or agency rep yelled that about a product color from the back of the room I’d be a rich man, and probably wouldn’t be sitting here writing this article!
By far the biggest pre-grade tip to improve the speed of your actual session when you’re grading projects that feature products is setting up color swatches and palettes that you can easily reference during the grade.
If you’re working on a project where product color is vital and ‘close enough’ won’t suffice then the first thing to do is ask the client or agency if they have a style guide. Style guides will often have CYMK (print) and RGB (what you want) values for many aspects of a campaign – brand colors, product colors, approved graphics colors, etc.
To utilize this information in Resolve here’s what I do:
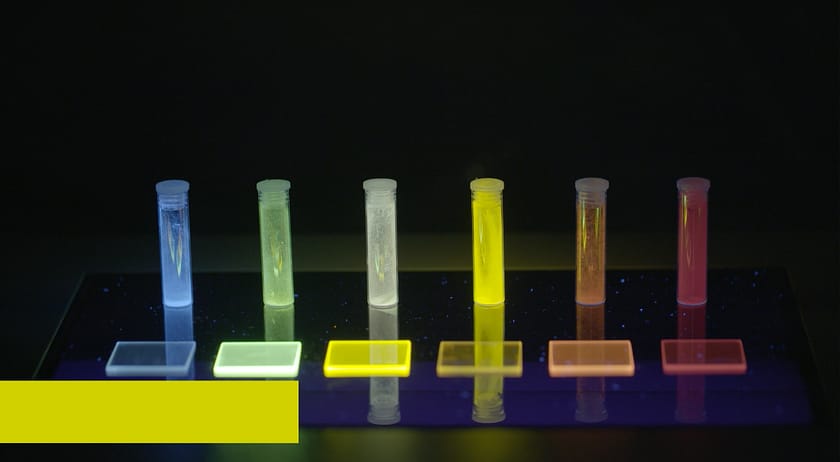
- From The Edit Page add a solid color generator to an upper track on your timeline – for spots, I’ll extend this the length of the timeline. Utilize new tracks for each brand/product color.
- The solid color generator will occupy the whole frame so I crop the solid color generator to small rectangular strip that I’ll place on one side of the screen or at the bottom of the frame.
- With the cropping done, click on the color swatch in the Inspector and enter the RGB values from the style guide or you were provided by the client.
- Enable/disable color swatch tracks as necessary.
Most of the time I’ll do my initial pass bringing up the color swatches on specific product shots, but I always like to bring up the swatches from the duration of the timeline too to make sure my grades complement the brand/product colors.
Generating Palettes From Client References
The ‘look’ is something that is discussed on nearly every project, but for some reason, I feel the look discussion is amplified with short-form – maybe it’s because there are only seconds to make an impression.
There is certainly no shortage of ‘show me something’ clients, but often clients have references that they’d like to use. I always ask clients if they can to provide a still(s) of the look they like. With those in hand, I can quickly generate a palette to reference in Resolve.
- Add the references to the end of the timeline, so they are out of the way and easy to come back to.
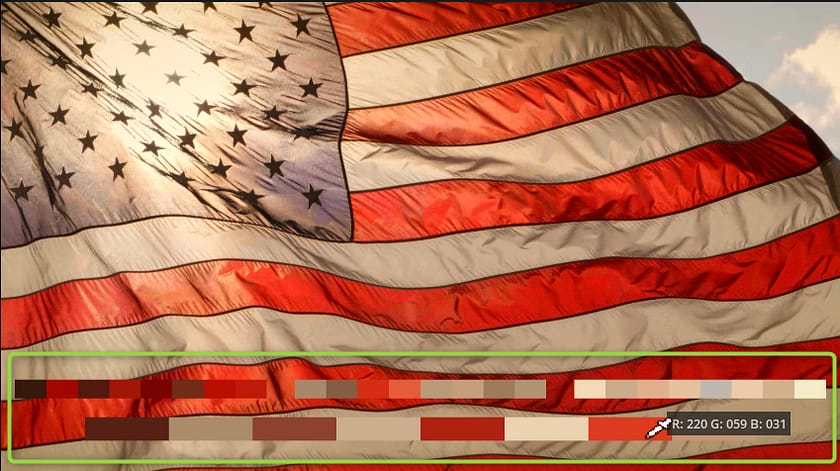
- For each clip, add the effect Color Palette to the node graph, which can be found under ResolveFX Generate.
- With this effect added, you’ll now see a color palette strip at the bottom of the clip. The default setup of this ResolveFX is to show 8 colors, which is usually enough to pull from.
- Right-click on the Viewer and choose to show the RGB color picker (your call if you’d like to display 8 or 10-bit values).
- Use the color picker to sample the swatches generated by Color Palette ResolveFX. Make note of these values and as you grade, see if your grades are hitting or close to some of the major hues present in your client’s reference.
You’re unlikely to get footage that exactly matches what your client has provided for references, but this technique allows you quick reference to the hues used in those samples.
Also, you might be wondering if the Color Palette step is necessary – could you just sample the color you want with the color picker? Sure, but I like having the whole palette visually accessible to reference quickly while I’m grading.
Viewing Product Examples
Sometimes, even if you match a style guide for a product color it will still look not quite right given the rest of the grade. Other times there is no style guide to reference!
I’ll often ask clients for a physical example of the product so I can reference it in person, and yes, hold it up to the screen (if its small!) to check out against the grade.
Mixing Light co-founder Dan Moran has some epic stories for holding up dresses, and sweaters to the monitor with demanding fashion clients in the room – sometimes it needs to be done!
Stills Organization
Are you one of those people that has a single stills folder in a project and inside that folder there are hundreds of stills? How do you get anything done?!
I’m teasing, and I’ve been that person myself. From a pre-grade point of view & in combination with a spotting session, and a hero shot workflow, I’ll often build a stills folder structure before diving into the actual grade.
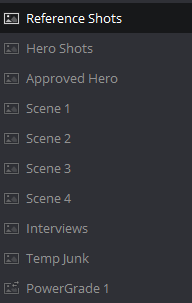
Here’s a typical setup:
- Reference Shots
- Hero Shots
- Approved Hero’s
- Scene Folders (one for each scene)
- Interviews
- Temp_Junk
There are two other stills options that I’ll often enable – these govern the overall saving of stills.
The first is saving stills with timeline timecode – I hate saving a still in a project with 2000 shots and trying to find exactly where it is especially when shot numbers can change when adding shots, splitting or joining clips etc.
To enable to this option:
- Open Project Preferences > General Options > Color
- Check Automatically Label Gallery Stills Using
- Choose Timeline Timecode
The other thing that will greatly reduce the amount of ‘junk’ stills is only creating one per shot. Simply right-click on anywhere in the gallery and choose one still per scene.
Final Thoughts
There is a lot that you can do before a grade to ensure that you can work faster once you sit down to grade a project in earnest.
I would stress that you focus on organizational things to help you move faster when it comes time to actually grade – in my experience, there is nothing that replaces grade prep for working faster.
Have a question or something to add to the conversation? Use the comments below.

