Using Custom Curves To Emulate ‘Fill Light’ Adjustments

October 19, 2022

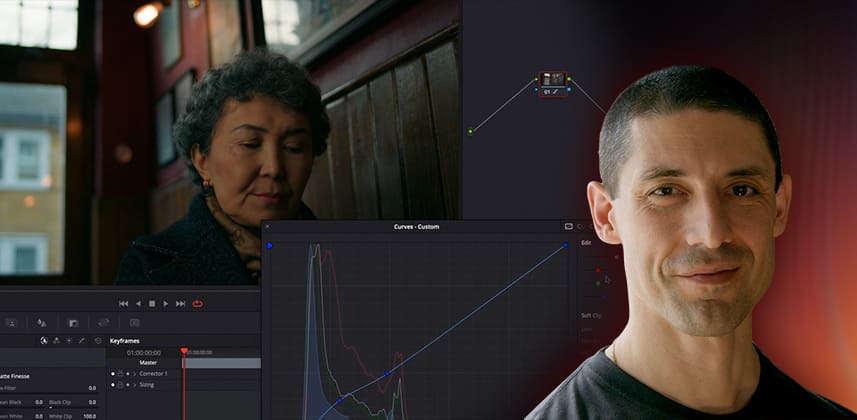
Sometimes you want to 'open up' the shadows as if you added a bounce card or fill light to the scene. Custom curves make this easy.


Using a custom DCTL to find middle gray – and adjusting accordingly

Resolve offers MANY tools for manipulating contrast, but I’ve realized in the last year or so that there’s no ready-made knob for adding or photographically removing fill light. In this Insight, we’ll explore a technique I’ve recently developed for tackling this need.

Along the way, I give a quick shout of joy for the return of the Gigantor Curves – allowing us to fine-tune control of the points we place in the Custom Curves interface.

Key takeaways from this Insight

By the end of this Insight, you should be able to:

  • Think about contrast manipulation more photographically — evaluating the ratio between the key light and the fill light
  • Use an exposure chart to find an objective middle exposure point for your working color space
  • Understand the benefits of operating within sensible constraints — i.e., a curve that has no effect at or past middle gray

Resources Mentioned in this Insight

  • Premium Members: Scroll down to Additional Downloads for this DCTL.
  • Kodak Film Exposure Chart DCTL – This is the DCTL I developed (and demonstrated in this Insight). You can download it for free at the low, low cost of your email address.

Questions or Comments? Scroll down and say so.

Is this Insight useful to you? Let us know! Mixing Light is all about community discussions, and we’re curious if you found this helpful, if you have something to add, or if you have more questions we can address.

– Cullen


Additional Downloads

Sorry... downloads are available for Premium Members only.

Become a Premium Member
Comments

Homepage Forums Using Custom Curves To Emulate ‘Fill Light’ Adjustments


  • Jim Robinson
    Member

    As always, some really useful information with the curves.
    I do something similar by putting the node into a layer node and changing the composite mode to darken and applying the curve to the bottom node only.
    Now although that works for me, I can see that setting up the middle grey would ( or should ) be more accurate to the colorspace. But as I think about it now, I am wondering if the composite blending modes on the layer mixer are colorspace aware, and set the middle grey point on the composite layer?
    If they are, then the setting of the middle grey would be automatic and all the other great information you provided, could then be applied.
    I jsut tested it and with the “darken” composite mode, you can push the curve above middle and it does nothing to the image.
    Not sure how to test the accuracy of the middle grey though.
    It seems like I watch one of your insights and I spend a ton of time testing theories. And of course, that’s what I love about them.
    Thanks Cullen.


  • Cullen Kelly
    Member

    Glad you enjoyed this one Jim! And cool idea re the ‘darken’ mode! As I understand it, that blend mode is set up to always take the darker of two layered pixels, meaning you can essentially only ever lower (or maintain) your input values, but never raise them, regardless of where the pixels may sit in relation to a mid gray point. Fun possibilities there!

  • Nice! I would love to see your method of photometrically pulling down highlights that are too harsh!


  • Cullen Kelly
    Member

    Glad you like this one Roman! Photometric highlight shaping is a tricky but very worthwhile topic to explore — I’ve talked about it recently on my YouTube channel, but maybe we can dive deeper here on Mixing Light soon!


  • Yash Mistry
    Member

    Hey Cullen,

    You have been an amazing teacher. Thank you for being here!

    I have a small request for a video. Can you create a video series on how to build the Film Print power grades? e.g. Kodak 2383 on our own?

    I have made one for myself however, I would like to have insight from a pro colorist to know what parameters should be taken care of while making these powergrades.

    With this FPE powergrades, it becomes easy to handle each parameter with their full potential and customise them as per project requirements.

    Thank you!

    Best,

    Yash M.


  • Cullen Kelly
    Member

    You got it Yash! TBH, recreating a print stock using native Resolve tools isn’t something I’ve ever undertaken — certainly possible to get close, but not an ideal toolset IMO. But that’s awesome you’ve developed your own!

Log in to reply.

1,000+ Tutorials to Explore

Get full access to our entire library of over 1,100+ color tutorials for an entire week!


Start Your Test Drive!
Loading...