Simple Strategies Can Have Big Payoffs
3631
Three thousand six hundred and thirty-one. That’s how many shots I’ve graded over the past 9 days. That’s over 4-hour long broadcast shows averaging about 900 shots each, and with about 2 days to work on each show – plus handle reviews, outputs, etc. On average I have about 60-90 seconds (at most) to color each shot!
While I do grade some short form, over the years long-form grading has really become my thing and most weeks I’m grading one or two shows.
Thousand shot shows that need to be graded in 2 days or less have become so regular for me that I forgot how much they can suck!
Recently one of our members, Michelle, wrote asking for some help:
‘I’m struggling with high-shot count projects that used to have 4 or 5-day grading schedules that are now often condensed to 2 days! Is there any advice you could provide for how to handle projects like this? I feel like I’m getting crushed!’
The fact is – this is a common thing in long form grading – project lengths and shot counts are pretty much the same, but clients are expecting color correction to happen faster (and usually at the same price!)
In this Insight, I’d like to share some strategies and things to think about when it comes to tackling (and surviving) high shot count projects with short schedules.
Keep in mind, this is just my perspective so if you have something to add to the conversation that could be helpful for other members please use the comments at the end of the article!
The Focus Battle
Facebook, Twitter, email, Spotify, coffee, clients talking – there are hundreds of things in a color suite that are competing for your attention. In my opinion, one’s ability to complete a 1000+ shot show is largely based on one’s ability to focus.
5 min on Facebook, 7 min responding to some emails, 10 min talking to some coworkers might not seem like a lot of time in the grand scheme of things, but when you have a high-shot count project with a tight schedule every minute counts. Depending on the project, you may only have a minute (or less) per shot, so if you spent 30 min of your day not focusing on the show that’s 30 less shots you’ll have done. While that seems like you can easily make up that time 30min is probably a gross underestimation of how much time each of us probably wastes per day!
To get through a high-shot count project you have to focus by any means necessary. 4 years ago in one of our early Insights, I wrote about several apps that can help you stay focused. The one I still use daily is Freedom .

Freedom is a highly configurable productivity app. One use is to block websites & services that might be distracting you.
Another use is to simply kill the Internet! That’s right! You can totally turn off outside traffic (while still maintaining connectivity to your local network). Here’s the thing – Freedom can even be configured so that the only way to turn it off is to restart your computer! If you’re jonzing that much for Facebook to restart your rig – you may have a problem!
Freedom is available for many different platforms and I can’t recommend it enough as it has really helped me stay focused on many long projects.
Another approach that I’ve been forced to do with some projects I’ve been working on is to completely take my workstation off the Internet by actually pulling the cable! Seems a little extreme, but this is a requirement by the company I’m working for that no machine with their material on it can be attached to the Internet. This forceful approach has actually been pretty liberating and reminds me of my early days on a hardware color correction system where the Internet was simply not a thing you’d ever use on a workstation.
Finally, as I have attempted to do at home, when I get to the office I’m leaving my phone, laptop, etc., out of the suite. This helps me not ‘cheat’ by not having those devices accessible.
Regardless of your solution, focus is THE key component of getting high-shot count projects done within very tight schedules.
Grading Strategies Part 1
Before I get into some technical approaches to banging through 1000 shot + timelines in just a few days, in this section, I’d like to spend some time discussing some of the ‘softer’ approaches to managing a lot of short period of time. This shouldn’t come as a surprise, but getting through a long project in short amount of time is partly about technical skill, but it’s also in large part about focus (mentioned earlier) and discipline in your approach.
We all have off days, but the more you can build discipline into your day to day, the more you can get done. Let’s take a look at a few approaches:
Live In 5 Minute Chunks (Just Get To The End!)
Thinking about getting started a long project can be intimidating. Especially if the project is just wall to wall shots.
It’s demoralizing to look at the screen and realize you’re on shot 400 and only 7min into the project!
I have two coping mechanisms for this problem:
First up, is grading in 5 min batches. Don’t get me wrong, I don’t mean 5 min of your time. I mean 5 min of show time.

A typical broadcast hour that I work on is about 52min or about 10.5 five minute blocks. If I have two days to grade a show, thinking about finishing five, five-minute blocks per day is easier to get my head around.
From a focus point of view, these five-minute blocks of time are also how I time my day. I’m not going to check Facebook, write emails, etc., until I complete a 5 min chunk of project time. I’ve found that breaking a project down into 5 min of chunks makes even the longest projects seem doable.

Next, when pressed for time, all that really matters is simply getting to the end of the timeline! As I’ll discuss in a moment, you can always come back and re-touch problematic shots, or even do a full second (or third) pass, but the most important thing is that you touch every shot in the timeline at least once. By doing so you add a tremendous amount of value to the project and for your client. I constantly remind myself when I’m not happy with a correction on shot, that I’ve improved it, and I will come back to it and force myself to move on.
Sounds easy right? For those of us who suffer err…are blessed with OCD, moving on can be hard but its something you have to do – just get to the end and remember that every project doesn’t have to be art.
The Benefit Of Passes
I often joke with Patrick and Dan that one reason I don’t do a whole lot of grade breakdown videos is that I’m never on a shot long enough to think about all that!
In long-form grading, when you’re pressed for time and because I’m simply trying to get to the end of the show, I rarely focus on a single shot for more than 45 seconds and seldom have the luxury of dozens of nodes.
But how can you get the shot looking great you might be thinking….
Passes.
If getting to the end of a project and touching every single shot is the most important thing for any given project, the next most important thing is the second pass.
It’s on the second pass that the groundwork has already been laid and you’re making tweaks – shot matching, secondaries and so on. I make sure before a client ever sees the project I have done the second pass and most of the time, I try to do this second pass at the start of the day when I have fresh eyes.
But I don’t limit myself to just a second pass. The client review is my opportunity for a 3rd pass – which is extremely helpful as the client is usually sitting with me. And a fourth pass is often possible after the review, and right before final output.
Standardize
There are a lot of ways to approach grading a project – Curves, Lift, Gamma, Gain, Offsets, etc., and even more combination of nodes to use those tools!
On a tight project, it doesn’t really matter which toolset you use or even how many nodes you use – but if you want to work fast, try to standardize on your base grade.
So how do you do that?
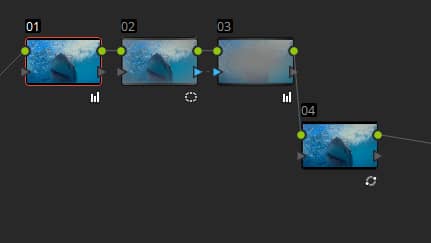
- Have a go-to approach – For me, this usually means a 4 node structure. Base Grade on Node 1, Window on Node 2, Outside on Node 3 and a blank Node on 4 or I’ll use that node for noise reduction. In my Powergrade toolkit (discussed later) I’ll have additional nodes I can layer in without having to create them from scratch. Depending on the project, I’ll usually have an alternate standard grade ready to go.
- The results of look setting – while many standard broadcast shows won’t have time or budget for a look setting session, many films will at least have a few hours. Often, I build my base grade based on that work.
- Incorporate fixes/style – whatever ever your base grade try to incorporate the problematic issues in the project. This could be a master curve role off, a shadow lift, etc.
- Don’t get locked in – I know! It could be tempting to create a very specific look/feel as your base grade – don’t. Using LUTs and heavy-handed approaches are tempting but they’ll ultimately lock you into an approach. While you want a framework for your base grade you don’t want something that paints you into a corner.

One more point about standardization – figuring out what tool(s) will work for the project is vital. While there is a ton of overlap in terms of color correction tools, the look that they impart is slightly different and because of that, I think it’s important to stick to (as much as you can) to one toolset in your base grade.
So, if I determine that Contrast and Pivot work best for my base grade, I’m going to stick to that rather then using curves on one shot, and Lift, Gamma, Gain on a another shot. While this might sound limiting, I’ve found that it provides the most consistency in terms of look/feel for my base grades.
A Control Surface Helps (Duh!)
If you’re a member of this site, you’re no stranger to how emphatically we endorse the use of a control surface to work faster.

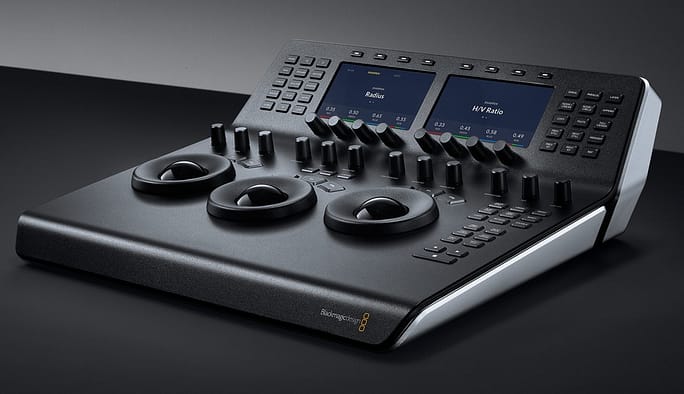
While smaller control surfaces can help you with basic functionality -lift, gamma, gain and things like saturation. To be most efficient, the control surfaces you use need to be able to let you effectively manage all the controls you regularly access. Here are some things to think about with the control gear you use.
- Quick access to common controls – instead of menu choices or hard to remember keyboard shortcuts, a control surface allows you to access all manner of controls quickly. Depending on how many knobs and buttons the control surface has, this could mean a significant speed increase.
- Copy grades in various ways – true you can do this with keyboard shortcuts, but it’s often more intuitive to do so with dedicated hard keys on a control surface. This includes saving stills, memories, etc.
- Simultaneous moves – with a mouse something like a simple contrast correction might be 3 or 4 click/drags. With a control surface, you can drastically reduce your dependence on multiple clicks/drags.
- Save stills & memories – Larger panels will have tools to load and save stills and memories, which allow for quick comparisons that are helpful in shot matching and consistency checking.
In addition, to dedicated control surfaces, a niche industry of devices mainly intended for gamers has sprung up to provide control panel functionality on a smaller, more affordable scale. Popular devices like the xKeys units, Logitech G13, MidiGrade and my new favorite the El Gato Stream Deck provide programmable functionality that is very customizable.
No matter your choice in control surface device, there is no faster way to speed up your work.
Member Content
Sorry... the rest of this content is for members only. You'll need to login or Join Now to continue (we hope you do!).
Need more information about our memberships? Click to learn more.
Membership optionsMember Login


