Building A New High Powered Grading Rig
I remember when my family got our first Apple computer.
Like many American families watching SuperBowl XVIII we were floored by the now famous 1984 Spot from Apple introducing the Macintosh.
I guess my folks who are both Washington Redskins fans were more impressed by the ad than Washington’s playing (they lost to the Oakland Raiders 38-9).
So we got a Mac!
Since that day, almost exclusively I’ve been using machines made by Apple.
While never quite the die hard ‘fan boy’ like many people I know, it’s a fair statement to say that I’m a pretty huge fan of the Mac experience.
I think like many of our members here on MixingLight.com the same is true – there is just something about the Mac that’s ‘different’ and the idea of Windows and a generic PC is just anathema to the ideals of being an Apple computer owner.
When Apple introduced the new Mac Pro…well, let’s just say that put me into a bit of a tailspin.
I didn’t know if I should jump in feet first or jump ship.
After over a year of thinking, I decided I had to do something – my 2010 Mac Pro just wasn’t cutting it anymore.
Obviously, based on the title of this Insight you can deduce what I did!
I thought it’d be useful to share with you what went into making the switch, the machine I configured and give you a tour of the machine.
However, that only paints part of the picture.
In Part 2 of this series I will explore actually using the machine, how Resolve, Adobe Apps, and other tools behave, and share with you how the transition with my main day to day work machine has gone.
The Psychology Of Making The Switch
If you’re a serious Mac user, the idea of going to Windows makes your skin crawl.
For years we’ve be indoctrinated to ‘think different’.
We’ve been told Windows is nothing but pain and misery and that the hardware/design of Windows based computers is sub-par.
One a few different levels those things may be true, but just believing things about Windows without trying it out for yourself is a bit like hating a style of food without ever sampling it.
For many Mac users there is a deeply held belief that Windows sucks and The Mac OS and Hardware are just better.
I’m too early in my experience with Windows to say that’s true or complete BS, but here is one thing I believe and was the determining factor for me attempting to make a switch to Windows.
Apple Pro Machines Aren’t The Pro Machines They Used To Be.
Yes, I know I’ll catch some flack for that – it’s true that Apple continues to innovate with machines – Thunderbolt, Dual GPUs standard, Flash PCI storage, thermal design and so on.
But in many ways, Apple is forcing users to make a revolutionary leap forward rather than an evolutionary one and that is causing many people, myself included, to look elsewhere for other options for their postproduction computing needs.
On the Mac I can’t get a machine with Dual Processors – important for encoding/decoding.
I can’t upgrade to a more powerful GPU when a new one comes out due to the cards being proprietary in design and non-removeable (at least to my understanding).
The DDR3 memory is significantly slower then DDR4 used on many newer PC designs.
Well, I CAN probably get those things when a new new Mac Pro comes out – but that would mean an entirely new machine and not upgrading parts based on my need.
I’ll be honest, just thinking about and discussing the possible switch to a Windows based machine got me a lot of dirty looks in the circles that I work in.
But after building a detailed Pro/Con list and as I mentioned thinking about the switch for over a year, all signs pointed me to a Windows based machine like the Z840 which has clear advantages in upgradability and true raw power compared to a new Mac Pro, and that was when I had my ‘breakthrough’ and decided to dive in head first.
So What? Now You Hate The Mac?
Heck no! I love the Mac! Making a switch for my hero system did not and does not mean I’m abandoning the Mac at all!
The majority of machines in my facility, the computers I have home and the devices my family use are all stamped with and designed by Apple in Cupertino, California.
I have an amazingly wonderful iMac that I use at home, a Mac Book Pro for travel, iPads, iPhones and yes, I’ll probably get an Apple Watch.
For me, iMacs, new Mac Pros and Mac portables fill 96% of my computing needs and for the foreseeable future it’ll remain that way.
But for top end professional work and filling that last 4% – that’s where the HP Z840 comes in.
Linux Too?
Windows is not for everyone (it might not be for me in the long run).
One thing that’s important to note about the Z840 (and other HP machines) is you can run Linux on them!
I’ll cover my journey into setting up Cent OS to run Linux Resolve in Part 2 (or possibly Part 3) of this series.
It’s good to know that using Linux on a Z840 running Resolve is 100% possible to do and has many advantages like ProRes support, ZFS file system, number of GPUs etc.
I have an embarrassingly long battle with Linux in my shop – mainly due to my poor planning and implementation, but for now, I do have a Linux SSD ready to go for the Z840 if Windows dosn’t workout for me.
With that said, I’m hoping it does!
My Configuration
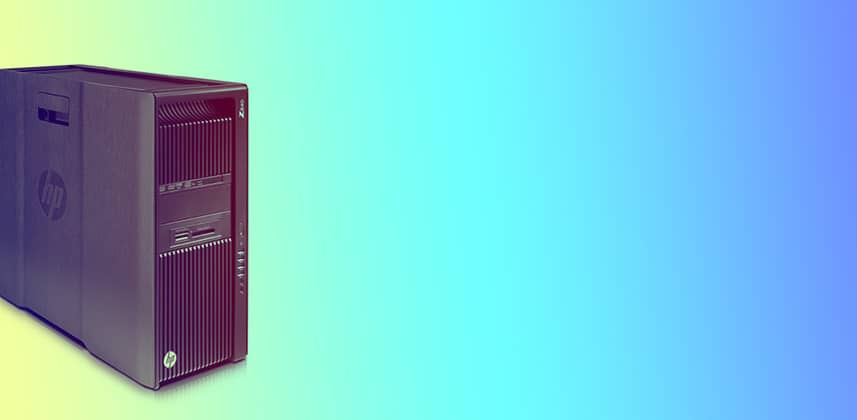
As I mentioned, the driving factor with the choice to go to a PC was expandability and at the end of the day I settled on an HP z840.
Last year I had the opportunity to travel to the HP Workstation Headquarters out in Ft. Collins, Colorado.
There I got a tour of the facility, saw what went into the testing, manufacturing and development of HP’s pro workstations and met the team behind the design and marketing of these computers.
Let’s put it this way – A LOT goes into making these computers as good as they are.
These machines are ridiculously engineered – so much so that HP has a standard 3 year warranty with them – yep, you get 3 years standard no Apple Care needed!
After the experience of being at HP, it was settled that I was going to be getting an HP and the Z820 at the time, and now Z840 as the top end machine made sense for my needs.
Here is how I configured the machine. If you’d like to configure you’re own machine head over to the HP Site.
- 1125 Watt Power Supply
- HP Thunderbolt 2 PCI Card
- 512GB SSD (System Drive)
- Blu-Ray Drive (BDXL capable)
- Intel 2690 v3 2.6 Ghz 12 Core Xeon Processor x 2
- 64GB DDR-4 2133 RAM
- Rackmount Kit
There are a few more things that I didn’t want to pay HP for that I either had or sourced separately. You’ll notice the big things missing from the above config are additional storage and graphics cards.
- 4x 1TB Samsung EVO 850 SSDs – I put these into a software RAID 0. Nope, this is not for DropBox! I share a SAN and sometimes for 4k+ EXR/DPX I need much faster I/O. I can usually get nearly 2 GB/s out of this setup.
- Nvidia GTX 970 SSC – Super clocked version of the 970. This is my monitor card. You might be thinking isn’t 4GB of the latest Nvidia goodness overkill to run your Resolve GUI? Well, it’s not a Titan, nor the 980 BUT it has lots of horsepower for Adobe Apps and other non-grading GPU accelerated apps. And its only $349.
- ATTO R680 Raid Card – This SAS card attaches to a older Sonnet Tech RAID I have. AT 24TB its a fast and offers huge capacity for a near term back up before going back out to LTO.
- QLogic 8GB Fiber Card – To attach to our SAN. This is my main storage.
- Cubix HBA – Host card for Cubix Elite Desktop Box that host 3x Titan Blacks used for processing in Resolve.
A few additional thoughts on the config:
1125 Watt Power supply lets me not worry about putting in more powerful GPUs and other drives, etc. into the box in the future.
While the HP Z840 is available with processors with higher clock speed and more cores (14 and 18 per processor) I felt the dual 12 cores at 2.6 gave a good balance of clock speed and number of cores per processor.
Generally speaking, the more cores the lower the clock speed. While different apps use these characters differently I felt the 2690s were a good middle ground.
For the price, I didn’t think the 128GB of default RAM was worth the extra 2k. 64GB still gives about 2.5GB per core. As the cost of the new DDR4 RAM comes down I may think about adding another 64GB. The Z840 can handle (in the near future) 2TB of memory!
I’ve opted to go Thunderbolt with a BMD UltraStudio 4k for my video/audio I/O thus why I picked up the HP Thunderbolt 2 card. I wanted to conserve PCI slots in the machine and I really only work on HD and UHD. Having true DCI 4k output was not a priority for me.
While the HP Thunderbolt card is only a single port TB 2 card, the UltraStudio 4k has a second port so I can daisy chain drives and other TB devices.
That’s actually an important point – many clients (Mac Based) are delivering Thunderbolt drives these days. I wanted the ability to directly support these drives without having to plug in elsewhere at my facility.
With that said, the z840 is stuffed with USB 3 ports as well.
A rack mount option was actually a really big deal for me as all of our gear is in a central machine room and having it rack mounted makes it secure and accessible.
I’ll show you the rack setup in Part 2, but the rack rails are really nice! They allow you to slide the machine in and out of the rack making getting inside of the machine easy to do if you need to perform maintenance or install a new piece of hardware.
Design & Opening Up The Machine
Let me just say I think this is one of the best designed machines I’ve ever had the privilege of using.
Of course EVERY computer manufacturer owes homage to Apple for super clean and functional industrial design when it comes to computer case design.
With that said, the engineering and case design of this machine is pretty amazing, but there are more plastic and bendy parts vs. an older or even new Mac Pro, but to me that’s a benefit! As result, the computer doesn’t weigh 200lbs!
Let’s start with overall design and dimensions. The box is a fairly typical large computer case measuring in at 8 x 20.7 x 17.5 in (20.3 x 52.5 x 44.4 cm). Empty, the machine is about 46lbs/21Kg

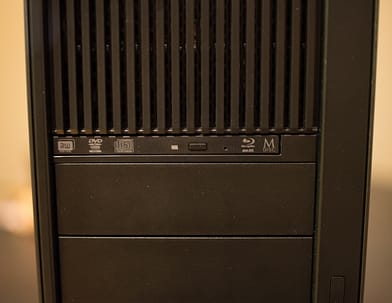
The front of the machine is mainly composed of a large slotted grill that allows for efficient airflow from the front (air in) to back (air out) design. Also, on the front you’ll find 2 5.25″ bays and one slim ODD bay.
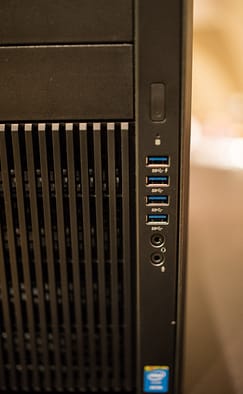
On the right hand edge of the front part of the case you’ll find some USB 3 and audio in/out connections. Having 4 USB 3 connections on the front of the case is nice. I can fill those up easily with connected drives, flash memory sticks and so on. Personally, I don’t have much use for the mic and headphone outs as my setup is in a machine room but for many those will be nice to have.
The other nice thing about the Z840 are the top handles that make moving the heavy machine around pretty easy. As an added bonus, they’re not the sharp edge metal that you find on older style Mac Pros.
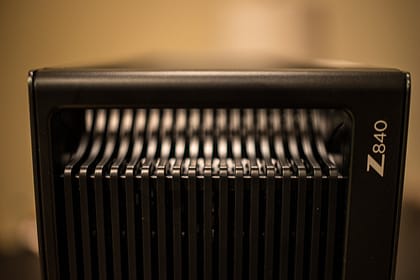
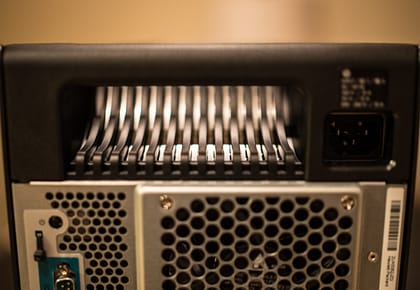
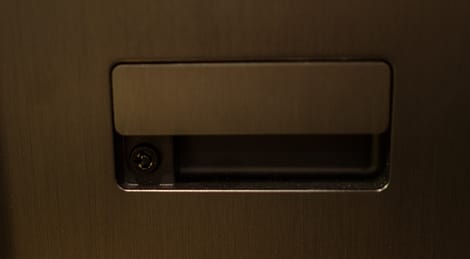
HP starting with z800 took many queues from Apple and the side handle to open the machine on the side of the case is one such touch.
The side handle has one really nice feature – it’s lockable (keys included). While for many of us locking your computer case is not a big deal, for many buying these machines, security is important so it’s nice to know you can lock down the machine if you need too.
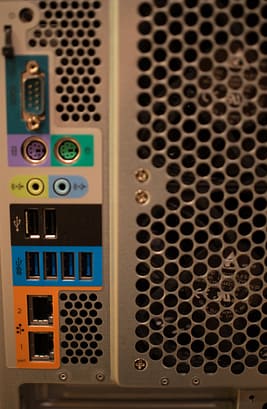
On the back of the machine the I/O is pretty straight forward. There are a whole bunch of legacy connections (important to someone) like old school PS/2 ports for older mice and keyboards.
But most important are all the USB ports – you’ll find 2 USB 2 ports (labeled in black) and 4 more USB 3 ports. I’m using the USB 2 ports for Dongles and the USB 3 ports for everything else.
Like many modern workstations, you’ll find dual Gigabit Ethernet ports for connecting to your network or other Ethernet based devices. I have not had a need for WiFi on this machine, and to be honest I don’t know if it’s built in.
So you’d think taking the cover off the machine is nothing special – well the HP Z840 cover panel is full of great information (and thermal sealing).
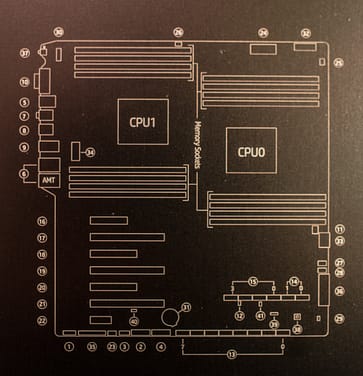
There is a block diagram, memory installation information and information on PCI slot configuration all stamped on the inside of the removable panel. I think this is a fantastic touch!
How often have you been inside your machine only to not remember what PCI slot are which or what memory slots you should use and then you have to get up and Google the answer?
Having this info printed right on the case really can come in handy.
Once you gain access to inside of the machine with a quick pull of the case handle, you’re presented with what looks like a sealed inaccessible machine.
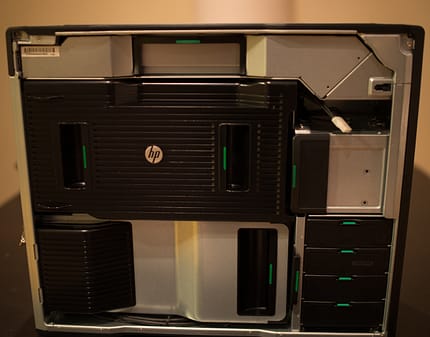
You’re probably thinking yeah that’s a PC – well, no tools needed. Again, taking a page out of Apple’s playbook, the HP Z840 features a tool less design.
Removing the covers or shrouds for the PCIe area, Processor/Memory area and other locations is simply a matter of pulling up on the black handles marked with neon green lines.
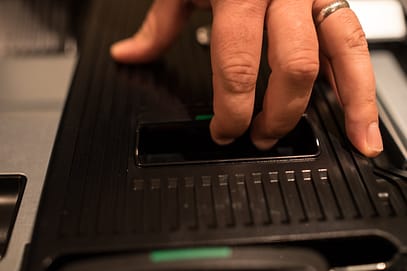
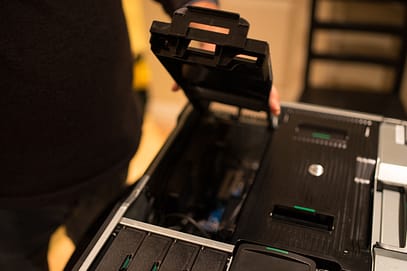
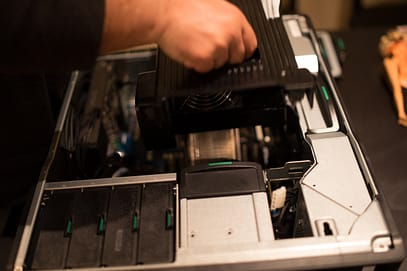
I’ve been hands on with a lot of machines that have been really well engineered but the processor area cover on the z840 is pretty darn amazing.
Comprising fans, bends/tunnels (for airflow) and precise molding of plastic this is one sophisticated cover!
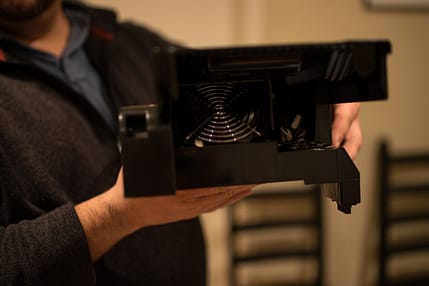
Once these main covers have been removed you get really easy access to the PCI slots, memory, processors, power connectors and other areas of the computer.
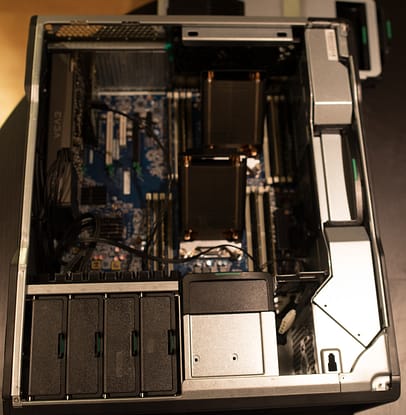
Also much like an older style Mac Pro, the drive area of the Z840 relies on a pull-out and plugin approach for storage (note you can configure the machine with PCIe based Flash Storage).
The machine can handle 5 traditional hard drives, or you can configure the machine to get 8 2.5in bays. Another great feature: the entire drive area can be removed and swapped out.
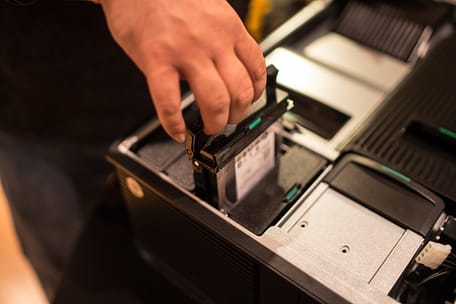
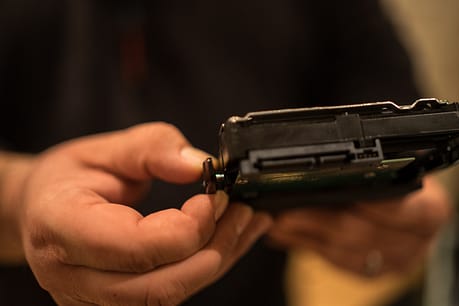
One really nice thing about the drive sleds is they are also tool less. No need to screw those ridiculously small screws into the side of a drive.
The sleds allow to simply bend the side and place pins in to the sides of traditional drives. Just note, you’ll need a 3.5in to 2.5in adapter for SSDs if you’re going to use the standard drive bay configuration.
If you don’t want to buy the really expensive HP version of this adapter here are the adapters I’ve used.
In my configuration, although in the above screen shot I show a traditional hard drive, I’m using SSDs in all 5 bays. I simply haven’t swapped out the entire drive area for the 8 2.5 in. option.
Moving closer in, here are the processor sockets and their heat sinks as well as the memory slots. Right now you can put in 512GB of memory, but soon you’ll be able to put in 128GB DIMMs for 2TB of memory! Yes 2TB of Memory!
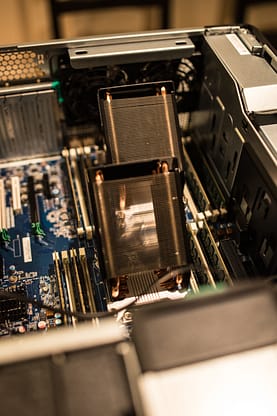
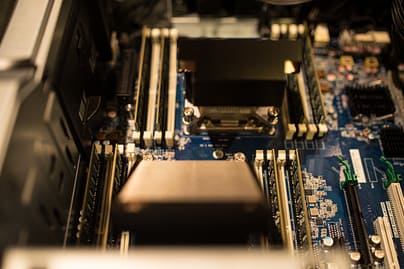
One more note about the memory – this is DDR4 Memory operating at 2133Mhz. This is incredibly fast memory, but also currently very expensive.
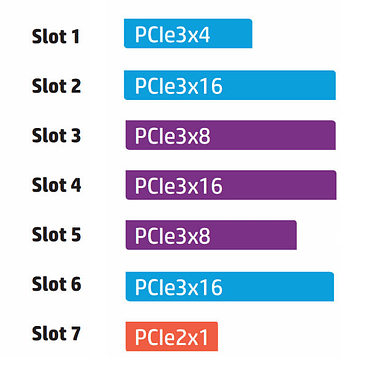
The PCI slots in the Z840 are on the one hand amazing – there are 7 including 3 x16 PCIe 3 slots, 2 x8 PCIe 3 slots, 1 x4 PCIe 3 Slot and if you need it a PCI 2 x 1 slot.
But on the other hand they’re also frustrating! The thing is the x16 slots are single width! For most of us, having a x16 slot means GPUs and what pro level GPU is single slot?
I’ll get into this more in Part 2, but this is a frustrating thing and a big reason to consider something like a SuperMicro that as double width x16 slots.
Here is the layout of slots:
Putting GPUs in any of the x16 slots will block the next slot down – a huge bummer.
Also, as I mentioned in the section on my configuration I have the HP Thunderbolt 2 card. That goes in SLOT 5, but you have to reconfigure that slot via jumpers to a x4 slot.
For some really odd reason the card just won’t work in slot 1 which already is a x4 slot. I’ve written HP asking about that odd phenomenon.
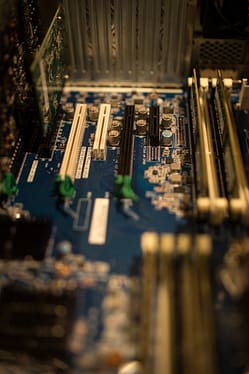
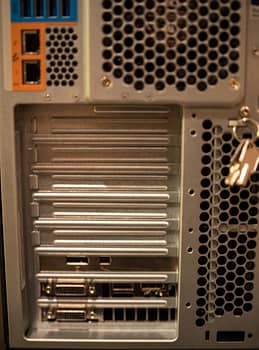
I really love this hardware! Besides the old school connectors on the back, this is a really well engineered machine. While maybe not as polished as Mac, it’s functional and I’ll take functional any day of the week over pretty – after all clients don’t pay you based on how your computer looks.
Windows 8.1
I’ll fully cover my feelings about the Windows OS in the next installment of this series, however I wanted to discuss why I went with Windows 8.1
If you ask around, many pros seem to prefer Windows 7 for several reasons:
- Stability – Windows 7 is a tried and true version of the OS. Drivers, Apps and hardware seemingly have no problems.
- Support – There is a bit of myth that companies catering to the media industry really only support Windows 7 but thats just not true – it’s a good OS but most companies do support Windows 8+
- Look/Feel – An important reason – Windows 7 looks and feels like Windows where Windows 8+ is a different approach.
All of these things are important, but I want to go on record as a die hard Mac user – Windows 8.1 is the most Mac like Windows OS I have ever used. Nearly everything about Windows 8.1 is intuitive. While I’m still getting to know a lot of the trouble shooting and preference type issues of Windows, I feel really comfortable with 8.1.
Ever since I started using it, I haven’t really ever been frustrated, worried or angry at how it works.
I’m also really looking forward to Windows 10 which promises to be a good melting of Windows 7 and Windows 8. And yes – Microsoft seemingly is emulating Apple going to 10 (not X!)
The two strangest Windows 8.1 things for me are that there are ‘native’ apps that run full screen and are touch friendly – like Mail, Internet Explorer and a few others. Then there are Desktop apps – meaning everything else that run like a normal applications.
Second, Windows 8.1 relies heavily on contextual corners of the screen for various options and settings and different apps seem to utilize these areas differently.
I’ve found that Win + D to access the Desktop, Win + C to access charms/settings, and Alt + Tab to switch between apps are the shortcuts I’m using most BUT, there is a lot to learn on the shortcut/power user front.

I’ll be honest – I don’t know enough yet about Windows 8 to be a guru, but what I can tell you is that it’s not nearly as scary as some Mac folks make it out to be.
Indeed there are some features like split screens, One Note and others that make Windows 8.1 feel really nice.
I will report back in much more detail about my experiences with Windows 8.1 in the next and future Insights.
Software
Nearly everything that I use on a daily basis works on Windows. For the most part, software that you use on the Mac works exactly the same (minor differences) on Windows.
- Creative Cloud – Yep, works exactly the same, maybe even a bit more peppy.
- Resolve – Also the same with some minor differences that I’ll cover in part 2.
- DropBox – I’m highly invested in DropBox and I’ve had no problems syncing between Mac/Windows.
- Virtual KVM – I’ve used Synergy for a long time and it works perfectly on this new machine allowing me to share mouse and keyboard between this machine and Macs that I have.
- PostBox – I know it’s a work station! However, I want email where ever I go. I use PostBox and it works great on Windows.
- Chrome – I miss Safari a bit, but Chrome on Windows works for the most part the same.
Of course there are some miscelaneous pieces of software – VLC, Media Info, HandBrake and so on – but all of those have Mac and Windows variants.
The one thing that will be new to Mac users moving to Windows is security software. So far, seems like Windows Defender works well. However for other nasty stuff, I’ve been using MalwareBytes.
Something my buddy Jeff Greenberg mentioned was www.ninite.com. While not specific to Windows (works on Mac too) it’s a cool place to download a single installer for many common apps like iTunes, Spotify, DropBox and others.
In Part 2
In part 2 of this short series I want to share quite a few things about actually using the HP Z840.
How is the actual switch over to Windows working out. Does Windows suck? Does it make me miss the Mac even more?
How does Resolve function on the Windows platform?
How have I been getting around the lack of ProRes encoding on Windows?
Is Linux a viable option on a HP Z840 vs. something a bit more robust like the SuperMicro series of workstations?
What are the things I like the most about this switch and what things are driving me crazy?
I’ve already started working on Part 2 so keep an eye out for it in the coming weeks.
Any questions? Please use the comments below to let me know.
-Robbie

