| Series |
|---|
Part 1 – Background, technical setup, and workflow
I’ve known Tashi Trieu for a number of years, since he was in his final year at Dodge College of Film & Media Arts at Chapman University in Orange, California. We were introduced by a mutual mentor, Wyndham Hannaway of GW Hannaway & Associates in Boulder Colorado, an image scientist and VFX veteran involved in pioneering work on films like the original Star Trek: The Motion Picture (1979). A friend of Tashi’s father, motion graphic artist Terry Trieu, Wyndham mentioned that Tashi and I shared a lot of interests in color grading and image workflows, and suggested that we should meet.
Side note: Wyndham Hannaway is one of the world’s foremost experts on the restoration & recovery of media from legacy optical and tape formats. If you’re interested in film and imaging technology history, check out this video series as Wyndham relates the stories behind his remarkable collection of vintage equipment.
I first visited Tashi at Chapman University right as he was preparing to graduate. He was finishing one of his thesis films, shot on 35mm, which he’d scanned on the school’s Spirit 4K film scanner and was grading in Autodesk Lustre. As we talked he mentioned that he’d already started working at a post facility in LA.
Since then we’ve stayed in touch, and I’ve watched Tashi’s developing career with great interest. As a DI editor & color assist he’s worked on some of the biggest titles and franchises in the industry, including the Marvel Cinematic Universe, Star Wars, Stranger Things, Ford vs. Ferrari & more. He’s pushed pixels at Technicolor, EFILM, and Company 3, assisting colorists like Steve Scott, Mike Sowa, Tony Dustin, and Skip Kimball.

In early 2019 I visited Tashi at the amazing Stage One grading theater at EFILM, the world’s largest grading suite, just after he’d completed DI editorial and finishing for Alita: Battle Angel and was prepping Pokémon: Detective Pikachu. We had a long conversation about the process of managing and delivering multiple versions of Alita for different 2D & 3D projection technologies. I was blown away by both the depth of his technical knowledge and his nuanced perspective on working within the studio & post-facility world in Hollywood. Comfortable at the forefront of emerging color & imaging technologies, managing complex DIs on some of the biggest VFX-driven productions on the planet, he was also thinking deeply about his future and how he wanted to work differently.
Being selected as the DI colorist for Avatar: The Way of the Water
In early 2022 I had a chance to catch up with Tashi, and he delivered some big news: Director James Cameron and Lightstorm Entertainment had selected him as the DI colorist for the long-gestating sequel to one of the highest-grossing films of all time: Avatar: The Way of Water. The film, a 192-minute epic with over 3200 VFX shots, finished in stereoscopic 3D at 48fps High Frame Rate (HFR), would ultimately require 11 discrete theatrical deliverables optimized for the world’s various projection technologies. Since its release on Dec. 16, 2022 the film has grossed over $2.1 billion at the worldwide box office, re-immersing audiences in the world of Pandora and establishing the Avatar series as one of cinema’s biggest franchises.
In June 2022, Tashi traveled to Wellington, New Zealand, to set up shop at Park Road Post. His first task? Remastering the original Avatar (2009) for a 48fps HFR stereo 3D theatrical re-release in advance of Avatar: The Way of Water. That remaster served as a shakedown cruise for the processes that would be implemented on the sequel, allowing Tashi and the team at Park Road to thoroughly test every element as they prepared to grade Avatar: The Way of Water and deliver James Cameron’s long-awaited vision to the world.
After an intense 3-month grade & finish leading up to the worldwide release of Avatar: The Way of Water on December 16th, Tashi returned to Colorado for the holidays and some time with family. While he was back, we sat down and discussed the details of finishing this landmark film.
In this two-part series, you’ll get an inside look at the technology, techniques, and thought processes involved in grading, finishing, and delivering this remarkable production to cinemas worldwide.
Professional Background
What’s your background, and how were you chosen as the colorist for Avatar: The Way of Water?
I have a rich background in compositing and online editorial. The first studio feature I was involved with was Iron Man 3, where I worked as an additional DI Editor and color assist support for Steve Scott on Autodesk Smoke and Lustre. That was the first Marvel film at Technicolor, Steve and his team had just moved over, and I was brand new to the world of “big” movies. Previously, my work was limited to comparatively simple indie films where “picture lock” is a real thing and VFX number in the dozens rather than thousands.
I worked in online editorial for years at the facility side while maintaining a stable of indie color clients, mostly night and weekend work from home. It’s challenging to break into the facility world as a colorist. As a young colorist without a lot of credits to your name, you’re a pretty tough sell for the sales team!
I eventually worked my way into a hybrid role where, as a DI Editor, I served as part workflow-architect, color assist, and compositor. On shows like Stranger Things and Sense 8, I did literally thousands of VFX shots, paint, rig removal, complex opticals, and stabilizations. It was common then to outsource a lot of that to VFX teams and most people worked with pre-debayered DPX or EXRs. I pushed for us to work from camera RAW and bring conform from Flame/Smoke into Resolve so I could work natively in the same environment as the colorist and bring our roles closer. I worked with Tony Dustin and Skip Kimball to really kick that off in 2015/2016 at a time when flat-publish workflows (where reels are delivered for color as single flattened clips and cut using an EDL) were still pretty common in facility DI’s.
In 2016 I did some online editorial support for the remastering of Terminator 2 (1991) on which Skip Kimball was the colorist. We teamed up to do a long run of projects from Stranger Things to Pokémon: Detective Pikachu, Ford v. Ferrari, Free Guy, as well as Alita: Battle Angel, another Lightstorm project. Alita was, in some ways, a dress rehearsal for Avatar: The Way of Water. Many of the crew, stereo camera technology, and workflows were shared between the films. It was a great opportunity to learn how to orchestrate a complex DI with a dozen different simultaneous deliverables.
Sign up for a 7-Day Test Drive to explore everything we have to offer!
This free Insight is just the tip of the iceberg! We’ve been teaching these topics for a decade.
Normally a theatrical feature DI has one standard exhibition deliverable and, if it’s a big movie, a premium large format deliverable like Dolby Cinema. On Alita, we were 3D and one of Jim Cameron and Jon Landau’s big priorities is providing tailored versions of their films for every possible audience to give them the best possible experience.
Theaters that go the extra mile and have brighter projectors will get a specific version of the film graded for those light levels.
There’s no one-size-fits-all approach to this, which makes it complex and challenging to wrangle. A lot of that was my responsibility on Alita. I needed to provide a workflow in which the colorist (Skip) and I could work in concert to finish the film, trailers, and myriad marketing materials.
My experience in workflow, editorial, and color science in addition to color grading made me an ideal candidate for a project like Avatar, which throws every challenge at you.
What was it like picking up and moving to New Zealand for the post process?
Rather straightforward. A colorist in a typical studio film usually works for a big facility they have a contract or partnership. They’re tied to that business, and typically anything they work on gets finished at that facility with all the other staff and ancillary services it provides. I had worked at Technicolor and EFILM (later, Company 3), but I had decided I wanted to try something different and see if there was a way to work client-side again. In 2015, I had a taste of that, working in-house at Bad Robot on Star Wars: The Force Awakens.
It’s a totally different experience being on the production side and working on the filmmaker’s team rather than as an employee of a post-production vendor.
For Avatar: The Way of Water, I was a production hire, just like anybody else on the crew, so the dynamic was totally different from the studio films I’d done before. It’s a lot more like my indie projects, where it’s just a relationship between the filmmakers (my clients) and me. It’s as simple and straightforward as the biggest movie ever made could be!
Post facility, team, & tech setup
What was it like working at Park Road Post?
Despite being a hemisphere away from Hollywood, Wellington is an amazing hub with a tremendous talent pool for filmmaking. Peter Jackson has built a network of companies there that really can do anything from start to finish. Much of the live-action production was shot at his Stone Street Studios, just down the road from WetaFX and Park Road Post. The close collaboration with WetaFX, the principal VFX vendor on the film, made all the difference.
Park Road is a fantastic place to work. Think Skywalker Ranch, but all in one building and in a sleepy suburb. We finished both picture and sound at Park Road, which meant Jim and Jon [producer Jon Landau] could jump between the mix and color whenever they wanted.
What did your team look like?
One of the brilliant things about finishing this film was our tight, small picture finishing team. I’ve worked on films with five colorists, several assistants, editors, and an army of coordinators and producers. I don’t think that process was any more efficient or productive than a small team approach. I’m very self-sufficient and have a very strong technical background, so I find it’s often simpler for me to do a lot of things that color assists would typically do without details being lost in a game of telephone.
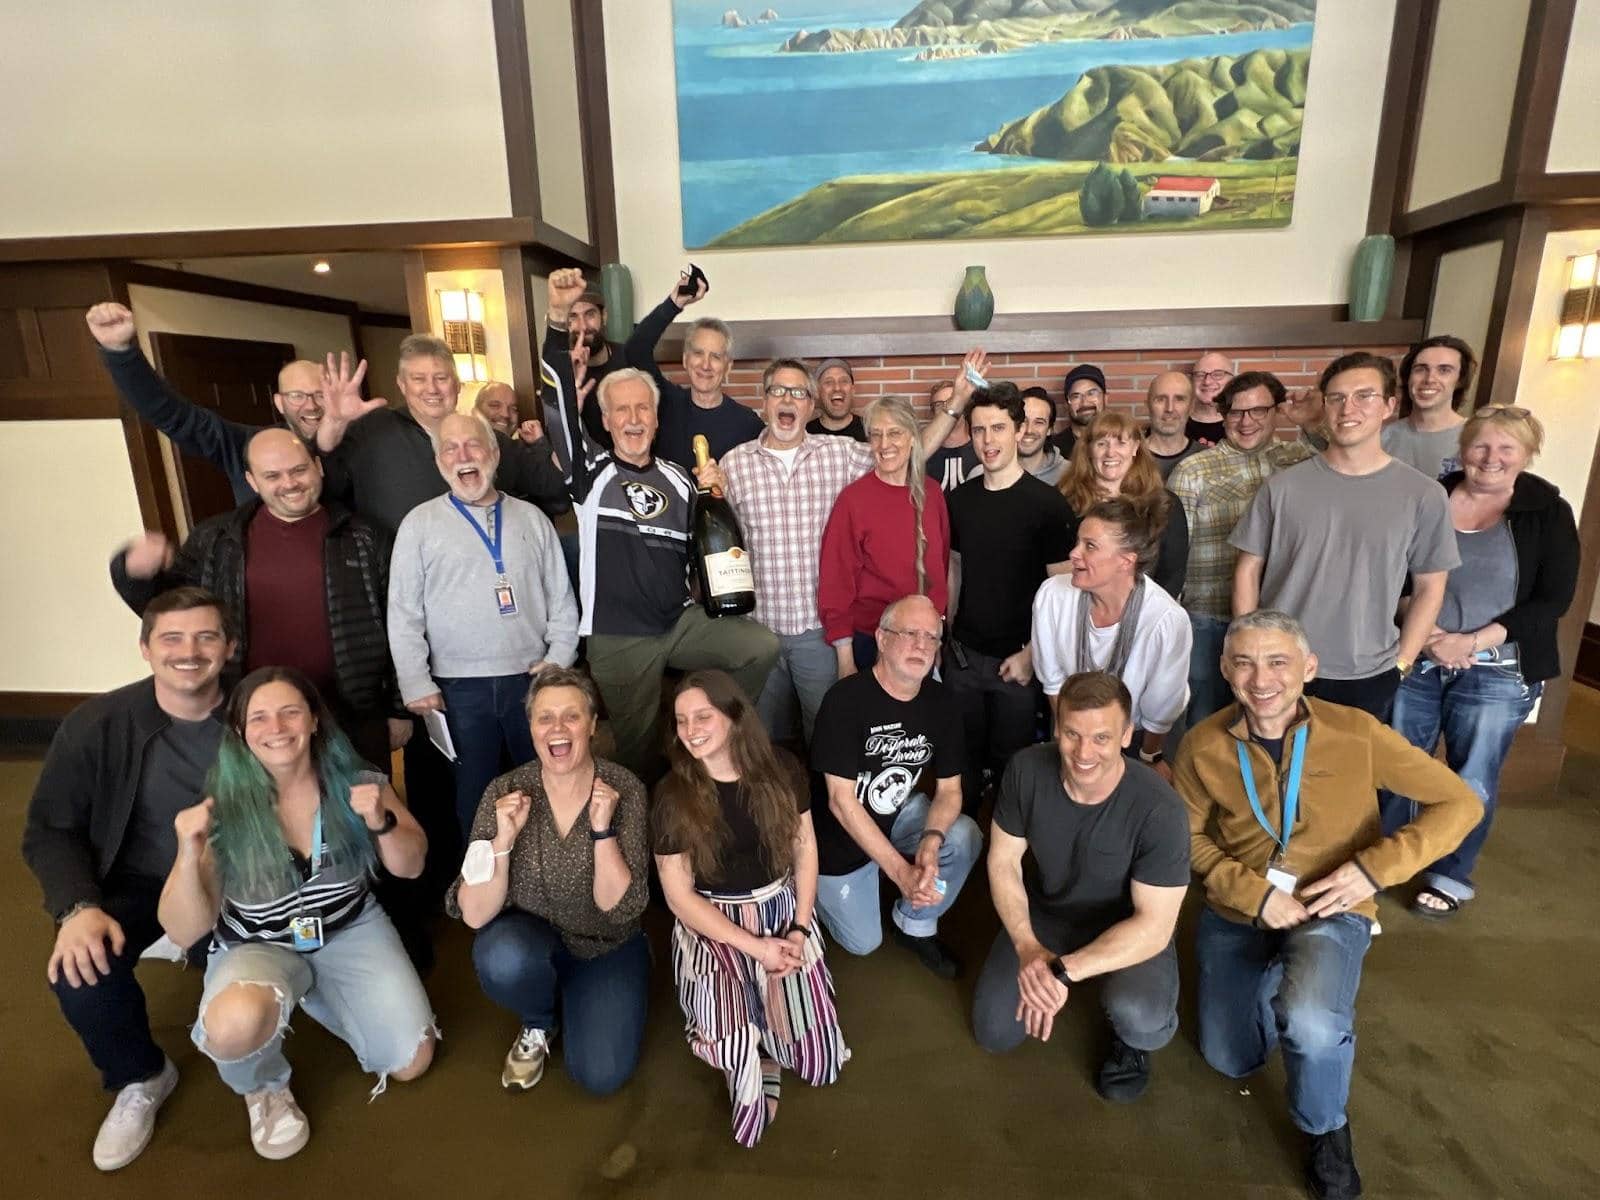
Geoff Burdick from Lightstorm was our picture supervisor and oversaw all matters stereo 3D and the entire acquisition-to-distribution pipeline. Robbie Perrigo, part of Geoff’s team at Lightstorm, was critical in our workflow operations between picture editorial, visual effects production, and picture finishing.
Tim Willis (Park Road Post) was the lead online editor. He handled the daily updates from picture editorial, chasing those changes into anywhere from three to eleven different unique grading timelines per reel, depending on how far along we were in the grading process.
Tim was supported by Rob Gordon, Francisco Cubas, Damien McDonnell, Matthew Wear, and Jon Newell in renders and QC of all our distribution masters before they left the building. Dan Best and Jenna Udy managed Park Road’s teams and were the glue that kept the machine humming.
After we delivered the film, I remember Dan saying to me, “I thought it would be harder.”
Ian Bidgood, James Marks, and Hamish Charleson led the engineering team that kept us up and running 24/7. Paul Harris was our projectionist. And there are another twenty or thirty people at Disney, Deluxe, and IMAX who were instrumental in distribution as well, and many, many more I didn’t work with directly.
What kind of workstation did you use as your main grading rig?
- SuperMicro SuperServer
- 2 x Intel Xeon Gold 6346 CPU @ 3.10GHz
- 4 x Nvidia A6000 + Cooling kits
- 256GB RAM
- Dual 32Gb ATTO Gen 7 Fibre Channel HBA
- Rocky Linux OS
What kind of shared storage system was in place?
We utilized a highly-tuned stack of Quantum StorNext File System for a seamless and collaborative workflow. Multiple Quantum F-Series NVMe storage chassis to be able to sustain IOPs and bandwidth and a high storage capacity Quantum QXS 12G storage system:
- Quantum F2100 NVMe Array – Dual Controller / 24 x 7.68TB NVMe SSDs / 154TB RAID6 total formatted capacity / Sixteen 32Gb Fibre Channel Ports
- Quantum QXS-484 HDD Array – 1.44PB Volume RAID6 formatted capacity / 168 x LFF 7.2k Drives
The NVMe and HDD volumes were kept separate. We kept all source files on one NVMe volume, and put renders on the other. The renders would get QC’ed and then moved off to spinning disk storage and uploaded to AWS for encoding and digital cinema packaging.
All of this was stitched together with the latest Gen7 fibre channel infrastructure, including multiple Brocade G720 Gen7 FC switches.
What kind of projectors and screen did you use in the hero grading theater?
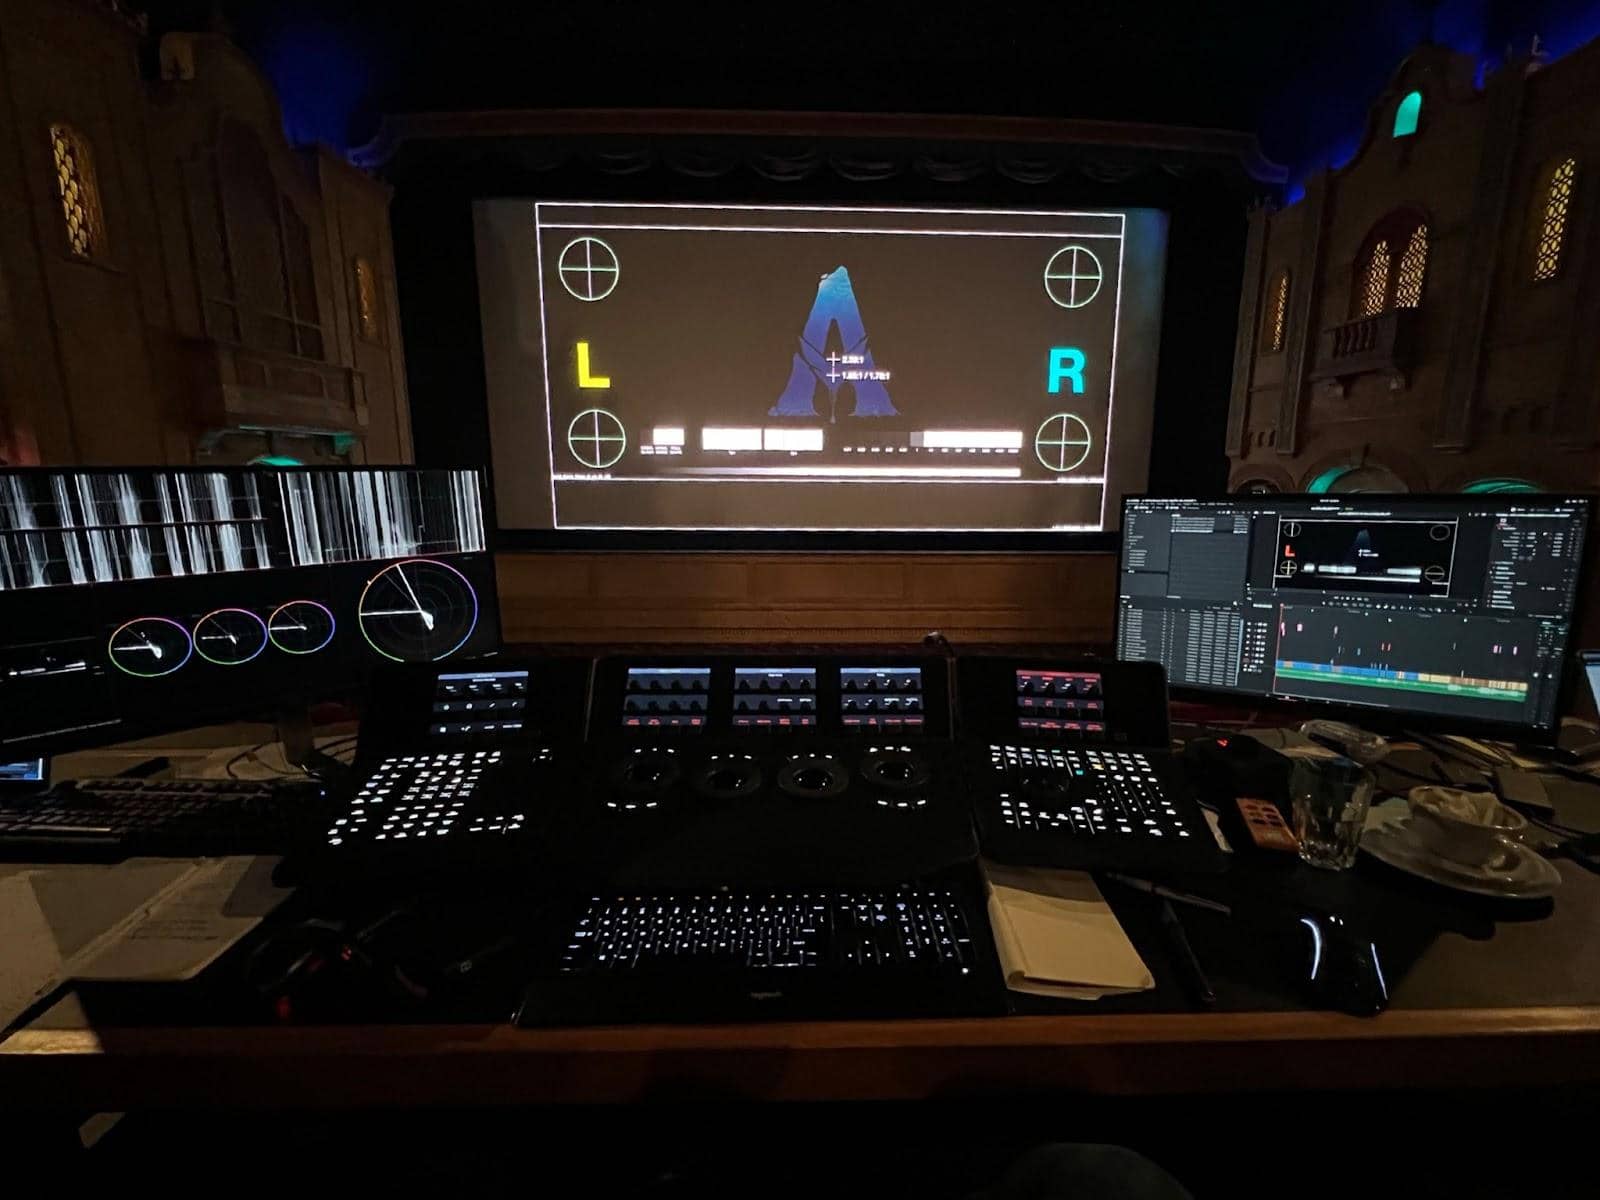
Dual DolbyVision Christie Eclipse E3LH projectors were used in the primary grading cinema, shining onto a Harkness low-gain white screen about 12m (40ft) wide.
We had a second DolbyVision setup in a smaller grading theater down the hall that served as a backup room and QC theater.
Did you have alternate projectors for your xenon / 3.5fL grades, or did you emulate those using your hero projectors?
We had another room setup with a Christie CP2220 and a RealD 3D system for initial testing and then final SDR render QC. We made comparisons between that room and the hero cinema. We arrived at a reasonable approximation of real-world contrast ratio to emulate in the cinema using the Dolby projectors in DCI emulation mode.
In an ideal world, we’d have had a traditional Xenon DCI projector in the Cinema as well, but every projection booth has its limits. Ultimately I’m very happy with the results we achieved and the workflow flexibility it afforded us. Being able to switch to any format in 30-60 seconds in the cinema rather than moving rooms, systems, routing, and dealing with all that is a real luxury. What we saw there very accurately reflected the real-world experience in commercial DCI projection as well as IMAX Laser and Xenon projection.
What software did you use?
Resolve 17 at the beginning of the project, and eventually, 18.0.2 at the end. NukeX in case there were any opticals I didn’t want to do directly in Resolve.
What was your scope setup?
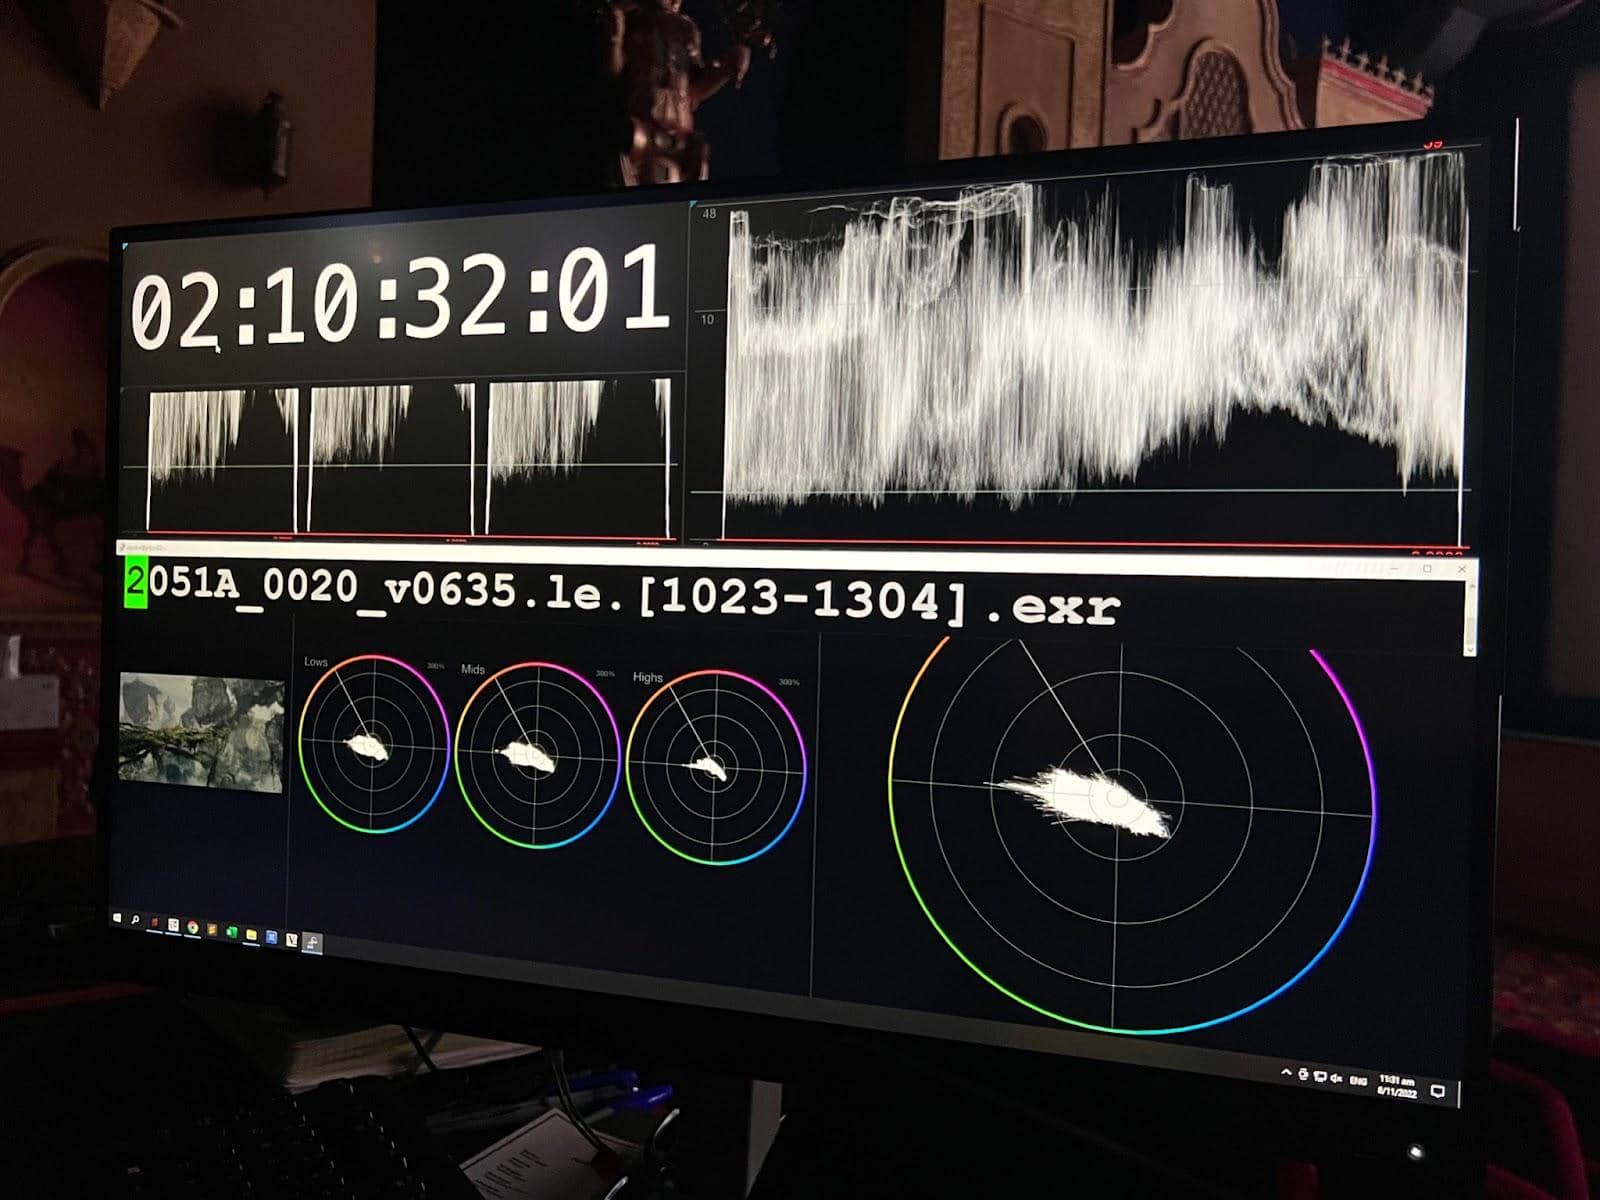
I used Nobe OmniScope by Tomasz Huczek of Time In Pixels, running on a HP Z840 with a Blackmagic Design Decklink 8K Pro so it could handle the 47.952p signal format. There are a lot of hardware scope solutions out there. But I like that this software-based one is really modular, easy to configure, and always improving.
I had a Python script running in another window on top that polled my Resolve for the current clip name, so it was easily visible to Robbie or me when doing VFX version checking. Currently, there isn’t a way to view the full clip name on the Color page in a way that’s easy to read. In retrospect, this is one of those little quality-of-life improvements that seems hard to live without.
Check out our DaVinci Resolve Accelerator Plan!
It gives you everything on Mixing Light: 5 training courses, 2 practice projects, and 1-year membership to our library of over 1,100 Insight tutorials.
What kind of internet or dark fibre connectivity did you have between facilities, and from NZ to the US?
We utilized Park Road’s private dark fibre infrastructure between Park Road Post and WetaFX, as well as automated sync scripts to pull everything as soon as it was available from WetaFX.
Delivering 11 DCDMs simultaneously would be daunting even if we were state-side.
Ian Bidgood at Park Road had the brilliant idea to ditch the traditional 16-bit TIFF DCDM approach and instead render losslessly compressed JPEG2000’s straight from Resolve, saving us up to 50% of the size and bandwidth requirements. Disney, Deluxe, and IMAX all got on board and it worked really well.
We delivered DCDMs to AWS, where Disney’s THANOS (THeatrical Automation Network Operations System) group picked up the files and began processing them into the many different DCP versions. We used a private Sohonet connection, AWS FastLane, and two 10gbps connections directly into an AWS S3 bucket in Sydney, Australia. Disney could then leverage the AWS backbone to sync over to the US side from Sydney.
Before starting on Avatar: The Way of Water you took on the 4k 48fps stereo 3D remaster of the original Avatar for its re-release ahead of the sequel. What was that process like?
Remastering Avatar (2009) required going back to the original project files from the 2009 original theatrical release and the 2010 special edition re-release. Those projects were created in Resolve 6. Blackmagic Design’s Dwaine Maggart built us a system at their office in Burbank where we resurrected the old project database and migrated projects forward. There were architectural changes to how Resolve handled stereo timelines and I was worried it was going to break and we’d be stuck on a really old version, but we were miraculously able to upgrade the projects to the latest version and have continued to do so until I finished the remaster this past year in version 18.
All of the live-action elements and most of the original VFX were mastered at 1920×1080, and for this remaster, we wanted to uprez it to 4K. In prior years, this wasn’t realistic and most uprezzing algorithms were essentially scaling with a bit of sharpening and didn’t add much value.
We used Park Road Post’s proprietary uprezzing process, which they developed for their work on They Shall Not Grow Old (2018) and The Beatles: Get Back (2021).
Using SGO’s Mistika grading system, an uprezzing artist would first analyze the shot for uprez and, depending on the characteristics of the shot, would use several different types of filters to treat noise or grain so as not to lose any image quality. Their proprietary pipeline uses ML (machine learning) to enhance the resolution. They can even rotoscope regions of the shot and then mix back different levels of the ML process to output the final shot. Ultimately, it’s not simply an automated process but an artist-curated approach that provides a major advantage over commercial off-the-shelf solutions.
Technical Workflow & Deliverables
What were the technical specifications for the 11 different theatrical versions you delivered?
With the high light output and excellent stereo separation of the DolbyCinema laser projectors, was the DolbyVision 3D version your hero grade?
Yes. Dolby Cinema is my preferred format by far. It has fewer compromises compared to other formats. Nothing is ever perfect, though. Compared to linear or circular polarized lenses, Dolby’s are smaller, have a little less field of view, and can tint the color on the edges if you turn your head a bit. But linear polarized lenses don’t let you tilt your head at all, and neither linear nor circular polarized systems have as good of cancellation as Dolby’s wavelength separation technique. Narrow spectrum lasers aren’t *ideal*, and like OLEDs, could result in some metamerism challenges for certain people [Editor’s note: For a technical explanation of metamerism read this article on Light Illusion’s website]. But the light levels are way better than xenon, and the 3D is absolutely brilliant and immaculate.
Why was Davinci Resolve chosen as the grading platform?
I’ve had years of extensive color and editorial experience in Resolve. I know its strengths and weaknesses inside and out. Resolve’s recent database performance improvements made simple save/load operations faster than on previous projects. We started on Resolve 17 and migrated up to 18 during the project because I wanted to take advantage of large-project database optimizations in 18. We ultimately finished on 18.0.2. Now, we can maintain multiple timelines within a single project without much overhead. Versioning and maintenance between derivative grades is a lot easier and requires a lot less media management and manual work from DI editorial.
We leveraged Resolve’s Python API heavily, and I wrote several scripts that accelerated our shot ingest and version checking so we could rapidly apply reel updates as soon as new shots were ready. This is critical on a big VFX film, particularly one where virtually every shot is VFX and tracked accordingly. I wrote scripts for automatically loading in shots from EDLs, comparing current EDLs with new shots on the filesystem, and producing different EDLs for rapid change cuts and shot updates.
What did the process look like for you and your assistants, on a daily basis, as new reels and shots were being delivered?
Picture editorial, led by 1st Assistant Editors Justin Yates and Ben Murphy, would provide turnovers to our online editor, Tim Willis. He’d layer in all of the new, ungraded shots over the previous versions in different timelines for each master format. From there, I’d manually copy my previous grades and visually compare the updated version for differences that might require a color change.
To review shots quickly and in context, before a final, approved editorial turnover could be produced, we used some of my Resolve Python API scripts to generate updated EDLs of just the new shots.
What role did you play in pre-production, and how closely did the final images match the pre-viz and expected look?
I wasn’t involved much in pre-production. Early on I did some camera tests with [DP] Russell Carpenter and saw some of the brilliant and detailed tests he shot, mainly for stereo.
The major test I remember compared different swatches of paint for their polarization characteristics. A big challenge in stereo photography is eliminating optical differences between the camera eyes. Polarized light can be filtered out through the beam-splitter into one eye, but reflected off of it into the other eye. That causes a pretty uncomfortable mismatch that leads to “bad 3D”. I was really impressed that Russell and his team took such efforts to perfect their approach and inform production design. That level of preparation is a big part of why this movie has immaculate stereo 3D.
This film has a virtual production process that’s beyond any one person to explain.
Anytime I think I have an end-to-end understanding of it, I learn about something new that blows my mind. Others with much more authority on the subject can speak more about all of that. But I know Jim was meticulous in his camera operating, both live-action and virtual, his lighting in the template phase of shots, and the lighting in the finals. The creative intent is there throughout, but the templates aren’t terribly useful in the DI, aside from being visual placeholders. I more or less only graded finals or final candidates.
What was the process for receiving and conforming shots from WetaFX?
Tim Bicio, the production’s CTO, wrote Framebot, a proprietary system for exchanging and syncing VFX shots via their secure ECS S3 Private Cloud. As Weta delivered VFX review agendas, the shots would automatically download to our local SAN at Park Road Post so we’d have immediate access. This saved a lot of time and circumvented the traditional EDL assembly, missing shot search, and shot request process that often happens.
Maintaining the VFX shots in cloud storage allows for on-demand access by the VFX production team, partner VFX vendors, editorial, and post-production finishing. Once the film was complete and delivered, the S3 bucket simply became our archive without any of the arduous labor and verification of a typical LTO archive.
Because we were conducting stereo reviews in the theater at Park Road, it meant we had the latest and greatest shots immediately available. As soon as VFX editorial confirmed versions and provided a picture turnover, we’d be in version-sync.
What was the format of the clips you were receiving from WetaFX, their data rate, and did they have embedded mattes?
All VFX on this show were delivered as OpenEXR with embedded mattes, typically foreground, background, midground, and CGI character mattes, depending on the complexity of the comp.
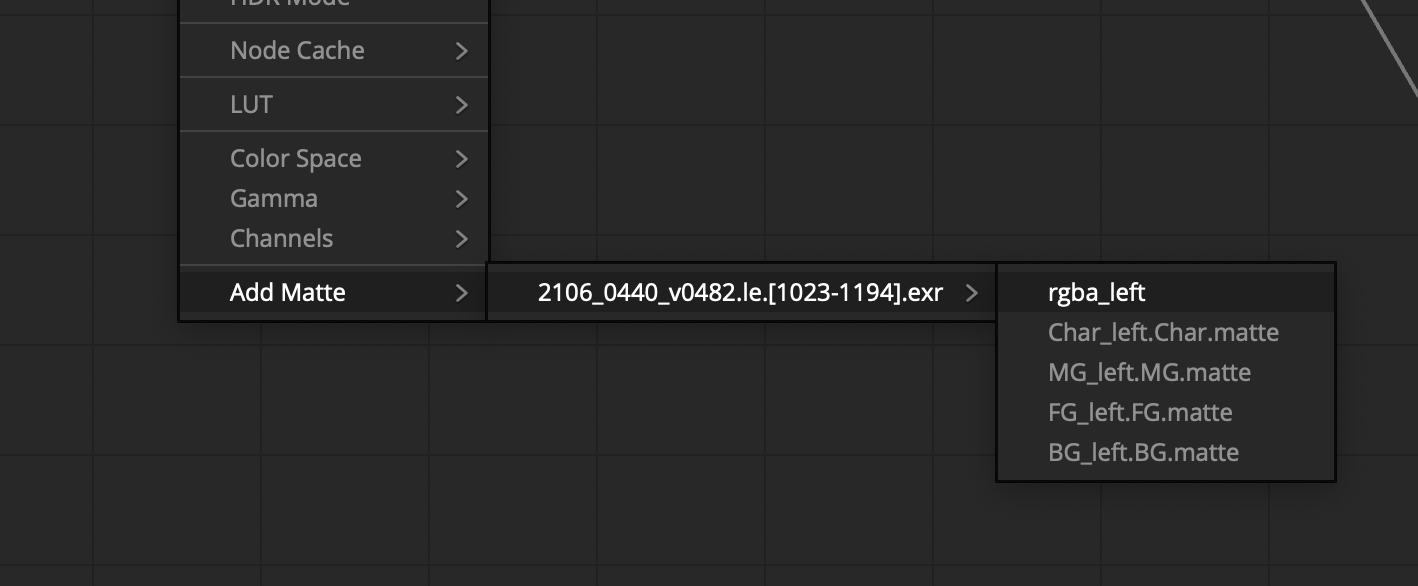
The RGB layers were uncompressed to optimize playback performance, and the mattes were ZIP-compressed.
Why did you work in reels vs. a single long-play timeline?
It’s customary on studio features to work in reels rather than a long play. It’s easier on editorial, and distributes and parallelizes work in all departments. I think sound mixing appreciates it too since they’re chaining together multiple Pro Tools systems and the overhead and management is a lot more intense on the mix stage.
This film was broken into fifteen reels, each only 10-15 minutes long, which made for shorter review sessions. It’s easier to schedule time with a director when there are fewer scenes to focus on at a given time.
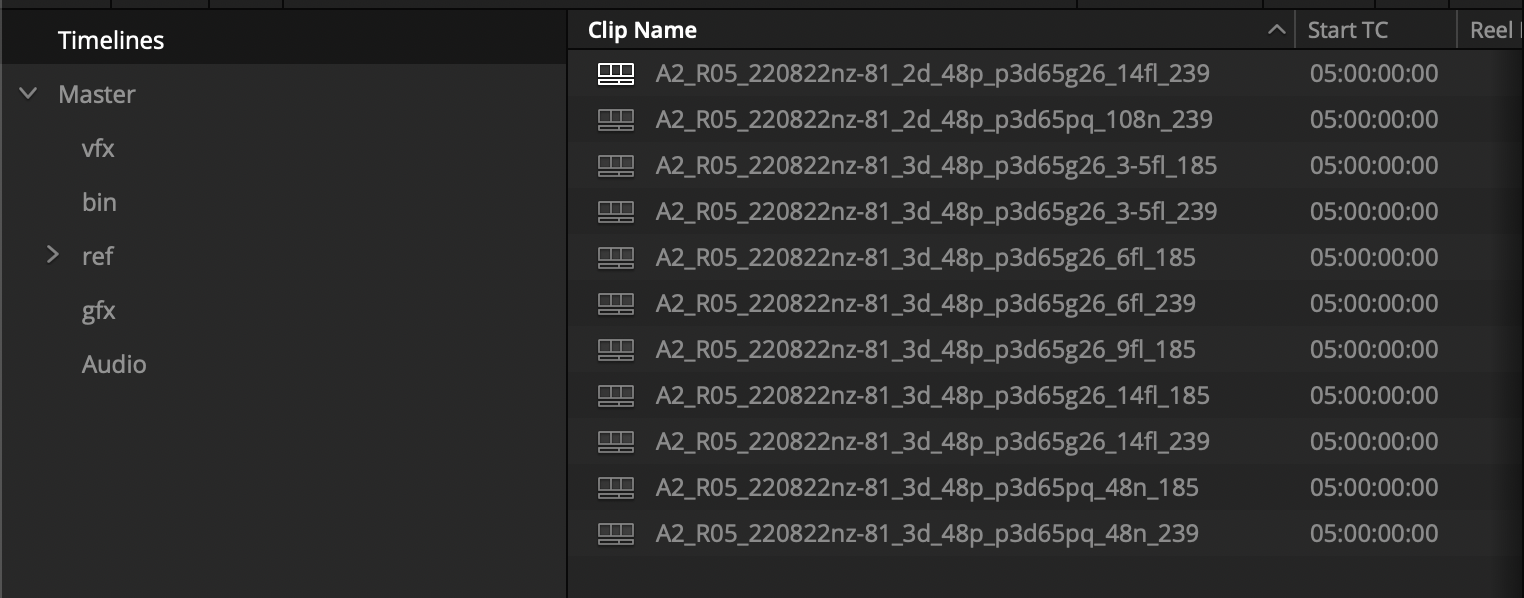
Every reel had its own Resolve project, each containing up to eleven different theatrical masters at various formats, light levels, and aspect ratios.
Working this way made it easier for my DI editor, Tim Willis at Park Road Post, to quickly apply change cuts, and for me to rapidly apply creative color updates between versions.
Were there any challenges maintaining real-time playback in Resolve during grading?
48fps 3D really challenges even the most state-of-the-art workstations and storage infrastructures. The NVMe-based SAN screamed at 6GB/s, and we were rarely impacted, even when other systems were accessing the volumes for renders.
Transitions and temporal Resolve FX would usually require caching for real-time playback. I occasionally used Deflicker to reduce chatter in noisier shots or to smooth out rare stereo artifacts (which also required caching).
What was your stereoscopic workflow during grading?
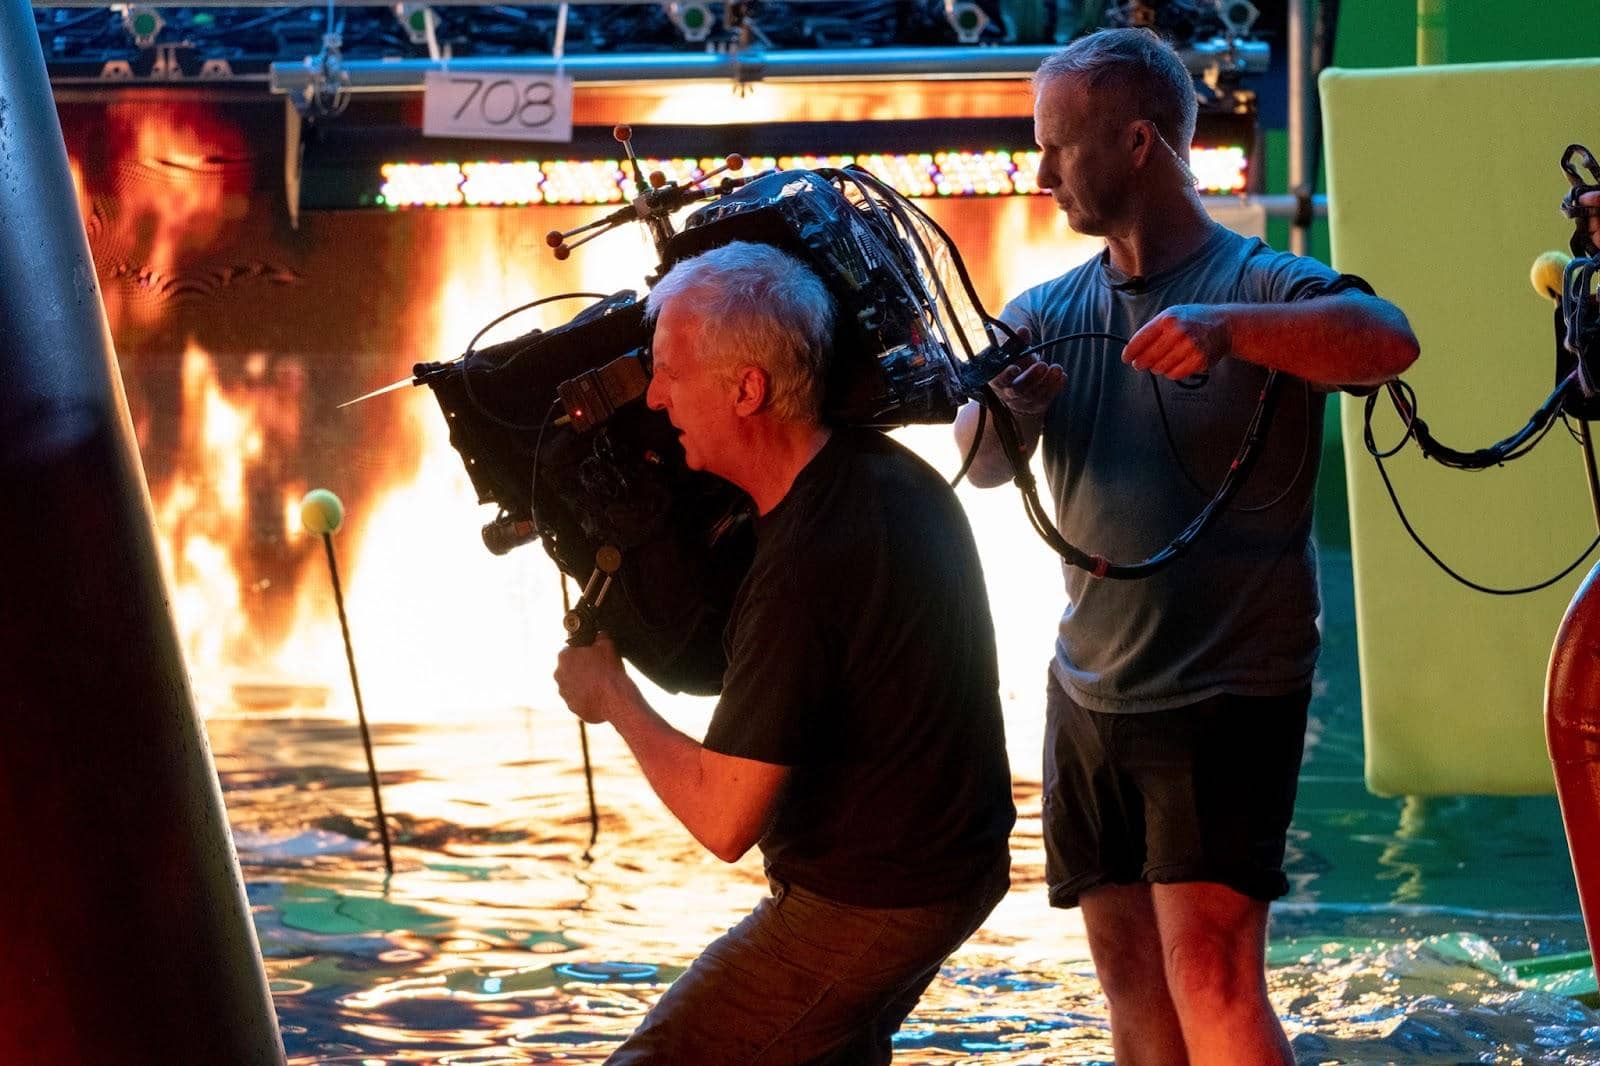
Stereo 3D is a huge priority for this movie, as all of the live-action photography was natively shot in 3D, and all of the visual effects shots were natively produced in 3D. From day one, we graded and reviewed in 3D Dolby Vision at 48nits (or 14fL) per eye through the glasses.
Many films don’t have the luxury of grading for Dolby until the very end of their process, so they might start with a 2D hero grade and eventually get a 3D version going once enough material has been locked and converted to 3D. Then, grading a lower light level, they aren’t afforded the same visibility into stereo issues or decisions.
We were lucky to start in Dolby Vision 3D 48nits and work our way down to lower light levels, so we saw everything big and bright from the beginning.
That gave us more time to dial in stereo decisions like animated convergence pulls or request additional work from VFX to improve the stereo effect.
Did you work in High Frame Rate 48fps from the start?
We graded in 48fps from day one. Seeing how the various 48fps and 24fps shots worked together was key, and since all of our 24fps deliverables could be derived from 48fps by dropping the B-frames, it was easy for us to rely on the 48fps as the hero master.
Our Resolve projects were all configured for 23.976, but our individual timelines were built at 47.952. This was done so that EDLs from picture editorial, who were operating at 23.976, could easily be conformed. Resolve handles mixed frame rates pretty well, so once 47.952 clips are conformed at 23.976, it’s easy to copy and paste them into a 47.952 timeline and frame accurately expose the B-frames.
Do you think the lossless JPEG2000 alternative for DCDMs could be a viable alternative for productions going forward?
No good reason not to. Almost every project I’ve done has ordered additional R’G’B’ archival elements so that the DCDMs might become less of a long-term archival work element and more useful just as a reference for future remastering. There’s the benefit that DCDMs are X’Y’Z’ and rendering-device agnostic, but I think we’re doing a good enough job with the archival notation that P3D65 R’G’B’ should be decipherable decades from now.
JPEG2000 at 16-bit exhibits no quality loss compared with 16-bit TIFF in my testing. 12-bit does, but so insubstantially. Considering the ultimate DCP is going to be compressed down to 250-400mb/s, I feel pretty good about the only barely measurable difference at 12-bit lossless. We’re talking less than a hundredth of a percent mean average error. The gains we get in delivery speed are well worth it.
To be continued in Part 2…
I want to thank Tashi for sharing such a detailed look behind the scenes at his work on Avatar: The Way of Water. In Part 2, we’ll explore the color management pipeline, his grading process, and some of the specific challenges related to the film.
– Peder
Sign up for a 7-Day Test Drive to explore everything we have to offer!
This free Insight is just the tip of the iceberg! We’ve been teaching these topics for a decade.

