Resolve 10 Beta – Hands On
Dan Moran
Resolve 10 Beta – Hands On
As a colourist who spends 40 to 50 hours a week locked in a dark suite grading music videos and commercials, the software I use is important to me. After 4 years of using DaVinci Resolve almost exclusively, I feel like Resolve is part of me!
You could say it has become physically connected to me – but, I guess the Resolve control panels have something to do with that!
Resolve 10 First Impressions
After working with the Resolve 10 Beta (it’s in private beta) for a few weeks here are my initial impressions:
Resolve 10 has risen the bar. Not just in features, but in speed of common operations and workflows. In this blog post, I’d like to talk about what I’ve found to be the most useful and most interesting new features on my very first supervised session with Resolve 10 – I’m not going to cover every new feature (there are dozens of them) but rather give you a quick glimpse of using Resolve 10 in the context of a real project.
And if you’ve missed it, I’ve previously covered the top new features back during NAB 2013, so if you’d like to check out what’s new please click here. You should also click here to check out this great demo by Mixing Light contributor Rob Bessette from NAB this past year.
The Software
As an experienced Resolve colorist, making the move to version 10 felt totally transparent to me. Sure, things look a little different, buttons are in slightly different places – but over all I’d say if you’ve used Resolve 9 making the move to version 10 will be pretty straight forward.
Let me put it another way, Resolve 10 has an easy learning curve. Thanks to the hard work of the Resolve team you can literally open version 10 and keep working as normal thanks to what the team is calling “Progressive Disclosure” which to normal people like you and me means that all the less used options are tucked away. The interface stays clean and intuitive. When you need a new feature – such as new OFX plugin support or the new time warp settings – they’re a click and hidden panel away!
Working on Beta Software
In a professional grading environment, taking the dive into a new beta release of software, with clients in the room… is well, a brave decision. Our former head engineer at Smoke & Mirrors, Mark “Dog” Wildig, used to have a rule of not installing major software updates for two months to “let other people get burned in the middle of important jobs and we’ll start using it when all the nasty bugs have been fixed”.
Luckily, I have to say Resolve 10 has been unbelievably stable from day one. I should also add, Dog if you are reading this, I’m sorry I couldn’t resist installing it – I just wanted all the new features!
The Job / Test Subject
I had a job coming up with the amazing DOP Stephen Murphy, I have worked Stephen many times, and I knew he’d be excited to see the new version in action. When testing beta software on a real job, you have to pick and choose carefully (both clients and projects), so that if something goes wrong, you don’t lose your client (or your job). I knew Stephen would be excited if the software failed or if the software was brilliant.
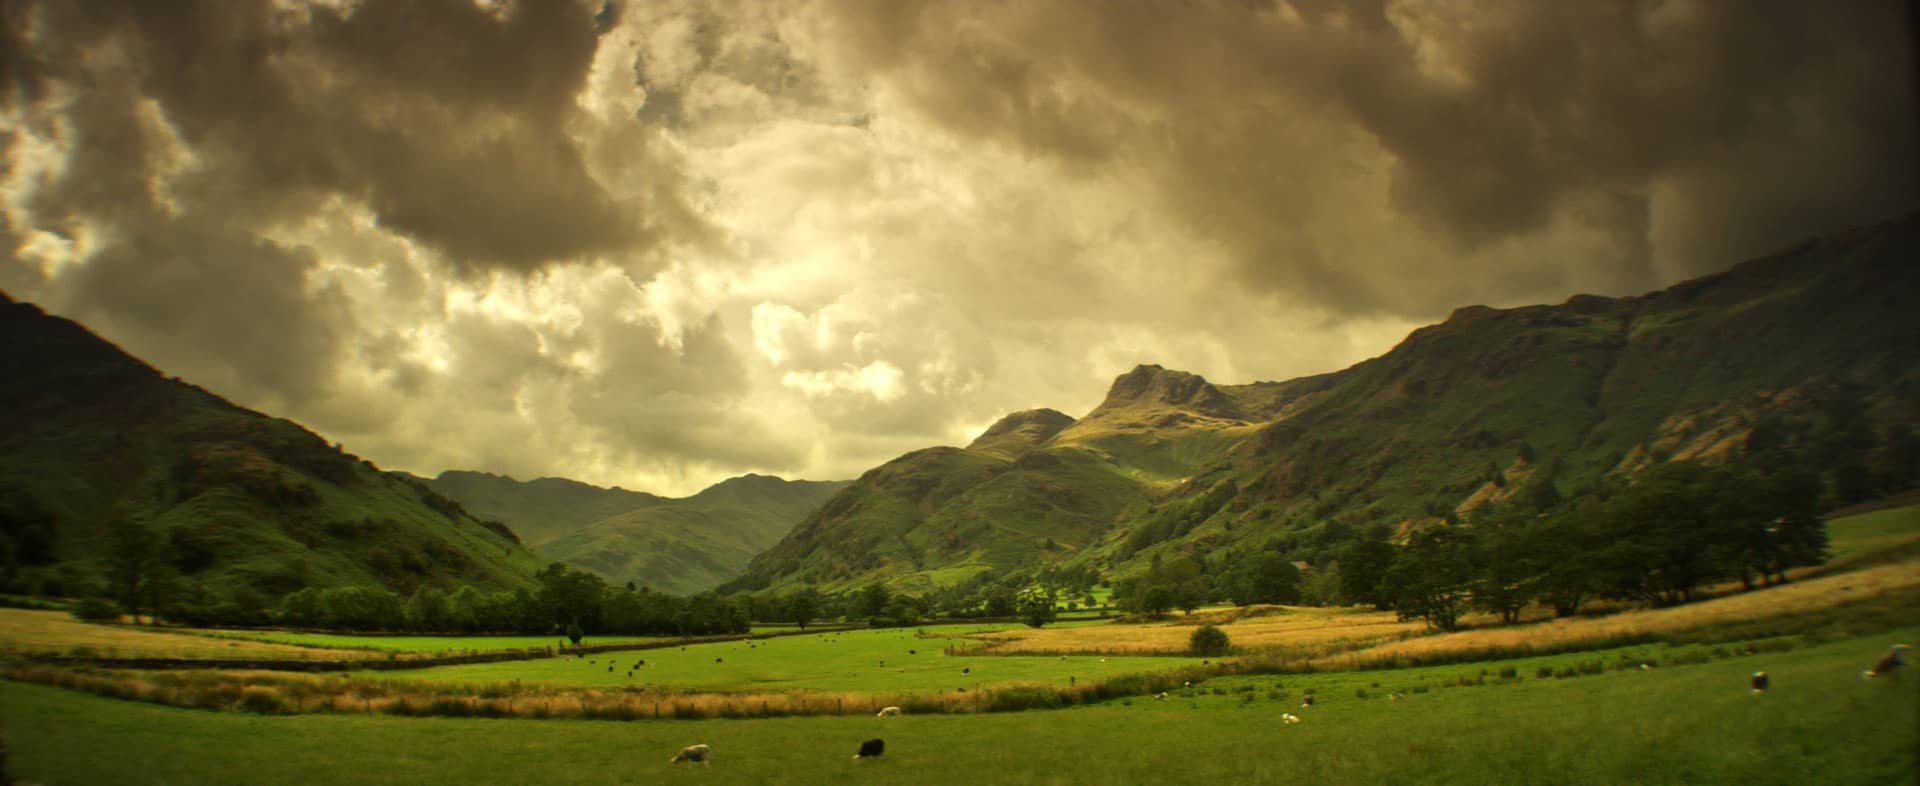
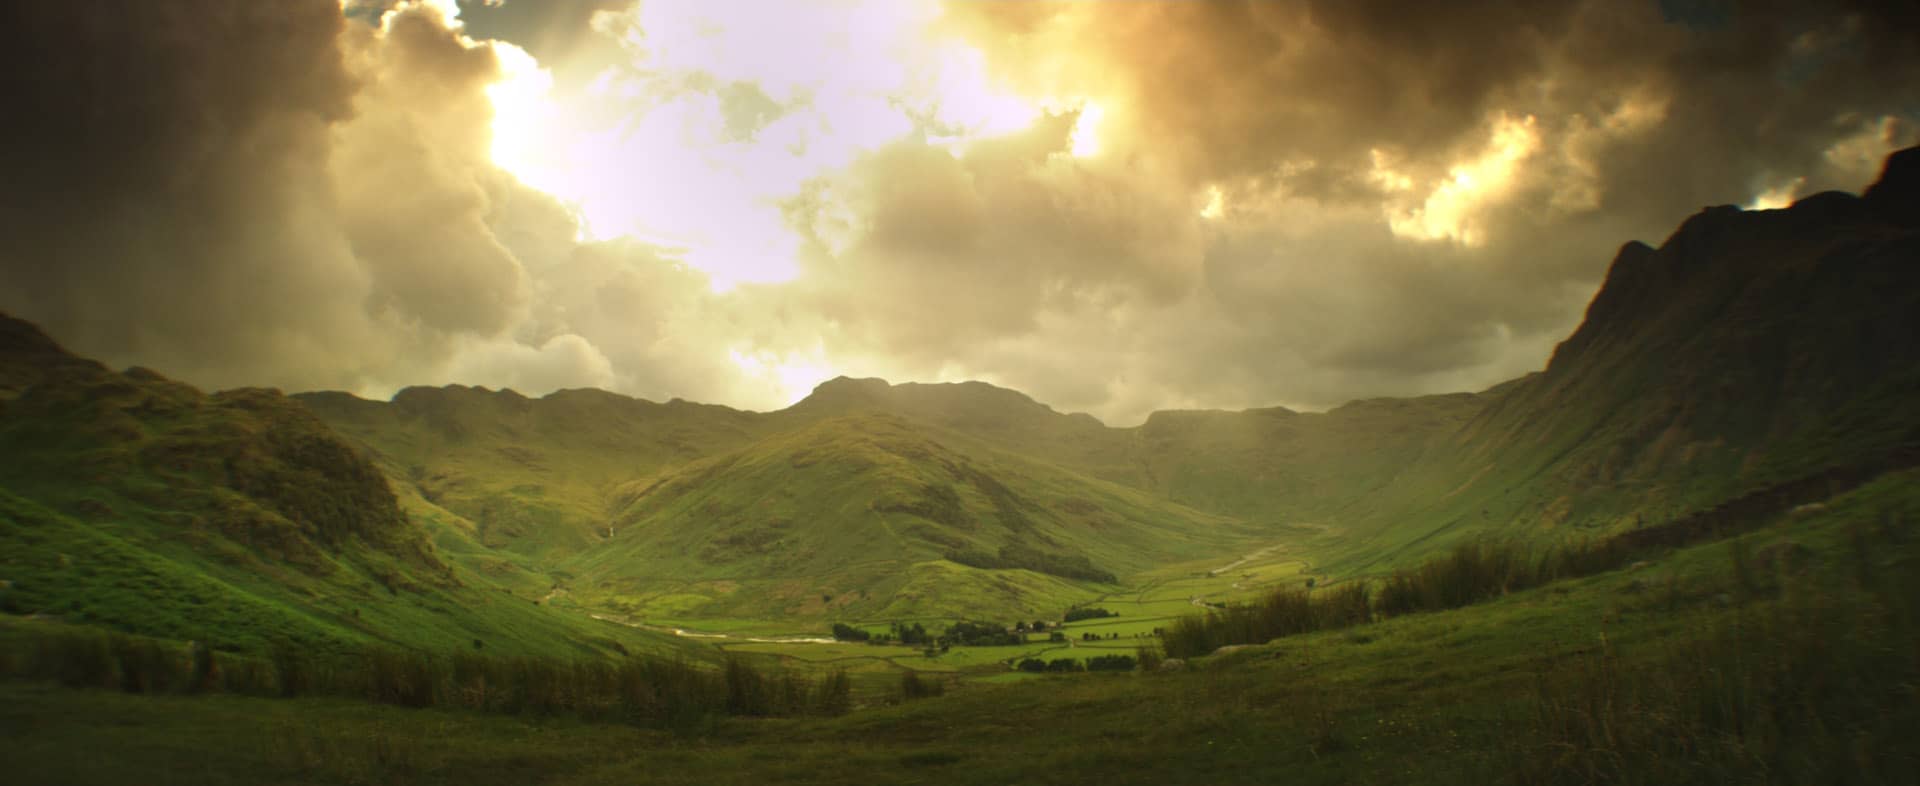
Check out the finished job :
The particular job with Stephen featured beautiful landscapes of the Lake District in the UK, shot on a Red One MX with a beautiful vintage Cooke Xtal express anamorphic lens (the same type of lens as used on Return of the Jedi). Stephen used some coral filters and soft edged grad filters – the result? Really nice stuff!
You can check out Stephen’s site here.
The Conform
Getting the 90-second project conformed was a breeze. I used an XML generated in Final Cut Pro 7 to pull in the R3D files. I think my first wow moment was as soon as the XML loaded. Everything was there. All the audio layers, the rough FCP titles were in place (and centered). Even the opacity keyframes had come across.
Simplifying the workflow
Straight away Resolve 10 had just saved me a ton of work rebuilding the edit. Checking the conform against the offline was simple as you can now add the offline video onto a track in your timeline and use the new crop video effect to do a split screen and check your conform on the SDI output. I could then also drag and drop the work-in-progress audio mix onto the timeline instead of having to assign it as a chase audio track like you have to in Resolve 9. Within 10 minutes we were ready to go and could start grading.
There has been lots of buzz about Resolve 10’s editing features – to be honest I didn’t need them on this project, so I’ll save opinions on that for a later post. However, seeing an NLE-type timeline open up in Resolve? That was pretty terrific.
The Grade
Powerful Power Windows
My favorite new feature -and the first one I noticed – are the new power windows. The whole power window architecture has been redesigned:
- Unlimited windows per node
- Draw freehand using the new power curve window – which feels incredibly natural
- The new gradient power window is very handy and fast
This job involved lots of time-lapse shots with two video layers of the same shot composited together – one was sped up to 450% for a dramatic sky and the bottom layer was real time foreground action.
I was able to rotoscope parts of a shot – like mountains in the foreground – easily and effortlessly by clicking to add a point (or clicking + hold and drag to add a point with bezier handles).
I then used the new alpha output option to blend the two layers–an improvement that alone is worth upgrading to v10!
As someone who is a Power Window power user, these seem like such simple updates, but because I use windows so frequently–this is Resolve 10’s biggest improvement.
Quick tip – You can now practically rotoscope in Resolve but keep it a secret so you can still send the difficult shots to the compositors on your team!
Paste This!
Being able to copy and paste nodes with keyframes–as well as saving them to your still store with keyframes intact, is HUGE!!!
I can’t tell you how frustrating it was in the past, getting a new VFX shot, replacing it in the timeline, and trying to get all the keyframes moved to the replacement shot without redoing all that work. Now, it is literally a two click operation!
Time-Remapping
Unexpectedly to this colorist, on this job the second most important new feature is the improved time remapping. The new optical flow / frame blending option was a huge new bonus. As we were dealing with big speed changes, we tested out the different time remapping options and could pick the one that suited us best.
As I think about it, this is going to be big for my music video clients. No longer will I need to send footage to After Effects (using Twixtor) or Flame. It is a massive time saver and a cost savings that clients will appreciate.
Can you say: Plug-Ins?
We had a quick play around with the new OFX plug-in architecture. Working on a Resolve Linux system I am currently playing it safe and only testing out the Sapphire plugins. We didn’t end up using any of the plugins on this job, but it was great to test out the deflicker, throw on some fun lens flares and god rays on the time-lapse landscape footage.
It’s an amazing feeling knowing I have hundreds of new tools at my disposal if I need them on a job. Colorist as visual effects artist… I like it.
The Big Surprise
What else impressed me on this, my first job using Resolve 10 Beta? Believe it or not, the new split screen option. Back at NAB 2013 I knew this feature would help me, especially with clients in the suite. But actually spending time with it has opened up so many new possibilities.
On this job with Stephen, I wanted to make sure I didn’t burn out the highlights of a sky. It was a simple click to turn on the split screen option and choose to play the timeline with the graded shots on the left and the ungraded on the right – while sending the split screen out from SDI to the external ‘hero’ monitor. What a great new feature!
Matching shots with the split screen option is a surprisingly intuitive and speedy way to do it. All you need to do is shift select the clips you want to be split screened and you can instantly go from one-up to 3-up to even 16-up. This is something I’ll be using more and more as I get used to it.
A great moment was being able to select all the shots on the timeline and Resolve automatically arrange them on the SDI output for us. It was a great way to see how our sky matched from shot to shot. Split screens seem to be really flexible, so I’m sure I’ll be discovering uses for the multiple options over the next year.
Paint and repair???
Another fun discovery is how you can use the new node-based PTZR (Pan, Tilt, Zoom, Rotate) to do some basic painting. On this job, we played around with moving some clouds around our sky and I also tested it on doing some spot removal / beauty work and it gave us the exact result we needed.
Its a little tricky at first, but if you can, imagine the clone tool in Photoshop: Select an area that you would like to replace by using a power window, then use the node PTZR to “clone” or move another area of the picture to replace it. Yes!
This should be a great time saver if simple things like a boom in shot or the leg of a light stand needs to be removed. One less thing to send to the VFX team! One more thing that makes me valuable as a colorist.
Noise Reduction
I’d also like to note that the new Noise Reduction options are a huge step forward in both power and flexibility.
We didn’t need to use the NR on this job so after I finished my grade with Stephen I revisited an old job where we had trouble with controlling the noise on a product shot. Since I never want to turn to a client and say, “I can’t make your product look bright, clean and shiny without all this noise” this was the perfect acid test for the new tool.
Resolve 10 has new options for both spatial (single frame) and temporal (up to 4 frames blended) Noise Reduction. I found blending a little of both types gave me the cleanest results.
You can also noise reduce either the luma or the chroma channels independently – which is a big addition as it allows us to refine the noise reduction to keep maximum sharpness in our image. I’m sure some of you will still prefer to use Neat Video for particularly stubborn shots, I think with all the new Noise Reduction options as well as using windows and multiple layers of NR, I should be able to get results acceptable for me and my clients.
The Online
Once we had finished up the grade, it was time to start our simple online of the job which involved:
- Adding the final titles (which had been created by the graphic designer)
- Adding a 2.39 crop
- Laying back final audio
It was a simple drag and drop to add the graphics (with Alpha Channels) over the opening shot and edit in the end board. Resolve has a promising titling tool for quick and easy titles, but it’s not going to replace After Effects or Smoke in your workflow. But for a colourist who just needs to add basic info like the title of the video or copyright info, this time consuming and annoying part of finishing is now slightly easier.
The Render
After one final review of our timeline it was time to go exploring the new output options. This job needed multiple deliverables including a DCP.
On this job, I played it safe (I had pushed far enough using beta software with a paying client!) the DCP was completed at another facility. But it made me think that we had the option of completing this project end to end in Resolve–from Conform to Grade to Titles to 5.1 audio to DCP creation (the later being a new feature in Resolve 10)
Resolve may not replace your online system just yet but for people like me Resolve is firmly on the road to being a full finishing system.

My Conclusion
Resolve 10 is another wonderful step in the right direction from the Resolve development team. Think of how far we have come in such a short amount of time . . .
In Resolve 7 we had a single layer of video, no audio tracks, no way to render audio and rudimentary XML support. On this project, I took a multi-layered sequence with massive speed ramps, graded it in context and in real time, did basic rotoscoping and layer compositing, playing with glows and lens flares, completed the final online, did the audio layback, and considered (for a moment) creating the DCP – this run on sentence blows my mind!
BlackMagic has taken the DaVinci banner and run with it. In each new version, we have gotten a huge amount of features and time savers. Each new version seems to be building on earlier versions – suggesting BlackMagic and Team DaVinci have a vision for this product – and we like that!
The most astonishing thing? Since buying Resolve 7, all these updates have cost me exactly nothing. The feature list for a major release of Resolve always looks impressive on paper, but after grading this job today I have to say (at the risk at sounding cheesy) this is probably the biggest and most useful Resolve update I’ve seen.
Resolve 10 on Mixing Light
Here on Mixing Light, we’re gearing up for a big push on adding Resolve 10 Insights to the Library, so make sure to use the comments below to let us know what features you’d like for us to cover. And once BlackMagic gives its Resolve private beta testers the green light… we’ll update this post with a slew of interface screen shots, to help you explore these features once you’ve got Resolve 10 in your hands!
-Dan
Comments
5 thoughts on “Resolve 10 Beta – Hands On”
Leave a Reply
You must be logged in to post a comment.

nice review! Can’t wait to finish my current project to install the new 10!
I’d love more exploration of the finishing features of Resolve 10, such as laying in audio, light compositing, and creating professional deliverables such as a DCP. Speaking as a small freelance colorist, I often get asked for these kinds of things by clients who don’t really understand the time it takes to pull all these elements back into Smoke or a NLE and do yet another reconform. Understanding what is now possible from within Resolve would really be a big help. Thanks for the post!
Hi Dan,
Thanks for the quick insite on the new Resolve. Nice work on Stephen’s gig. I worked on the NY part of the project as his Gaffer. Great great Guy!
Thanks Again Dan for the review
Thanks for the post! I’m a big noob, I’ve not get how to spot removal things (like red pixel in my case). Is that something that I can do with Resolve 10 lite or do I need the full version?
yes! Single pixels are a little hard but with Node Based PTZR a crude “clone stamp” like functionality is available in Resolve 10. This week I’m posting a post for our members in the Insights Library about this very thing.