| Series |
|---|
Bonus Insight: 24 Insights in 24 Days – 2018 New Year Marathon
Getting Comfortable with Silverstack
Have you ever had that initial sinking feeling of self-doubt, anxiety, and paralysis when you boot up new software for the first time? It comes at you hard and fast, right after the splash graphic disappears, and it stares back at you full-screen. Thankfully, one of the biggest hurdles with learning a new program is simply getting comfortable with the interface, and the sooner you are able to get to the point of understanding and navigating its most basic of sections, the quicker the fear of that unknown fades away. This insight is a quick house tour of Silverstack to provide you a birds eye view of the software.
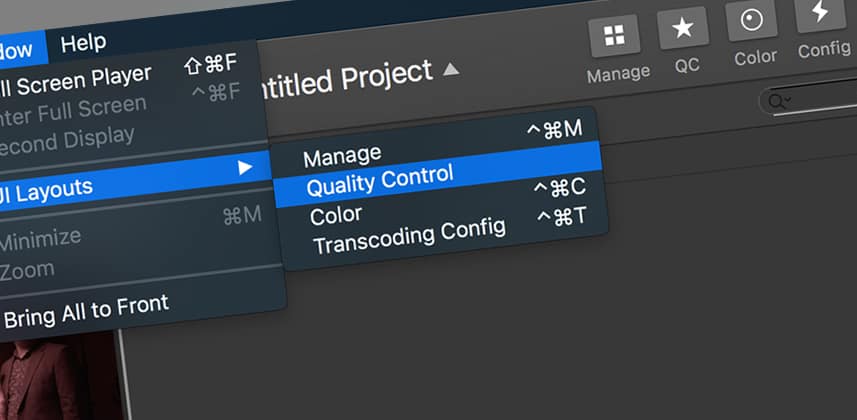
Silverstack is designed very well in the sense that all the main controls are immediately within reach. The information that is important to you as a Digital Imaging Technician or Digital Loader is stored in different panels, and can be individually toggled on and off, or called into view by way of ‘Layouts’. They can be thought of as preset workspaces, from those coming from the Adobe world. There are 5 main layouts you need to know, and each layout has its own feature-set and core functionality. In the coming insights, we will be looking at each of these layouts one by one in practice.
This insight is using Silverstack LAB, though 90% of what we’re covering here also relates to Silverstack XT and below. There is the option to have the interface across two GUIs in a dual screen mode, but we will be looking at Silverstack today in its single monitor mode.
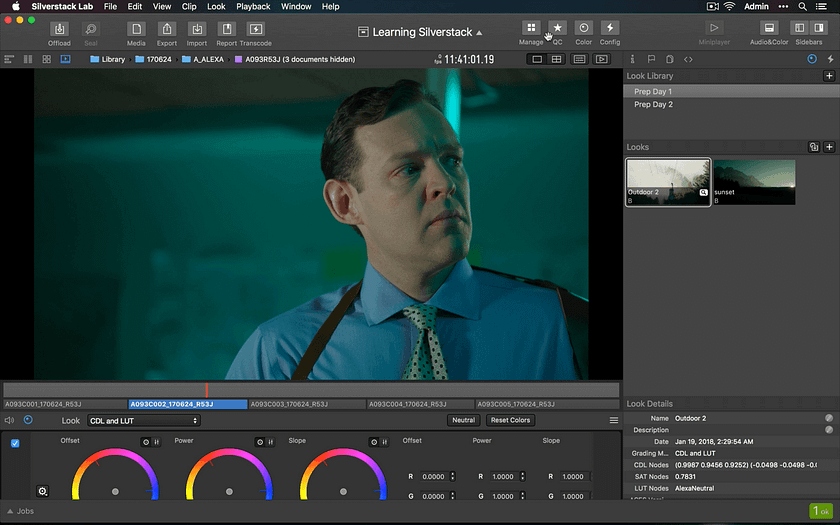
The ‘Manage’ Layout
I consider the Manage layout to be the default view of Silverstack – it’s the one layout out of the 5 that I like to rest on when idle. This layout provides you a top down view of your project at large, and is tailored around allowing you to oversee your files. From here you can jump around the project and traverse the many Folders, Bins, and Smart Bins you have created for yourself. Flanked on the left and right are ‘Side Bar’ panels – the left holds your project tree, and the right side displays file metadata for any clips you have actively selected.
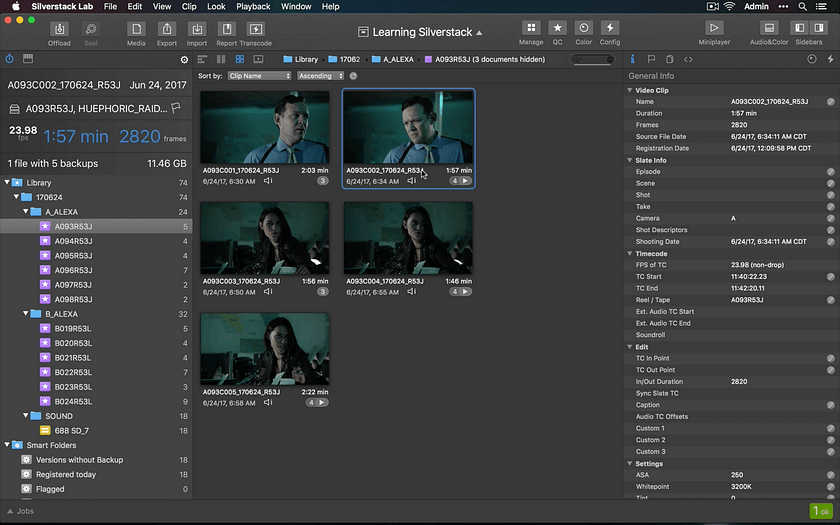
You have the option to see your video clips as large thumbnails, or have them in a traditional list view. The list view, just like Explorer from Windows or Finder from Mac, allows you to customize what information you’d like to see. You can turn on and off specific columns to your liking, and even save them for recall for another project later on.
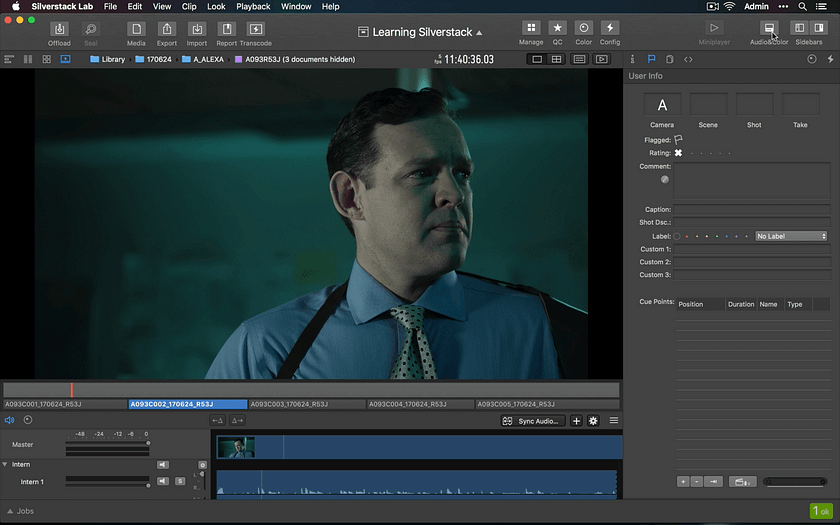
The ‘QC’ (Quality Check) Layout
You can think of the Quality Check layout as a quarantine room of sorts. I like to imagine the QC layout like one of those X-Ray machines you see at the TSA security check points at the airport – here you can thumb through the video clips one by one to rule out any technical issues as well as enter user managed metadata, flags, and markers. This is also the same place where we sync external audio clips to our video clips to prepare sound sync dailies or edit-friendly transcodes.
If you are using Silverstack XT or LAB, you can send this signal out to your calibrated reference display using a I/O device such as the Blackmagic Decklink, which is much more preferable to squinting at your GUI monitor for extended periods of time, and you get the added confidence of evaluating the footage on a color critical screen.
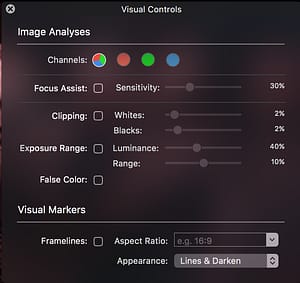
Also built into this page is the Image Analysis Window which gives you access to essential visual diagnostic tools such as:
- R/G/B Channel Only Filters
- Focus Assist
- Clipping
- Exposure Range
- False Color
- Custom Framelines
The ‘Color’ Layout
One of the strengths of Silverstack is its ability to crosstalk with many other color environments such as LiveGrade and DaVinci Resolve. The color layout is where you can create, import, and export looks from your project. In the case of moving grades made from LiveGrade into Silverstack, Pomfort has its own way of matching looks to video clips imported into your Library, comparable to way ‘Color Trace’ works from inside of DaVinci Resolve. More on all of that another day.
You’ll notice that the workspace is very similar to the QC layout. In fact, the only difference between the QC layout and the Color layout, is that the Color Controls and Look Library become active. The entire bottom bar is referred to as the “Audio & Color” bar. There is a small toggle button on the top left of the window that allows you to switch between the waveform view (as previously seen in the QC layout) and the color controls.
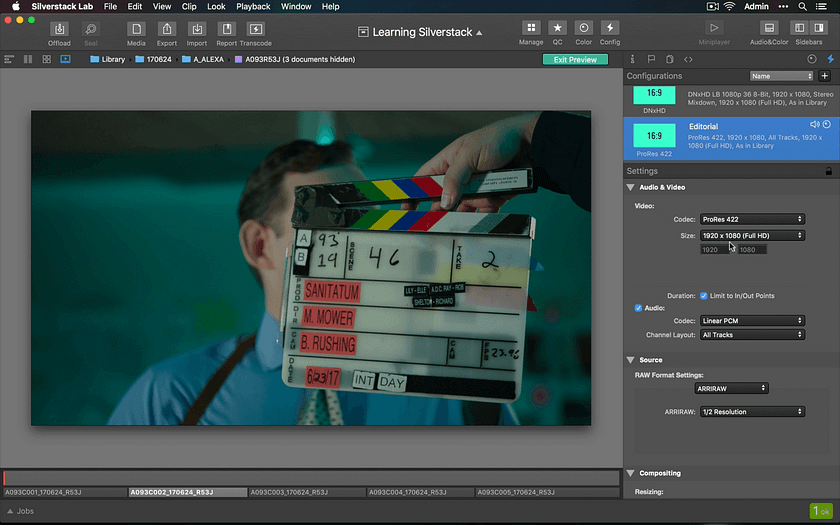
The ‘Config’ Layout
Just like the QC and Color layout, this workspace will be fully covered in another insight, but already at first glance you can appreciate what this panel is all about. The transcode configuration tab is where you can customize and setup your render presets. It’s extremely full-featured and one of the best strengths of Silverstack LAB. Note that these controls are not part of Silverstack XT and lower – this is unique to LAB.
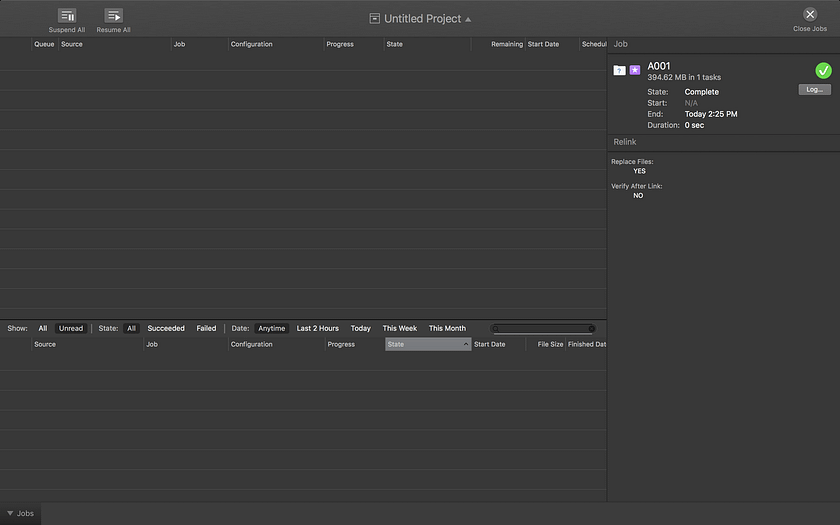
The Jobs Detail Sheet
This is the mystery 5th layout I was alluding to earlier. Technically, this layout isn’t a layout at all but a sheet that ‘covers’ the active workspaces behind it. You can bring up the Jobs Detail sheet by clicking ‘Jobs’ on the bottom right hand corner, or using its keyboard shortcut. This special page lists all current, past, and upcoming jobs that you have queued up in Silverstack. We’re going to take a look at the Jobs page more in-depth in the next insight to see it in-action, where we will start to register footage into Silverstack and see how useful (and critical) this page can be than it initially lets on.
About this Video Insight
In this video you’ll learn:
- How to navigate Silverstack.
- Identify the five main different layouts available in Silverstack.
- Recognize each layout’s core functional design.
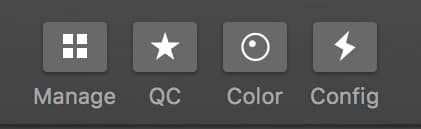
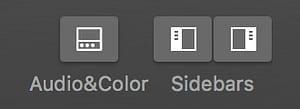
- Distinguish between Action Buttons and Layout Buttons.
Extra Reading
- Pomfort Silverstack Knowledgebase: UI Layouts
https://kb.pomfort.com/silverstack/user-interface/ui-layouts-quick-configurations-silverstack-user-interface/ - Pomfort Silverstack Knowledgebase: User Interface Overview
https://kb.pomfort.com/silverstack/cliplibrary/user-interface-overview/ - Pomfort Silverstack Knowledgebase: Using a Second Display for a Dual Screen Environment
https://kb.pomfort.com/silverstack/user-interface/second-display-two-screen-working-environment-silverstack/
Member Content
Sorry... the rest of this content is for members only. You'll need to login or Join Now to continue (we hope you do!).
Need more information about our memberships? Click to learn more.
Membership optionsMember Login
